Eliminating High Background in Immunohistochemistry: A Scientist's Guide to Clearer Staining and More Reliable Data
High background staining is a pervasive challenge in immunohistochemistry (IHC) that can obscure specific signals and compromise data interpretation.
Eliminating High Background in Immunohistochemistry: A Scientist's Guide to Clearer Staining and More Reliable Data
Abstract
High background staining is a pervasive challenge in immunohistochemistry (IHC) that can obscure specific signals and compromise data interpretation. This article provides a comprehensive, step-by-step guide for researchers and drug development professionals to systematically diagnose, troubleshoot, and prevent high background in both chromogenic and fluorescent IHC. Drawing on current best practices and validation guidelines, we cover foundational principles of non-specific binding, methodological optimizations for sample preparation and detection, advanced troubleshooting protocols, and rigorous validation strategies to ensure reproducible, publication-quality results. By implementing these evidence-based solutions, scientists can significantly improve signal-to-noise ratio, enhance the reliability of their IHC data, and accelerate research and diagnostic outcomes.
Understanding IHC Background: The Root Causes of Non-Specific Staining
In Immunohistochemistry (IHC), high background staining refers to non-specific signals that obscure the true antigen-antibody reaction, compromising the clarity and interpretability of results. This undesirable staining can appear diffusely across the tissue section or localized to specific structures, masking the true signal and leading to potential misinterpretation of protein expression levels and localization [1] [2].
High background fundamentally compromises data integrity by reducing the signal-to-noise ratio, making it difficult to distinguish true positive staining. This can lead to both false-positive and false-negative conclusions, directly impacting experimental validity, diagnostic accuracy, and the reliability of research findings used for drug development and clinical decision-making [2].
Frequently Asked Questions (FAQs) on High Background
Q1: What are the most common causes of high background staining in IHC? The most frequent causes include:
- Primary antibody concentration is too high, leading to non-specific binding [2].
- Insufficient blocking of endogenous enzymes or non-specific protein interactions [2].
- Inadequate washing steps, failing to remove unbound antibodies [1].
- Over-development with the chromogen, causing a diffuse, non-specific precipitate to form [2].
- Tissue sections drying out during the procedure, which causes irreversible, non-specific antibody binding [2].
Q2: How does high background staining affect the interpretation of IHC results? High background obscures specific signal, making it difficult to:
- Accurately localize the target antigen within cells or tissue compartments.
- Determine the true percentage of positively stained cells.
- Reliably assess staining intensity, which is often semi-quantified for scoring systems. This can lead to incorrect biological conclusions, misdiagnosis in clinical pathology, and flawed data for drug development research [1] [2].
Q3: What are the best practices to prevent high background before it occurs? Proactive measures are crucial for clean staining:
- Perform antibody titration for every new antibody and tissue type to find the optimal concentration [2].
- Use validated antibodies known to perform well in IHC applications [2].
- Ensure complete and consistent blocking, using serum from the same species as the secondary antibody [3].
- Never let tissue sections dry out at any point during the staining procedure [2].
- Include appropriate controls (positive and negative) to monitor staining specificity [1].
Troubleshooting Guide: Systematic Problem-Solving for High Background
When faced with high background, follow this systematic approach to identify and correct the issue.
Primary Causes and Corrective Actions
The table below summarizes the primary causes and specific corrective actions.
Table: Troubleshooting High Background Staining
| Primary Cause | Specific Corrective Action | Key Technical Tip |
|---|---|---|
| High Antibody Concentration [2] | Perform a titration experiment. Test a series of dilutions (e.g., 1:50, 1:100, 1:200) to find the concentration that gives a strong specific signal with minimal background. | Start with the manufacturer's recommended dilution as a baseline, not a definitive solution. |
| Insufficient Blocking [2] [3] | Extend blocking time or try a different blocking agent. For peroxidase-based systems, ensure a peroxidase blocking step (e.g., with 3% H2O2) is included. | The blocking serum should ideally be from the same species as the secondary antibody [3]. |
| Hydrophobic Interactions [2] | Add a gentle detergent like Tween-20 (typically 0.05%) to antibody diluents and wash buffers. | This reduces non-specific sticking of antibodies to proteins and lipids in the tissue. |
| Over-development [2] | Monitor chromogen development under a microscope. Stop the reaction as soon as the specific signal is clearly visible. | For new assays, establish a standard development time to ensure consistency. |
| Residual Fixative [3] | Increase the number and duration of washes after fixation and between steps. Use PBS or TBS buffers. | Ensure adequate washing after fixation to remove any residual cross-linking agents. |
Optimized Protocol for Reducing Background
This detailed protocol incorporates key steps to minimize background, drawing from established methodologies [3].
Tissue Preparation and Fixation:
Antigen Retrieval:
Blocking:
Antibody Incubation:
- Incubate with optimally diluted primary antibody.
- Use a humidity chamber to prevent slides from drying out.
- Perform thorough washing (3 x 5 minutes) with wash buffer (e.g., PBS/TBS with 0.05% Tween-20) after incubation.
Detection and Mounting:
- Apply detection system (e.g., HRP-conjugated secondary antibody) and monitor chromogen development closely.
- Stop the reaction promptly and counterstain.
- Dehydrate, clear, and mount (for chromogenic IHC) or use an anti-fade mounting medium (for immunofluorescence) [3].
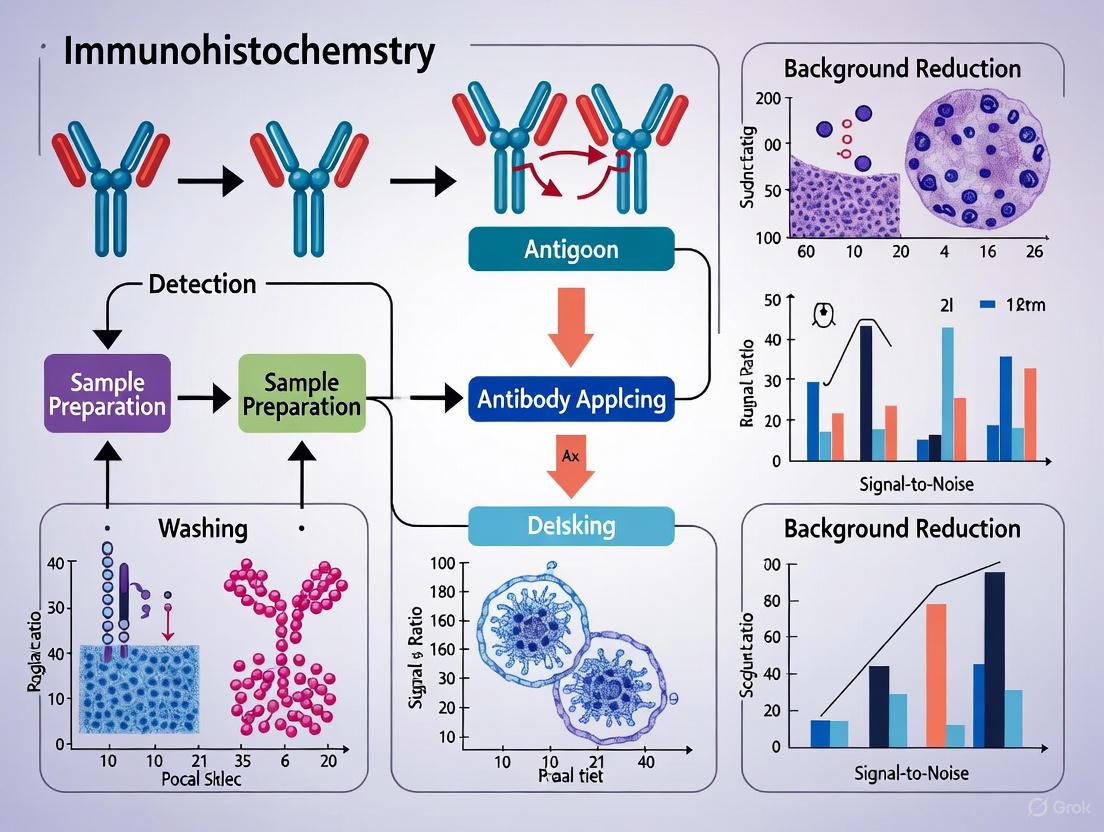
The following workflow diagram maps the logical relationship between the major steps of an IHC protocol and the specific anti-background measures integrated at each stage.
The Scientist's Toolkit: Essential Reagents for Clean IHC Results
The quality and appropriateness of reagents are fundamental to achieving low-background, high-integrity IHC data. The following table details key solutions and their specific roles in mitigating background issues.
Table: Research Reagent Solutions for Background Reduction
| Reagent / Solution | Critical Function in Background Reduction | Key Considerations |
|---|---|---|
| Blocking Serum [2] [3] | Occupies non-specific protein-binding sites on the tissue and slide surface. | Must be from the same species as the secondary antibody host. Normal serum from the secondary host is ideal. |
| Peroxidase Block [2] [3] | Quenches endogenous peroxidase activity present in certain tissues (e.g., red blood cells, myeloid cells). | Use 3% H2O2 for 10-15 minutes. This is essential for HRP-based detection systems to prevent high background. |
| Antibody Diluent [2] | Provides a stable, optimized environment for antibody binding. Often contains protein (BSA) and detergent. | A good diluent with 1% BSA and 0.05% Tween-20 reduces hydrophobic interactions and antibody aggregation. |
| Wash Buffer (with Detergent) [2] | Removes unbound and loosely-bound antibodies from the tissue section between steps. | TBS or PBS with 0.05% Tween-20 is standard. Increased wash volume, frequency, and duration are highly effective. |
| Validated Primary Antibody [2] | Ensures high specificity for the target epitope, minimizing off-target binding. | Do not rely on datasheet dilutions alone. Always titrate a new antibody on your specific tissue type for optimal results. |
| Detection System Kits [3] | Amplifies the specific signal while minimizing non-specific polymer attachment. | Use high-quality, modern polymer systems which often produce less background than older biotin-streptavidin systems. |
| Bis(pinacolato)diborane | Bis(pinacolato)diborane, CAS:73183-34-3, MF:C12H24B2O4, MW:253.9 g/mol | Chemical Reagent |
| 2-Hydroxy-2-methylbutanoic acid | 2-Hydroxy-2-methylbutanoic acid, CAS:3739-30-8, MF:C5H10O3, MW:118.13 g/mol | Chemical Reagent |
Advanced Topics: Quality Control and Future Directions
The Role of Automated Systems and Quality Control
Incorporating rigorous quality control (QC) is vital for standardized, reproducible IHC with minimal background. The use of positive and negative control tissues validates the entire staining protocol and helps distinguish specific signal from background [1]. Automation is becoming a key tool in this endeavor. Automated staining systems can significantly improve reproducibility by standardizing reagent application, incubation times, and wash conditions, thereby reducing operator-dependent variables that lead to background [4]. Furthermore, novel QC methods are emerging, such as Controls in Liquid Form (CLFs) prepared from genetically modified cell lines, which can be automatically applied by systems like the LYNX480 PLUS platform. These provide a consistent and tissue-saving method to monitor staining performance, including background levels, in every run [4].
The Emerging Role of Artificial Intelligence (AI)
The field of IHC is on the cusp of a transformation driven by artificial intelligence and digital pathology. AI algorithms are now being developed to assist in the automated interpretation of complex staining patterns, which can help mitigate the subjectivity of visual assessment, including the interpretation of background vs. specific staining [1]. Deep learning models are even being trained to predict IHC biomarker status directly from H&E-stained whole slide images, a technology known as AI-generated virtual IHC [5]. While not a direct solution for wet-lab background, these tools represent a paradigm shift towards more objective, quantitative, and reproducible analysis, ultimately strengthening the data integrity chain that begins with a clean, well-optimized IHC stain.
FAQs: Addressing High Background in Immunohistochemistry
1. Why is there high background staining throughout my entire tissue section? High, diffuse background is frequently caused by endogenous enzymes or biotin. Tissues contain native proteins that can react with your detection system. Endogenous peroxidases will react with HRP substrates (like DAB), and endogenous biotin will bind to streptavidin-biotin (ABC) detection complexes, creating a false positive signal throughout the sample [6] [7]. Other common causes include insufficient blocking, using a primary antibody concentration that is too high, or inadequate washing between steps [8].
2. My positive control stains well, but my experimental tissue has high background. What should I do? This indicates that your protocol and reagents are working, but the specific tissue sample has high levels of an interfering substance. Tissues such as liver, kidney, mammary gland, and adipose tissue are particularly rich in endogenous biotin [7]. Similarly, tissues with many blood cells (which contain peroxidases) will show high background with HRP-based detection. Implement the appropriate blocking steps for endogenous biotin or enzymes specifically for these problematic tissues.
3. I am using a blocking serum, but I still have background. Is Fc receptor binding the cause? For routinely fixed paraffin-embedded tissue sections, recent evidence suggests that Fc receptor (FcR) binding is not a common source of background staining [9]. Standard aldehyde fixation appears to denature endogenous FcRs, eliminating their ability to bind the Fc portion of antibodies. Therefore, you should investigate other causes, such as endogenous enzymes, biotin, or non-specific antibody interactions [9] [6].
4. How can I confirm that endogenous enzymes are causing my background problem? You can run a simple control test. Incubate a test tissue section with only the enzyme substrate (e.g., DAB for HRP) for the same duration as your normal antibody incubation. If a colored precipitate forms, it confirms the presence of interfering endogenous enzyme activity that must be blocked prior to immunostaining [6].
Troubleshooting Guide: Identifying and Resolving Common Issues
The table below summarizes the primary culprits of high background, their characteristics, and solutions.
| Culprit | Characteristics of Background | Recommended Solutions |
|---|---|---|
| Endogenous Peroxidases (e.g., in red blood cells) [6] [7] | Diffuse, brown precipitate throughout the tissue, often in blood-rich areas. | Quench with 3% H2O2 in methanol for 10-15 minutes at room temperature before primary antibody incubation [6] [10]. |
| Endogenous Biotin (e.g., in liver, kidney) [6] [7] | Diffuse, speckled staining, particularly pronounced in frozen sections. | Block using a commercial avidin/biotin blocking kit sequentially, or use a biotin-free polymer-based detection system to avoid the issue entirely [8] [10]. |
| Endogenous Alkaline Phosphatase [6] [8] | Diffuse staining when using AP-conjugated antibodies or AP-based substrates. | Inhibit by adding 1-2 mM levamisole to the substrate solution [6] [8]. |
| Non-specific Antibody Binding [6] [8] | Uniform background haze; may also be seen in negative controls missing the primary antibody. | - Ensure adequate protein blocking (e.g., with 5-10% normal serum from the secondary antibody species) [8].- Optimize primary antibody concentration; overly high concentrations increase non-specific binding [6] [8].- Add NaCl (up to 0.6 M) to antibody diluents to reduce ionic interactions [6]. |
| Fc Receptor Interactions [9] | Believed to cause background on specific immune cells (e.g., macrophages). | For routinely fixed paraffin-embedded tissues, protein blocking steps (e.g., with normal serum) may be unnecessary, as fixation denatures FcRs [9]. |
Experimental Protocols for Blocking Endogenous Activity
Protocol 1: Blocking Endogenous Peroxidase Activity
This protocol is for use just prior to the application of the primary antibody when using an HRP-based detection system [6] [10].
- Solution Preparation: Prepare a solution of 3% hydrogen peroxide (H22O2) in methanol or deionized water. Note: A lower concentration of 0.3% H2O2 can be tried if the 3% solution damages tissue epitopes [7].
- Incubation: Submerge the deparaffinized and rehydrated tissue sections in the peroxidase blocking solution for 10-15 minutes at room temperature.
- Washing: Rinse the slides thoroughly with distilled water, followed by two washes of PBS or TBS buffer for 5 minutes each.
- Proceed: Continue with the standard protocol for antigen retrieval and immunostaining.
Protocol 2: Blocking Endogenous Biotin
This protocol is essential when using avidin-biotin complex (ABC) detection systems on tissues known to be high in endogenous biotin [7].
- Preparation: Following antigen retrieval and washing, apply an excess of unlabeled streptavidin (or avidin) to the tissue section. Incubate for 10-20 minutes to bind all endogenous biotin sites.
- Rinse: Briefly rinse the slide with buffer.
- Blocking Sites: Apply an excess of free, unlabeled biotin to the tissue section. Incubate for 10-20 minutes. This step saturates all remaining binding sites on the streptavidin molecules applied in the previous step.
- Wash: Wash the slides thoroughly with buffer before proceeding with the application of the primary antibody and the rest of the biotin-based detection protocol.
Alternatively, to avoid this multi-step process, switch to a polymer-based detection system that does not rely on biotin-streptavidin chemistry [10].
Visual Guide to Troubleshooting High Background
This flowchart outlines a logical process to diagnose and resolve the most common causes of high background staining in IHC experiments.
The Scientist's Toolkit: Key Reagent Solutions
This table lists essential reagents used to mitigate high background in IHC, along with their specific functions.
| Reagent | Function in Troubleshooting |
|---|---|
| Hydrogen Peroxide (H2O2) [6] [7] | Quenches endogenous peroxidase activity by acting as a substrate for the enzyme in the absence of a chromogen, depleting its activity before the detection step. |
| Levamisole [6] [8] | An inhibitor of endogenous alkaline phosphatase (specally intestinal-type AP), allowing the use of AP-based detection systems without background interference. |
| Avidin/Biotin Blocking Kits [7] [8] | Sequential application of avidin (to bind endogenous biotin) followed by free biotin (to block avidin's remaining binding sites) prevents subsequent detection by biotinylated antibodies and streptavidin-enzyme complexes. |
| Normal Serum [6] [8] | Used as a protein block to occupy non-specific binding sites on the tissue, reducing hydrophobic and ionic interactions that can cause background. Typically from the same species as the secondary antibody. |
| Polymer-Based Detection Kits [11] [10] | A modern detection method that avoids the use of biotin-streptavidin, eliminating background from endogenous biotin. These systems also provide high sensitivity due to multiple enzyme molecules being conjugated to the polymer. |
| Sodium Chloride (NaCl) [6] | When added to antibody diluents (at 0.15-0.6 M), it can reduce background caused by non-specific ionic interactions between antibodies and tissue components. |
| (+)-1-(1-Naphthyl)ethylamine | (R)-(+)-1-(1-Naphthyl)ethylamine, 99%|CAS 3886-70-2 |
| 6-Methoxykaempferol 3-O-rutinoside | 6-Methoxykaempferol 3-O-Rutinoside|High-Purity |
In immunohistochemistry (IHC), fixation is a crucial process for preserving cellular integrity and tissue morphology by stabilizing proteins and preventing degradation [12]. However, this essential step presents a significant paradox: the same chemical cross-links that preserve tissue structure can also mask epitopes and create substantial background noise, compromising experimental results [12]. Formaldehyde, the most common fixative, works by creating methylene bridges between proteins, which effectively preserves morphology but often at the cost of obscuring the very antigenic sites that antibodies need to bind [13]. This technical challenge lies at the heart of reducing high background in IHC research, directly impacting the reliability and reproducibility of data generated by researchers, scientists, and drug development professionals.
Frequently Asked Questions (FAQs) on Fixation Artifacts
What are the primary causes of high background staining related to fixation? Over-fixation, particularly with aldehyde-based fixatives like formalin, is a major contributor. It can create excessive cross-linking, leading to non-specific antibody trapping and increased hydrophobic interactions. Furthermore, fixation can introduce autofluorescence, especially in the green spectral range, and fail to preserve certain labile epitopes, which then become sites for non-specific binding [14].
How does over-fixation lead to epitope masking? Prolonged formalin fixation creates an excessive number of methylene bridges between proteins. This dense network of cross-links can physically obscure the specific three-dimensional structure of an epitope, making it inaccessible to the primary antibody. While some masking occurs even with optimal fixation, over-fixation exacerbates the problem to a point where standard retrieval methods may be insufficient [12] [13].
My positive control stains well, but my experimental tissue does not. Could fixation be the issue? Yes. Inconsistent or variable fixation across different tissue samples is a common source of such discrepancies. Differences in fixation time, fixative concentration, or penetration depth (especially in larger specimens) can lead to uneven antigen preservation. This results in patchy staining or false negatives in poorly fixed regions, even if your protocol works perfectly on a consistently fixed control [2].
Can the issues caused by over-fixation be reversed? In most cases, yes. Antigen Retrieval is a critical step designed specifically to reverse the effects of cross-linking. Techniques like Heat-Induced Epitope Retrieval (HIER) use high temperature and specific buffer solutions to break the methylene bridges formed during fixation, thereby unmasking the epitopes [15]. However, extremely over-fixed tissue may require more aggressive retrieval optimization.
Troubleshooting Guide: Fixation-Related Problems and Solutions
| Problem | Root Cause | Solution |
|---|---|---|
| Weak or No Staining | Over-fixation causing severe epitope masking [2]. | Optimize and intensify antigen retrieval (e.g., increase HIER time, try a higher-pH buffer) [2]. |
| The primary antibody cannot detect the target in its cross-linked, native conformation [14]. | Validate the antibody for IHC on fixed tissues; it may be specific for a denatured epitope more common in Western blot [14]. | |
| High Background Staining | Non-specific antibody trapping in densely cross-linked areas [16]. | Increase blocking time; use protein blockers like BSA or normal serum; add detergent (e.g., Tween-20) to buffers [6] [2]. |
| Hydrophobic interactions increased by fixation [2]. | Ensure wash buffers and antibody diluents contain a mild detergent (e.g., 0.05% Tween-20) [2]. | |
| Uneven or Patchy Staining | Inconsistent fixation across the tissue sample [2]. | Standardize fixation protocol (time, volume) for all samples; ensure adequate fixative volume (typically 10:1 ratio to tissue) [12] [2]. |
| Tissue degradation or delay before fixation, creating artificial staining sites [14]. | Fix tissue immediately after collection (or by perfusion); use cross-linking fixatives to prevent antigen diffusion [14]. | |
| Excessive Autofluorescence | Fixative-induced fluorescence, common with aldehyde fixatives [14]. | Use fluorophores in the red or infrared spectrum; treat tissue with autofluorescence quenching reagents like Sudan Black [6] [14]. |
Experimental Protocols for Mitigating Fixation Effects
Protocol: Heat-Induced Epitope Retrieval (HIER)
HIER is the most effective and widely used method to counteract epitope masking caused by formalin fixation and cross-linking [15].
- Objective: To break methylene bridges formed during fixation and restore antibody access to epitopes.
- Materials:
- Sodium citrate buffer (10 mM, pH 6.0) or Tris-EDTA buffer (10 mM Tris, 1 mM EDTA, pH 9.0) [15].
- Pressure cooker, microwave, or vegetable steamer.
- Slide rack and coplin jars.
- Method (Pressure Cooker):
- Deparaffinize and rehydrate FFPE tissue sections through xylene and a graded ethanol series to water [15].
- Place the slides in a rack and immerse in a pre-heated antigen retrieval buffer within the pressure cooker.
- Secure the lid and heat until full pressure is achieved.
- Start timing once full pressure is reached. Process for 3 minutes under pressure [15]. For over-fixed tissues, this time can be empirically increased.
- Carefully release pressure and transfer the cooker to a sink. Run cold water over it for 10 minutes to cool the slides rapidly [15].
- Transfer slides to wash buffer and proceed with the standard IHC staining protocol.
Protocol: Blocking Non-Specific Background
- Objective: To reduce high background noise resulting from non-specific antibody binding, which can be exacerbated by fixation.
- Materials:
- Method:
- After antigen retrieval and washing, incubate sections with peroxidase block for 10-15 minutes at room temperature to quench endogenous peroxidase activity [6].
- Wash slides gently.
- Apply enough protein-based blocking solution to cover the tissue. Incubate for 30-60 minutes at room temperature in a humidified chamber [2].
- Tap off the blocking solution. Do not wash. Proceed directly with primary antibody application.
Workflow: From Fixation to Signal Retrieval
The following diagram illustrates the core concepts of how fixation leads to epitope masking and the key steps involved in antigen retrieval to solve the problem.
The Scientist's Toolkit: Essential Reagents for Optimal Fixation and Retrieval
| Reagent | Function | Application Note |
|---|---|---|
| 10% Neutral Buffered Formalin | Standard cross-linking fixative. Preserves morphology by creating methylene bridges between proteins. | Avoid over-fixation; 24-48 hours is typically sufficient. Tissue should be immersed in a 10:1 volume ratio of fixative to tissue [12]. |
| Sodium Citrate Buffer (pH 6.0) | A common buffer for Heat-Induced Epitope Retrieval (HIER). | Effective for a wide range of antigens. The acidic pH helps reverse formaldehyde cross-links [6] [15]. |
| Tris-EDTA Buffer (pH 9.0) | A high-pH buffer for HIER. | Often more effective for certain nuclear antigens or difficult targets. The choice between pH 6.0 and 9.0 is often antigen-specific and requires testing [15]. |
| Protein Block (BSA/Normal Serum) | Reduces non-specific background staining by occupying hydrophobic and charged sites on the tissue. | Use normal serum from the species of the secondary antibody for best results. Increase concentration to 10% if background is high [6] [2]. |
| Peroxidase Block (3% Hâ‚‚Oâ‚‚) | Quenches endogenous peroxidase activity in tissues, preventing false-positive signals in HRP-based detection. | Essential when using HRP-conjugated antibodies. Incubate for 10-15 minutes at room temperature [6]. |
| Detergent (Tween-20) | A mild non-ionic detergent added to wash buffers and antibody diluents. | Reduces hydrophobic interactions and improves reagent penetration. A concentration of 0.05% is typically used [6] [2]. |
| Ciprofibrate impurity A | Ciprofibrate impurity A, MF:C12H14O3, MW:206.24 g/mol | Chemical Reagent |
| 2-Amino-1,3-bis(carboxylethoxy)propane | 2-Amino-1,3-bis(carboxylethoxy)propane, CAS:1020112-73-5, MF:C9H17NO6, MW:235.24 | Chemical Reagent |
FAQs: Troubleshooting Antibody-Related Background
FAQ 1: How do I determine if my primary antibody concentration is causing high background?
High primary antibody concentration is a very common cause of high background staining. When the antibody is too concentrated, it can bind non-specifically to off-target epitopes. To diagnose this, perform a antibody titration assay. Test a series of dilutions of your primary antibody on consecutive tissue sections. The optimal concentration is the highest dilution that provides strong specific signal with minimal background. If background decreases without a significant loss of specific signal as you dilute the antibody, the concentration was likely too high [6] [2] [8].
FAQ 2: What is the difference between polyclonal and monoclonal antibodies in terms of specificity and background?
Polyclonal antibodies are a heterogeneous mixture that recognize multiple epitopes on the target antigen. This can increase the chance of cross-reactivity with similar epitopes on non-target proteins, potentially leading to higher background. Monoclonal antibodies are homogeneous and recognize a single, specific epitope, which generally makes them less prone to nonspecific binding and can result in a cleaner background [17] [18].
FAQ 3: My secondary antibody control shows staining. What does this mean?
If you get staining in a control where the primary antibody is omitted, it indicates that the secondary antibody is binding nonspecifically to the tissue. This can happen if the secondary antibody is raised against the same species as your sample (e.g., using an anti-mouse secondary on mouse tissue). The solution is to use a secondary antibody that has been pre-adsorbed against the immunoglobulin of the species from which your sample was obtained. This process removes cross-reactive antibodies from the serum [19] [18] [20].
FAQ 4: Can the way I prepare my antibody diluent affect background?
Yes, the composition of your antibody diluent can significantly impact background. The ionic strength of the buffer can influence nonspecific ionic interactions between the antibody and tissue proteins. If you are experiencing high background, try adding NaCl to your blocking buffer or antibody diluent to achieve a final concentration between 0.15 M and 0.6 M. This can shield these non-specific charges. Conversely, for some monoclonal antibodies, lowering the ionic strength may help reduce hydrophobic interactions [6] [21] [18].
Troubleshooting Guide: Causes and Experimental Solutions
| Problem Category | Specific Cause | Experimental Solution & Protocol |
|---|---|---|
| Antibody Concentration [6] [2] [8] | Primary antibody concentration is too high. | Perform an Antibody Titration:1. Prepare a series of primary antibody dilutions (e.g., 1:50, 1:100, 1:200, 1:500).2. Apply each dilution to consecutive tissue sections from the same positive control block.3. Process all slides with the same protocol and detection system.4. Select the dilution that gives the strongest specific signal with the cleanest background. |
| Antibody Specificity [17] [18] | Polyclonal antibody serum contains cross-reactive immunoglobulins. | Switch Antibody Clonality:• Use a monoclonal antibody for higher specificity to a single epitope.Use Advanced Specificity Verification:• Source antibodies that have undergone additional validation (e.g., Advanced Verification badges, KO-validated) to ensure specificity for the intended target [6]. |
| Secondary Antibody Cross-Reactivity [19] [18] [20] | Secondary antibody binds to endogenous immunoglobulins in the tissue. | Use Cross-Absorbed Secondary Antibodies:• Purchase secondary antibodies that have been pre-adsorbed against the species of your tissue sample.Run a Negative Control:• Always include a control slide processed without the primary antibody to isolate secondary antibody background. |
| Non-Specific Ionic Interactions [6] [21] [18] | Charged residues on antibodies interact non-specifically with tissue components. | Modify Ionic Strength of Diluent:• Add NaCl to your antibody diluent to a final concentration of 0.15-0.6 M to disrupt weak electrostatic bonds.• Empirically determine the optimal salt concentration for your specific antibody. |
Experimental Protocol: Systematic Antibody Optimization
Protocol 1: Antibody Titration for Optimal Signal-to-Noise Ratio
Purpose: To empirically determine the ideal primary antibody concentration that maximizes specific staining while minimizing background.
Materials:
- Primary antibody
- Positive control tissue slides (known to express the target)
- Standard IHC detection kit
- Antibody diluent
Method:
- Prepare Dilutions: Reconstitute the primary antibody according to the manufacturer's instructions. Prepare a series of at least four dilutions in antibody diluent. A typical range might be 1:50, 1:100, 1:200, and 1:500, but this should be guided by the datasheet recommendation.
- Apply Antibodies: Label slides for each dilution. Apply the different antibody dilutions to consecutive tissue sections. Ensure all slides are processed in the same run to maintain consistency.
- Develop and Image: Complete the IHC protocol with your standard detection method. Use the same development time for all slides.
- Analyze Results: Examine slides under a microscope. The optimal dilution is the one that produces the strongest specific staining with the lowest level of non-specific background. There should be a clear "sweet spot" where further dilution weakens the specific signal [2] [20].
Protocol 2: Diagnostic Control Experiments for Specificity and Cross-Reactivity
Purpose: To identify the source of background staining, distinguishing between primary antibody non-specificity and secondary antibody cross-reactivity.
Materials:
- Test tissue slides
- Primary antibody
- Species-matched isotype control (for monoclonal antibodies) or normal serum (for polyclonal antibodies)
- Secondary antibody only
Method:
- Test Slide 1 (Full Staining): Process one slide with the full IHC protocol (primary + secondary antibody). This is your experimental result.
- Test Slide 2 (Primary Antibody Control): Process one slide, replacing the specific primary antibody with a non-immune IgG from the same host species at the same concentration. The appearance of staining on this slide indicates non-specific binding from the primary antibody.
- Test Slide 3 (Secondary Antibody Control): Process one slide, omitting the primary antibody entirely. The appearance of staining on this slide indicates non-specific binding from the secondary antibody or endogenous enzyme activity that was not properly blocked [19] [20].
- Interpretation: Compare the staining across all three slides to pinpoint the exact cause of the high background.
The Scientist's Toolkit: Key Research Reagent Solutions
| Reagent / Material | Function in Reducing Background |
|---|---|
| Cross-Adsorbed Secondary Antibodies | Secondary antibodies that have been purified to remove antibodies that cross-react with immunoglobulins from other species. Critical for staining tissue from the same species as the secondary antibody host (e.g., mouse-on-mouse) [19] [18]. |
| Monoclonal Antibodies | Antibodies that are derived from a single B-cell clone and target one specific epitope. This reduces the probability of non-specific binding compared to polyclonal sera [17] [18]. |
| Advanced Validation Antibodies | Antibodies sold with additional verification data (e.g., knockout-validated), providing higher confidence in their specificity and helping to avoid non-specific staining [6]. |
| Ionic Strength Modification Buffers | Antibody diluents with optimized or adjustable salt concentrations (e.g., 0.15-0.6 M NaCl) to disrupt non-specific ionic interactions between antibodies and tissue components [6] [21]. |
| Polymer-Based Detection Systems | Non-biotin detection systems that avoid background from endogenous biotin, which is highly expressed in tissues like liver and kidney. They also offer high sensitivity [19] [18]. |
| N-acetyl Lenalidomide | N-acetyl Lenalidomide, CAS:1421593-80-7, MF:C15H15N3O4, MW:301.30 g/mol |
| (E)-Naringenin chalcone | Naringenin Chalcone Research Compound |
In immunohistochemistry (IHC), the quality of sample preparation is paramount for achieving specific, interpretable results with low background. This guide addresses three critical pitfalls—tissue degradation, drying, and inadequate blocking—within the broader context of reducing high background in IHC research. Proper management of these steps is essential for preserving tissue architecture and antigenicity while minimizing non-specific staining, thereby ensuring the reliability of data for researchers, scientists, and drug development professionals.
FAQs and Troubleshooting Guides
Frequently Asked Questions
Q1: How does tissue drying during IHC procedures lead to high background, and how can it be prevented? Tissue drying, even if partial, during immunostaining causes irreversible artifacts and antigen masking. This occurs due to a progressive loss of protein-associated water, which can abolish the immunoavailability of the epitope. The consequences are erratic, unpredictable staining, poor reproducibility, and an inability to fully remove antibody layers in sequential staining, all of which contribute to high, non-specific background [22].
- Prevention Strategy: Incorporate disaccharides like lactose or sucrose (at 10% concentration) into antigen retrieval buffers or antibody diluents. These sugars protect tissue-bound antigens and antibodies from air drying-induced damage by stabilizing proteins during suboptimal hydration conditions [22]. Additionally, always perform incubation steps in a humidified chamber to prevent accidental drying [14].
Q2: What are the consequences of inadequate blocking, and what are the key elements of an effective blocking step? Inadequate blocking fails to occupy non-specific binding sites on the tissue section. This allows primary or secondary antibodies to bind indiscriminately to these sites, leading to high background staining and potential false-positive results [23].
- Effective Blocking Protocol: Use a protein-based blocking solution. A common and effective method is to incubate tissue sections with 5-10% normal serum from the same species as the secondary antibody host, or with 1-5% bovine serum albumin (BSA), for 30 minutes at room temperature [23]. It is critical that the blocking serum does not originate from the same species as the primary antibody.
Q3: How can improper tissue fixation lead to tissue degradation and background issues? Delayed or inadequate fixation leads to tissue degradation, including autolysis (self-digestion) and proteolysis, which disrupts cellular morphology and can release cellular components that contribute to background noise. Furthermore, over-fixation, particularly with aldehydes, can create excessive cross-linking that masks epitopes, requiring harsher antigen retrieval which can damage tissue and increase background [14].
- Optimal Fixation Practice: Fix tissue as soon as possible after dissection (ideally within 30 minutes) in an appropriate fixative like 10% neutral buffered formalin. The fixation time should be optimized for the tissue size and type, typically 18-24 hours, to perfectly balance morphology preservation and antigen accessibility [23].
Troubleshooting High Background
The table below summarizes the primary causes and research-grade solutions for high background staining related to sample preparation.
Table 1: Troubleshooting Guide for High Background Staining
| Pitfall | Specific Cause | Research Reagent Solution & Methodology |
|---|---|---|
| Tissue Drying | Partial/complete drying during staining, leading to antigen masking & antibody trapping [22]. | Add disaccharides (e.g., 10% lactose/sucrose) to buffers [22].Methodology: Include 10% w/v lactose or sucrose in your antigen retrieval buffer or antibody dilution buffer. Perform all incubations in a humidified chamber. |
| Inadequate Blocking | Non-specific sites remain available for antibody binding [23]. | Use 5-10% normal serum or 1-5% BSA [23].Methodology: Incubate sections with blocking solution for 30 minutes at room temperature. Ensure the normal serum matches the host species of the secondary antibody. |
| Endogenous Enzymes | Peroxidase or phosphatase activity in tissues (e.g., RBCs, liver) [23] [6]. | Quench with 3% Hâ‚‚Oâ‚‚ (for HRP) or levamisole (for AP) [6].Methodology: After antigen retrieval, incubate sections with 3% Hâ‚‚Oâ‚‚ in methanol or water for 10-15 minutes at room temperature to inactivate endogenous peroxidases. |
| Endogenous Biotin | High biotin levels in tissues (e.g., liver, kidney) bind to avidin-biotin detection systems [6]. | Use a commercial Avidin/Biotin Blocking Kit or switch to a polymer-based detection system [6] [24].Methodology: Follow kit instructions for sequential avidin and biotin blocks. Alternatively, use a biotin-free polymer detection system to avoid the issue entirely. |
| Antibody Cross-Reactivity | Secondary antibody binding to endogenous immunoglobulins in the tissue [24]. | Use species-adsorbed secondary antibodies and include species-matched serum in blocking [6].Methodology: For mouse tissue, use a secondary antibody pre-adsorbed against mouse IgG. Always include a no-primary-antibody control to identify this issue. |
The Scientist's Toolkit: Research Reagent Solutions
Table 2: Essential Reagents for Mitigating Sample Preparation Pitfalls
| Reagent | Function in IHC |
|---|---|
| Normal Serum | Provides a protein source to block non-specific binding sites, reducing background. Must be from a species different from the primary antibody but often matches the secondary antibody host [23] [6]. |
| Bovine Serum Albumin (BSA) | A common protein used in blocking buffers to occupy non-specific hydrophobic binding sites on tissues and slides [23]. |
| Disaccharides (Lactose/Sucrose) | Protect antigens from drying-induced damage and masking by stabilizing proteins during periods of potential dehydration during staining procedures [22]. |
| Hydrogen Peroxide (Hâ‚‚Oâ‚‚) | A key reagent for quenching endogenous peroxidase activity, which is critical when using HRP-based detection systems to prevent high background [23] [6]. |
| Sodium Azide | An inhibitor of microbial growth and endogenous alkaline phosphatase activity; can be added to antibody stocks and some buffers. Caution: Do not use with HRP enzymes, as it inactivates them [6]. |
| Polymer-Based Detection Reagents | Biotin-free detection systems that offer high sensitivity and avoid non-specific staining caused by endogenous biotin in certain tissues [24]. |
| 6-O-trans-Cinnamoylphlorigidoside B | 6-O-trans-Cinnamoylphlorigidoside B, CAS:1246012-25-8, MF:C28H34O14, MW:594.6 g/mol |
| Dermaseptin | Dermaseptin, CAS:136033-70-0; 136212-91-4, MF:C152H257N43O44S2, MW:3455.1 g/mol |
Experimental Protocols
Detailed Protocol: Preventing Drying Artifacts with Disaccharides
Background: This protocol is adapted from a study demonstrating that disaccharides like lactose and sucrose prevent air drying-induced antigen masking, allowing for homogeneous, consistent staining [22].
Materials:
- Dewaxed and rehydrated FFPE tissue sections.
- Antigen Retrieval Buffer (e.g., 10 mM EDTA, pH 8, or 10 mM Sodium Citrate, pH 6.0).
- D-Lactose monohydrate or Sucrose.
- Tris-Buffered Saline with Tween-20 (TBS-T).
Methodology:
- Prepare Lactose-Augmented Antigen Retrieval Buffer: Supplement your standard antigen retrieval buffer with 10% (w/v) lactose or sucrose [22].
- Perform Antigen Retrieval: Carry out heat-induced epitope retrieval (HIER) using a microwave, pressure cooker, or water bath, as you normally would, but using the lactose-supplemented buffer [22].
- Post-Retrieval Handling: After retrieval, slides can be cooled in the buffer. If there is a risk of the slides drying during the cooling period or subsequent transfer, the presence of disaccharides in the buffer provides continuous protection [22].
- Optional Antibody Diluent Additive: For additional protection, especially in long protocols, 10% lactose or sucrose can also be added to the primary and secondary antibody dilution buffers [22].
Detailed Protocol: Optimized Blocking for Low Background
Background: Effective blocking is a critical step to minimize non-specific binding of antibodies, which is a major contributor to high background staining [23] [6].
Materials:
- TBS or PBS buffer.
- Normal serum from the species of your secondary antibody (e.g., Normal Goat Serum if using a goat-anti-rabbit secondary).
- Alternatively, Bovine Serum Albumin (BSA).
Methodology:
- Prepare Blocking Solution: Create a solution of 1X TBST or PBS containing 5-10% (v/v) normal serum or 1-5% (w/v) BSA [23] [24].
- Apply Block: After antigen retrieval and any endogenous enzyme quenching, drain the excess liquid from the slide and apply enough blocking solution to fully cover the tissue section.
- Incubate: Incubate the slides for 30 minutes at room temperature in a humidified chamber to prevent evaporation [23].
- Proceed to Staining: After incubation, do not rinse the slide. Instead, tap off the excess blocking solution and immediately apply the appropriately diluted primary antibody.
Visual Guides
Workflow for Addressing Sample Preparation Pitfalls
The following diagram illustrates the logical workflow for identifying and resolving the key sample preparation pitfalls discussed in this guide.
Critical Control Points in IHC Sample Prep
This diagram maps the key control points in the IHC sample preparation workflow where the discussed pitfalls can be introduced and must be actively managed.
Proactive Protocol Design: Methodologies to Minimize Background from the Start
In immunohistochemistry (IHC), the precision of your results hinges on effective blocking. This process involves incubating tissue samples with proteins or other reagents to occupy nonspecific binding sites, thereby preventing detection antibodies from adhering to these sites and causing high background staining. A well-optimized blocking strategy is the most critical step for achieving a high signal-to-noise ratio, which is fundamental for accurate data interpretation in research and drug development. This guide provides targeted troubleshooting and FAQs to address specific blocking-related challenges.
FAQs and Troubleshooting Guides
What is the fundamental principle behind blocking in IHC?
Blocking is essential because antibodies can bind to tissue sections via simple adsorption, charge-based interactions, hydrophobic forces, and other non-immune interactions. If these potential nonspecific binding sites are not occupied before antibody incubation, your detection reagents may bind to a variety of sites unrelated to specific antibody-antigen reactivity, leading to high background and false-positive results [25].
How do I choose between normal serum, BSA, and commercial blockers?
The choice of blocking agent depends on your specific experimental setup, including the secondary antibody and detection system. Each option has distinct advantages and considerations, summarized in the table below.
Table: Comparison of Common Protein-Based Blocking Reagents
| Blocking Reagent | Recommended Concentration | Key Advantages | Potential Pitfalls |
|---|---|---|---|
| Normal Serum [25] [26] | 1-5% (v/v), up to 10% for high background [6] | Contains antibodies that bind to reactive sites; rich in albumin and other proteins. Ideal for blocking Fc receptors. | Must be from the secondary antibody host species, not the primary antibody species [25]. |
| Bovine Serum Albumin (BSA) [25] [27] | 1-5% (w/v) [25] | Inexpensive, readily available, and a pure protein. | Ensure it is IgG-free and protease-free to avoid cross-reactivity with anti-bovine secondary antibodies [26]. |
| Non-Fat Dry Milk [25] | 1-5% (w/v) [25] | Inexpensive and effective for many targets. | Contains biotin and casein; not suitable for biotin-streptavidin detection systems or phospho-specific antibodies [25] [28]. |
| Commercial Blocking Buffers [25] [27] | As per manufacturer's instructions | Often proprietary, optimized formulations with improved shelf life and performance. | Can be more expensive than homemade preparations. |
Why does using a mouse primary antibody on mouse tissue cause high background, and how can I block it?
This common problem, known as the "mouse-on-mouse" effect, occurs because the anti-mouse secondary antibody will bind to endogenous mouse immunoglobulins present in the mouse tissue, in addition to your primary antibody [29] [27].
Solution: Use F(ab) fragment antibodies. The secondary antibody used should be a F(ab) fragment, which lacks the Fc region responsible for much of this nonspecific binding. For the most robust blocking, you can also use a monovalent Fab fragment to block endogenous immunoglobulins before applying your primary antibody [26].
What should I do if my fluorescent IHC has high background from tissue autofluorescence?
Autofluorescence can mimic a specific signal, leading to false positives. Causes include aldehyde-based fixatives (like formalin) and naturally occurring fluorescent compounds in tissues [6] [27].
Solutions:
- Chemical Blocking: Treat samples with quenching dyes such as pontamine sky blue, Sudan black, or trypan blue [6] [27].
- Fixative Alternatives: Use non-aldehyde fixatives like Carnoy's solution where possible [27].
- Aldehyde Quenching: If you must use formalin, treat the sample with ice-cold sodium borohydride (1 mg/mL) or glycine/lysine to block reactive aldehyde groups [6] [27].
- Switch Detection: If autofluorescence cannot be sufficiently reduced, consider switching to a chromogenic detection system [27].
How do I block endogenous enzymes and biotin for chromogenic detection?
If your detection system relies on an enzyme (like HRP or AP) or a biotin-streptavidin complex, you must inactivate the endogenous versions present in many tissues.
Table: Blocking Endogenous Activities in Tissue
| Endogenous Element | Tissues Where it is Prevalent | Blocking Method |
|---|---|---|
| Peroxidase (HRP) [6] [29] [27] | Kidney, liver, red blood cells [27] | Incubate with 3% Hâ‚‚Oâ‚‚ in methanol or water for 10-15 minutes at room temperature [6] [29]. |
| Alkaline Phosphatase (AP) [6] [27] | Kidney, intestine, bone, lymphoid tissue [27] | Incubate with levamisole (an AP inhibitor) in the substrate solution [6] [27]. |
| Biotin [6] [27] | Kidney, liver, brain [27] | Use a sequential avidin/biotin block: incubate with an excess of avidin, followed by an excess of free biotin to saturate all binding sites [6] [27]. Alternatively, use a polymer-based detection system that does not rely on biotin [29] [27]. |
My background is still high after protein blocking. What other strategies can I try?
If standard protein blocking is insufficient, consider these advanced adjustments to your protocol:
- Optimize Antibody Concentration: Excess primary or secondary antibody is a common cause of high background. Perform a titration experiment to find the lowest concentration that gives a strong specific signal [6] [28].
- Increase Salt Concentration: Adding NaCl to your blocking buffer and antibody diluent to a final concentration of 0.15 M to 0.6 M can reduce ionic interactions that cause nonspecific binding [6].
- Include Detergents: Adding a mild detergent like Tween-20 (e.g., 0.05% v/v) to your buffers can minimize hydrophobic interactions [6] [26].
- Ensure Adequate Washing: Perform thorough washing after each antibody incubation step, typically three washes for 5 minutes each with a buffer containing a mild detergent like 0.05% Tween-20 [29].
Experimental Protocol: A Standardized Blocking Procedure for IHC
The following protocol provides a general workflow for blocking and antibody incubation in IHC. Always optimize incubation times and temperatures for your specific antibodies and targets [25].
Workflow Overview:
Step-by-Step Methodology:
Sample Preparation: After your tissue sections have been fixed, deparaffinized (if FFPE), and undergone antigen retrieval, gently tap off excess liquid from the slide. Do not let the tissue dry out.
Apply Blocking Solution: Pipette enough of your chosen blocking buffer (e.g., 5% normal serum from the secondary antibody host species or 3% IgG-free BSA) to completely cover the tissue section. Ensure the entire section remains covered throughout the incubation.
Incubate: Place the slides in a humidified chamber to prevent evaporation. Incubate for 30 minutes at room temperature or overnight at 4°C for challenging targets. The incubation time should be determined empirically [25].
Optional Wash: After blocking, you may wash the slides briefly with your wash buffer (e.g., PBS). However, many researchers skip this wash and proceed directly to the primary antibody, especially if the primary antibody will be diluted in the same blocking buffer used in this step [25].
Apply Primary Antibody: Tap off the blocking buffer (or the wash buffer, if used). Immediately apply the primary antibody, which should be diluted in an appropriate diluent. For optimal consistency, diluting the primary antibody in the same blocking buffer used in step 2 is recommended [25].
The Scientist's Toolkit: Essential Reagents for Effective Blocking
Table: Key Research Reagent Solutions for IHC Blocking
| Reagent | Function/Purpose | Example Use Case |
|---|---|---|
| Normal Serum [25] [26] | Blocks nonspecific sites and Fc receptors. | Using 5% normal goat serum to block when using a goat anti-rabbit secondary antibody. |
| IgG-Free BSA [25] [26] | A general protein blocker that competes for nonspecific binding sites. | Used at 1-5% in buffer as a non-species-specific blocking agent. |
| F(ab) Fragment Secondary Antibodies [26] | Lacks the Fc region, minimizing binding to endogenous immunoglobulins and Fc receptors. | Essential for mouse-on-mouse experiments or tissues with high endogenous Ig. |
| Hydrogen Peroxide (Hâ‚‚Oâ‚‚) [6] [29] [27] | Quenches endogenous peroxidase activity. | 3% Hâ‚‚Oâ‚‚ incubation before primary antibody when using HRP-based detection. |
| Levamisole [6] [27] | Inhibits endogenous alkaline phosphatase activity. | Added to the substrate solution when using AP-based detection. |
| Avidin/Biotin Blocking Kit [6] [27] | Sequentially blocks endogenous biotin. | Critical for biotin-rich tissues (liver, kidney) when using biotin-streptavidin detection. |
| Sodium Borohydride [6] | Reduces fixative-induced autofluorescence by blocking reactive aldehyde groups. | Treating formalin-fixed sections before blocking to reduce autofluorescence. |
| Tween-20 / Triton X-100 [6] [26] | Detergents that reduce hydrophobic and ionic interactions. | Adding 0.05% Tween-20 to wash and antibody dilution buffers to lower background. |
| Schisanlignone C | Schisanlignone C, MF:C23H26O7, MW:414.4 g/mol | Chemical Reagent |
| Confidential-2 | Confidential-2, MF:C20H25N5O8, MW:463.4 g/mol | Chemical Reagent |
A technical guide for achieving clear, specific staining in immunohistochemistry
Why is antibody titration critical for reducing high background in IHC?
Antibody titration is the systematic process of determining the optimal concentration of a primary antibody that provides the strongest specific signal with the lowest non-specific background. Using an antibody at too high a concentration is a primary cause of high background staining because it promotes off-target binding to non-antigenic sites [30] [14]. Conversely, an antibody that is too dilute may yield a weak or absent specific signal [14]. Titration is therefore a fundamental and essential step for any IHC experiment aimed at generating reliable, publication-quality data.
The table below outlines the recommended starting concentration ranges for different antibody types [31]:
| Antibody Type | Recommended Starting Concentration Range | Typical Incubation Conditions |
|---|---|---|
| Monoclonal Antibody | 5–25 µg/mL [31] | Overnight at 4°C [31] |
| Polyclonal Antibody | 1.7–15 µg/mL [31] | Overnight at 4°C [31] |
How do I perform a systematic antibody titration experiment?
A standard titration experiment involves testing a series of antibody dilutions on consecutive tissue sections from the same positive control sample. The following workflow and protocol ensure a methodical approach.
Experimental Protocol: Checkerboard Titration
Materials Needed:
- Positive control tissue (FFPE or frozen) with known antigen expression [32]
- Primary antibody
- Recommended antibody diluent [33]
- Detection kit (e.g., polymer-based HRP detection) [33]
Methodology:
- Section Preparation: Cut multiple sequential sections (5–8 is typical) from your positive control tissue block and mount them on slides [34].
- Dilution Series: Prepare a series of primary antibody dilutions. A common approach is to prepare a 2-fold or 10-fold serial dilution series that brackets the manufacturer's recommended concentration [31]. For example, if the recommended dilution is 1:500, prepare dilutions of 1:100, 1:250, 1:500, 1:1000, and 1:2000.
- Staining: Perform the IHC staining procedure according to your standard protocol, applying a different antibody dilution to each section. It is critical to keep all other variables (incubation times, temperature, antigen retrieval, detection, etc.) completely consistent across all slides [34].
- Analysis: Examine the stained slides under a microscope. The optimal dilution is the one that yields strong specific staining of the target antigen with a clean, low-background appearance in the surrounding tissue [34]. A "no primary antibody" control slide is essential for identifying background contributed by the detection system [33] [26].
What is the role of antibody diluents in managing background staining?
The antibody diluent is not merely a solvent; it is a critical reagent that stabilizes the antibody and minimizes its non-specific interaction with tissue components. A poor-quality or inappropriate diluent can be a direct cause of high background [14]. Commercial antibody diluents are specially formulated with buffering agents, salts, and carrier proteins to maintain antibody stability and block non-specific binding sites.
The choice of diluent can be antibody-specific. As demonstrated in the table below, the same antibody can perform dramatically differently in various diluents [33].
| Diluent Type | Key Components | Function & Impact on Background |
|---|---|---|
| Commercial Diluent (e.g., SignalStain) | Stabilizers, preservatives, proprietary blocking agents [33] | Recommended. Optimized to reduce non-specific binding; provides consistent results [33]. |
| TBST / 5% Normal Goat Serum | Tris buffer, salt, Tween detergent, animal serum [33] | Variable. Works well for some antibodies (e.g., Phospho-EGF Receptor #4407) but can cause high background for others [33]. |
| PBS | Phosphate buffer, salt [26] | Basic. Lacks protein stabilizers; can lead to antibody aggregation and background. Centrifuge working dilution to remove aggregates [26]. |
| Incompatible Buffers | e.g., Phosphate buffer with AP system; Sodium azide with HRP system [34] | Causes Failure. Can inhibit the detection enzyme, leading to weak or no signal [34]. |
The Scientist's Toolkit: Essential Reagents for Optimization
The following reagents are essential for effectively performing antibody titration and background reduction.
| Reagent / Material | Critical Function in Optimization |
|---|---|
| Positive Control Tissue | Tissue with known expression of the target antigen is non-negotiable for validating staining and titration results [32]. |
| Commercial Antibody Diluent | Formulated to stabilize antibody concentration and reduce non-specific binding, directly combating high background [33]. |
| Normal Serum | Used for blocking (5% v/v) before primary antibody application. Use serum from the same species as the secondary antibody host for best results [26]. |
| Adsorbed Secondary Antibodies | Secondary antibodies that have been "adsorbed" against immunoglobulins from the tissue species minimize cross-reactivity and background [26] [14]. |
| Polymer-Based Detection Kits | These systems (e.g., SignalStain Boost) are more sensitive than traditional biotin-based methods and avoid background from endogenous biotin in tissues like liver and kidney [33]. |
| GS-444217 | GS-444217, MF:C23H21N7O, MW:411.5 g/mol |
| Gpr183-IN-1 | Gpr183-IN-1, MF:C16H19BrN2O2, MW:351.24 g/mol |
Frequently Asked Questions
What is the single most important step I can take to reduce high background?
Beyond titration, effective blocking is paramount. Before applying the primary antibody, block the tissue section with 5% normal serum from the same species as your secondary antibody host for 30-60 minutes. This saturates charged sites and Fc receptors that otherwise bind antibodies non-specifically [26] [14].
The manufacturer provides a recommended dilution. Should I still titrate?
Yes. The manufacturer's recommendation is an excellent starting point. However, variables like fixation time, tissue processing, and the specific detection system in your lab can alter the optimal concentration. Titration validates and potentially optimizes the antibody for your unique experimental conditions [32].
I've titrated my antibody and optimized the diluent, but background is still high. What should I check next?
Investigate these common culprits:
- Inadequate washing: Increase washes after primary and secondary antibody incubations to 3x5 minutes with vigorous agitation [33] [14].
- Endogenous enzymes: If using an HRP-based system, quench endogenous peroxidase activity with 3% Hâ‚‚Oâ‚‚ for 10 minutes prior to blocking [33] [34].
- Over-incubation: Ensure you are not exceeding the optimal incubation time for the primary antibody or detection substrate, as this can increase background [34] [14].
- Antibody cross-reactivity: Use a secondary antibody that has been cross-adsorbed against the species of your tissue sample to minimize non-specific binding [26] [14].
In the pursuit of reducing high background and enhancing signal specificity in immunohistochemistry (IHC), selecting the appropriate antigen retrieval method is a critical decision. Formalin fixation creates protein cross-links that mask epitopes, often resulting in weak target staining or elevated background noise that compromises data interpretation [35] [15]. This technical resource center provides a detailed comparison of the two principal antigen retrieval techniques—Heat-Induced Epitope Retrieval (HIER) and Proteolytic-Induced Epitope Retrieval (PIER)—to guide researchers in optimizing their IHC protocols for superior results in drug development and diagnostic applications.
Understanding Antigen Retrieval Methods
Heat-Induced Epitope Retrieval (HIER) utilizes high temperature in a specific buffer solution to break the methylene bridges and other cross-links formed during formalin fixation. This process helps to unfold proteins and restore epitope conformation, making them accessible to antibody binding [35] [15]. The effectiveness of HIER depends on multiple factors including temperature, incubation time, and the pH/composition of the retrieval buffer.
Proteolytic-Induced Epitope Retrieval (PIER) relies on enzymatic digestion to degrade the protein cross-links that obscure antigenic sites. Common enzymes used include proteinase K, trypsin, and pepsin [36] [35]. The specificity and aggressiveness of PIER are controlled by enzyme concentration, incubation time, temperature, and pH.
The fundamental mechanisms differ significantly: HIER primarily reverses cross-links through thermal energy, while PIER enzymatically cleaves them. Understanding this distinction is crucial for troubleshooting, as each method presents unique advantages and potential artifacts that can influence background staining levels.
Direct Comparison: HIER vs. PIER
The table below summarizes the core characteristics, advantages, and limitations of each antigen retrieval method to inform your experimental design.
| Feature | HIER (Heat-Induced Epitope Retrieval) | PIER (Proteolytic-Induced Epitope Retrieval) |
|---|---|---|
| Mechanism of Action | Uses heat to unfold proteins and break cross-links [35]. | Uses enzymes (e.g., proteinase K, trypsin) to digest cross-links [36] [35]. |
| Primary Effect | Reverses formalin-induced crosslinks, restoring epitope conformation [15]. | Degrades proteins around the epitope to physically unmask the antigen [36]. |
| Typical Conditions | 95-120°C for 10-20 min in buffer (e.g., citrate, Tris-EDTA) [36] [15]. | 37°C for 10-90 min with a specific enzyme concentration [36]. |
| Key Advantages | - Broad applicability for many antigens- Highly tunable via buffer pH and heat source [15]. | - Superior for some dense matrix proteins (e.g., in cartilage) [36]. |
| Major Limitations/Risks | - Can destroy some delicate epitopes- May cause tissue detachment from slides [36]. | - Higher risk of damaging tissue morphology- Over-digestion can increase background [36]. |
Quantitative Comparison Data
Recent research directly comparing these methods provides valuable insights for protocol selection. The following table summarizes findings from a 2024 study investigating the retrieval of Cartilage Intermediate Layer Protein 2 (CILP-2) in osteoarthritic cartilage, a challenging dense tissue [36] [37].
| Retrieval Method | Staining Outcome for CILP-2 | Impact on Tissue Morphology |
|---|---|---|
| No Retrieval (Control) | Poor / No Staining | Preserved |
| HIER Only | Moderate | Some tissue detachment observed |
| PIER Only | Best (Most abundant staining) | Preserved |
| HIER + PIER Combined | Reduced (compared to PIER alone) | Frequent section detachment |
This study demonstrated that for the specific glycoprotein CILP-2, PIER alone (using proteinase K and hyaluronidase) yielded superior results, while the combination of HIER and PIER was counterproductive, often leading to tissue loss [36]. This highlights the critical importance of empirical optimization, as the optimal method is highly dependent on the target antigen and tissue type.
Experimental Protocols
Standard HIER Protocol Using a Pressure Cooker
This is a widely used and effective method for performing HIER [15].
- Deparaffinize and Rehydrate: Process slides through xylene and graded ethanol series to water.
- Prepare Buffer: Fill a domestic stainless-steel pressure cooker with an appropriate antigen retrieval buffer (e.g., 10 mM Sodium Citrate pH 6.0 or Tris-EDTA pH 9.0). Place on a hot plate at full power.
- Heat Retrieval: Once the buffer is boiling, transfer the slides into the cooker. Secure the lid. Once full pressure is reached, time for 3 minutes [15].
- Cool: Turn off the heat, release pressure, and run cold water over the cooker for 10 minutes to cool.
- Continue Staining: Proceed with subsequent IHC steps (peroxidase blocking, washing, antibody incubation, etc.).
- Note: Alternative heating methods include a scientific microwave (20 minutes at 98°C) or a vegetable steamer (20 minutes at 95-100°C) [15].
Standard PIER Protocol for Challenging Tissues
This protocol is adapted from the successful retrieval of CILP-2 in cartilage [36].
- Deparaffinize and Rehydrate: Process slides to water.
- Proteinase K Digestion: Incubate slides with 30 µg/mL Proteinase K in 50 mM Tris/HCl, 5 mM CaCl2 (pH 6.0) for 90 minutes at 37°C [36].
- Hyaluronidase Treatment (Optional): For tissues with a high glycosaminoglycan content (e.g., cartilage), follow with a treatment of 0.4% bovine hyaluronidase in a HEPES-buffered medium for 3 hours at 37°C [36].
- Wash: Rinse slides thoroughly with PBS or distilled water before continuing with the IHC protocol.
Troubleshooting Guide: Antigen Retrieval and Background Issues
Troubleshooting FAQs
Q1: My staining is weak or absent after HIER. What should I check?
- Buffer pH: The optimal pH of the retrieval buffer is antigen-specific. Test citrate (pH 6.0) and Tris-EDTA (pH 9.0) buffers to determine which is superior for your target [15].
- Heat Source: Inconsistent heating can cause uneven retrieval. A pressure cooker is often more effective and consistent than a microwave or water bath [38]. Ensure your heating apparatus is functioning correctly.
- Over-retrieval: Excessive heat or time can destroy the epitope. Perform a time-course experiment (e.g., 1-5 minutes at pressure) to find the optimal window [15].
Q2: PIER caused high background or tissue damage. How can I fix this?
- Enzyme Concentration and Time: This is the most critical parameter. Over-digestion is a common cause of background and morphological damage. Titrate the enzyme concentration (e.g., test 10, 20, 30 µg/mL of Proteinase K) and reduce the incubation time [36].
- Enzyme Specificity: Different enzymes (trypsin, pepsin) may yield better results for specific antigens or tissues. If Proteinase K is too aggressive, try a milder alternative [35].
Q3: My tissue sections detach from the slides during HIER. How can I prevent this?
- Use Adhesive Slides: Ensure you are using charged or adhesive microscope slides [36].
- Dry Slides Properly: Before retrieval, ensure slides are adequately dried after deparaffinization.
- Cooling Step: After heating, allow the slides to cool in the buffer for 10 minutes before handling. Abrupt temperature changes can cause detachment [15].
- Alternative Method: For very delicate tissues like cartilage and skin, consider using a water bath set to 60°C for overnight retrieval instead of high-temperature methods [15].
The Scientist's Toolkit: Essential Reagents for Antigen Retrieval
| Reagent / Tool | Function / Purpose | Examples & Notes |
|---|---|---|
| HIER Buffers | Creates the chemical environment for heat-based unmasking. pH is critical. | Sodium Citrate (pH 6.0): Standard for many targets [15].Tris-EDTA (pH 9.0): Often better for phosphorylated epitopes [15]. |
| Proteolytic Enzymes | Enzymatically digests cross-links for PIER. | Proteinase K: Broad-spectrum, robust [36].Trypsin: Commonly used, milder than Proteinase K [35]. |
| Heating Apparatus | Provides consistent and controlled heat for HIER. | Pressure Cooker: Fast and effective [38] [15].Scientific Microwave: Provides programmable temperature control [15]. |
| Blocking Sera | Reduces non-specific antibody binding to lower background. | Use normal serum from the same species as the secondary antibody host [38] [6]. |
| Endogenous Enzyme Blockers | Quenches background from native tissue enzymes. | 3% Hâ‚‚Oâ‚‚: Blocks endogenous peroxidase [38] [6].Levamisole: Inhibits alkaline phosphatase [6]. |
| [D-Trp34]-Neuropeptide Y | [D-Trp34]-Neuropeptide Y, MF:C196H289N55O56, MW:4312 g/mol | Chemical Reagent |
| [Tyr1]-Somatostatin-14 | [Tyr1]-Somatostatin-14, MF:C82H108N18O20S2, MW:1730.0 g/mol | Chemical Reagent |
Optimizing antigen retrieval is a cornerstone of robust IHC, directly impacting signal strength and background levels. There is no universal solution; the choice between HIER and PIER must be empirically determined based on the specific antigen-tissue-antibody combination. As demonstrated by comparative studies, PIER can be superior for certain targets, particularly in dense extracellular matrices, while HIER remains the gold standard for a broad range of applications. Systematic troubleshooting of retrieval parameters, combined with appropriate controls, is essential for developing reliable, high-quality IHC assays that generate reproducible data for critical research and drug development decisions.
For researchers in investigative and toxicologic pathology, achieving high-specificity staining with low background is a fundamental requirement. The choice of detection system is critical, especially when working with sensitive tissues that have high levels of endogenous biotin, such as liver and kidney. This technical support center focuses on the core challenge of reducing high background by comparing two prevalent detection methodologies: polymer-based and biotin-based systems. The following guides, protocols, and FAQs will provide the necessary framework to select and optimize the appropriate detection system for your experimental context.
Detection System Comparison
The table below summarizes the key characteristics of the two main detection system types, which is crucial for making an informed selection.
| Feature | Polymer-Based Systems | Biotin-Based Systems (ABC/LSAB) |
|---|---|---|
| Core Principle | Secondary antibodies and enzymes are conjugated to a polymer backbone [11] [39]. | Relies on the high-affinity interaction between biotin and (strept)avidin to form a complex [11] [39]. |
| Sensitivity | Generally higher sensitivity due to a high enzyme-to-antibody ratio on the polymer [39]. | High sensitivity, though typically lower than polymer-based methods [39]. |
| Steps After Primary Antibody | One incubation step [39]. | Two or more incubation steps (secondary antibody + (strept)avidin complex) [11]. |
| Risk of Background from Endogenous Biotin | Very low, as the system is biotin-free [39]. | High, particularly in tissues like liver and kidney, which can cause nonspecific staining [11] [39]. |
| Steric Hindrance | Potential for steric hindrance due to the larger size of the polymer, though this has been improved in newer formulations [11]. | Smaller complex size (especially LSAB) can facilitate better tissue penetration [39]. |
| Cost & Time | Faster protocol and can be more cost-effective due to fewer steps and reagents [40] [39]. | Additional steps and reagents can increase time and cost. |
Experimental Protocols
Protocol 1: Polymer-Based Detection Method
This is a common, streamlined protocol for formalin-fixed, paraffin-embedded (FFPE) tissues using a horseradish peroxidase (HRP) polymer system.
- Dewaxing and Hydration: Deparaffinize slides by passing through xylene (two changes, 5-10 minutes each). Rehydrate through a graded ethanol series (100%, 95%, 80%, 70%) and finally rinse in deionized water [41].
- Antigen Retrieval: Perform heat-induced epitope retrieval using a suitable buffer (e.g., 1x sodium citrate, pH 6.0) in a pressure cooker, microwave, or water bath. Heat until steaming and maintain for 5-20 minutes depending on the antigen. Cool to room temperature [11] [41].
- Endogenous Peroxidase Blocking: Incubate sections with 3% hydrogen peroxide aqueous solution in the dark for 10-15 minutes to quench endogenous peroxidase activity [41].
- Blocking: Incubate sections with a ready-to-use blocking solution (e.g., 2.5% normal horse serum) for 10-30 minutes at room temperature to reduce nonspecific background [42] [41].
- Primary Antibody Incubation: Apply the optimized dilution of primary antibody in a diluent to the sections. Incubate at 37°C for 1-2 hours or at 4°C overnight [41].
- Polymer Reagent Incubation: Wash slides with buffer (TBS or PBS). Apply the HRP-labeled polymer reagent (conjugated with the appropriate secondary antibody) for 30 minutes at room temperature [42].
- Chromogenic Substrate Development: Wash slides and apply freshly prepared DAB substrate solution. Monitor the color development (brown precipitate) under a microscope and stop the reaction by immersing in deionized water once specific staining is clear [41].
- Counterstaining and Mounting: Counterstain with hematoxylin, dehydrate, clear, and mount with a permanent mounting medium [41].
Protocol 2: Biotin-Based (LSAB) Detection Method
This protocol for FFPE tissues uses the Labeled Streptavidin-Biotin method, which is less susceptible to nonspecific background than the Avidin-Biotin Complex (ABC) method due to streptavidin's neutral isoelectric point [11].
- Steps 1-5: Identical to the Polymer-Based Protocol (Dewaxing, Antigen Retrieval, Peroxidase Blocking, Blocking, Primary Antibody Incubation) [41].
- Biotinylated Secondary Antibody Incubation: After primary antibody incubation and washing, apply a biotin-conjugated secondary antibody for 30-60 minutes at room temperature [11] [39].
- Streptavidin-Peroxidase Conjugate Incubation: Wash slides and incubate with HRP-conjugated streptavidin for 30 minutes at room temperature [11] [39].
- Steps 7-8: Identical to the Polymer-Based Protocol (Chromogenic Development, Counterstaining, and Mounting) [41].
Troubleshooting Guide: High Background
High background staining is a common issue. The table below addresses specific problems related to the detection system.
| Problem | Possible Source | Test or Action |
|---|---|---|
| High Background, especially in liver/kidney | Endogenous biotin in biotin-based systems [39]. | Switch to a polymer-based (biotin-free) detection system [39]. Use an endogenous biotin blocking kit. |
| Overall High Background | Non-specific binding of primary or secondary antibodies [21]. | Titrate antibody concentrations to optimal levels [21]. Ensure blocking steps use appropriate serum (from the secondary antibody host species) [41]. |
| Overall High Background | Ionic interactions with tissue proteins [21]. | Increase the ionic strength of the antibody diluent buffer [21]. |
| Patchy Nonspecific Staining | Tissue drying during the staining procedure [21]. | Ensure sections remain fully hydrated throughout the protocol. |
| Specific Background with Polymer Systems | Polymer reagent sticking to charged tissue components. | Use the proprietary blocking serum provided with the kit. Ensure the polymer reagent is compatible with the primary antibody species. |
Frequently Asked Questions (FAQs)
Q1: When should I definitely choose a polymer-based system over a biotin-based one? A1: A polymer-based system is strongly recommended when working with tissues known to have high endogenous biotin (e.g., liver, kidney) [39]. It is also the better choice for streamlining your workflow, as it requires fewer incubation steps and is less prone to this specific type of background interference [40] [39].
Q2: My staining is completely absent. What could be wrong with my detection system? A2: If controls suggest the primary antibody is valid, check the viability of your detection reagents. Ensure the secondary antibody is compatible with the host species of your primary antibody. Also, confirm that all reagents were added in the correct order and that the enzyme substrate (e.g., DAB) was prepared correctly and is active [21].
Q3: Can I use polymer-based systems for multiplexing? A3: Yes, polymer-based systems are well-suited for multiplexing. Dual enzyme kits are available, for example, containing an anti-mouse IgG polymer conjugated with HRP and an anti-rabbit IgG polymer conjugated with Alkaline Phosphatase (AP). These can be used with different chromogens to visualize multiple targets on the same tissue section [42].
Q4: Are polymer-based systems compatible with mouse primary antibodies on mouse tissue? A4: Yes, but this requires a special approach. Standard secondary antibodies will bind nonspecifically to endogenous immunoglobulins in the mouse tissue. For such "mouse-on-mouse" applications, you should use a specialized kit that includes a blocking reagent to minimize this background, followed by a mouse-adsorbed polymer reagent [42] [11].
The Scientist's Toolkit: Essential Research Reagent Solutions
| Item | Function in IHC |
|---|---|
| Polymer-Based Detection Kit | A ready-to-use system that conjugates secondary antibodies and multiple enzyme molecules to a polymer backbone, providing high sensitivity in a single step after the primary antibody [42] [39]. |
| Biotin-Based Detection Kit | A system that utilizes a biotinylated secondary antibody and a pre-formed (strept)avidin-enzyme complex to amplify the detection signal [11] [39]. |
| Normal Serum | Used for blocking nonspecific binding sites on tissue sections before primary antibody incubation, significantly reducing background. The serum should match the host species of the secondary antibody [41]. |
| Chromogenic Substrate (e.g., DAB) | A chemical solution that, when catalyzed by the detection enzyme (e.g., HRP), produces an insoluble, colored precipitate at the antigen site, allowing visualization [11] [41]. |
| Antigen Retrieval Buffer | A solution (e.g., citrate or EDTA buffer) used to break protein cross-links formed during formalin fixation, thereby restoring the antigenicity and enabling antibody binding [11] [41]. |
| Endogenous Enzyme Block | A solution like hydrogen peroxide (for HRP) or levamisole (for AP) used to inactivate the respective endogenous enzymes in the tissue, preventing false-positive signal [41]. |
| Oleoyl ethyl amide | Oleoyl ethyl amide, MF:C20H38NO-, MW:308.5 g/mol |
| epi-aszonalenin A | epi-aszonalenin A, MF:C25H25N3O3, MW:415.5 g/mol |
FAQs on Washing in Immunohistochemistry
Why is washing so critical in IHC experiments? Adequate washing is fundamental for achieving a high signal-to-noise ratio. It removes unbound antibodies, residual fixatives, and other reagents that contribute to non-specific background staining, thereby revealing a clean, specific signal [8] [43].
What is the recommended standard washing regimen? A common and effective protocol involves washing slides three times for 5-10 minutes each in an appropriate buffer between incubation steps (e.g., after primary and secondary antibody applications) [44] [43]. For fluorescent IHC, some protocols recommend more extensive washes of three times for 15 minutes each [45].
Which wash buffer should I use? The choice of buffer depends on your detection system and protocol.
- PBS (Phosphate-Buffered Saline) or TBS (Tris-Buffered Saline): These are the most common base solutions [44] [45].
- Detergent Addition: Adding a low concentration (0.025%-0.1%) of a mild detergent like Tween-20 or Triton X-100 is crucial. The detergent helps minimize hydrophobic, non-specific interactions between antibodies and the tissue, which is a major cause of high background [44] [43] [2].
Troubleshooting Guide: Washing for Low Background
The following table summarizes common issues related to inadequate washing and their solutions.
| Problem | Possible Cause | Solution |
|---|---|---|
| High, uniform background | Insufficient washing after primary or secondary antibody incubation, leaving unbound antibodies that bind non-specifically [8]. | Increase washing time and volume [8]. Follow a regimen of 3 washes for 5-10 minutes each with vigorous agitation [43]. |
| Spotty or uneven staining | Incomplete deparaffinization or uneven reagent coverage during washes [43] [2]. | Ensure full deparaffinization with fresh xylene [43]. Use sufficient buffer to fully submerge the tissue section during all washes [2]. |
| General high background from multiple sources | Residual fixative or unbound antibodies from all steps [8]. | Wash extensively in buffer between all steps of the IHC protocol [8]. Use a buffer containing 0.05% Tween-20 (PBST or TBST) to reduce hydrophobic binding [6]. |
Detailed Washing Protocols
Here are specific washing protocols adapted from standardized methods for different IHC applications.
Standard Washing Protocol for Chromogenic IHC (FFPE Tissue) This protocol is adapted from general IHC guidelines [44] [43].
- Buffer: 1X Tris-Buffered Saline (TBS) or Phosphate-Buffered Saline (PBS) with 0.05% Tween-20 (TBST or PBST).
- Duration & Frequency:
- Technique: Use a sufficient volume of buffer to completely cover the slides. Gentle agitation during washing (e.g., on an orbital shaker) improves efficiency.
Extended Washing Protocol for Fluorescent IHC Fluorescent detection is often more sensitive to background; therefore, longer wash times are frequently used [45].
- Buffer: 1X PBS with 0.025% Triton X-100 [44].
- Duration & Frequency:
- Technique: Protect slides from light from the secondary antibody step onward to prevent fluorophore photobleaching.
Optimizing Your Washing Workflow
The diagram below outlines a logical workflow for troubleshooting high background through washing optimization.
The Scientist's Toolkit: Essential Reagents for Clean Washes
| Reagent | Function in Washing | Key Consideration |
|---|---|---|
| PBS (Phosphate-Buffered Saline) | A isotonic, pH-balanced salt solution that prevents tissue damage during washing [44] [45]. | Ensure it is fresh and sterile to avoid bacterial contamination that can damage epitopes [46]. |
| TBS (Tris-Buffered Saline) | An alternative saline buffer; required when using alkaline phosphatase (AP)-based detection systems [44]. | Do not use phosphate buffers with AP systems [46]. |
| Tween-20 or Triton X-100 | Non-ionic detergents added to wash buffers to reduce hydrophobic, non-specific binding, thereby lowering background [44] [43] [6]. | Typical working concentration is 0.025% to 0.1% [44] [43]. Triton X-100 also permeabilizes cells [44]. |
Systematic Troubleshooting: Diagnosing and Fixing Stubborn Background Issues
High background staining is a common challenge in immunohistochemistry (IHC) that can obscure specific signal and compromise experimental results. This guide provides a systematic approach to diagnose and resolve the sources of high background, enabling researchers to achieve clean, publication-quality staining with optimal signal-to-noise ratios.
IHC Background Troubleshooting Flowchart
The diagram below outlines a step-by-step diagnostic pathway to identify the source of high background in your IHC experiments.
Research Reagent Solutions
The following table details essential reagents for resolving common background issues in IHC:
| Reagent Type | Specific Examples | Function & Application |
|---|---|---|
| Blocking Agents | Normal serum (5-10% from secondary host species) [47] [8], BSA (0.5-5%) [48] | Reduces non-specific binding by occupying reactive sites without specific antigens [8]. |
| Endogenous Enzyme Blockers | 3% Hâ‚‚Oâ‚‚ in methanol/water [47] [6], Levamisole (for AP) [8] [6] | Quenches endogenous peroxidase/alkaline phosphatase activity to prevent false positives [8] [6]. |
| Biotin Blockers | Avidin/Biotin Blocking Kits [8] [6] | Blocks endogenous biotin in tissues like kidney, liver, and spleen when using biotin-based detection [6]. |
| Detection Systems | Polymer-based HRP detection [47], Streptavidin/NeutrAvidin (vs. avidin) [6] | Increases sensitivity and reduces non-specific binding; non-glycosylated options prevent lectin binding [47] [6]. |
| Wash Buffers | TBST with 0.05% Tween-20 [47] [6], PBST [48] | Removes unbound antibodies and reagents; detergent minimizes hydrophobic interactions [2] [6]. |
| Antibody Diluents | Commercial antibody diluents [47], PBS/BSA with 0.15-0.6M NaCl [6] | Optimizes antibody stability and binding; increased ionic strength reduces non-ionic interactions [6]. |
Detailed Troubleshooting Protocols
Problem: Endogenous Enzyme Activity
Experimental Protocol:
- Prepare a control tissue section and incubate with detection substrate alone for the same duration as antibody incubation [6].
- If background signal develops, endogenous enzymes are interfering.
- Solution: Quench slides in 3% Hâ‚‚Oâ‚‚ diluted in RODI water for 10 minutes prior to primary antibody incubation [47].
- For alkaline phosphatase systems, use 2mM Levamisole as an inhibitor [8] [6].
Problem: Secondary Antibody Cross-Reactivity
Experimental Protocol:
- Include a control slide stained with secondary antibody only (no primary antibody) [47] [49].
- If staining appears in control, secondary antibody is binding non-specifically.
- Solution: Increase normal serum concentration from secondary host species to 10% [8] [6].
- Use secondary antibodies pre-adsorbed against the immunoglobulin of your sample species [8] [6].
- For mouse-on-mouse staining, use polymer-based detection systems to avoid background [47].
Problem: Insufficient Blocking or High Antibody Concentration
Experimental Protocol:
- Test different blocking conditions: increase blocking time to 1 hour and try different blocking agents [8].
- Perform antibody titration: test a series of primary antibody dilutions to find optimal concentration [2] [49].
- Solution: Add NaCl to antibody diluent (0.15-0.6M) to reduce ionic interactions [6].
- Ensure all incubation steps occur in a humidified chamber to prevent tissue drying [2] [8].
Problem: Endogenous Biotin Interference
Experimental Protocol:
- Identify tissue types with high endogenous biotin (kidney, liver, spleen) [47] [49].
- Solution: Use avidin/biotin blocking kit prior to primary antibody incubation [47] [6].
- Alternatively, switch to polymer-based detection systems that don't use biotin-streptavidin chemistry [47].
Problem: Tissue Drying or Inadequate Washes
Experimental Protocol:
- Examine tissue pattern: higher background at edges suggests drying artifacts [8].
- Solution: Ensure tissue sections remain covered in liquid throughout staining procedure [47] [49].
- Increase washing time and volume: wash slides 3 times for 5 minutes with TBST after primary and secondary incubations [47].
- Use adequate buffer volume to thoroughly remove unbound reagents between steps [8].
High background staining is a frequent challenge in immunohistochemistry (IHC) that can obscure specific signals and compromise data interpretation. This technical guide addresses three critical antibody-related factors—titration, cross-adsorption, and host species selection—to help researchers achieve cleaner results with improved signal-to-noise ratios.
FAQs and Troubleshooting Guides
How does antibody titration reduce background staining, and how do I optimize it?
Answer: Antibody titration is fundamental to reducing background because using a primary antibody at too high a concentration is a primary cause of non-specific staining and high background [6] [50]. An overly concentrated antibody increases hydrophobic and ionic interactions with non-target epitopes. Optimization involves testing a series of antibody dilutions to find the concentration that yields the strongest specific signal with the lowest background.
The table below summarizes a typical titration experiment and expected outcomes:
| Primary Antibody Dilution | Staining Intensity | Background | Recommended |
|---|---|---|---|
| 1:50 | Very Strong | High | No |
| 1:200 | Strong | Moderate | No |
| 1:500 | Strong | Low | Yes |
| 1:1000 | Weak | Very Low | No |
Detailed Protocol:
- Preparation: Create a dilution series of your primary antibody (e.g., 1:50, 1:200, 1:500, 1:1000) in the recommended diluent [51].
- Staining: Apply each dilution to consecutive tissue sections from the same positive control sample, keeping all other protocol conditions (incubation time, temperature, retrieval method, detection) identical.
- Incubation: Incubate the slides. While overnight incubation at 4°C is common for many antibodies [51], also consider reducing incubation time if overstaining occurs [50].
- Analysis: Compare the stained slides microscopically. The optimal dilution is the one that provides the highest specific signal with the cleanest background, not necessarily the strongest overall stain.
What is secondary antibody cross-adsorption, and when is it necessary?
Answer: Cross-adsorption is an additional purification process that removes antibodies from a secondary antibody mixture that could bind to immunoglobulins (IgGs) from off-target species [52]. This dramatically increases specificity and is crucial for reducing background in two key scenarios:
- Multiplexing Experiments: When using multiple primary antibodies from different species (e.g., mouse and rabbit) on the same tissue section, a standard goat anti-mouse secondary antibody might weakly bind to the rabbit primary antibody, causing false-positive signals. A cross-adsorbed goat anti-mouse secondary antibody would be purified against rabbit IgG to prevent this cross-reactivity [52].
- Samples with Endogenous Immunoglobulins: When the tissue sample itself contains endogenous IgGs (e.g., in lymphoid tissues, plasma cells), a standard secondary antibody can bind to them, creating high background. Using a secondary antibody that has been cross-adsorbed against the species of the sample will minimize this non-specific binding [52].
Considerations: While highly cross-adsorbed secondary antibodies offer superior specificity, the cross-adsorption process filters out a portion of the polyclonal antibody pool, which can sometimes lead to a slight decrease in sensitivity compared to non-adsorbed antibodies [52].
Why is the host species of my primary antibody critical, and what is "mouse-on-mouse" background?
Answer: The host species of the primary antibody is critical because the secondary antibody is raised against the immunoglobulins of that host. If the primary antibody's host species matches the species of the tissue sample, the secondary antibody will bind to endogenous immunoglobulins present throughout the tissue, creating widespread, high background staining [51] [53]. This is often called "mouse-on-mouse" (MOM) background when using a mouse primary antibody on mouse tissue.
Solution: The most straightforward solution is to select a primary antibody raised in a species different from your experimental tissue sample [53]. For example, when working with mouse tissue, choose a rabbit, rat, or goat primary antibody instead of a mouse primary.
Workflow for Host Species Selection:
If an antibody from the same species is unavoidable, specialized blocking kits containing Fab fragments to block endogenous IgG are required to mitigate this background [51].
The Scientist's Toolkit: Key Research Reagent Solutions
The table below lists essential reagents and their specific roles in mitigating antibody-related background.
| Reagent | Function in Reducing Background |
|---|---|
| Cross-Adsorbed Secondary Antibodies | Secondary antibodies purified against immunoglobulins of off-target species to prevent cross-reactivity in multiplexing or with endogenous Igs [52]. |
| SignalStain Boost IHC Detection Reagent | A polymer-based detection system that is more sensitive and produces less background than avidin-biotin (ABC) based systems, especially in tissues with high endogenous biotin [51]. |
| Normal Serum (from secondary host) | A standard blocking agent (e.g., 5-10%) used to occupy non-specific binding sites on the tissue. Normal goat serum is commonly used, but the serum should ideally match the species of the secondary antibody [54]. |
| Species-Matched Primary Antibodies | Primary antibodies raised in a host species different from the tissue sample species to prevent secondary antibody binding to endogenous immunoglobulins [53]. |
| Antibody Diluent with Additives | A specialized buffer for diluting antibodies. It may include proteins (like BSA) and detergents (Tween-20, Triton X-100) to minimize hydrophobic and ionic interactions, reducing non-specific binding [51] [55]. |
| Sodium Chloride (NaCl) | Adding 0.15-0.6 M NaCl to the antibody diluent can reduce non-specific ionic interactions between the antibody and tissue components [6]. |
In immunohistochemistry (IHC), high background staining severely compromises result interpretation by reducing the signal-to-noise ratio, potentially leading to false positives and erroneous biological conclusions [6]. This background frequently originates from endogenous activities present within tissues—specifically, peroxidases, phosphatases, and biotin [6] [8]. These elements can interact directly with detection systems, generating signal independent of antibody-antigen binding. Quenching, or blocking, these activities is therefore a prerequisite for specific and reliable staining [12]. This guide provides detailed protocols and troubleshooting advice to effectively suppress these endogenous activities, framed within the broader objective of reducing high background in immunohistochemistry research.
FAQs: Addressing Common Challenges in Endogenous Activity Blocking
Q1: What are the primary causes of high background staining in IHC? High background primarily arises from endogenous enzymes (peroxidases, phosphatases) and molecules (biotin) that interfere with detection systems [6] [8]. Other common causes include insufficient blocking of non-specific antibody binding, overly high antibody concentrations, inadequate washing steps, and tissue sections drying out during the procedure [6] [8].
Q2: How can I confirm that my background is caused by endogenous peroxidases? To test for endogenous peroxidase interference, incubate a control tissue section with only the detection substrate (e.g., DAB) for the same duration as your standard antibody incubation [6]. The development of a signal in the absence of any primary or secondary antibody indicates the presence of active endogenous peroxidases that require quenching [6].
Q3: My tissue is known to have high endogenous biotin (e.g., liver, kidney). What is the best approach? For tissues with high endogenous biotin, the most effective strategy is to use a biotin-free polymer-based detection system, which circumvents the issue entirely [56]. If you must use a biotin-based system (e.g., ABC), perform a sequential blocking step using an Avidin/Biotin Blocking Kit prior to incubation with the primary antibody [6] [57] [56].
Q4: After quenching with Hâ‚‚Oâ‚‚, my signal is weak. What might be wrong? Excessive concentration or incubation time with hydrogen peroxide can damage antigens and diminish specific staining [6] [56]. Ensure you are using the correct concentration (typically 0.3% - 3% [6] [56] [8]) and do not exceed the recommended incubation time (usually 10-30 minutes [58] [57]). Also, verify that your Hâ‚‚Oâ‚‚ solution is fresh, as it decomposes over time.
Standard Quenching Protocols: A Step-by-Step Guide
Quenching Endogenous Peroxidase Activity
Peroxidases are abundant in red blood cells and some other tissues [6]. When using Horseradish Peroxidase (HRP)-based detection systems, these enzymes catalyze the chromogen substrate, producing a diffuse background stain [12].
- Materials: Methanol or RODI water, 30% Hydrogen Peroxide (Hâ‚‚Oâ‚‚) stock solution.
- Procedure:
- Prepare a 0.3% - 3% Hâ‚‚Oâ‚‚ solution by diluting the 30% stock in absolute methanol or water [6] [57] [56]. Note: Methanol is often preferred for paraffin-embedded sections as it better preserves tissue morphology [57].
- Submerge the tissue sections in the peroxidase blocking solution and incubate for 10 to 30 minutes at room temperature [58] [57] [56].
- Rinse the slides thoroughly with PBS or distilled water, proceeding to the next step in your IHC protocol [57].
Quenching Endogenous Phosphatase Activity
Endogenous alkaline phosphatase (AP) is found in many tissues, including intestine, placenta, and bone [6]. If an AP-conjugated detection system is used, this enzyme will generate non-specific signal.
- Materials: Levamisole.
- Procedure:
- Prepare a levamisole solution at a final concentration of 2 mM in your antibody diluent or buffer [6] [8].
- Incubate the tissue sections with this solution for the duration of the primary or secondary antibody incubation, or as a separate pre-blocking step [6]. Levamisole inhibits intestinal-like AP isozymes but does not affect the calf intestinal AP commonly used in detection systems.
Blocking Endogenous Biotin Activity
Endogenous biotin is highly expressed in tissues such as liver, kidney, and brain [6]. This biotin binds tightly to avidin or streptavidin in detection complexes, causing intense background staining.
- Materials: Avidin/Biotin Blocking Kit (or separate Avidin and Biotin solutions).
- Procedure (Sequential Blocking):
- After peroxidase quenching and general blocking, incubate the sections with an avidin solution for 10-15 minutes to saturate endogenous biotin binding sites [57].
- Wash the slides briefly.
- Incubate the sections with a biotin solution to block any unoccupied binding sites on the avidin from the previous step [57].
- Wash thoroughly before applying the primary antibody [57].
Table 1: Summary of Standard Quenching Protocols
| Endogenous Activity | Recommended Reagent | Typical Concentration | Incubation Time | Key Considerations |
|---|---|---|---|---|
| Peroxidase | Hydrogen Peroxide (Hâ‚‚Oâ‚‚) | 0.3% - 3.0% [6] [56] [8] | 10 - 30 minutes [58] [57] [56] | Use methanol for paraffin sections; keep incubation time controlled to avoid antigen damage. |
| Phosphatase | Levamisole | 2 mM [6] [8] | Included with antibody incubation | Effective against intestinal-type alkaline phosphatase. |
| Biotin | Avidin/Biotin Blocking Kit | As per kit instructions | 10-15 min per step [57] | Essential for liver, kidney; or use biotin-free polymer systems [56]. |
Advanced Strategies and Integrated Workflows
For complex cases or to achieve the highest signal-to-noise ratio, advanced strategies are necessary. The following diagram illustrates the logical decision-making process for effective quenching within a typical IHC workflow.
Alternative Quenching Solution Formulations
Beyond the standard Hâ‚‚Oâ‚‚/methanol solution, other effective formulations exist and can be optimized for your specific tissue.
- Hâ‚‚Oâ‚‚ with Triton X-100 and Methanol: For floating frozen sections, a solution of 0.2% Hâ‚‚Oâ‚‚ in IHC-PBS with 0.2% Triton X-100 and 20% methanol incubated for 25 minutes at room temperature is highly effective [58]. The detergent improves penetration.
- Commercial Peroxidase Blockers: Ready-to-use products like "Peroxo-block" offer a quick (e.g., 45-second) incubation, streamlining the protocol and potentially reducing the risk of antigen damage [57].
The Scientist's Toolkit: Essential Reagents for Quenching
Table 2: Key Research Reagent Solutions for Blocking Endogenous Activities
| Reagent / Kit | Function | Specific Application Note |
|---|---|---|
| Hydrogen Peroxide (Hâ‚‚Oâ‚‚) | Quenches endogenous peroxidase activity by providing a substrate that depletes the enzyme [6]. | A fundamental reagent; a 3% solution in methanol is standard for FFPE tissues [57]. |
| Levamisole | Inhibits endogenous alkaline phosphatase activity [6]. | Specific for intestinal-type AP; use at 2 mM concentration in the detection step [6] [8]. |
| Avidin/Biotin Blocking Kit | Sequentially blocks endogenous biotin by saturating its binding sites [6] [57]. | Critical for tissues like liver and kidney; often used before primary antibody incubation [6]. |
| Polymer-Based Detection System | A biotin-free detection method that avoids interaction with endogenous biotin [56]. | The preferred modern solution for tissues with high endogenous biotin; also enhances sensitivity [56]. |
| Normal Serum | Blocks non-specific protein-protein interactions to reduce general background [58] [56]. | Should be from the same species as the secondary antibody; used at 2-10% concentration [58] [6]. |
Effective quenching of endogenous peroxidase, phosphatase, and biotin activities is a non-negotiable foundation for high-quality, interpretable IHC data. By understanding the sources of background interference and systematically applying the standardized protocols and troubleshooting advice outlined in this guide, researchers can significantly improve the specificity and reliability of their experiments. As IHC continues to be indispensable in both research and clinical diagnostics, mastering these fundamental blocking techniques is crucial for any scientist aiming to produce robust and publication-ready results.
FAQs and Troubleshooting Guides
Why is non-specific background staining a common problem in liver tissue?
Liver tissue is particularly prone to high background staining due to its inherent biological characteristics. The high metabolic activity and abundance of endogenous enzymes and proteins can cause non-specific antibody binding. Furthermore, the high lipid content can promote hydrophobic interactions with antibodies [2] [8].
Solutions:
- Extended Blocking: Increase blocking incubation time and use 10% normal serum from the secondary antibody species for at least 1 hour [8].
- Enhanced Washes: Include 0.05% Tween-20 in wash buffers to minimize hydrophobic interactions and increase washing time between steps [2].
- Endogenous Enzyme Block: For HRP-based detection, use 0.3% Hâ‚‚Oâ‚‚; for alkaline phosphatase systems, use 2mM Levamisol [8].
How can I reduce high background in kidney tissue IHC?
Kidney tissue presents unique challenges due to its complex tubular architecture and filtering function, which can trap antibodies non-specifically.
Solutions:
- Antibody Titration: Perform a titration experiment to find the optimal primary antibody concentration that maintains specific signal while reducing background [2].
- Detection System Check: For biotin-based systems, use an avidin/biotin blocking kit to prevent non-specific binding [2] [8].
- Controlled Development: Monitor chromogen development under a microscope and stop the reaction immediately once specific signal appears to prevent diffuse background [2].
What are the specific challenges with neural tissue staining?
Neural tissues are susceptible to autofluorescence and often require multiplexing to identify different cell types, which introduces additional complexity [59].
Solutions:
- Autofluorescence Quenching: Use Sudan Black B or commercial quenching reagents, especially when working with aged tissue containing lipofuscin [2].
- Fixative Considerations: For fluorescent detection, avoid glutaraldehyde fixation which can produce high autofluorescence [59].
- Fluorophore Selection: When using formalin/PFA fixatives that fluoresce at green wavelengths, choose fluorophores in the red or infrared range to minimize overlap [8].
Table 1: Quantitative Assessment of IHC Issues Across Tissue Types
| Tissue Type | Common Issue | Success Rate with Optimization | Key Parameter to Monitor |
|---|---|---|---|
| Liver | High metabolic background | ~90% with enhanced blocking [8] | Endogenous enzyme activity |
| Kidney | Tubular non-specific trapping | ~85% with antibody titration [2] | Signal-to-noise ratio |
| Neural Tissue | Autofluorescence | ~80% with quenching agents [2] | Background fluorescence intensity |
Table 2: Optimization Strategies for Sample-Specific Issues
| Issue | Liver Tissue Solution | Kidney Tissue Solution | Neural Tissue Solution |
|---|---|---|---|
| High Background | Extended Hâ‚‚Oâ‚‚ blocking (0.3% for 30 min) [8] | Antibody dilution series [2] | Sudan Black B treatment [2] |
| Weak Specific Signal | Enhanced antigen retrieval [2] | Check secondary antibody compatibility [2] | Alternative fluorophores [8] |
| Uneven Staining | Humidified chamber use [2] | Ensure complete tissue coverage [2] | Consistent fixation timing [59] |
Experimental Protocols
Protocol 1: Comprehensive Blocking Procedure for Liver Tissue
Materials:
- 10% normal serum (from secondary antibody host species)
- 0.3% Hâ‚‚Oâ‚‚ in methanol
- Avidin/Biotin blocking kit (if using biotin-based detection)
- PBS with 0.05% Tween-20
Method:
- Deparaffinize and rehydrate sections through xylene and graded alcohols
- Perform antigen retrieval using appropriate buffer (citrate pH 6.0 or Tris-EDTA pH 9.0)
- Block endogenous peroxidases with 0.3% Hâ‚‚Oâ‚‚ for 30 minutes [8]
- Wash 3× with PBS-Tween for 5 minutes each
- Apply avidin solution for 15 minutes, then biotin solution for 15 minutes (if using biotin system) [8]
- Block with 10% normal serum for 1 hour at room temperature in a humidified chamber [8]
- Proceed with primary antibody application without washing out the blocking serum
Protocol 2: Autofluorescence Reduction for Neural Tissue
Materials:
- Sudan Black B working solution (0.1% in 70% ethanol)
- Alternatively: Commercial autofluorescence quenching kits
- Glycine buffer (optional)
Method:
- Complete standard IHC protocol through secondary antibody incubation
- Prepare Sudan Black B solution fresh and filter before use
- Incubate sections with Sudan Black B for 10-20 minutes
- Rinse thoroughly with PBS or distilled water
- For aldehyde-induced fluorescence, consider additional treatment with 0.1M glycine buffer, pH 7.4
- Mount sections with anti-fade mounting medium
- Image promptly or store slides at 4°C in darkness
Visualization Diagrams
Tissue-Specific IHC Troubleshooting Flow
Systematic Background Reduction Approach
The Scientist's Toolkit
Table 3: Essential Research Reagent Solutions
| Reagent | Function | Application Notes |
|---|---|---|
| Normal Serum | Blocks non-specific binding | Use 10% serum from secondary antibody species; incubate 1 hour [8] |
| Hydrogen Peroxide | Blocks endogenous peroxidases | Use 0.3% solution for 30 minutes before primary antibody [8] |
| Tween-20 | Reduces hydrophobic interactions | Include at 0.05% in wash buffers and antibody diluents [2] |
| Avidin/Biotin Block | Prevents non-specific biotin binding | Essential for biotin-based detection systems [2] [8] |
| Sudan Black B | Quenches autofluorescence | Critical for neural tissues and aged samples; 0.1% for 10-20 minutes [2] |
| Enzyme-Specific Blockers | Inhibits endogenous enzymes | Levamisol (2mM) for alkaline phosphatase systems [8] |
What are the primary causes of autofluorescence in immunofluorescence (IF)?
Autofluorescence is the background fluorescence emitted naturally by tissues and cells, which can obscure the specific signal from your antibody-bound fluorophores. The primary causes are:
- Fixative-Induced Fluorescence: Aldehyde-based fixatives like formalin and paraformaldehyde (PFA) create fluorescent compounds. Formalin/PFA typically fluoresce at green wavelengths [8].
- Endogenous Molecules: Several naturally occurring biological molecules are fluorescent, including:
- Lipofuscin: Highly autofluorescent granules of oxidized proteins and lipids that accumulate in the lysosomes of aging cells, particularly in tissues like brain and retina. They fluoresce brightly across multiple channels [60].
- Collagen and Elastin: Structural components of the extracellular matrix that are common sources of autofluorescence [61].
- Red Blood Cells: Can contribute to background signal [61].
- Flavins (FAD, FMN) and NADH: Metabolic coenzymes with intrinsic fluorescence [62].
- Tissue Processing: Incomplete deparaffinization of formalin-fixed, paraffin-embedded (FFPE) tissues can cause high background [63]. Letting tissue sections dry out during processing is another common cause [8] [63].
Which chemical quenchers can I use to reduce autofluorescence?
Several chemical agents are effective at quenching autofluorescence. The best choice depends on your tissue type and the source of autofluorescence. The table below summarizes key reagents.
| Quenching Agent | Target Autofluorescence Sources | Key Considerations | Example Protocol |
|---|---|---|---|
| TrueBlack Lipofuscin Quencher [60] | Lipofuscin, collagen, elastin, red blood cells, general background. | - Superior to Sudan Black B with less far-red background.- Can be used before or after immunostaining.- Available in DMF or less toxic DMSO formulations. | Dilute stock (20X or 30X) in 70% ethanol. Incubate tissue sections for 2-5 minutes. Rinse with buffer [60]. |
| ReadyProbes Tissue Autofluorescence Quenching Kit [61] | Aldehyde fixation, red blood cells, collagen, elastin. | - Will not quench lipofuscin or natural pigments.- A three-component kit mixed right before use.- Used after secondary antibody but before counterstains. | Mix Components A, B, and C in a 1:1:1 ratio. Apply to tissue for 2–5 minutes at room temperature [61]. |
| Sudan Black B [60] | Lipofuscin and other broad sources. | - Traditional reagent.- Can introduce uniform non-specific background in red and far-red channels, limiting dye use in those wavelengths [60]. | Typically, a 0.1-0.3% solution in 70% ethanol is applied for 10-20 minutes. |
| Copper Sulfate [64] | General autofluorescence, particularly effective in decellularized plant scaffolds. | - Recent study shows high effectiveness.- May reduce cell viability in certain live-cell applications [64]. | Incubate tissue with a solution of copper sulfate (e.g., 50 mM in PBS) for 1 hour [64]. |
| Sodium Borohydride [6] | Aldehyde-induced fluorescence. | - Reduces free aldehyde groups from fixation [62]. | Treat sample with ice-cold sodium borohydride (1 mg/mL) in PBS or TBS [6]. |
The following workflow diagram illustrates the decision process for selecting and applying a chemical quencher in your experiment:
How can fluorophore selection help minimize interference from autofluorescence?
A strategic approach to fluorophore selection is one of the most effective ways to avoid autofluorescence. Since tissue autofluorescence is most intense in the blue and green emission wavelengths, selecting dyes that emit in the red to far-red (near-infrared) spectrum can dramatically improve your signal-to-noise ratio [6] [64].
The table below lists several recommended fluorophores with long emission wavelengths, which are ideal for avoiding common autofluorescence.
| Fluorophore | Excitation (nm) | Emission (nm) | Platform Compatibility | Key Feature |
|---|---|---|---|---|
| Alexa Fluor 594 | 590 | 618 | Microscopy, Flow Cytometry, Microplate Reader | Bright, photostable; emits in the orange-red region [65]. |
| Alexa Fluor 647 | 650 | 665 | Microscopy, Flow Cytometry | Far-red dye; excellent for avoiding most autofluorescence [6]. |
| Alexa Fluor 680 | 679 | 702 | Microscopy, Flow Cytometry | Near-infrared dye; minimizes background interference [6]. |
| Alexa Fluor 750 | 749 | 775 | Microscopy, Flow Cytometry | Near-infrared dye; ideal for low-autofluorescence imaging [6]. |
| PE-Cyanine7 | 569 | 780 | Flow Cytometry | Tandem dye; combines PE brightness with Cy7's far-red emission [65]. |
Use the following logic to guide your fluorophore selection process when autofluorescence is a primary concern:
What other troubleshooting steps can reduce high background in IF?
Beyond quenchers and fluorophore choice, a comprehensive strategy is needed for clean results.
- Optimize Blocking: Increase the concentration of your blocking agent (e.g., normal serum, BSA) and/or the incubation period. Using normal serum from the species of your secondary antibody is highly recommended [8] [63].
- Titrate Antibodies: A primary or secondary antibody concentration that is too high is a common cause of high background. Run a concentration gradient to find the optimal dilution that gives strong specific signal with low noise [8] [6] [63].
- Control for Endogenous Activities:
- Biotin: For avidin-biotin detection systems, block endogenous biotin (common in liver, kidney, adipose tissue) by sequentially applying unlabeled avidin/streptavidin followed by free biotin [7] [63].
- Enzymes: When using enzyme-based detection (e.g., HRP), quench endogenous peroxidase activity with 0.3-3% Hâ‚‚Oâ‚‚. Block endogenous alkaline phosphatase with levamisole [8] [7].
- Ensure Thorough Washing: Wash tissues extensively with buffer (e.g., PBS with 0.05% Tween-20) between all steps to remove unbound antibodies and reagents [8] [6].
- Prevent Tissue Drying: Always keep tissue sections in a humidified chamber during incubations. Drying out causes massive non-specific staining [8] [63].
The Scientist's Toolkit: Research Reagent Solutions
| Reagent / Kit | Primary Function | Key Application Note |
|---|---|---|
| TrueBlack Lipofuscin Autofluorescence Quencher [60] | Selectively quenches lipofuscin granule fluorescence. | The go-to solution for imaging in aged human or animal tissues (e.g., brain, retina). |
| ReadyProbes Tissue Autofluorescence Quenching Kit [61] | Reduces autofluorescence from aldehyde fixation, RBCs, collagen, and elastin. | A convenient multi-component kit for common background sources; not for lipofuscin. |
| Endogenous Biotin-Blocking Kit [7] | Blocks endogenous biotin to prevent nonspecific staining in avidin-biotin systems. | Essential for tissues rich in endogenous biotin like liver, kidney, and adipose tissue. |
| Peroxidase Suppressor [7] | Quenches endogenous peroxidase activity to reduce background in HRP-based detection. | Used before primary antibody incubation for chromogenic IHC/IF. |
| Alexa Fluor Dyes (647, 680, 750) [65] [6] | Bright, photostable fluorophores with emissions in the red to near-infrared spectrum. | Ideal for multiplexing and avoiding the green/blue autofluorescence window. |
FAQs on Autofluorescence
Q: Can I use autofluorescence quenchers after immunofluorescence staining? A: Yes, many quenchers are designed for post-staining application. TrueBlack can be used before or after immunostaining [60], while the ReadyProbes Kit is applied after the secondary antibody but before any nuclear counterstains [61].
Q: Why doesn't the ReadyProbes Kit quench my sample's autofluorescence? A: The ReadyProbes Kit is specifically formulated for autofluorescence caused by aldehyde fixation, red blood cells, collagen, and elastin. It will not quench autofluorescence from lipofuscin granules or natural pigments [61]. For lipofuscin, you need a specialized reagent like TrueBlack [60].
Q: What is the simplest first step to troubleshoot high background? A: Always run an unstained control (a tissue section carried through your protocol without primary or secondary antibodies). This will immediately show you the level and color of inherent tissue autofluorescence, guiding your next steps [6] [62].
Q: My tissue was fixed with paraformaldehyde. What is my best option? A: Aldehyde fixation is a major cause of background. You can try sodium borohydride treatment to reduce aldehyde groups [6] [62], use the ReadyProbes Kit designed for this purpose [61], or select a fluorophore like Alexa Fluor 647 whose emission is beyond the green fluorescence caused by PFA [8] [6].
Validation and Quality Control: Ensuring Reproducible, Low-Background IHC
IHC Control FAQs: Mastering Background Troubleshooting
Q1: What are the essential controls for an IHC experiment, and why are they non-negotiable for troubleshooting high background?
Control slides are a fundamental tool for assessing the performance of your staining reagents and IHC methods [66]. The three essential controls are:
- Positive Control: A tissue or cell pellet known to express the target antigen. It verifies that your antibody and protocol are working correctly. A lack of staining here indicates a problem with the antibody, protocol, or detection system [67] [66].
- Negative Control: A tissue or cell pellet known to not express the target antigen. It helps identify nonspecific antibody binding or off-target staining [66].
- No-Primary Antibody Control: This control omits the primary antibody, replacing it with buffer or an isotype-matched irrelevant antibody. It is critical for diagnosing high background caused by your detection system or by endogenous enzyme activity [6] [66]. Staining in this control means your background is not due to the primary antibody.
Q2: My no-primary antibody control shows high background. What does this mean, and how do I fix it?
Staining in your no-primary control is a clear sign that the background is not specific to your primary antibody. The table below outlines the common causes and their solutions [6] [67] [66].
| Possible Cause | Solution |
|---|---|
| Endogenous Enzyme Activity | Quench endogenous peroxidases with 3% Hâ‚‚Oâ‚‚ in methanol or water for 10 minutes before primary antibody incubation. Inhibit endogenous phosphatases with levamisole [6] [67] [66]. |
| Endogenous Biotin | Use a polymer-based detection system instead of an avidin-biotin complex (ABC). Alternatively, block endogenous biotin with a commercial avidin/biotin blocking solution [6] [66]. |
| Cross-Reactive Secondary Antibody | Ensure your secondary antibody is not binding to endogenous immunoglobulins in the tissue. Use a secondary antibody that has been pre-adsorbed against the species of your sample. Increase the concentration of normal serum from the host species of the secondary antibody in your blocking buffer [6] [67] [66]. |
| Inadequate Blocking | Increase the blocking incubation time or change the blocking reagent. A solution of 1X TBST with 5% normal serum from the host species of the secondary antibody is commonly used for 30 minutes [67] [66]. |
| Inadequate Deparaffinization | Spotty, uneven background can be caused by insufficient deparaffinization. Repeat the experiment with new tissue sections and fresh xylene [66]. |
Q3: My positive control fails, but my experimental tissue stains. Is my result valid?
No, a failed positive control invalidates your experiment. A positive control must be included and perform as expected in every run to confirm that your entire IHC protocol—from antigen retrieval to detection—was executed properly. Without this verification, you cannot be certain that the staining in your experimental tissue is specific and reproducible. Always repeat the experiment after troubleshooting the cause of the positive control failure [67] [66].
Q4: What are the best practices for selecting and validating a positive control?
- Use Validated Tissues: Select a control tissue with known, documented expression of your target protein. Many antibody datasheets suggest appropriate control tissues.
- Run Concurrently: The positive control should be processed on the same slide, or at the same time under identical conditions, as your experimental samples to control for technical variability [66].
- FFPE Cell Pellets: Paraffin-embedded cell pellets with high (positive) and low/no (negative) expression of the target can serve as excellent, consistent controls [66].
- Internal Controls: Look for internal positive controls within your tissue section, such as normal structures known to express the protein, which can provide an additional layer of validation [68].
Experimental Protocol: Implementing Controls for Background Reduction
The following workflow integrates the essential controls into a standard IHC protocol to systematically identify and reduce high background staining.
The Scientist's Toolkit: Key Research Reagent Solutions
The following table details essential reagents used in the protocol above to ensure specific staining and low background.
| Reagent | Function & Importance |
|---|---|
| Normal Serum | Used for blocking; should be from the same species as the host of the secondary antibody to prevent nonspecific binding [6] [66]. |
| Hydrogen Peroxide (Hâ‚‚Oâ‚‚) | Used to quench endogenous peroxidase activity, a major source of background in HRP-based detection systems [6] [67] [66]. |
| Polymer-Based Detection Reagents | A modern detection system that avoids the high background from endogenous biotin, which is common in tissues like liver and kidney when using avidin-biotin complexes (ABC) [66]. |
| Pre-Adsorbed Secondary Antibody | A secondary antibody that has been purified to remove antibodies that might cross-react with immunoglobulins in the sample tissue, reducing non-specific background [67] [66]. |
| Avidin/Biotin Blocking Solution | Used to block endogenous biotin when a biotin-based detection system must be employed [6]. |
| Appropriate Antigen Retrieval Buffer | Critical for unmasking the target epitope. The correct buffer (e.g., Citrate pH 6.0 or EDTA pH 8.0) is antibody-dependent and must be optimized [69]. |
Logical Guide to IHC Control Analysis
The decision tree below provides a clear, step-by-step logic for diagnosing IHC results based on the outcome of your control slides.
For researchers and drug development professionals, high background staining in immunohistochemistry (IHC) represents more than a technical inconvenience—it constitutes a critical analytical variable that can compromise assay validity and therapeutic decision-making. The College of American Pathologists (CAP) has updated its "Principles of Analytic Validation of Immunohistochemical Assays" in 2024 to address precisely these challenges, affirming that proper validation is the foundational step toward reducing variation and ensuring accuracy in IHC laboratory practices [70]. This technical support center articulates how adherence to these updated guidelines, coupled with systematic troubleshooting, enables researchers to achieve the precise, reliable results essential for both diagnostic applications and drug development pipelines.
FAQ: CAP Guideline Compliance & Background Reduction
What are the key changes in the 2024 CAP guideline update affecting validation design?
The 2024 guideline update introduces several critical modifications from the 2014 publication. A major harmonization specifies that laboratories should aim for a minimum of 90% overall concordance between a new assay and its comparator for all IHC assays, including predictive markers like HER2 and PD-L1, unifying what were previously variable concordance requirements [70] [71]. Furthermore, the update now provides explicit statements for validating IHC assays on cytology specimens that use alternative fixatives, requiring separate validations with a minimum of 10 positive and 10 negative cases [70]. For predictive marker assays with distinct scoring systems, the guideline strongly recommends separately validating each unique antibody-scoring system combination [70] [71].
How do CAP guidelines help in troubleshooting high background issues before they occur?
The CAP guidelines promote a proactive approach to quality. By mandating rigorous initial analytic validation that documents performance characteristics, the guidelines force a systematic investigation of variables that cause background long before clinical use [70]. This process inherently identifies optimal conditions for each assay. The guideline also emphasizes that validation is not a one-time event; if unexpected results occur during verification, the IHC Medical Director must investigate the causes, establishing a framework for continuous troubleshooting [71].
Are there specific CAP recommendations for validating assays used on different tissue preparation types?
Yes, the updated guideline provides new conditional recommendations for cytology specimens not fixed identically to tissues used for initial validation. It recognizes that fixatives used in cytology labs can create variable IHC assay sensitivity compared to standard formalin-fixed, paraffin-embedded (FFPE) tissues [70]. Consequently, laboratories must perform separate validations for these alternative fixation protocols. While revalidation of all existing assays on cytology specimens is not mandated, the guideline stipulates that some form of validation study should have been performed, and lack of documentation may put a laboratory out of compliance with accrediting agencies [70].
Troubleshooting Guide: Systemic Approach to High Background
High background staining destroys the signal-to-noise ratio critical for interpreting IHC results. The table below synthesizes common causes and evidence-based solutions from leading technical resources.
Table 1: Troubleshooting High Background Staining in IHC
| Cause of Background | Underlying Principle | Recommended Solution | Supporting Protocol Detail |
|---|---|---|---|
| Endogenous Enzyme Activity | Peroxidases/phosphatases in tissue react with substrate [8] [6]. | Quench with 3% Hâ‚‚Oâ‚‚ (peroxidases) or 1mM levamisole (phosphatases) prior to primary antibody incubation [8] [7]. | Incubate 10-15 min at room temperature with peroxidase suppressor; use ready-to-use hydrogen peroxide blocking agent [6] [72]. |
| Endogenous Biotin | High biotin levels in tissues (e.g., liver, kidney) bind avidin/streptavidin detection reagents [6] [7]. | Use an endogenous biotin blocking kit or switch to a polymer-based detection system [6] [72]. | Sequential blocking: incubate with avidin, then biotin, to saturate all binding sites [7]. |
| Nonspecific Antibody Binding | Primary or secondary antibodies bind off-target via ionic interactions or Fc receptors [8] [73]. | Optimize antibody concentration; use normal serum (up to 10%) from secondary host for blocking [8] [6]. | Add NaCl (0.15-0.6 M) to antibody diluent to reduce ionic interactions; use cross-adsorbed secondary antibodies [6]. |
| Insufficient Blocking | Non-specific sites on tissue are available for antibody binding [8]. | Extend blocking incubation; use 10% normal serum from the species of the secondary antibody for 1 hour [8]. | Use a proprietary blocking reagent or TBST/5% normal goat serum for 30 minutes at room temperature [72]. |
| Tissue Over-drying | Causes denaturation and non-specific trapping of antibodies, often seen as darker edges [8]. | Maintain tissue sections in a humidified chamber throughout the staining procedure [8]. | Ensure slides remain covered in liquid at all times; do not allow sections to dry after deparaffinization [72]. |
| Inadequate Washing | Unbound antibodies or reagents remain trapped in the tissue matrix [8]. | Increase washing time and volume; use buffered solutions with detergents like Tween-20 [8] [72]. | Wash slides 3 times for 5 minutes with TBST or PBST after primary and secondary antibody incubations [72]. |
Workflow for Systematic Background Investigation
The following diagram outlines a logical decision pathway for diagnosing and resolving high background issues, integrating CAP validation principles with technical troubleshooting.
Experimental Protocols for Background Reduction
Protocol 1: Validated Blocking Procedure for Endogenous Interferents
This protocol is essential for initial assay validation, particularly when working with new tissue types as encouraged by CAP guidelines [70] [7].
- Deparaffinization and Rehydration: Process FFPE sections through xylene and graded ethanol series to water.
- Antigen Retrieval: Perform Heat-Induced Epitope Retrieval (HIER) using appropriate buffer (e.g., 10 mM Sodium Citrate, pH 6.0) and method (microwave or pressure cooker) [6] [72].
- Endogenous Peroxidase Blocking: Incubate slides in 3% Hâ‚‚Oâ‚‚ in methanol or aqueous solution for 10-15 minutes at room temperature [6] [72].
- Wash: Rinse slides twice with distilled water, then twice with PBS or TBST buffer [72].
- Endogenous Biotin Blocking (if using biotin-based detection):
- Apply avidin solution for 10-15 minutes.
- Wash with buffer.
- Apply biotin solution for 10-15 minutes.
- Wash with buffer [7].
- Proceed with standard blocking and immunostaining protocol.
Protocol 2: Antibody Titration and Optimization for Specificity
A core requirement of CAP analytic validation is establishing optimal antibody concentration to ensure specificity while minimizing background [70] [73].
- Preparation: Prepare a series of primary antibody dilutions (e.g., 1:50, 1:100, 1:200, 1:500) in the recommended diluent.
- Sectioning: Apply each dilution to consecutive sections of a well-characterized control tissue that expresses the target antigen. Include a negative control (no primary antibody) for each run.
- Staining: Process all slides in a single automated run or simultaneously by hand to minimize procedural variation.
- Evaluation: Examine slides for specific signal intensity versus non-specific background staining.
- Selection: Select the dilution that provides the highest specific signal with the cleanest background. The optimal dilution is often the highest (most dilute) that gives strong specific staining.
- Documentation: Record the selected concentration and the resulting performance characteristics as part of the assay's permanent validation records.
The Scientist's Toolkit: Essential Reagents for Background Reduction
Table 2: Key Research Reagent Solutions for Clean IHC Assays
| Reagent Category | Specific Example | Function in Background Reduction |
|---|---|---|
| Enzyme Blockers | 3% Hydrogen Peroxide [72], Levamisole [8] | Inhibits endogenous peroxidases and phosphatases to prevent false-positive signal from enzyme-based detection. |
| Biotin Blockers | Avidin/Biotin Blocking Kit [7] | Saturates endogenous biotin in tissues like liver and kidney, preventing binding of detection reagents. |
| Blocking Sera | Normal Goat Serum (5-10%) [72], Serum from secondary host species [6] | Occupies non-specific protein-binding sites on tissue to prevent off-target antibody attachment. |
| Specialized Diluents | SignalStain Antibody Diluent [72], Antibody diluent with 0.15-0.6 M NaCl [6] | Provides optimal ionic and protein environment to suppress hydrophobic/ionic interactions causing background. |
| Polymer Detection | SignalStain Boost IHC Detection Reagents [72] | Eliminates background from endogenous biotin and offers high sensitivity without avidin-biotin chemistry. |
| Wash Buffers | TBST [72], PBST [6] | Removes unbound antibodies and reagents; detergents (Tween-20) help reduce hydrophobic interactions. |
Reducing high background in IHC is not merely a technical exercise but a fundamental component of assay validation mandated by the 2024 CAP guidelines. By integrating these updated principles—harmonized concordance targets, separate validation for distinct scoring systems and cytology specimens, and rigorous documentation—into a systematic troubleshooting workflow, researchers and drug developers can significantly enhance the reliability of their data. A validated, well-characterized IHC assay with minimal background is the bedrock upon which accurate diagnostic interpretations and confident therapeutic decisions are built.
Immunohistochemistry (IHC) detection systems are critical for visualizing target antigens in tissue samples. The choice of detection method represents a fundamental compromise between sensitivity—the ability to detect low-abundance targets—and background staining, which can obscure specific signal and impair interpretation. This technical resource center provides a comprehensive comparison of three principal detection methodologies: chromogenic, tyramide signal amplification (TSA), and polymer-based systems. Understanding the principles, advantages, and limitations of each system is essential for optimizing IHC experiments, particularly within research focused on minimizing non-specific background while maintaining excellent detection capabilities.
Comparative Performance Table
The table below summarizes the key characteristics of the three main detection system types to guide your initial selection process.
| Detection System | Relative Sensitivity | Background Concerns | Best Applications | Protocol Complexity |
|---|---|---|---|---|
| Chromogenic (e.g., ABC, LSAB) | Moderate to High [74] [75] | Endogenous biotin (ABC/LSAB), endogenous peroxidases [75] [7] | Single-plex staining, brightfield microscopy, clinical diagnostics [75] [76] | Multi-step (3+ steps) [74] |
| Polymer-Based | High [74] [75] [77] | Low; avoids endogenous biotin issues [74] [75] | High-sensitivity single-plex, routine multiplexing (fluorescent) [75] [78] | Simplified (often 2-step) [74] [77] |
| TSA (Tyramide Signal Amplification) | Very High (up to 100x amplification) [79] [78] | High; over-amplification can cause spillover, requires careful optimization [78] | Detecting low-abundance targets, highly multiplexed assays (sequential staining) [79] [78] | High (cyclic staining protocol) [79] [78] |
Key Methodologies and Experimental Protocols
Polymer-Based Detection
Polymer systems enhance sensitivity by attaching a high density of enzyme molecules (e.g., HRP) to a polymer backbone, which is itself linked to a secondary antibody. This design dramatically increases the enzyme-to-antibody ratio at the target site without relying on biotin.
Detailed Protocol:
- Step 1: After primary antibody incubation and washing, apply the polymer reagent. This reagent consists of a micropolymer (e.g., dextran) conjugated with numerous enzyme molecules and secondary antibodies [77] [78].
- Step 2: Incubate according to manufacturer's instructions (typically 30-60 minutes). The compact size of modern polymers facilitates better tissue penetration compared to older dextran-based systems [74] [77].
- Step 3: Proceed with chromogenic or fluorescent substrate development. The high local enzyme concentration yields a strong, specific signal with minimal background, as the system avoids endogenous biotin entirely [74] [75].
Tyramide Signal Amplification (TSA)
TSA is an enzymatic amplification method that utilizes the catalytic activity of HRP to deposit numerous labeled tyramide molecules covalently at the antigen site. This makes it exceptionally powerful for detecting low-abundance targets.
Detailed Protocol for Sequential Multiplexing:
- Cycle 1:
- Antibody Elution: Apply a heat-induced or chemical stripping buffer to remove the primary and secondary antibodies while leaving the covalently-bound tyramide signal intact [79].
- Cycle 2: Repeat steps using a primary antibody from species A again (or a different species) for a new target. The covalent nature of the first signal prevents its loss during antibody stripping [78].
- This cycle can be repeated multiple times to label several targets with antibodies from the same host species, enabling highly multiplexed imaging [79].
Chromogenic Detection (ABC Method)
The Avidin-Biotin Complex (ABC) method is a classic, high-sensitivity chromogenic approach that leverages the strong affinity between avidin and biotin.
Detailed Protocol:
- Step 1: Apply a biotinylated secondary antibody that recognizes the primary antibody.
- Step 2: Pre-form a complex of Avidin and Biotinylated Enzyme (ABC). Each tetrameric avidin molecule can bind multiple biotinylated enzymes, creating a large lattice structure [74] [75].
- Step 3: Apply the pre-formed ABC complex. The avidin in the complex binds to the biotin on the secondary antibody.
- Step 4: Add a chromogenic substrate (e.g., DAB). The numerous enzyme molecules in the complex convert the substrate to an insoluble, colored precipitate at the antigen site [74] [76].
Troubleshooting Guides
FAQ: How do I reduce high background staining in my IHC experiments?
High background is a common challenge. The solutions are often method-specific.
For All Methods:
- Titrate Your Primary Antibody: Excessive primary antibody concentration is a leading cause of background. Perform a dilution series to find the optimal concentration [2].
- Ensure Proper Blocking: Block with normal serum from the secondary antibody species to occupy non-specific binding sites [80] [2].
- Optimize Washes: Include a mild detergent like 0.05% Tween-20 in wash buffers to reduce hydrophobic interactions [2].
- Prevent Slide Drying: Never let tissue sections dry out during the procedure, as this causes severe non-specific binding [2].
Method-Specific Solutions:
- Polymer Systems: Generally have low background. If background occurs, it is likely due to the primary antibody or insufficient blocking [74] [75].
- TSA Systems: Background often results from over-amplification. Solution: Titrate the tyramide reagent concentration and reduce the incubation time. Ensure antibody stripping between cycles is complete [78].
- Chromogenic/ABC Systems:
- Endogenous Biotin: Tissues like liver and kidney are rich in biotin. Solution: Use an endogenous biotin blocking kit. This involves sequential incubation with avidin (to bind endogenous biotin) and then free biotin (to block avidin's remaining binding sites) [75] [7].
- Endogenous Peroxidase: Found in red blood cells and some other cells. Solution: Quench with 3% Hâ‚‚Oâ‚‚ in methanol for 10-15 minutes before primary antibody incubation [7] [2].
FAQ: What should I do if I have weak or no signal?
- Check Antibody Validation: Confirm the primary antibody is validated for IHC and your specific tissue type (e.g., FFPE). Run a positive control tissue [2].
- Optimize Antigen Retrieval: Inadequate epitope unmasking is a common culprit. Test different retrieval buffers (e.g., citrate pH 6.0, Tris-EDTA pH 9.0) and increase heating time if needed [2].
- Confirm Detection System Activity: Ensure your secondary antibody or polymer reagent is active and compatible with your primary antibody host species. Test the chromogen or fluorophore separately [2].
- Address Over-fixation: Tissues fixed too long in formalin can have over-masked epitopes. Increase the duration or intensity of antigen retrieval [2].
The Scientist's Toolkit
The table below lists essential reagents and materials for performing IHC experiments with the discussed detection systems.
| Reagent/Material | Function | Key Considerations |
|---|---|---|
| Polymer-Based Detection Kit | A two-step system providing high-sensitivity detection with low background. | Choose HRP or AP enzyme based on the tissue's endogenous enzyme activity. Compatible with many automated platforms [74] [77]. |
| TSA Kit (Fluorescent or Chromogenic) | Provides extreme signal amplification for low-abundance targets. | Essential for highly multiplexed experiments. Requires careful optimization of concentration and incubation time to prevent background [79] [78]. |
| Endogenous Enzyme Block | Quenches activity of endogenous peroxidases or phosphatases. | A crucial step before applying an enzyme-based detection system to prevent widespread background [7] [2]. |
| Endogenous Biotin Blocking Kit | Blocks endogenous biotin to prevent non-specific staining in ABC/LSAB methods. | Critical for biotin-rich tissues (e.g., liver, kidney). Less needed for polymer systems [75] [7]. |
| Antigen Retrieval Buffer | Reverses formaldehyde-induced cross-links to unmask epitopes. | Citrate (pH 6.0) and Tris-EDTA (pH 9.0) are common choices. The optimal buffer is antigen-dependent [2]. |
Experimental Workflow and Decision Pathway
The following diagram illustrates a logical workflow for selecting and troubleshooting an IHC detection system, based on your experimental goals and the issues you encounter.
Decision Workflow for IHC Detection System Selection
Signal Amplification Mechanisms
The core difference in sensitivity between detection systems lies in their amplification architecture. The following diagram visualizes the key structural mechanisms.
Mechanisms of Major IHC Detection Systems
Frequently Asked Questions (FAQs)
Q1: What is digital pathology, and how can it help with objective analysis? Digital pathology involves using digital tools, like whole-slide imaging, to capture, manage, and interpret pathology slides. A key benefit is the use of digital image analysis (DIA) and artificial intelligence (AI) to provide quantitative, objective measurements, such as the H-score for protein expression in IHC, reducing the subjectivity of visual assessment by pathologists [81] [82].
Q2: My IHC staining has high background. What are the first things I should check? High background staining, which creates a poor signal-to-noise ratio, is a common issue. The initial troubleshooting steps should focus on the most frequent causes [6]:
- Endogenous Enzymes: Check for endogenous peroxidase or phosphatase activity by incubating a control sample with only the detection substrate.
- Endogenous Biotin: Use a commercial avidin/biotin blocking solution if you are using a biotin-based detection system.
- Antibody Concentration: A concentration that is too high is a common culprit. Try reducing the concentration of your primary or secondary antibody.
- Cross-reactivity: Ensure your secondary antibody is specific and not cross-reacting with non-target epitopes.
Q3: How do I validate a digital pathology system for primary diagnosis in my lab? The College of American Pathologists (CAP) recommends that each institution or practice performs its own validation when implementing digital pathology for clinical diagnostic purposes. The scope of this validation study is determined by the institution based on its intended use [82].
Q4: Are there specific CPT codes for digital pathology services? Yes, as of 2024, there are Category III CPT add-on codes specifically for digital pathology digitization procedures. These codes (e.g., 0827T-0856T) are reported in addition to the primary pathology service code and are intended to capture the clinical staff work associated with digitizing glass slides [83].
Q5: Can image processing correct for staining variations between different IHC batches? Yes, whole-slide imaging enables the use of image normalization techniques to correct inter-batch staining variability. Methods based on blind colour deconvolution can be used to separate the staining components (e.g., DAB and hematoxylin) and apply transforms to create coherent, quantitative staining data across multiple batches [84].
Troubleshooting Guide: High Background Staining
The following table outlines specific causes and proven solutions for high background staining in IHC experiments.
| Cause of Background | Identification Method | Recommended Solution |
|---|---|---|
| Endogenous Peroxidases [6] | Incubate a tissue sample with the detection substrate alone. A resulting signal indicates their presence. | Quench with 3% Hâ‚‚Oâ‚‚ in methanol or a commercial peroxidase suppressor. |
| Endogenous Biotin [6] | High background when using an avidin-biotin complex (ABC) detection system. | Block with a commercial avidin/biotin blocking solution. |
| Primary Antibody Concentration Too High [6] | Nonspecific interactions are amplified. | Titrate the antibody to find the optimal, lower concentration. |
| Secondary Antibody Cross-reactivity [6] | Moderate to strong nonspecific binding to non-target antigens. | Increase the concentration of normal serum from the secondary antibody species in your block (up to 10%). |
| Issues with Antibody Diluent [6] | Low ionic strength in the diluent can promote ionic interactions. | Add NaCl to the blocking buffer/antibody diluent to a final concentration of 0.15-0.6 M. |
Experimental Protocol: Automated H-Score Quantification
This protocol details a deep learning-based method for the objective quantification of the H-score from IHC images, minimizing human subjectivity [81].
1. Image Acquisition and Input:
- Stain tissue samples via standard IHC protocols (DAB as the brown chromogen for the target protein, hematoxylin as the blue nuclear counterstain).
- Capture whole-slide images at 10x or 20x magnification using a whole-slide scanner.
- The algorithm takes the raw IHC image as its input.
2. Color Deconvolution:
- Perform color deconvolution on the original RGB image to separate the hematoxylin staining signal from the diaminobenzidine (DAB) staining signal. This isolates the protein expression data (DAB) from the tissue morphology (hematoxylin) [81] [84].
3. Region Recognition via Deep Learning:
- Train a deep learning model (e.g., a UNet-MobileNet architecture) using only the hematoxylin channel.
- This model learns to recognize and segment specific cell regions—such as tumor, stroma, necrosis, and lymphocytes—based on morphological features without interference from the DAB stain [81].
4. Target Area Segmentation:
- Within the region of interest (e.g., tumor region), further segment the specific cellular structure where the target protein is expressed.
- This is achieved by generating a nuclei mask from the hematoxylin signal, allowing the quantification to be confined to the nucleus, cytoplasm, or membrane as required [81].
5. DAB Intensity Classification and H-Score Calculation:
- Classify each pixel within the target area into one of four categories: Negative, Weak, Moderate, or Strong DAB staining, based on its intensity compared to predefined standards.
- Calculate the final H-score using the standard formula [81]:
H-score = (1 × % weak staining) + (2 × % moderate staining) + (3 × % strong staining) - The result is an objective, reproducible H-score ranging from 0 to 300, generated in a matter of seconds [81].
The workflow for this automated analysis is outlined below.
The Scientist's Toolkit: Research Reagent Solutions
| Reagent / Material | Function in IHC & Background Reduction |
|---|---|
| Sodium Citrate Buffer (pH 6.0) [6] | A common buffer used for heat-induced epitope retrieval (HIER) to expose target proteins in FFPE tissue sections. |
| Peroxidase Suppressor (e.g., 3% Hâ‚‚Oâ‚‚) [6] | Blocks endogenous peroxidase activity in tissues, which is a major cause of high background in HRP-based detection. |
| Avidin/Biotin Blocking Solution [6] | Blocks endogenous biotin present in some tissues, preventing nonspecific binding of avidin-biotin complex (ABC) detection systems. |
| Normal Serum [6] | Used as a blocking agent to reduce nonspecific binding of secondary antibodies. Should be from the same species as the secondary antibody. |
| Levamisole [6] | An inhibitor used to block endogenous alkaline phosphatase activity when using AP-based detection kits. |
| Diaminobenzidine (DAB) [81] [84] | A chromogen that produces a brown precipitate upon reaction with HRP, used to visualize the target protein. |
| Anti-eIF5B / Anti-AKT3 Antibodies [81] | Examples of specific primary antibodies used for detecting target proteins (eukaryotic translation initiation factor 5B and AKT serine/threonine kinase 3) in IHC development. |
FAQs: Spectral Unmixing and Background Challenges
What is spectral unmixing and why is it critical in multiplex IHC? Spectral unmixing is a computational process that separates the overlapping fluorescence or chromogen signals from multiple biomarkers in a multiplexed immunohistochemistry (mIHC) panel [85] [86]. In both multiplex immunofluorescence (mIF) and brightfield mIHC, fluorophores or chromogens with broad emission/absorbance spectra inevitably create "spectral crosstalk," where signal from one marker appears in the detection channel of another [87]. Accurate unmixing is essential for the precise assignment of marker expression to individual cells or compartments, which directly impacts downstream analysis like cell phenotyping and spatial relationship assessment [85]. Without proper unmixing, data integrity is compromised, leading to false co-expression findings and inaccurate cell counts.
What are the primary causes of high background in complex multiplex panels? High background in multiplex IHC often arises from a combination of factors. Antibody-related issues are common, including using too high a concentration of primary or secondary antibodies, cross-reactivity of secondary antibodies with tissue immunoglobulins, or non-specific binding [14] [88] [89]. Tissue-based factors can also contribute, such as insufficient deparaffinization, over-fixation (which can mask epitopes), endogenous peroxidase activity (for HRP-based detection), or high levels of endogenous biotin in tissues like liver and kidney [88] [89] [90]. Furthermore, suboptimal protocol steps like inadequate blocking, insufficient washing between steps, or tissue drying during processing are frequent culprits [14] [88].
How can I minimize spectral overlap when designing my panel? While computational unmixing corrects for spectral overlap, minimizing it during panel design improves overall data quality. For fluorescence-based multiplexing, this involves selecting fluorophores with minimal emission spectrum overlap whenever possible and ensuring your imaging system's filter sets can distinguish them [86]. For brightfield multiplexing, emerging solutions involve using novel chromogens with narrow absorbance bands instead of traditional broadly absorbing ones, combined with multispectral imaging and matched illumination [87]. A strategic approach is to use a method like PICASSO, which leverages information theory to unmix signals from highly overlapping fluorophores, thus allowing more flexibility in panel design [86].
Troubleshooting Guide: High Background and Spectral Issues
The table below outlines common problems, their causes, and specific solutions to implement in your multiplex IHC workflow.
| Problem Observed | Potential Causes | Recommended Solutions |
|---|---|---|
| High Background Staining | Inadequate blocking [14] [88]. | Extend blocking time to 1 hour; use normal serum from the same species as the secondary antibody host [88] [90]. |
| Endogenous peroxidase activity (HRP detection) [88] [89]. | Quench with 3% H2O2 in RODI water for 10 minutes before primary antibody incubation [88]. | |
| Endogenous biotin (biotin-based detection) [88] [90]. | Use a polymer-based detection system or perform a biotin block with avidin/biotin blocking kits [88]. | |
| Antibody concentration too high [14] [89]. | Titrate primary and secondary antibodies to find the optimal dilution; reduce incubation time for room temperature steps [14]. | |
| Inaccurate Spectral Unmixing | High autofluorescence from aldehyde fixatives [14]. | Use fluorophores in the red or infrared range; treat tissue with aldehyde quenchers (e.g., ethanolamine) for glutaraldehyde fixation [14] [59]. |
| Poor reference spectra measurements [86]. | For heterogeneous tissues (e.g., brain), use a method like PICASSO that does not require reference spectra, or measure references from all relevant tissue sub-regions [86]. | |
| Spectral crosstalk from broad chromogen absorbance [87]. | Use narrowband chromogens and multispectral imaging with illumination channels matched to their absorbance peaks [87]. | |
| Weak or No Target Signal | Epitope masking from over-fixation [14] [88]. | Optimize antigen retrieval conditions (e.g., use microwave oven instead of water bath); reduce fixation time [88] [89]. |
| Ineffective antigen retrieval [14] [88]. | Optimize antigen retrieval buffer, method (e.g., microwave, pressure cooker), and incubation length [88]. | |
| Low antibody concentration or short incubation [14] [89]. | Increase antibody concentration and/or incubation time; incubate primary antibodies overnight at 4°C [89] [90]. | |
| Non-Specific Staining | Secondary antibody cross-reactivity [14] [88]. | Always include a secondary-only control; use secondary antibodies pre-adsorbed against the serum proteins of the tissue species [88]. |
| "Mouse-on-Mouse" background [88]. | Use a primary antibody from a different host species or a species-on-species detection kit [88]. | |
| Insufficient washing [14] [88]. | Increase wash volume, duration, and frequency; perform 3-5 minute washes with gentle agitation after each incubation step [88] [90]. |
Experimental Protocol: Validating Your Multiplex IHC Assay
A rigorous validation protocol is fundamental for generating robust and reproducible data from multiplex IHC assays, ensuring that both staining and spectral unmixing perform as expected [85] [32].
1. Assay Optimization
- Antibody Selection: Choose antibodies and clones with documented performance in IHC. Resources like NordiQC assessments or vendor data sheets are invaluable [32].
- Titration: For each antibody, perform a titration experiment on a control tissue with known expression of the target antigen to determine the optimal dilution that provides a strong specific signal with minimal background [14] [88].
- Multiplex Panel Check: Confirm that all primary and secondary antibodies are compatible. Staining with secondary antibodies alone (omitting primaries) can identify cross-reactivity within the panel [14] [88].
2. Validation and Concordance Testing
- Cohort Size: For a laboratory-developed test (LDT), validate with a minimum of 20 known positive and 20 known negative cases for predictive markers. For non-predictive markers, 10 positive and 10 negative cases may suffice [32]. The laboratory director must approve the final cohort size.
- Defining "Known" Results: Expected results should be determined by an orthogonal method, such as a different validated IHC test, in situ hybridization (ISH), or molecular testing [32].
- Image Acquisition and Unmixing: Acquire images using calibrated scanners for whole slides or selected regions of interest (ROIs). For brightfield mIHC, use sequential illumination with wavelengths matched to narrowband chromogens. For mIF, acquire images at the emission peak of each fluorophore. Then, apply the chosen spectral unmixing algorithm (e.g., linear unmixing, PICASSO) [85] [86] [87].
- Analysis: Compare the unmixed results from your multiplex assay against the expected results from singleplex stains or orthogonal methods. The generally accepted threshold for overall concordance is ≥90%. Scrutinize any discordant cases to determine if the issue is with sensitivity (false negatives) or specificity (false positives) [32].
Research Reagent Solutions
This table lists key materials and their specific functions for successfully implementing a multiplex IHC experiment with effective background management and spectral unmixing.
| Reagent / Material | Function in Multiplex IHC |
|---|---|
| Polymer-based Detection Reagents | Provides high-sensitivity detection without using biotin, eliminating background from endogenous biotin in tissues like liver and kidney [88]. |
| Narrowband Chromogens | For brightfield mIHC, these chromogens have sharp absorbance peaks, enabling cleaner separation via multispectral imaging and reducing spectral crosstalk compared to traditional chromogens like DAB [87]. |
| Tyramide Signal Amplification (TSA) Reagents | Generates an intensely bright and covalent signal, improving the signal-to-noise ratio. This stable signal is also resistant to photobleaching [91]. |
| Species-Specific Normal Serum | Used as a blocking agent to reduce non-specific binding of secondary antibodies. The serum should be from the same species in which the secondary antibody was raised [88] [90]. |
| Antigen Retrieval Buffers | Reverses methylene cross-links formed during formalin fixation, thereby unmasking epitopes and restoring antibody binding sites to improve signal strength [88] [59]. |
| Primary Antibody-Fab Complexes | A pre-formed complex of a primary antibody and a fluorophore-conjugated Fab fragment. This technique bypasses host species restrictions, allowing unlimited use of primary antibodies from the same host [86]. |
Workflow Diagram: Multiplex IHC with Spectral Unmixing
The following diagram illustrates the key steps in a multiplex IHC workflow, from sample preparation through to quantitative analysis, highlighting where spectral unmixing and background management are critical.
Multiplex IHC Workflow with Spectral Unmixing
Technical Diagram: Spectral Unmixing Principle
This diagram details the core principle of spectral unmixing, showing how mixed signals from overlapping fluorophores are separated into distinct channels for accurate analysis.
Principle of Spectral Unmixing
By systematically applying these troubleshooting guides, validation protocols, and technical solutions, researchers can significantly reduce high background and master spectral unmixing, thereby unlocking the full potential of multiplex IHC to characterize the complex tumor microenvironment.
Conclusion
Achieving low-background, high-quality IHC staining is not a matter of chance but the result of a systematic approach that integrates foundational knowledge, optimized methodologies, rigorous troubleshooting, and comprehensive validation. By understanding the root causes of non-specific staining—from inadequate blocking and endogenous enzyme activity to suboptimal antibody concentrations—researchers can proactively design robust protocols. The consistent implementation of appropriate controls, adherence to established validation guidelines, and leveraging of digital analysis tools are paramount for generating reliable, reproducible data. As IHC continues to evolve, particularly with the rise of multiplexed techniques and artificial intelligence-driven analysis, the principles of meticulous background reduction will remain fundamental to advancing both basic research and clinical diagnostics, ultimately leading to more confident interpretations and accelerated scientific discovery.
References
- 1. Review of immunohistochemistry techniques: Applications, ... [https://www.sciencedirect.com/science/article/abs/pii/S0740257024000467?utm_source=chatgpt.com]
- 2. Ultimate IHC Troubleshooting Guide: Fix Weak Staining & ... [https://www.atlasantibodies.com/knowledge-hub/blog/the-ultimate-ihc-troubleshooting-guide-from-weak-staining-to-high-background/]
- 3. IHC Protocol [https://www.bostonbioproducts.com/resources/ihc-protocol/]
- 4. A novel automated IHC staining system for quality control ... [https://www.por-journal.com/journals/pathology-and-oncology-research/articles/10.3389/pore.2025.1611964/full]
- 5. Development and clinical validation of deep learning ... [https://pmc.ncbi.nlm.nih.gov/articles/PMC12211442/]
- 6. IHC Troubleshooting Guide [https://www.thermofisher.com/us/en/home/life-science/protein-biology/protein-biology-learning-center/protein-biology-resource-library/pierce-protein-methods/ihc-troubleshooting-guide.html]
- 7. Methods to Block Endogenous Detection [https://www.thermofisher.com/us/en/home/life-science/protein-biology/protein-biology-learning-center/protein-biology-resource-library/pierce-protein-methods/methods-block-endogenous-detection.html]
- 8. High background in immunohistochemistry [https://www.abcam.com/en-us/technical-resources/troubleshooting/high-background-in-immunohistochemistry]
- 9. Non-specific binding of antibodies in immunohistochemistry [https://www.nature.com/articles/srep00028]
- 10. Immunohistochemistry (IHC) Troubleshooting Guide & the ... [https://www.cellsignal.com/learn-and-support/troubleshooting/ihc-troubleshooting-guide?srsltid=AfmBOopA0FKGYR7KHbS8rAOUR5pqjEDWCjsq1C1xWaS7JtswLh_CFfxu]
- 11. Immunohistochemistry in investigative and toxicologic ... [https://pmc.ncbi.nlm.nih.gov/articles/PMC6033701/]
- 12. A Guide to Better IHC Staining: Steps, Troubleshooting, ... [https://www.celnovte.com/solution/a-guide-to-better-ihc-staining-steps-troubleshooting-and-optimization/]
- 13. Insights on IHC Techniques [https://www.bosterbio.com/blog/category/ihc?srsltid=AfmBOoqmf_Gfc4NVSVC2dK4sUQNYoEDb3JhMikmiK_znbdQ_GDzBkj7B]
- 14. Immunohistochemistry Troubleshooting [https://www.antibodies.com/applications/immunohistochemistry/ihc-troubleshooting]
- 15. IHC antigen retrieval protocol [https://www.abcam.com/en-us/technical-resources/protocols/ihc-antigen-retrieval]
- 16. Artifacts in IHC [https://www.biozol.de/en/techniques/Artifacts-in-IHC]
- 17. How to Avoid or Reduce High Background in ... [https://www.linkedin.com/pulse/how-avoid-reduce-high-background-immunohistochemistry-huang-md-phd-xtvpe]
- 18. Immunohistochemistry Troubleshooting Guide [https://www.enzo.com/note/immunohistochemistry-troubleshooting-guide/]
- 19. Immunohistochemistry (IHC) Troubleshooting Guide & the ... [https://www.cellsignal.com/learn-and-support/troubleshooting/ihc-troubleshooting-guide?srsltid=AfmBOooi7fY1DozaTNhjYUl0XJXvkGB6oFxNFcfyGlQPXJ9qWUgfuVTg]
- 20. IHC Troubleshooting Guide | Common Issues & Fixes [https://www.bosterbio.com/protocol-and-troubleshooting/ihc-troubleshooting?srsltid=AfmBOooP1m6tVvXvbK6EwLnkNRTyUUK7Rag-M9fnlkHUeouP7Q7W-Jo0]
- 21. Troubleshooting Guide: Immunohistochemistry [https://www.rndsystems.com/resources/technical/troubleshooting-guide-immunohistochemistry]
- 22. Disaccharides Protect Antigens from Drying-Induced Damage ... [https://pmc.ncbi.nlm.nih.gov/articles/PMC4810794/]
- 23. å…疫组化IHC实验æ¥éª¤+常è§é—®é¢˜è§£æž [https://www.biolabreagent.com/archive/1486.html?srsltid=AfmBOoovhzRvXQeBZbuNA0VydMyM8OBtIIE5qPF0k_oqFK44rDc84uwz]
- 24. å…疫组织化å¦(IHC) 疑难排除指å—和使用对照的é‡è¦æ€§ [https://www.cellsignal.cn/learn-and-support/troubleshooting/ihc-troubleshooting-guide]
- 25. Blocking Strategies for IHC [https://www.thermofisher.com/us/en/home/life-science/protein-biology/protein-biology-learning-center/protein-biology-resource-library/pierce-protein-methods/blocking-strategies-ihc.html]
- 26. A guide to selecting control and blocking reagents. [https://www.jacksonimmuno.com/secondary-antibody-resource/technical-tips/controls-diluents-blocking/]
- 27. Blocking in IHC [https://www.abcam.com/en-us/technical-resources/guides/ihc-guide/blocking-in-ihc]
- 28. Western Blot Troubleshooting [https://www.thermofisher.com/us/en/home/life-science/protein-biology/protein-biology-learning-center/protein-gel-electrophoresis-information/western-blot-troubleshooting.html]
- 29. Immunohistochemistry (IHC) Troubleshooting Guide & the ... [https://www.cellsignal.com/learn-and-support/troubleshooting/ihc-troubleshooting-guide?srsltid=AfmBOopWaMJ61xf2hayqBF8HrAoeXgJBjc5h1PjpjqvwVPZ4DZUCRhiK]
- 30. IHC Troubleshooting: High Background [https://www.sinobiological.com/category/ihc-troubleshooting-high-background]
- 31. IHC Primary Antibody Selection & Optimization [https://www.novusbio.com/primary-antibody-selection-optimization?srsltid=AfmBOop_PQs01mrKbZjfjyMgx8T8rhkg2OU6hVBE0LBKoF8K-YVAImUz]
- 32. Frequently Asked Questions from Immunohistochemistry ... [https://www.cap.org/member-resources/councils-committees/immunohistochemistry-topic-center/frequently-asked-questions-from-immunohistochemistry-laboratories]
- 33. Immunohistochemistry (IHC) Troubleshooting Guide & the ... [https://www.cellsignal.com/learn-and-support/troubleshooting/ihc-troubleshooting-guide?srsltid=AfmBOoqonDsMLcrLEWIIUypWLFpdz7YrJJ6_DhDMmpxfZdxUfT2s_Hhi]
- 34. IHC Troubleshooting Guide | Common Issues & Fixes [https://www.bosterbio.com/protocol-and-troubleshooting/ihc-troubleshooting?srsltid=AfmBOopbr8wqSc0IBWYA1beBJKzPS6Fqh0tiBH3k3k6uaupNXohy_lD4]
- 35. IHC Epitope/ Antigen Retrieval: HIER vs. PIE [https://www.bio-techne.com/applications/imaging/immunohistochemistry/epitope-retrieval]
- 36. Comparison of Antigen Retrieval Methods for ... [https://pmc.ncbi.nlm.nih.gov/articles/PMC11417793/]
- 37. Comparison of Antigen Retrieval Methods for ... [https://www.mdpi.com/2409-9279/7/5/67]
- 38. Immunohistochemistry (IHC) Troubleshooting Guide & the ... [https://www.cellsignal.com/learn-and-support/troubleshooting/ihc-troubleshooting-guide?srsltid=AfmBOooJE2IVBp8XiDBB5xJhDI68fnO6zVjN8YhsbdeFpBSsBLKj8v6v]
- 39. IHC Detection Systems: Advantages and Disadvantages [https://www.novusbio.com/ihc-detection?srsltid=AfmBOopAl5UE3AlChX8Au8xfMNIbYnqs-Wupb4ZMmZ1BJdFbRyfdtUF-]
- 40. Comparison of two polymer-based immunohistochemical ... [https://pubmed.ncbi.nlm.nih.gov/17204059/]
- 41. Immunohistochemistry (IHC): Experimental Protocols and ... [https://www.antibodysystem.com/archive/387.html]
- 42. ImmPRESS® Polymer Reagents For IHC [https://vectorlabs.com/browse/immpress-polymer-detection-kits-for-ihc/?srsltid=AfmBOoomnirHfD0ibrOgnd_4bpSUSPqjfzRaU4IBa0FCf2qXAI0ihQJW]
- 43. Immunohistochemistry (IHC) Troubleshooting Guide & the ... [https://www.cellsignal.com/learn-and-support/troubleshooting/ihc-troubleshooting-guide?srsltid=AfmBOop-mSNg8yI1kv7w1KBG10iPMjlbndEprghuasi6YHD8Nd2SG5er]
- 44. Immunohistochemistry Protocols [https://www.antibodies.com/applications/immunohistochemistry/ihc-protocol]
- 45. Fluorescent IHC Protocol: Paraffin-embedded Tissue ... [https://www.rndsystems.com/resources/protocols/protocol-preparation-and-fluorescent-ihc-staining-paraffin-embedded-tissue]
- 46. IHC Troubleshooting Guide | Common Issues & Fixes [https://www.bosterbio.com/protocol-and-troubleshooting/ihc-troubleshooting?srsltid=AfmBOorGOxwXPCYFPvRCUobbkC3SlpId9jk-Obh1T_zucJP8O8MlizWV]
- 47. Immunohistochemistry (IHC) Troubleshooting Guide & the ... [https://www.cellsignal.com/learn-and-support/troubleshooting/ihc-troubleshooting-guide?srsltid=AfmBOorVLBNEpOnBkgRsFa6i9LDZl9WNWKqJ4YKg4ezA9h9ML8mA1EZD]
- 48. Immunohistochemistry (Histology + Imaging)-Mendelsohn ... [https://www.protocols.io/view/immunohistochemistry-histology-imaging-mendelsohn-dyuq7wvw.html]
- 49. Immunohistochemistry Troubleshooting | Tips & Tricks [https://www.stressmarq.com/support/technical-support/troubleshooting/immunohistochemistry-troubleshooting/?srsltid=AfmBOopTK95iYpPePnSl8dCMKPrgxsiH00_fvKIDAgwe6mzpj27CytqS]
- 50. IHC Troubleshooting Guide | Common Issues & Fixes [https://www.bosterbio.com/protocol-and-troubleshooting/ihc-troubleshooting?srsltid=AfmBOoolb6jX_dCggNDBintxSB_sVejz1y-eyw4-n7CoAqJyVHhcnPVe]
- 51. Immunohistochemistry (IHC) Troubleshooting Guide & the ... [https://www.cellsignal.com/learn-and-support/troubleshooting/ihc-troubleshooting-guide?srsltid=AfmBOoocpVXbEWVZbUo35FdJYUS7x9fsx_4bczZJZxCQUKoi6v5dUbAS]
- 52. Secondary Antibody Cross-Adsorption and Cross Reactivity [https://www.thermofisher.com/us/en/home/life-science/antibodies/antibodies-learning-center/antibodies-resource-library/antibody-methods/secondary-antibody-cross-adsorption-cross-reactivity.html]
- 53. Considerations When Selecting A Primary Antibody [https://vectorlabs.com/blog/considerations-when-selecting-a-primary-antibody/?srsltid=AfmBOorvIoVJii-zPE1Jxwa4GMPfbwtiKKRQy2fynmz3MS0mIq0nMs4V]
- 54. Immunohistochemistry for Pathologists: Protocols, Pitfalls, ... [https://pmc.ncbi.nlm.nih.gov/articles/PMC5122731/]
- 55. ICC/IF Antibody Selection Guide: Host Species, Primary & ... [https://www.bio-techne.com/applications/imaging/immunocytochemistry/antibody-selection-for-icc-if]
- 56. Immunohistochemistry (IHC) Troubleshooting Guide & the ... [https://www.cellsignal.com/learn-and-support/troubleshooting/ihc-troubleshooting-guide?srsltid=AfmBOoo9Uf42JLSLm3taGmc6GwJHVuLd1qLMTj-T3zNgQBuvKNVfdNrA]
- 57. Immunohistochemistry Protocols [https://www.thermofisher.com/us/en/home/life-science/cell-analysis/cellular-imaging/ihc/immunohistochemistry-protocols.html]
- 58. Immunohistochemistry (IHC) Protocols for Frozen Sections [https://www.alomone.com/info/immunohistochemistry-ihc-protocols-indirect-and-direct-methods?srsltid=AfmBOorQ-7PCwgbTBg_lka16vvXD_H1XPVyQ_orJfVX96tDc_ENwhBFa]
- 59. Immunohistochemistry (IHC): The Complete Guide [https://www.antibodies.com/applications/immunohistochemistry]
- 60. TrueBlack® Lipofuscin Autofluorescence Quencher [https://biotium.com/product/trueblack-lipofuscin-autofluorescence-quencher/]
- 61. ReadyProbesâ„¢ Tissue Autofluorescence Quenching Kit [https://www.thermofisher.com/order/catalog/product/R37630]
- 62. Immunofluorescence Troubleshooting | Tips & Tricks [https://www.stressmarq.com/support/technical-support/troubleshooting/immunofluorescence-troubleshooting/?srsltid=AfmBOoooBpuia3fHEUVttYjUQLpiGQN2VelJPOvl0pvHq92K7WNSz3Ss]
- 63. Tips for Reducing Non-specific Staining in IHC [https://www.biossusa.com/blogs/news/tips-for-reducing-non-specific-staining-in-ihc?srsltid=AfmBOoqCQdbRP91mCDp_bbW7izNPPvU3wvHAHIBjdCugDyXnPUJi8AZX]
- 64. Autofluorescence Quenching in Decellularized Plant Scaffolds ... [https://pubmed.ncbi.nlm.nih.gov/40819159/]
- 65. Fluorophore Selection Guide | Thermo Fisher Scientific - ES [https://www.thermofisher.com/us/en/home/life-science/cell-analysis/fluorophores.html]
- 66. Immunohistochemistry (IHC) Troubleshooting Guide & the ... [https://www.cellsignal.com/learn-and-support/troubleshooting/ihc-troubleshooting-guide?srsltid=AfmBOoqf6LjB1BrqWQjz3H9lkVouEnMTK6DlCJ5hDf-9_Qu2ySk9OCd5]
- 67. IHC Troubleshooting Guide | Common Issues & Fixes [https://www.bosterbio.com/protocol-and-troubleshooting/ihc-troubleshooting?srsltid=AfmBOoqXpa2KGIg6ASI7klWoMqzpy5kmhf6ZeBe8kc1qNDHBfoXxdjGr]
- 68. å…疫组化: 改善IHC 染色的概述+ æ¥éª¤ [https://www.leicabiosystems.com/zh/knowledge-pathway/immunohistochemistry-an-overview-steps-to-better-ihc-staining/]
- 69. å…疫组织化å¦(IHC) 概述 [https://www.cellsignal.cn/learn-and-support/overview-of-ihc]
- 70. Principles of Analytic Validation of Immunohistochemical ... [https://www.cap.org/protocols-and-guidelines/cap-guidelines/current-cap-guidelines/principles-of-analytic-validation-of-immunohistochemical-assays]
- 71. CAP Updates Their 'Principles of Analytic Validation ... [https://www.bioanalysis-zone.com/cap-updates-their-guidelines-for-principles-of-analytic-validation-of-immunohistochemical-assays/]
- 72. Immunohistochemistry (IHC) Troubleshooting Guide & the ... [https://www.cellsignal.com/learn-and-support/troubleshooting/ihc-troubleshooting-guide?srsltid=AfmBOoqLO5CKU4bSbnh1hhm5IELpy3RsXKtNAadyWE1EreoYc9fKgDgP]
- 73. Ten Approaches That Improve Immunostaining: A Review of ... [https://pmc.ncbi.nlm.nih.gov/articles/PMC8836139/]
- 74. What are the different detection methods for IHC? [https://www.enzo.com/note/what-are-the-different-detection-methods-for-ihc/]
- 75. IHC Detection Systems: Advantages and Disadvantages [https://www.novusbio.com/ihc-detection?srsltid=AfmBOorZt-tx_v91moRaeRs7DIdsZ5hZK9ZXXTmMu_9rs1HVIo4KW2yU]
- 76. Chromogenic IHC and ISH Resources [https://diagnostics.roche.com/us/en/products/product-category/immunohistochemistry--ihc-/chromogenic-resources.html]
- 77. Enzyme Polymer Detection Systems [https://vectorlabs.com/browse/enzyme-polymer-detection-systems/?srsltid=AfmBOorrCxYJJsikd845q_tpzAdcTq93wBhRNe5hulvO5000OxfIWMZO]
- 78. Multiplex immunohistochemistry (mIHC): A technical deep ... [https://www.abcam.com/en-us/knowledge-center/immunohistochemistry/multiplex-immunohistochemistry-mihc]
- 79. Research progress and perspectives on the application of ... [https://pmc.ncbi.nlm.nih.gov/articles/PMC11804208/]
- 80. Detection Systems in Immunohistochemistry [https://www.intechopen.com/chapters/64808]
- 81. Deep learning-based H-score quantification of ... [https://pmc.ncbi.nlm.nih.gov/articles/PMC11141889/]
- 82. FAQs [https://digitalpathologyassociation.org/faq]
- 83. Digital Pathology Codes [https://www.cap.org/advocacy/payments-for-pathology-services/digital-pathology-codes]
- 84. Image processing in digital pathology: an opportunity to ... [https://www.nature.com/articles/srep42964]
- 85. Society for Immunotherapy of Cancer - PubMed Central - NIH [https://pmc.ncbi.nlm.nih.gov/articles/PMC11749220/]
- 86. PICASSO allows ultra-multiplexed fluorescence imaging of ... [https://www.nature.com/articles/s41467-022-30168-z]
- 87. Brightfield multiplex immunohistochemistry with ... [https://www.sciencedirect.com/science/article/pii/S0023683722003798]
- 88. Immunohistochemistry (IHC) Troubleshooting Guide & the ... [https://www.cellsignal.com/learn-and-support/troubleshooting/ihc-troubleshooting-guide?srsltid=AfmBOop4f-o2SOdrOKL31tgLZhVX17qDQbtbnBHPjeY_bFli8DhfygJH]
- 89. Immunohistochemistry Troubleshooting | Tips & Tricks [https://www.stressmarq.com/support/technical-support/troubleshooting/immunohistochemistry-troubleshooting/?srsltid=AfmBOorloPBlnYXtSES9v9UIGJ99xSIUz7MNsWWat2f8NslFVfIPkgEY]
- 90. Immunohistochemistry Frozen Troubleshooting: IHC-Fr Help [https://www.novusbio.com/support/support-by-application/immunohistochemistry-frozen/troubleshooting.html?srsltid=AfmBOorBdVRcF6Vue2SMLItem8_5jvI2XUoomkr0thdQd_Biqp1v7KH1]
- 91. Overcoming the 4 Key Challenges in Multiplex IHC [https://www.atlasantibodies.com/knowledge-hub/blog/multiplex-ihc-workflow-solutions/]