Blocking Endogenous Biotin in IHC: A Complete Guide to Eliminating Background for Reliable Results
This article provides a comprehensive guide for researchers and drug development professionals on managing endogenous biotin interference in immunohistochemistry (IHC).
Blocking Endogenous Biotin in IHC: A Complete Guide to Eliminating Background for Reliable Results
Abstract
This article provides a comprehensive guide for researchers and drug development professionals on managing endogenous biotin interference in immunohistochemistry (IHC). It covers the foundational science behind endogenous biotin, details step-by-step blocking protocols for various tissue types, offers advanced troubleshooting strategies for high-background scenarios, and outlines validation techniques to ensure assay specificity. The content integrates current methodologies from leading protocols and addresses common pitfalls in biotin-rich tissues like liver, kidney, and brain, enabling scientists to achieve clean, interpretable IHC staining essential for accurate research and diagnostic outcomes.
Understanding Endogenous Biotin: The Science Behind IHC Background Interference
Endogenous Biotin and Why Does It Cause Problems in IHC?
What is endogenous biotin?
Endogenous biotin is a naturally occurring vitamin (a coenzyme) found within cells and tissues, particularly concentrated in organs involved in high metabolic activity [1]. It is essential for many biological reactions, especially those taking place in mitochondria [1].
Why does endogenous biotin cause problems in IHC?
In immunohistochemistry (IHC), the avidin-biotin complex (ABC) method is a common detection technique that exploits the high-affinity interaction between biotin and proteins like streptavidin or avidin [1] [2]. Researchers often use biotin-conjugated secondary antibodies to link the primary antibody to a detection complex.
The problem arises because the endogenous biotin naturally present in the tissue is chemically identical to the biotin used in the detection system [1]. When using a biotin-based detection system, the streptavidin or avidin component cannot distinguish between the experimental biotin tags and the endogenous biotin in the tissue. This leads to the binding of the detection complex to endogenous biotin, resulting in non-specific staining and high background signal that can obscure the true, antigen-specific signal [1] [3] [4].
Tissues Prone to High Endogenous Biotin
The following tissues are known to have high levels of endogenous biotin and are particularly problematic for biotin-based IHC detection systems [1] [3] [4]:
| Tissue Type | Reported Level of Endogenous Biotin |
|---|---|
| Liver | High [1] [3] |
| Kidney | High [1] [3] |
| Heart | High [3] |
| Brain | High [3] [4] |
| Lung | High [3] |
| Mammary Gland | High [1] |
| Adipose Tissue | High [1] |
| Spleen | High [5] |
It is important to note that endogenous biotin activity is usually more pronounced in frozen (cryostat) sections compared to formalin-fixed, paraffin-embedded (FFPE) tissues, though the process of heat-induced epitope retrieval (HIER) can increase its detectability in FFPE samples [1] [2].
How to Identify Endogenous Biotin Interference
Detection Protocol
To determine if your tissue sample has problematic levels of endogenous biotin, you can perform a simple test [3]:
- Deparaffinize and rehydrate your tissue section as usual.
- Incubate the tissue section with streptavidin-HRP followed by a chromogen like DAB, or incubate with the ABC complex alone.
- Interpret the results: The presence of a brown-colored precipitate (in the case of DAB) indicates the presence of endogenous biotin that will interfere with your assay [3].
How to Block Endogenous Biotin
The standard and most effective method for blocking endogenous biotin involves a two-step sequential blocking process [1] [3] [4].
Sequential Blocking Protocol
- Avidin Incubation: Coat the sample with an excess of free, unlabeled avidin (or streptavidin). This step saturates the endogenous biotin present in the tissue.
- Biotin Incubation: Add an excess of free biotin. This step fills all the remaining unoccupied biotin-binding sites on the avidin molecules from the first step, preventing them from later binding to your biotinylated secondary antibody.
This process effectively "blocks" the endogenous biotin and the binding proteins, leaving them unavailable to participate in the detection reaction [1].
Alternative Strategies
- Use a Polymer-Based Detection System: A highly effective alternative is to avoid biotin altogether. Polymer-based detection systems use a dextran backbone to which multiple enzyme molecules and secondary antibodies are directly attached [6] [2] [4]. These systems are more sensitive than biotin-based methods and completely eliminate issues with endogenous biotin [6] [2].
- Use Streptavidin/NeutrAvidin: If using a biotin-based system, prefer streptavidin or NeutrAvidin over egg-white avidin. Avidin is highly glycosylated, and these sugar groups can bind to lectins in the tissue, causing additional background. Streptavidin and NeutrAvidin are not glycosylated and avoid this problem [7] [1].
Research Reagent Solutions
The following table lists key reagents used for managing endogenous biotin in IHC.
| Reagent Type | Function | Example |
|---|---|---|
| Avidin/Biotin Blocking Kit | Sequential blocking of endogenous biotin and avidin binding sites. | Invitrogen ReadyProbes Avidin/Biotin Blocking Solution [7] [1] |
| Polymer-Based Detection Reagent | Biotin-free detection; eliminates endogenous biotin interference. | SignalStain Boost IHC Detection Reagents [6] |
| Streptavidin/NeutrAvidin | Non-glycosylated biotin-binding protein; reduces lectin-based background. | Thermo Scientific NeutrAvidin Protein [7] |
Frequently Asked Questions (FAQs)
Why should I block endogenous biotin even if my tissue is not on the "high-risk" list?
While certain tissues are known for high levels, many tissues contain detectable amounts of endogenous biotin. Heat-induced epitope retrieval (HIER), a common step in FFPE IHC, can significantly increase the exposure and detectability of endogenous biotin, potentially causing false positives in tissues not traditionally considered high-risk [1]. Therefore, blocking is a good practice for any experiment using a biotin-based detection system.
My background is still high after blocking. What else could it be?
High background can have multiple causes. If you have ruled out endogenous biotin, consider:
- Primary antibody concentration is too high: Titrate your antibody to find the optimal dilution [7] [8].
- Insufficient blocking of non-specific protein binding: Ensure you are using an appropriate protein block, such as normal serum or BSA [7] [3].
- Endogenous peroxidase activity: If using an HRP-based system, quench with 3% H2O2 [7] [6].
- Insufficient washing: Ensure adequate washing between steps with a buffer containing a mild detergent like Tween-20 [6].
Can I use a polymer-based system for all my IHC experiments?
Yes. Polymer-based systems are now widely considered superior to biotin-based methods for most routine IHC applications due to their higher sensitivity, faster protocols (fewer steps), and the fact that they completely avoid the problem of endogenous biotin [6] [2]. They are an excellent default choice for new protocol development.
FAQs on Endogenous Biotin in IHC
1. Why is it necessary to block endogenous biotin, and which tissues are most problematic?
Endogenous biotin is a vitamin and coenzyme found naturally in many cells. When using avidin-biotin complex (ABC) detection methods in immunohistochemistry (IHC), the reagents can bind to this endogenous biotin instead of just the labeled antibodies, generating high, non-specific background staining that obscures the true results [1] [9]. This interference is most pronounced in tissues rich in endogenous biotin. These include the liver, kidney, mammary gland, and adipose tissue [1]. The brain is also noted as a tissue where endogenous biotin can lead to significant background when using biotin-based systems [10]. Blocking is therefore essential for clear and accurate interpretation in these tissues.
2. How can I test if my tissue sample has problematic levels of endogenous biotin?
You can perform a simple control test. Omit the primary antibody from your standard IHC protocol and instead incubate the tissue section directly with the ABC complex or with streptavidin-HRP, followed by your chromogen (e.g., DAB). If a stain develops, it indicates the presence of detectable endogenous biotin (provided you have first quenched any endogenous peroxidase activity with H₂O₂) [9]. This test helps confirm that background staining is due to endogenous biotin and not other factors.
3. I've blocked endogenous biotin, but I'm still seeing high background. What else could be wrong?
Several other factors can cause high background staining. If you are using an ABC method that relies on avidin (a glycoprotein from egg white), the carbohydrate groups on avidin can bind to lectins in the tissue sample [7]. To solve this, switch to using streptavidin or NeutrAvidin, which are not glycosylated and thus avoid this type of non-specific binding [11] [7]. Other common causes include an overly high concentration of your primary or secondary antibody, or cross-reactivity of your secondary antibody [7]. Running the appropriate controls will help identify the specific cause.
4. Are there detection systems that avoid the problem of endogenous biotin entirely?
Yes, a highly effective alternative is to use polymer-based detection systems [12]. These systems do not rely on the biotin-streptavidin interaction. Instead, multiple enzyme molecules (like HRP) are directly conjugated to a polymer backbone that is linked to a secondary antibody. This eliminates the problem of endogenous biotin and often provides better tissue penetration and higher sensitivity compared to avidin-biotin systems [10] [12].
Comparison of Biotin-Binding Proteins for IHC Detection
When using biotin-based detection, the choice of biotin-binding protein significantly impacts background levels. The table below compares the key properties of the three main options.
| Protein Source | Molecular Weight (kDa) | Isoelectric Point (pI) | Glycosylation | Non-Specific Binding | Relative Affinity for Biotin (Kd) |
|---|---|---|---|---|---|
| Avidin (Egg White) | 67-68 [11] | 10 - 10.5 [11] | Yes (High) [11] | High [11] | ~1.3 x 10⁻¹⁵ M [11] |
| Streptavidin (Bacterial) | ~53 [11] | 6.8 - 7.5 [11] | No [11] | Low [11] | ~0.04 x 10⁻¹⁵ M [11] |
| NeutrAvidin (Modified Avidin) | ~60 [11] | 6.3 [11] | No (De-glycosylated) [11] | Lowest [11] | ~1.3 x 10⁻¹⁵ M [11] |
Standard Protocol for Blocking Endogenous Biotin
This two-step sequential blocking method is the most effective way to suppress background from endogenous biotin [1] [9].
Procedure:
- Avidin Incubation: After deparaffinization, rehydration, and antigen retrieval (if performed), incubate the tissue sections with a ready-to-use avidin solution or a 0.05% avidin solution in PBS for 15 minutes at room temperature [9].
- Rinse: Briefly rinse the slides with PBS [9].
- Biotin Incubation: Incubate the sections with a ready-to-use biotin solution or a 0.005% biotin solution in PBS for 15 minutes at room temperature [9].
- Rinse: Briefly rinse the slides with PBS again before proceeding to the standard serum blocking and primary antibody incubation steps [9].
Mechanism: The first step (avidin) saturates all endogenous biotin molecules in the tissue. The second step (biotin) blocks all remaining unoccupied biotin-binding sites on the avidin molecules just applied, preventing them from later binding your biotinylated secondary antibody [1] [9].
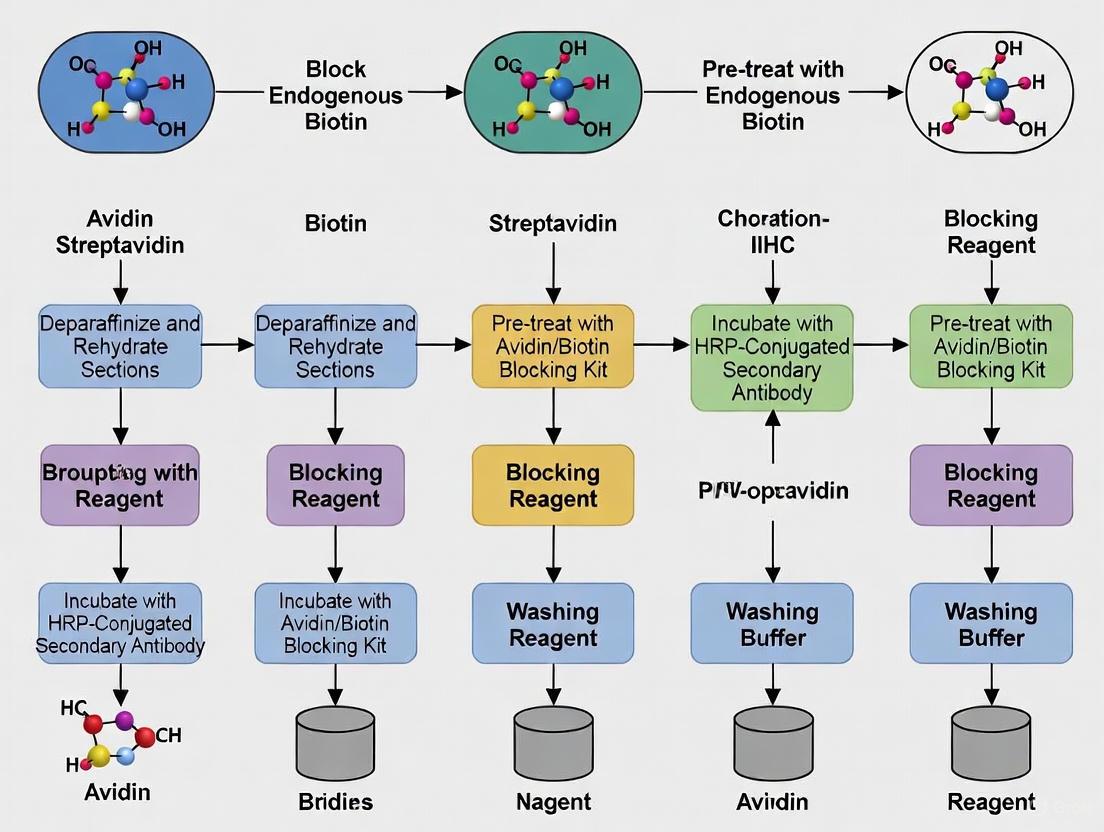
Experimental Workflow for IHC with Endogenous Biotin Blocking
The following diagram illustrates the key decision points and steps for handling tissues with high endogenous biotin.
Research Reagent Solutions
This table lists key reagents used to address the challenge of endogenous biotin in IHC.
| Reagent | Function | Key Consideration |
|---|---|---|
| Avidin/Biotin Blocking Kit | Sequential blocking to mask endogenous biotin and its binding sites [1] [7]. | Essential for biotin-based methods on high-biotin tissues like liver and kidney [1] [12]. |
| Streptavidin | Non-glycosylated biotin-binding protein for detection [11]. | Reduces lectin-mediated background compared to avidin [11] [7]. |
| NeutrAvidin | De-glycosylated avidin with a near-neutral pI [11]. | Offers the lowest non-specific binding among biotin-binding proteins [11]. |
| Polymer-Based Detection System | HRP- or AP-linked polymer avoids biotin-streptavidin chemistry entirely [10] [12]. | The simplest solution to eliminate endogenous biotin interference [12]. |
| ReadyProbes Endogenous HRP/AP Blocking Solution | Suppresses endogenous peroxidase and phosphatase activity [7]. | Used alongside biotin blocking to quench other sources of background [7]. |
Frequently Asked Questions (FAQs)
Q1: What causes non-specific detection of unwanted targets in ABC systems? The primary cause is the presence and detection of endogenous (naturally occurring) biotin in your sample tissue [13] [14]. The ABC system cannot distinguish between biotin tags you have attached to your detection antibodies and the biotin that is naturally found in tissues. When the avidin/streptavidin reagent is applied, it binds to所有这些biotin molecules, leading to staining that is not related to your target antigen [15]. This is particularly problematic in tissues such as liver, kidney, brain, and mammary gland [13].
Q2: Besides endogenous biotin, what other factors can lead to unwanted detection? Other common factors include [13] [14] [16]:
- Non-specific protein interactions: Avidin, a positively charged glycoprotein, can stick nonspecifically to negatively charged cellular structures. While streptavidin and NeutrAvidin are improvements, some non-specific binding can still occur.
- Cellular receptors: Streptavidin contains an RYD amino acid sequence, which can mimic the mammalian RGD sequence and bind to certain integrin receptors on cell surfaces.
- Endogenous avidin-binding proteins: Samples derived from egg (a source of avidin) or certain bacteria (a source of streptavidin) can introduce their own biotin-binding proteins that interfere with the assay.
Q3: How can I confirm that the signal in my experiment is specific? Running the appropriate controls is essential.
- Primary Antibody Omission Control: Omit the primary antibody. Any remaining signal is due to non-specific binding of the secondary antibody, the ABC complex, or endogenous biotin.
- Biotin-Streptavidin Only Control: Omit both the primary and secondary antibodies. Apply only the ABC complex and substrate. Any signal you see is directly attributable to endogenous biotin activity or non-specific binding of the ABC complex.
Q4: My negative controls still show staining even after a blocking step. What should I do?
- Extend the blocking time: The standard 15-minute incubation may be insufficient for tissues with high endogenous biotin levels. Try blocking for 30-60 minutes or even longer.
- Increase the avidin concentration: Ensure the avidin solution is concentrated enough to sequester all free endogenous biotin.
- Check your reagent order: The biotin solution must be applied after the avidin solution and before the ABC reagent. Applying the biotin solution first will saturate the endogenous biotin binding sites and prevent the avidin block from working.
Q5: Are there alternatives to the ABC method to avoid these issues? Yes. * enzyme polymer detection systems* are an excellent alternative. These systems conjugate the enzyme (e.g., HRP) directly to a secondary antibody via a polymer backbone, eliminating the use of the biotin-streptavidin interaction altogether. This simplifies the procedure to a single incubation step after the primary antibody and completely bypasses issues with endogenous biotin [14].
Troubleshooting Guide: Resolving Unwanted Detection
| Problem Phenomenon | Potential Cause | Recommended Solution |
|---|---|---|
| High background staining across entire tissue section | Endogenous biotin | Implement a sequential avidin/biotin blocking step prior to the primary antibody incubation [14]. |
| Staining in negative controls (no primary antibody) | Endogenous biotin or non-specific ABC binding | Perform rigorous controls; use streptavidin or NeutrAvidin instead of avidin to reduce charge-based binding [13] [16]. |
| Persistent background after standard blocking | High levels of endogenous biotin (e.g., in liver tissue) | Extend the duration of the avidin/biotin blocking step; re-apply blocking solutions after the primary antibody step [14]. |
| Specific cellular structures (e.g., mitochondria) are stained | Endogenous biotin in cellular organelles | This is a classic sign of endogenous biotin. Accurate interpretation requires effective blocking and proper controls. |
| High background with avidin-based reagents | Non-specific binding due to avidin's positive charge and glycosylation | Switch to streptavidin (near-neutral pI, non-glycosylated) or NeutrAvidin (deglycosylated, neutral pI) for significantly lower non-specific binding [13] [15] [16]. |
Comparison of Key Biotin-Binding Proteins
Selecting the appropriate biotin-binding protein is crucial for minimizing the detection of unwanted targets. The table below summarizes the properties of the most common options.
| Property | Avidin | Streptavidin | NeutrAvidin |
|---|---|---|---|
| Source | Chicken egg white [13] | Streptomyces avidinii bacterium [13] | Deglycosylated Avidin [13] |
| Molecular Weight (kDa) | 67 - 68 [13] | ~53 - 60 [13] [17] | ~60 [13] |
| Isoelectric Point (pI) | 10.0 - 10.5 [13] | 5.0 - 7.5 (varies by preparation) [13] [17] | ~6.3 [13] |
| Glycosylation | Yes [13] | No [13] | No (removed) [13] |
| Biotin Affinity (Kd) | ~10⁻¹⁵ M [13] | ~10⁻¹⁵ M [17] | ~10⁻¹⁵ M [13] |
| Key Cause of Non-Specificity | High pI and carbohydrate content [13] | RYD receptor-binding sequence [14] [16] | Lowest overall [13] |
| Recommended Use Case | Cost-sensitive applications where background is manageable | General-purpose use; the standard for many assays | Gold standard for sensitive assays and problematic tissues with high background |
Experimental Protocol: Blocking Endogenous Biotin
The following sequential blocking protocol is recommended to suppress signal from endogenous biotin effectively [14].
Principle: The tissue is first saturated with avidin to occupy all endogenous biotin binding sites. Then, free biotin is added to block the remaining binding sites on the avidin molecules. This two-step process ensures the ABC reagent added later has nothing to bind to except the biotinylated secondary antibody.
Procedure:
- After performing any necessary antigen retrieval and general protein blocking (e.g., with normal serum), prepare the following solutions:
- Avidin Working Solution: Dilute avidin (or a proprietary avidin block) in an appropriate buffer like PBS.
- Biotin Working Solution: Dilute biotin (or a proprietary biotin block) in the same buffer.
- Cover the tissue section with the Avidin Working Solution.
- Incubate at room temperature for 15-20 minutes.
- Rinse the slide gently with buffer.
- Cover the tissue section with the Biotin Working Solution.
- Incubate at room temperature for 15-20 minutes.
- Rinse the slide thoroughly with buffer.
- Proceed with the application of your primary antibody and continue with the standard ABC staining protocol.
Workflow Diagram: Problem vs. Solution
The diagram below illustrates the mechanism of unwanted detection and how the blocking protocol prevents it.
The Scientist's Toolkit: Essential Reagents
| Item | Function | Notes |
|---|---|---|
| Avidin/Biotin Blocking Kit | Commercially available sequential blocking solutions. | Pre-optimized concentrations ensure reliable and complete blocking [14]. |
| NeutrAvidin | A deglycosylated, neutral-pI avidin derivative. | Superior for minimizing non-specific binding; the ideal choice for sensitive detection [13] [15]. |
| Streptavidin | A non-glycosylated biotin-binding protein from bacteria. | The standard reagent for most applications; lower non-specific binding than native avidin [13] [17]. |
| Enzyme Polymer Detection System | A biotin-free detection method. | The most effective alternative to avoid endogenous biotin issues entirely [14]. |
| Biotinylated Secondary Antibody | Links the primary antibody to the ABC complex. | Ensure the host species matches the primary antibody. |
The Impact of Heat-Induced Epitope Retrieval (HIER) on Biotin Detectability
Frequently Asked Questions (FAQs)
1. Why does my IHC staining show high background in liver or kidney tissues after HIER? Tissues such as liver, kidney, spleen, and adipose tissue have high concentrations of endogenous biotin [1] [18]. HIER, by breaking cross-links formed during formalin fixation, dramatically increases the access to and reactivity of this endogenous biotin [18]. If you are using an avidin-biotin detection system, the labeled streptavidin or avidin will bind to these sites, causing widespread nonspecific staining and false-positive results [1] [18].
2. I did not have biotin background issues without HIER. Why are they appearing now? Paraffin embedding alone can destroy or mask much endogenous biotin activity [18]. The HIER process actively unmasks these epitopes, effectively retrieving the native biotin along with your target antigen [18]. This is why a protocol that works without HIER might suddenly show high background when HIER is introduced.
3. How can I tell if my background is caused by endogenous biotin? Background from endogenous biotin often appears as a diffuse, nonspecific stain throughout the tissue, particularly in the cytoplasm of cells in biotin-rich organs [1]. The most reliable method is to include a negative control omission where the primary antibody is left out. If this control still shows staining after HIER and detection, it strongly indicates interference from endogenous elements like biotin [1].
4. Are some detection methods better for avoiding this issue? Yes. A highly effective strategy is to switch to biotin-free polymer detection systems [19]. These systems do not rely on the avidin-biotin interaction, thereby completely bypassing the problem of endogenous biotin and eliminating the need for an additional blocking step [19].
Troubleshooting Guides
Problem: High Background Staining Post-HIER
| Suspected Cause | Diagnostic Clues | Recommended Solution |
|---|---|---|
| Endogenous Biotin | High background in tissues like liver, kidney, adipose; diffuse, nonspecific staining [1]. | 1. Use an Endogenous Avidin/Biotin Blocking Kit [1] [18]. 2. Switch to a biotin-free polymer detection system (e.g., VisUCyte) [19]. |
| Ineffective Blocking | Background persists after attempting a blocking step. | Use a commercial blocking kit and follow the protocol sequentially: incubate with avidin first, then biotin, to saturate all binding sites [1]. |
| Overly Stringent HIER | Background increases with longer heating times or higher pH buffers. | Optimize HIER conditions (time, temperature, pH) to achieve a balance between antigen retrieval and minimal biotin unmasking [20]. |
Problem: Weak Target Staining After Biotin Blocking
| Suspected Cause | Diagnostic Clues | Recommended Solution |
|---|---|---|
| Over-Blocking | Specific signal is lost alongside background reduction. | Titrate the concentration of the blocking reagents and the incubation time to find the optimal balance that suppresses background without diminishing the specific signal. |
| Suboptimal HIER for Primary Antigen | Weak specific signal even without blocking. | Re-optimize HIER conditions (buffer pH, heating time) specifically for your target antigen, as the primary antigen may require different retrieval conditions [20] [21]. |
Experimental Optimization Protocols
Protocol 1: Establishing an Endogenous Biotin Blocking Procedure
This protocol should be performed after HIER and before applying the primary antibody [1].
- After HIER and cooling, rinse slides gently in PBS [20].
- Apply unlabeled avidin or streptavidin to the tissue section. Incubate for 10-15 minutes at room temperature. This step binds to endogenous biotin.
- Rinse with PBS.
- Apply free biotin to the tissue section. Incubate for 10-15 minutes at room temperature. This step blocks any remaining unoccupied binding sites on the avidin/streptavidin molecules [1].
- Rinse with PBS, then proceed with your standard IHC staining protocol (blocking, primary antibody application, etc.).
Protocol 2: Systematic Optimization of HIER to Minimize Biotin Detectability
The following table outlines a experimental setup to optimize HIER conditions, balancing strong antigen retrieval with minimal biotin unmasking. Results should be compared to a control slide with no HIER [20].
| Incubation Time | Antigen Retrieval Solution pH | ||
|---|---|---|---|
| Acidic (pH ~3-5) | Neutral (pH ~6-7) | Basic (pH ~8-10) | |
| 5 minutes | Slide #1 | Slide #2 | Slide #3 |
| 10 minutes | Slide #4 | Slide #5 | Slide #6 |
| 20 minutes | Slide #7 | Slide #8 | Slide #9 |
- Procedure:
- Prepare slides from the same biotin-rich tissue block (e.g., liver).
- Perform HIER using the time/pH conditions outlined in the table above. A water bath or steamer at 92-95°C is recommended for even heating [20] [22].
- After HIER and cooling, proceed with the endogenous biotin blocking protocol (Protocol 1).
- Complete the IHC staining for your target antigen.
- Analyze slides for both the intensity of the specific target signal and the level of nonspecific background staining. The goal is to identify the condition that yields the highest signal-to-noise ratio.
The diagram below illustrates the logical relationship between HIER parameters and biotin detection, and the corresponding experimental workflow for optimization.
The Scientist's Toolkit: Key Research Reagent Solutions
| Reagent / Kit | Function & Rationale |
|---|---|
| Endogenous Avidin/Biotin Blocking Kit | Contains sequential reagents (avidin then biotin) to saturate endogenous biotin and its binding sites, eliminating nonspecific detection in ABC/LSAB methods [1] [18]. |
| Biotin-Free Polymer Detection Systems (e.g., VisUCyte, SuperPicTure) | Enzyme-linked polymer reagents that detect the primary antibody directly without using biotin, providing a simple solution to completely avoid endogenous biotin interference [19] [18]. |
| NeutrAvidin Protein | A deglycosylated form of avidin; reduces non-specific binding to tissue lectins compared to native, glycosylated avidin, leading to cleaner background in biotin-based detection [1]. |
| Citrate (pH 6.0) & Tris-EDTA (pH 9.0) Buffers | Common HIER retrieval buffers. The pH is a critical factor, with high-pH buffers often more effective for retrieval but potentially more likely to unmask biotin [22] [23]. |
| Streptavidin | A non-glycosylated bacterial protein with high affinity for biotin. Preferred over avidin for detection as it results in lower non-specific background due to the lack of carbohydrate groups [1] [18]. |
Within immunohistochemistry (IHC) protocols, endogenous biotin presents a significant challenge for researchers, often leading to high, non-specific background staining that can compromise experimental validity. The level of this interference is profoundly influenced by the choice of tissue preparation method—formalin-fixed paraffin-embedded (FFPE) or frozen sections. This article explores the critical differences in endogenous biotin expression between these two common preparation techniques, providing troubleshooting guides and detailed protocols to assist researchers and drug development professionals in obtaining clean, interpretable results.
Core Quantitative Comparison: Frozen vs. Paraffin Sections
The following table summarizes the key characteristics of frozen and paraffin-embedded tissues that directly impact the detection and management of endogenous biotin.
| Characteristic | Frozen Sections | Paraffin-Embedded (FFPE) Sections |
|---|---|---|
| Endogenous Biotin Interference | High [1] [24] | Lower [24] |
| Primary Cause of Interference | Better preservation of native biotin [24] | Fixation and processing reduce biotin detection [24] |
| Tissue Morphology | Compromised by ice crystals [25] [26] | Excellent, well-preserved [25] [27] [26] |
| Antigen Preservation | Excellent for many targets, especially post-translational modifications [25] | Variable; often masked by cross-linking fixatives [25] [26] |
| Fixation Step | After sectioning (usually alcohol/acetone) [25] [26] | Before embedding (usually formalin) [25] [26] |
| Typical Section Thickness | Thicker [25] | Thinner [25] |
| Long-Term Storage | Up to 1 year at -80°C [25] [26] | Multiple years at room temperature [25] [27] [26] |
Experimental Protocols for Detection and Blocking
Protocol: Testing for Endogenous Biotin
Before beginning a full IHC experiment, it is prudent to test whether endogenous biotin is present at problematic levels in your tissue sample.
1. Principle: This test bypasses the primary antibody to check if the detection system itself produces a signal due to endogenous biotin [9].
2. Reagents:
- Phosphate-Buffered Saline (PBS)
- Appropriate ABC complex or Streptavidin-HRP
- Hydrogen Peroxide (H₂O₂)
- Chromogen (e.g., DAB)
3. Method: 1. Follow your standard protocol for deparaffinization, rehydration, and antigen retrieval (if using FFPE). 2. Perform an endogenous peroxidase block by incubating the section in 3% H₂O₂ for 10 minutes [9] [28]. 3. Rinse the slides with PBS. 4. Apply the ABC complex or Streptavidin-HRP directly to the tissue section. 5. Incubate, then wash with PBS. 6. Apply the chromogen (e.g., DAB) to develop the color. 7. Counterstain, dehydrate, and mount as usual.
4. Interpretation: Any developed color indicates the presence of endogenous biotin (or other interfering factors) that will require a blocking step in the full protocol [9].
Protocol: Blocking Endogenous Biotin
The following two-step blocking procedure is the most effective method to suppress background from endogenous biotin.
1. Principle: The tissue is first incubated with avidin to saturate endogenous biotin binding sites, followed by an incubation with free biotin to block the remaining binding sites on the avidin now bound to the tissue [9] [1].
2. Reagents:
- Avidin solution (e.g., 0.05% in PBS) [9]
- Biotin solution (e.g., 0.005% in PBS) [9]
- Note: Commercial blocking kits are also available.
3. Workflow:
4. Key Considerations:
- Timing: This blocking step should be performed immediately after the normal serum blocking step and before the primary antibody incubation [9]. Antigen retrieval procedures can expose hidden biotin, making this sequence critical.
- Tissue Specificity: This step is especially crucial for tissues with high endogenous biotin, such as kidney, liver, spleen, mammary gland, and adipose tissue [9] [1].
Troubleshooting FAQs
Q1: I followed the avidin/biotin blocking procedure, but I am still observing high background staining. What could be wrong?
A: Several factors could be at play:
- Expired Reagents: The avidin/biotin solutions may have degraded. Try fresh or newly prepared solutions [9].
- Insufficient Blocking: The concentration of your avidin or biotin may be too low for the level of endogenous biotin in your tissue. Consider increasing the concentration or incubation time, or use a commercial blocking kit.
- Detection System: The inherent limitations of biotin-based detection systems might be the issue. If the problem persists, consider switching to a polymer-based detection system that does not rely on biotin-streptavidin chemistry, thereby eliminating the problem entirely [9] [28] [24].
Q2: How does antigen retrieval affect endogenous biotin in FFPE tissues?
A: Heat-induced epitope retrieval (HIER), a common step for FFPE tissues, can significantly increase the detectability of endogenous biotin that was masked during the fixation and embedding process [1]. For this reason, it is essential that your negative control samples also undergo the full HIER process to accurately assess background levels and avoid false positives [1].
Q3: Should I always use frozen sections if I am studying a phosphorylated protein target?
A: While frozen sections are generally recommended for studying sensitive post-translationally modified proteins like phospho-targets due to superior antigen preservation [25], the high level of endogenous biotin in certain tissues can be a major drawback. The choice requires careful consideration. If your target tissue is known to be high in biotin (e.g., liver) and you must use frozen sections, a rigorous biotin blocking protocol or a switch to a polymer-based detection system is highly advisable.
The Scientist's Toolkit: Essential Reagents and Solutions
The table below lists key reagents required for the protocols described in this article.
| Reagent / Kit | Function / Purpose |
|---|---|
| Avidin & Biotin Solutions | The core reagents for the two-step blocking procedure. Avidin binds endogenous biotin, and free biotine blocks avidin's remaining binding sites [9] [1]. |
| Commercial Avidin/Biotin Blocking Kits | Pre-optimized, ready-to-use reagents that ensure consistent performance in blocking endogenous biotin [9] [1]. |
| Polymer-Based Detection Kits | A detection system that avoids biotin-streptavidin chemistry altogether, eliminating non-specific staining from endogenous biotin [28] [24]. Examples include SignalStain Boost and POLYVIEW PLUS. |
| Streptavidin-HRP/AP | Used in biotin-based detection systems and in the test protocol for detecting endogenous biotin [9]. |
| Hydrogen Peroxide (H₂O₂) | Used to quench endogenous peroxidase activity, which is a separate but common cause of background in HRP-based systems [1] [28]. |
| Normal Serum | Used for general protein blocking to reduce non-specific antibody binding. Performed before the endogenous biotin block [9] [28]. |
Comparative Diagram of IHC Detection Methods
The choice of detection method is pivotal in managing endogenous biotin. The following diagram compares the workflows and components of the biotin-based LSAB method and the modern polymer-based method.
Step-by-Step Protocols: Effective Biotin Blocking Techniques for Reliable IHC
In immunohistochemistry (IHC), the exceptional affinity of streptavidin for biotin is widely exploited in detection systems to amplify signals and enhance sensitivity. However, many tissues naturally contain endogenous biotin, which can bind to streptavidin-based detection reagents, leading to high background staining and false-positive results. This is particularly prevalent in tissues such as liver, kidney, mammary gland, and adipose tissue [1]. The standard two-step blocking protocol using unlabeled streptavidin followed by free biotin is a critical pretreatment step designed to neutralize this endogenous activity, ensuring that subsequent staining accurately reflects the target antigen [1] [9].
Core Protocol and Principles
The following diagram illustrates the logical sequence and mechanism of the two-step blocking procedure.
Detailed Protocol Steps
The two-step procedure is designed to systematically occupy all endogenous biotin and all potential binding sites on the streptavidin molecule [1] [9].
- Application of Unlabeled Streptavidin: The tissue section is incubated with an excess of unlabeled streptavidin for approximately 15 minutes at room temperature. This allows the streptavidin to bind to all available endogenous biotin molecules in the tissue [1] [9].
- Rinsing: A brief rinse with PBS is performed to remove any unbound streptavidin [9].
- Application of Free Biotin: The section is then incubated with an excess of free biotin for another 15 minutes at room temperature. This free bioin floods the remaining unoccupied biotin-binding sites on the streptavidin molecules that are now attached to the endogenous biotin [1] [9].
- Final Rinse and Continuation: After a final brief PBS rinse, the standard IHC protocol can proceed with primary antibody incubation [9].
When is Blocking Necessary?
Blocking is highly recommended when using avidin-biotin complex (ABC) or Labeled Streptavidin-Biotin (LSAB) detection systems, especially for tissues known to be rich in endogenous biotin [1] [9]. Heat-induced epitope retrieval (HIER) can increase the detectability of endogenous biotin, making this blocking step even more critical in protocols that include HIER [1].
Troubleshooting Guide
Despite being a standard method, researchers can encounter issues. The table below outlines common problems and their solutions.
| Problem | Possible Cause | Recommended Solution |
|---|---|---|
| High background after blocking | Incomplete blocking due to expired or depleted reagents [9] | Prepare fresh avidin/biotin solutions or use a new commercial blocking kit [9]. |
| Tissue with extremely high biotin levels (e.g., liver, kidney) [1] | Consider switching to a polymer-based detection system that does not rely on biotin-streptavidin chemistry [9]. | |
| Persistent nonspecific staining | Nonspecific binding from lectins interacting with avidin [7] | Use streptavidin or NeutrAvidin (deglycosylated avidin) instead of avidin for blocking and detection, as they are not glycosylated [1] [7]. |
| Background is from endogenous enzymes, not biotin [7] | Perform appropriate controls: quench endogenous peroxidases with 3% H₂O₂ [7] [4] or inhibit phosphatases with levamisole [1] [7]. |
Frequently Asked Questions (FAQs)
Q1: Why are two separate steps (streptavidin then biotin) required for effective blocking? The two-step process ensures complete neutralization. The first step (streptavidin) binds all endogenous biotin in the tissue. The second step (free biotin) saturates the remaining empty binding sites on the streptavidin molecules just applied, preventing them from later binding your detection reagents [1] [9].
Q2: At what point in the IHC protocol should I perform the endogenous biotin block? The blocking step should be performed immediately after the normal serum blocking step and before incubation with the primary antibody. This is because the antigen retrieval procedure (if used) can expose additional endogenous biotin, and it is crucial to block these sites before any biotinylated antibodies are introduced [9].
Q3: How can I test if my tissue has problematic levels of endogenous biotin? You can perform a simple control experiment: incubate your tissue section directly with the ABC complex or streptavidin-HRP, followed by your chromogen (e.g., DAB), omitting the primary antibody. Be sure to quench endogenous peroxidase activity first with H₂O₂ to rule out its contribution. Any resulting staining indicates the presence of detectable endogenous biotin that requires blocking [9].
Research Reagent Solutions
A selection of key reagents for implementing this protocol is summarized in the table below.
| Reagent Type | Function | Examples & Notes |
|---|---|---|
| Streptavidin | First-step blocker; binds endogenous biotin. | Recombinant streptavidin is preferred due to its near-neutral pI and lack of glycosylation, which minimizes nonspecific binding [1] [11]. |
| Biotin | Second-step blocker; saturates remaining streptavidin binding sites. | Free biotin (Vitamin H); available in high-purity formulations from chemical suppliers [1]. |
| Commercial Blocking Kits | Pre-formulated, ready-to-use reagents for convenience and reliability. | Streptavidin/Biotin Blocking Kit (Vector Labs, SP-2002) [29]. Endogenous Biotin–Blocking Kit (Thermo Fisher, E21390) [1]. |
| Alternative Biotin-Binding Proteins | Can be used for blocking and/or detection to reduce background. | NeutrAvidin Protein: Deglycosylated avidin with a neutral pI, offers the lowest nonspecific binding [1] [11]. |
A technical guide for researchers navigating biotin-binding proteins in immunohistochemistry.
In immunohistochemistry (IHC), achieving a high signal-to-noise ratio is paramount. When using avidin-biotin systems, background staining can arise from two primary sources:
- Endogenous Biotin: Naturally occurring in tissues like liver, kidney, brain, and mammary glands.
- Non-Specific Protein Binding: Caused by the physicochemical properties of the avidin or streptavidin reagent itself, leading to electrostatic or hydrophobic interactions with tissue components [30] [11].
Selecting the appropriate biotin-binding protein is a critical first step in minimizing these non-specific interactions.
Comparative Analysis of Biotin-Binding Proteins
The table below summarizes the key biochemical characteristics of the three main reagents, which directly influence their tendency to cause background staining [30] [11] [13].
| Feature | Avidin | Streptavidin | NeutrAvidin |
|---|---|---|---|
| Source | Chicken Egg White [11] [13] | Bacterium Streptomyces avidinii [11] [13] | Deglycosylated Avidin [30] [11] |
| Molecular Weight | 67-68 kDa [11] [13] | ~53 kDa [11] [13] | ~60 kDa [11] [31] |
| Isoelectric Point (pI) | 10.0 - 10.5 [30] [11] [13] | ~5-6.8 (near neutral) [11] [13] | ~6.3 (near neutral) [30] [11] |
| Glycosylation | Yes (~10% of mass) [11] [13] | No [11] [13] | No (removed during processing) [30] [11] |
| Biotin Affinity (Kd) | ~10⁻¹⁵ M [13] | ~10⁻¹⁵ M [13] | ~10⁻¹⁵ M [13] |
| Primary Cause of Background | High pI (positive charge) and glycosylation, leading to binding to negatively charged cellular structures and lectins [30] [11]. | RYD sequence, which can mimic the RGD cell-adhesion sequence and bind to integrins [30] [11]. | Lowest overall; minimal charge-based or lectin-based binding [30] [11]. |
| Relative Specificity | Low [11] | High [11] | Highest [11] |
The following diagram illustrates the fundamental differences in how these proteins interact with tissue components, leading to varying levels of non-specific background.
Frequently Asked Questions (FAQs) & Troubleshooting
Q1: Our lab has always used streptavidin successfully. Why should we consider switching to NeutrAvidin?
While streptavidin is a significant improvement over native avidin due to its lack of glycosylation and near-neutral pI, it is not without flaws. Streptavidin contains an RYD sequence that mimics the RGD sequence found in extracellular matrix proteins like fibronectin. This RYD sequence can bind to integrins and related cell-surface molecules on certain tissues, leading to elevated background in specific applications [30]. NeutrAvidin is engineered to lack this RYD sequence, eliminating this particular source of non-specificity and often yielding the cleanest signal [30] [11].
Q2: I am working with a biotin-rich tissue (e.g., liver). What is the most critical step besides reagent choice?
Regardless of your choice of biotin-binding protein, blocking endogenous biotin is non-negotiable. Sensitive detection of biotinylated targets in cells requires the use of specific biotin-blocking agents. A recommended protocol is to use a commercial Endogenous Biotin-Blocking Kit [30]. This typically involves a sequential two-step process:
- Incubation with avidin to saturate endogenous biotin sites.
- Incubation with free biotin to block the remaining binding sites on the avidin from step 1. This process effectively "masks" the endogenous biotin, preventing it from interacting with your detection reagent later.
Q3: The search results mention that avidin was the most effective "chasing agent." Does this mean it's superior for all applications?
No, this is a critical distinction. The "chase effect" study cited refers to a very specific pre-targeting application in in vivo radioimmunoimaging [32] [33]. In this protocol, a biotinylated antibody is allowed to distribute in the animal, after which avidin is injected to rapidly clear any unbound antibody from the bloodstream. Avidin's high pI and positive charge might facilitate faster clearance through the liver in this unique scenario. However, these same properties are precisely what cause high non-specific background in static in situ applications like IHC [11]. Therefore, avidin is not recommended for standard IHC detection.
Q4: My NeutrAvidin solution precipitated after I prepared it in PBS. What went wrong?
This is a common issue related to the isoelectric point (pI). NeutrAvidin has a pI of approximately 6.3 [30] [31]. Phosphate-buffered saline (PBS) has a pH of 7.4, which is close to or above NeutrAvidin's pI. Proteins are least soluble at their pI and can precipitate. To prevent this:
- Reconstitute and dilute the protein first in ultrapure water before diluting to the final working concentration in your assay buffer.
- Consider adding stabilizers like 10% glycerol to the solution, which can aid initial solubilization and prevent precipitation without interfering with biotin binding [31].
Experimental Protocol: Effective Biotin Blocking for IHC
This protocol integrates the selection of a high-specificity protein (NeutrAvidin) with a robust method for blocking endogenous biotin.
Objective: To significantly reduce or eliminate background staining from endogenous biotin and non-specific protein binding in IHC.
Materials:
- Research Reagent Solutions:
- NeutrAvidin Protein: The recommended biotin-binding reagent for detection due to its low nonspecific binding profile [30] [11].
- Endogenous Biotin-Blocking Kit: A commercial kit containing avidin and free biotin (or similar reagents) [30].
- Normal Serum: From the same species as the secondary antibody, to block non-specific protein binding sites.
- Biotinylated Secondary Antibody: Species-specific and validated for IHC.
- NeutrAvidin-Conjugated Reporter: e.g., NeutrAvidin-HRP (horseradish peroxidase) or NeutrAvidin conjugated to a fluorophore [11].
- Appropriate Buffer: e.g., Tris-buffered saline (TBS) or PBS.
Workflow:
The following diagram outlines the key steps in a standard IHC protocol utilizing the Labeled Streptavidin-Biotin (LSAB) method and highlights where critical blocking and detection steps occur.
Detailed Procedure:
Sample Preparation: Proceed with standard tissue sectioning, deparaffinization, rehydration, and antigen retrieval steps suitable for your target antigen.
General Blocking: Incubate sections with normal serum (e.g., 5-10% in buffer) for 30 minutes at room temperature to block non-specific protein-binding sites. Rinse gently with buffer.
Critical - Endogenous Biotin Blocking: Follow the manufacturer's instructions for your specific blocking kit. A typical sequence is:
- Apply the avidin solution for 20-30 minutes. Rinse with buffer.
- Apply the free biotin solution for 20-30 minutes. This step blocks the biotin-binding sites on the avidin from the previous step. Rinse thoroughly with buffer [30].
Primary Antibody Incubation: Apply the primary antibody diluted in an appropriate buffer. Incubate as required (e.g., 1 hour at room temperature or overnight at 4°C). Wash well with buffer.
Secondary Antibody Incubation: Apply the biotinylated secondary antibody for 30-60 minutes at room temperature. Wash well with buffer.
Detection: Apply the NeutrAvidin-conjugated reporter (e.g., NeutrAvidin-HRP) for 30-60 minutes at room temperature. Wash thoroughly with buffer.
Visualization and Mounting: Develop the signal with your chosen chromogenic substrate (e.g., DAB). Counterstain (e.g., with hematoxylin), dehydrate, clear, and mount with a suitable mounting medium.
The Scientist's Toolkit: Essential Reagents
| Item | Function in the Protocol |
|---|---|
| NeutrAvidin Protein | The core detection reagent with the lowest nonspecific binding, conjugated to an enzyme (HRP) or fluorophore for signal generation [30] [11]. |
| Endogenous Biotin-Blocking Kit | Contains the reagents (avidin and free biotin) necessary to sequester endogenous biotin in tissues, preventing false-positive signals [30]. |
| Biotinylated Secondary Antibody | Bridges the primary antibody to the NeutrAvidin reporter, providing signal amplification [11]. |
| Normal Serum | Blocks charged and hydrophobic sites on the tissue to minimize non-specific adsorption of immunoglobulins [11]. |
Frequently Asked Questions (FAQs)
Q1: Why is blocking endogenous biotin necessary in IHC? Some cells or tissues contain endogenous biotin. When using an avidin-biotin detection system, this endogenous biotin can be recognized by the detection reagents, leading to high, non-specific background staining that falsely indicates the presence of an antigen. Blocking it is essential for accurate results [1] [9].
Q2: How do I know if my tissues contain problematic levels of endogenous biotin? Tissues such as kidney, liver, spleen, pancreas, and mammary gland are known to have high levels of endogenous biotin [1] [9] [34]. You can perform a simple test by incubating your tissue sections directly with the ABC complex or streptavidin-HRP followed by a chromogen (like DAB), ensuring you first apply a peroxidase block to rule out background from endogenous peroxidases [9].
Q3: Where in the IHC procedure should the biotin blocking step be performed? The blocking step should occur immediately after normal serum blocking and before incubation with the primary antibody [9] [35]. This is crucial because the antigen retrieval procedure that often precedes antibody incubation can reveal otherwise masked endogenous biotin [1] [9].
Q4: Why are two steps (avidin and then biotin) required for effective blocking? The two-step process ensures complete saturation of all binding sites:
- The first step (avidin solution) binds to endogenous biotin in the tissue.
- The second step (biotin solution) saturates all the remaining biotin-binding sites on the avidin molecules applied in the first step [9] [35]. This sequential blocking prevents any subsequent detection reagents from binding non-specifically.
Q5: I performed biotin blocking, but I still have high background. What should I do? If background persists, consider these troubleshooting actions:
- Check if your avidin/biotin solutions have expired and try fresh reagents [9].
- Ensure you are using adequate washes between the blocking steps and after [9].
- Consider switching to a polymer-based detection system that does not rely on the avidin-biotin interaction, thus eliminating the problem at its source [36] [37].
Troubleshooting Guide
Problem: High Background Staining with Biotin-Based Detection
Potential Causes and Solutions:
Cause 1: Incomplete Blocking of Endogenous Biotin
Cause 2: High Endogenous Biotin Unmasked by Antigen Retrieval
Cause 3: Use of Glycosylated Avidin
Cause 4: Persistently High Background in Sensitive Tissues
Experimental Data and Protocols
Tissue-Specific Endogenous Biotin Activity
The table below summarizes quantitative findings on Endogenous Avidin Binding Activity (EABA) in various renal tissues, illustrating why blocking is critical in certain tissue types [34].
Table 1: Endogenous Avidin Binding Activity (EABA) in Renal Tissues
| Tissue Type | EABA Positivity Without Biotin Blocker | EABA Positivity With Biotin Blocker |
|---|---|---|
| Renal Oncocytoma | 93% (56/60 cores) | 48% (29/60 cores) |
| Normal Renal Tubules | 77% (46/60 cores) | 0% (0/62 cores) |
| Papillary RCC with Granular Features | 35% (19/55 cores) | 10% (5/52 cores) |
| Clear Cell RCC | 0% (0/87 cores) | 0% (0/88 cores) |
Detailed Step-by-Step Biotin Blocking Protocol
This standard protocol can be performed using homemade reagents or commercial kits [9] [35].
Materials:
- Wash buffer (PBS or TBS)
- Avidin or Streptavidin solution (e.g., 0.05% in wash buffer)
- Biotin solution (e.g., 0.005% - 0.01% in wash buffer)
Method:
- After deparaffinization, rehydration, antigen retrieval, and standard serum blocking, ensure sections are surrounded by a hydrophobic barrier.
- Apply avidin/streptavidin solution: Cover the tissue section with the avidin solution and incubate for 15-20 minutes at room temperature [9] [35].
- Rinse: Briefly rinse the slides with wash buffer to remove unbound avidin [9].
- Apply biotin solution: Cover the tissue section with the biotin solution and incubate for 15-20 minutes at room temperature [9] [35].
- Rinse: Briefly rinse the slides with wash buffer to remove unbound biotin [9].
- Proceed with the application of your primary antibody and continue with the rest of your IHC protocol.
Standard IHC Workflow with Integrated Biotin Blocking
The following diagram illustrates the optimal placement of the biotin blocking steps within a standard IHC workflow.
Diagram 1: IHC workflow with biotin blocking.
The Scientist's Toolkit: Key Reagent Solutions
Table 2: Essential Reagents for Blocking Endogenous Biotin
| Reagent | Function & Rationale |
|---|---|
| Avidin or Streptavidin | The first blocking reagent. It binds with high affinity to endogenous biotin present in the tissue, occupying those sites [9] [35]. |
| Free Biotin | The second blocking reagent. It saturates all remaining unoccupied binding sites on the avidin/streptavidin molecules applied in the first step [9] [35]. |
| Avidin/Biotin Blocking Kits | Commercial kits (e.g., from Vector Labs, Thermo Fisher, Abcam) provide ready-to-use, optimized reagents for convenience and reliability [38] [7] [39]. |
| Polymer-Based Detection System | An alternative detection method (e.g., ImmPRESS kits) that does not use avidin-biotin chemistry, thereby completely circumventing issues with endogenous biotin [36] [37]. |
| Streptavidin or NeutrAvidin | Preferred over egg-white avidin in detection systems because they are not glycosylated and therefore do not bind to lectins in tissues, which reduces non-specific background [1] [7]. |
Why is IHC on Biotin-Rich Tissues Problematic?
In immunohistochemistry (IHC), the avidin-biotin complex (ABC) method is a popular detection system due to its high sensitivity and strong signal amplification [24]. However, this method can encounter significant background issues when used on tissues with high levels of endogenous biotin [35] [13].
Endogenous biotin is a small vitamin (Vitamin B7, also known as Vitamin H) that is naturally present in all living cells [13]. Its concentration is notably higher in certain tissues, including the liver, kidneys, spleen, and brain [7] [35] [13]. When you use a biotin-streptavidin detection system on these tissues, the detection reagents bind indiscriminately to the endogenous biotin, causing widespread non-specific staining that obscures the specific signal from your target antigen [7] [24].
This problem can be exacerbated by heat-induced epitope retrieval (HIER), a standard step for formalin-fixed paraffin-embedded (FFPE) tissues, which can further expose endogenous biotin and increase background staining [35].
Protocol Modifications for Biotin-Rich Tissues
Sequential Endogenous Biotin Blocking Protocol
The most effective method to prevent high background is to implement a dedicated biotin blocking step before applying your primary antibody [35]. The following sequential blocking method is recommended.
Materials Required:
- Wash buffer (PBS or TBS)
- Avidin or Streptavidin solution (0.05% in wash buffer)
- Biotin solution (0.01% in wash buffer)
Procedure:
- Incubate with Avidin/Streptavidin: After completing your standard blocking step with normal serum, incubate the tissue sections with the streptavidin or avidin solution for 20 minutes. This step binds to and blocks the endogenous biotin present in the tissue [35].
- Wash: Wash the sections thoroughly with wash buffer. This critical step removes any excess, unbound streptavidin/avidin that would otherwise bind your biotinylated secondary antibody later [35].
- Incubate with Biotin: Incubate the sections with the biotin solution for 20 minutes. This step saturates all the remaining binding sites on the streptavidin/avidin molecules used in step 1 [35].
- Wash Again: Perform another wash with the buffer to remove any excess biotin [35].
- Proceed with IHC: Continue with the application of your primary antibody and the subsequent steps of your standard IHC protocol [35].
Key Modifications and Considerations
- Blocking Reagent Choice: While avidin is effective, streptavidin or NeutrAvidin (deglycosylated avidin) are often preferred. Streptavidin has a neutral isoelectric point and lacks carbohydrate moieties, which significantly reduces non-specific electrostatic and lectin-like binding to tissue, leading to a cleaner background [13] [24].
- Placement in Workflow: The biotin blocking sequence should be performed after normal serum blocking and before the application of the primary antibody [35] [40].
- Commercial Kits: Ready-to-use endogenous biotin blocking kits are available from suppliers like Vector Laboratories and Thermo Fisher Scientific, which provide optimized reagents for this purpose [7] [40].
Comparison of Biotin-Blocking Proteins
| Protein | Source | Key Properties | Advantages for IHC |
|---|---|---|---|
| Avidin | Egg white | Glycosylated, basic pI (~10.5) [13] | Low cost [13] |
| Streptavidin | Streptomyces avidinii bacteria | Non-glycosylated, near-neutral pI [13] | Reduced non-specific binding [13] [24] |
| NeutrAvidin (Deglycosylated Avidin) | Modified avidin | Deglycosylated, near-neutral pI (~6.3) [13] | Minimal non-specific binding, no RYD sequence [13] |
Determining Optimal Blocking Incubation Time
The standard 20-minute incubation for each biotin blocking step is a good starting point. However, for tissues with exceptionally high biotin content or when background persists, you may need to extend the incubation time.
There is no universally defined "extended" time, but optimization is recommended as follows:
- Titration Experiment: Perform the biotin blocking protocol, systematically increasing the incubation time for both the avidin/streptavidin and the biotin steps. For example, test 20, 30, and 45 minutes.
- Control Slides: For each time point, include a negative control (no primary antibody) and a known positive control tissue.
- Evaluate Staining: Examine the negative control slides under a microscope. The optimal extended incubation time is the one that yields the lowest background in the negative control while maintaining strong specific signal in the positive control.
If problems persist despite extended blocking, it indicates that the background is likely due to other factors, such as non-specific antibody binding or issues with the primary antibody concentration [7] [8].
Troubleshooting Common Issues
Problem: High background staining persists after biotin blocking.
- Potential Cause 1: The concentration of your primary antibody is too high, leading to non-specific binding [7] [8].
- Solution: Titrate your primary antibody to find the lowest concentration that provides a strong specific signal [8].
- Potential Cause 2: Insufficient washing after the biotin blocking steps, leaving unbound reagents that contribute to background [35].
- Solution: Ensure thorough washing between steps, typically three washes of 5 minutes each with a buffer containing a mild detergent like Tween-20 (e.g., TBST or PBST) [41] [7].
Problem: Weak or no specific target staining.
- Potential Cause: Over-blocking, which might mask the target antigen or reduce the effectiveness of the biotinylated secondary antibody.
- Solution: Ensure you are not using outdated or improperly stored blocking reagents. Re-titrate the primary and secondary antibodies to ensure their potency [8]. Verify that the antigen retrieval method is optimal for your target [41] [8].
Problem: High background is only a problem in certain tissues (liver, kidney) but not others.
- Potential Cause: This is a classic sign of endogenous biotin interference, as these tissues are naturally biotin-rich [7] [13].
- Solution: Apply the sequential biotin blocking protocol specifically when working with these problematic tissues. You may not need it for all tissue types.
Alternative Detection Methods
If background from endogenous biotin continues to be unmanageable, consider switching to a detection system that does not rely on the biotin-streptavidin interaction.
Polymer-based detection systems are an excellent alternative. These systems use a dextran polymer backbone conjugated directly to multiple secondary antibodies and enzyme molecules (e.g., HRP) [24].
- Advantages: They completely bypass the issue of endogenous biotin, often have higher sensitivity, and typically require a simpler two-step protocol [24].
- Disadvantage: These kits can be more expensive than ABC-based methods [24].
Visualization of IHC Detection Methods
Frequently Asked Questions
Q1: Can I skip endogenous biotin blocking if I'm not using a biotin-based detection system? Yes. Endogenous biotin blocking is only necessary when using detection systems that involve biotin and streptavidin/avidin, such as the ABC or LSAB methods. If you use a direct detection method or a polymer-based system, endogenous biotin will not interfere [24].
Q2: How can I identify if my background is caused by endogenous biotin? Run a control where you omit the primary antibody but complete the rest of your standard ABC protocol. If this control slide shows significant staining, it indicates non-specific background signal is present, which, in biotin-rich tissues, is very likely due to endogenous biotin [7].
Q3: Does the duration of formalin fixation affect endogenous biotin? While formalin fixation can reduce the availability of endogenous biotin compared to frozen sections, it does not eliminate it. Heat-induced antigen retrieval (HIER) performed on FFPE tissues can reverse this effect and make endogenous biotin accessible again, leading to background [35] [24].
The Scientist's Toolkit: Key Reagents
| Reagent | Function in Biotin Blocking | Example Suppliers |
|---|---|---|
| Streptavidin (Blocking Solution) | Binds to and blocks endogenous biotin in the tissue. | Vector Labs, Thermo Fisher Scientific [7] [40] |
| Biotin (Blocking Solution) | Saturates the binding sites of the streptavidin used in the first step. | Vector Labs, Thermo Fisher Scientific [7] [40] |
| Avidin/Biotin Blocking Kit | A commercial kit containing pre-optimized solutions for the sequential blocking protocol. | Vector Laboratories [40] |
| NeutrAvidin | A deglycosylated form of avidin with minimal non-specific binding; can be used in blocking or detection. | Thermo Fisher Scientific [7] [13] |
| Polymer-Based IHC Detection Kit | A biotin-free detection system that eliminates the problem of endogenous biotin. | Various (e.g., Enzo Life Sciences) [24] |
Immunohistochemistry (IHC) is a critical technique for visualizing protein distribution and localization within tissue samples, providing essential diagnostic, prognostic, and predictive information in both research and clinical settings [42] [43]. However, a significant challenge in IHC staining arises from the presence of endogenous biotin in certain tissues, which can bind to avidin or streptavidin components in detection systems and cause high background staining, resulting in a poor signal-to-noise ratio [7] [44].
This technical guide explores the implementation of polymer-based detection systems as a superior alternative to traditional biotin-based methods. By eliminating the avidin-biotin interaction entirely, these systems provide enhanced sensitivity and specificity while effectively circumventing the problem of endogenous biotin interference [44] [45].
Detection System Comparison
IHC detection systems can be broadly categorized into direct and indirect methods, with various amplification approaches available [46] [43]. The table below summarizes the key detection systems and their characteristics:
| Detection System | Key Components | Sensitivity | Endogenous Biotin Interference | Best Use Cases |
|---|---|---|---|---|
| Direct [46] [43] | Labeled primary antibody | Low | No | Highly expressed antigens; multiplexing |
| Indirect [46] [43] | Unlabeled primary + labeled secondary | Medium | No | Routine staining; general use |
| Avidin-Biotin Complex (ABC) [44] | Biotinylated secondary + pre-formed Avidin-Biotin-Enzyme complex | High | Yes | Antigens with low expression |
| Labeled Streptavidin-Biotin (LSAB) [44] | Biotinylated secondary + enzyme-labeled streptavidin | High | Yes | Antigens with low expression; requires better tissue penetration |
| Polymer-Based [44] [45] | Secondary antibodies + enzyme directly conjugated to a polymer backbone | Highest | No | Low-expressing antigens; tissues with high endogenous biotin |
Polymer-based detection systems offer significant advantages by incorporating multiple secondary antibody and enzyme molecules directly onto an inert polymer backbone, eliminating the need for biotinylation entirely [44]. This approach not only avoids endogenous biotin interference but also provides superior sensitivity due to the high ratio of enzyme molecules per primary antibody [45].
Troubleshooting Guide: Addressing Common IHC Challenges
High Background Staining
Problem: High background staining resulting in poor signal-to-noise ratio.
| Potential Cause | Symptoms | Recommended Solution |
|---|---|---|
| Endogenous Biotin [7] [44] | High background in tissues like liver, kidney, and spleen | Switch to a polymer-based detection system to eliminate biotin-based interference [45] |
| Endogenous Enzymes [7] | Background in samples incubated with substrate alone | Quench endogenous peroxidases with 3% H2O2 in methanol or water prior to primary antibody incubation [7] |
| Primary Antibody Concentration [7] | Diffuse, non-specific staining across tissue | Titrate primary antibody to determine optimal concentration; excessive antibody increases non-specific binding [7] |
| Inadequate Blocking [47] | Uniform background across entire section | Extend blocking time or increase concentration of blocking serum (up to 10%) [7] |
Weak or No Staining
Problem: Little to no specific staining of the target antigen.
| Potential Cause | Symptoms | Recommended Solution |
|---|---|---|
| Antigen Masking [45] | Lack of staining in positive control tissue | Optimize antigen retrieval method; use microwave heating instead of water bath [45] |
| Antibody Potency [7] | Previously working antibody now shows weak signal | Test antibody on known positive control; ensure proper storage conditions and avoid repeated freeze-thaw cycles [7] |
| Inadequate Detection System [45] | Weak signal despite confirmed antigen presence | Switch to more sensitive polymer-based detection reagents [45] |
| Improper Sample Storage [45] | Spotty or uneven staining | Use freshly cut sections; store slides at 4°C if necessary and ensure sections remain hydrated [45] |
Experimental Protocol: Implementing Polymer-Based Detection
This protocol for formalin-fixed paraffin-embedded (FFPE) tissue sections utilizes polymer-based detection to avoid endogenous biotin interference.
Sample Preparation and Antigen Retrieval
Deparaffinization and Hydration:
- Incubate slides sequentially in:
- Xylene I (5-10 minutes)
- Xylene II (5-10 minutes)
- 100% ethanol I (1-3 minutes)
- 100% ethanol II (1-3 minutes)
- 95% ethanol (1-3 minutes)
- 80% ethanol (1-3 minutes)
- 70% ethanol (1-3 minutes)
- Deionized water (5 minutes) [47]
- Critical: Use fresh xylene to prevent inadequate deparaffinization, which causes spotty background [45].
- Incubate slides sequentially in:
Antigen Retrieval:
- Perform Heat-Induced Epitope Retrieval (HIER) using a microwave oven with 10 mM sodium citrate buffer (pH 6.0) or EDTA buffer (pH 8.0-9.0) [48] [45].
- Heat slides in retrieval solution for 8-15 minutes, maintaining a sub-boiling temperature [7].
- Cool slides for 20-30 minutes at room temperature.
- Note: The optimal retrieval buffer varies by antibody target; consult manufacturer's datasheet [48].
Immunostaining with Polymer Detection
Endogenous Peroxidase Blocking:
Protein Blocking:
- Incubate sections with protein-blocking solution (e.g., 5% normal serum or commercial protein block) for 30 minutes at room temperature [45].
- Do not rinse; gently tap off excess blocking solution.
Primary Antibody Incubation:
Polymer-Based Detection:
Chromogenic Development:
- Prepare DAB substrate solution immediately before use.
- Apply DAB to sections and monitor color development under a microscope (typically 30 seconds to 10 minutes).
- Stop reaction by immersing slides in deionized water when specific signal is clear and background remains low [47].
Counterstaining and Mounting:
Visual Guide: Polymer-Based Detection Workflow
The following diagram illustrates the core components and mechanism of a polymer-based detection system, highlighting how it avoids biotin-related issues.
Frequently Asked Questions (FAQs)
Q1: In which tissues is endogenous biotin most problematic? Tissues with high metabolic activity, particularly liver and kidney, contain significant endogenous biotin that causes high background staining [7] [44]. Frozen sections also exhibit higher endogenous biotin levels than FFPE sections [44].
Q2: Can I use a biotin block instead of switching detection systems? Yes, endogenous biotin can be blocked using commercial avidin/biotin blocking solutions [7]. However, switching to a polymer-based system is often more effective and efficient, as it eliminates the biotin issue entirely and simplifies the protocol by removing steps [44] [45].
Q3: Are polymer-based detection systems suitable for multiplex IHC? For fluorescent multiplexing, polymer systems are ideal as they avoid biotin cross-reactivity. For chromogenic multiplexing, polymer systems work best when antigens are located in different cellular compartments, as color mixing from co-localized antigens can obscure results [44].
Q4: Why does my polymer-based detection still show high background? High background with polymer systems typically indicates issues unrelated to biotin. Check: (1) Primary antibody concentration (too high), (2) Inadequate blocking (increase serum to 10%), (3) Insufficient washing (wash 3x5 min with TBST after each step), or (4) Inadequate deparaffinization (use fresh xylene) [7] [45].
Q5: How do I validate a new polymer-based detection system? Follow established validation guidelines. For predictive markers, test a minimum of 20 positive and 20 negative cases. Achieve at least 90% concordance with expected results. Include appropriate controls to monitor for sensitivity and specificity [49].
Research Reagent Solutions
The following table outlines essential reagents for implementing polymer-based detection systems, with recommended specifications for optimal performance.
| Reagent Category | Specific Examples | Function & Selection Criteria |
|---|---|---|
| Polymer Detection Kits | SignalStain Boost IHC Detection Reagents [45] | HRP-conjugated polymers providing superior sensitivity without biotin. Select based on host species of primary antibody. |
| Antigen Retrieval Buffers | Sodium Citrate (pH 6.0), EDTA (pH 8.0-9.0) [48] [45] | Unmask epitopes cross-linked by fixation. Citrate is a common starting point; EDTA may be needed for certain phospho-epitopes. |
| Antibody Diluents | Commercial antibody diluents (e.g., SignalStain Antibody Diluent) [45] | Maintain antibody stability and minimize non-specific background during incubation. |
| Chromogenic Substrates | DAB (3,3'-Diaminobenzidine) [47] [45] | Produce an insoluble brown precipitate at antigen sites. Provides permanent staining resistant to fading. |
| Blocking Sera | Normal Goat Serum, Normal Horse Serum [7] [45] | Reduce non-specific background by blocking reactive sites on tissue. Should match the species of the secondary antibody. |
Solving Persistent Background: Advanced Troubleshooting for Endogenous Biotin Issues
FAQs: Identifying and Resolving Endogenous Biotin Issues
What is endogenous biotin, and why does it cause background staining in IHC?
Endogenous biotin is a naturally occurring vitamin (B7) and coenzyme present in mammalian tissues. It causes high background staining in IHC because it is recognized by the streptavidin or avidin components used in biotin-based detection systems (e.g., ABC or LSAB methods). This results in non-specific staining that falsely indicates the presence of the target antigen [1] [24].
Tissues particularly rich in endogenous biotin include [1] [50] [4]:
- Liver
- Kidney
- Adipose tissue
- Mammary gland
- Brain
- Lung
- Heart
This interference is often more pronounced in frozen sections compared to formalin-fixed, paraffin-embedded (FFPE) tissues, though heat-induced epitope retrieval (HIER) can increase its detectability in FFPE samples [1].
How can I confirm that background staining is due to endogenous biotin?
Perform a simple control experiment. Omit the primary antibody from your standard IHC protocol and incubate the tissue section only with the streptavidin-HRP complex, followed by your chromogenic substrate (e.g., DAB) [1] [50].
- If a colored precipitate forms: The staining is due to endogenous biotin (or other molecules that bind streptavidin).
- If no staining occurs: The background is likely from another source, such as endogenous enzymes or non-specific antibody binding [7].
What is the most effective method to block endogenous biotin?
The most reliable method is a sequential two-step blocking procedure using an avidin-biotin blocking kit [1] [4].
- Avidin Incubation: Coat the sample with an excess of free avidin or streptavidin. This will bind to all endogenous biotin present in the tissue [1].
- Biotin Incubation: Add an excess of free biotin. This saturates all remaining binding sites on the avidin/streptavidin molecules used in the first step, preventing the subsequent detection reagents from binding [1].
This process ensures that endogenous biotin is "masked" and unavailable to the detection system.
My background is still high after biotin blocking. What else could it be?
High background staining can have several causes. It's crucial to systematically eliminate other common artifacts.
- Endogenous Enzymes: Peroxidases and phosphatases in tissues can react with chromogenic substrates, producing a signal indistinguishable from your target.
- Non-Specific Antibody Binding: The primary or secondary antibody may bind to charged sites or Fc receptors on tissue proteins.
- Hydrophobic Interactions: Antibodies can stick non-specifically to tissue.
- Solution: Include a gentle detergent like 0.05% Tween-20 in your wash buffers and antibody diluents [8].
- Polymer-Based Detection: Consider switching to a biotin-free, polymer-based detection system. These systems use a dextran polymer backbone conjugated directly to secondary antibodies and enzymes, completely avoiding the issue of endogenous biotin and often providing superior sensitivity [51] [24] [4].
Are some detection methods better for biotin-rich tissues?
Yes. While the Avidin-Biotin Complex (ABC) and Labeled Streptavidin Biotin (LSAB) methods are highly sensitive, they are susceptible to interference from endogenous biotin. A modern and effective alternative is to use polymer-based detection systems [24].
Comparison of IHC Detection Methods and Biotin Interference:
| Detection Method | Basis of Detection | Susceptibility to Endogenous Biotin | Key Advantages |
|---|---|---|---|
| Polymer-Based | Enzyme-linked polymer backbone bound to secondary antibody [24]. | Very Low (Biotin-free system) [24]. | Fast 2-step protocol; high sensitivity; no need for biotin blocking [51] [24]. |
| LSAB | Streptavidin conjugated to enzyme binds biotinylated secondary antibody [24]. | High [24]. | High sensitivity; reduced non-specific binding vs. ABC [24]. |
| ABC | Pre-formed complex of avidin and biotinylated enzyme binds biotinylated secondary antibody [24]. | High [24]. | Very high signal amplification due to large enzyme complexes [24]. |
Can the fixation process affect endogenous biotin detection?
Yes, the sample preparation method influences background. Frozen (cryostat) sections typically show higher levels of detectable endogenous biotin because the tissue is not subjected to the same processing as FFPE tissue, which may reduce biotin availability [1]. Furthermore, the heat from antigen retrieval (HIER) can unmask or increase the detection of endogenous biotin in FFPE samples. Always ensure your negative control samples undergo the same HIER process as your test samples to account for this [1].
The Scientist's Toolkit: Key Reagents for Blocking
| Reagent | Function | Example Application |
|---|---|---|
| Avidin/Biotin Blocking Kit | Sequentially blocks endogenous biotin and avidin binding sites to prevent non-specific detection [1] [4]. | Essential pre-treatment for biotin-based detection (ABC, LSAB) in liver, kidney, or frozen sections [1]. |
| Hydrogen Peroxide (H2O2) | Quenches endogenous peroxidase activity to reduce background in HRP-based detection [7] [4]. | Incubate rehydrated tissue sections with 3% H2O2 for 10-15 minutes before primary antibody incubation [51]. |
| Levamisole | Inhibits endogenous alkaline phosphatase (AP) activity [7] [4]. | Add to AP substrate solution at 1 mM final concentration to block endogenous AP in intestine, kidney, or bone tissue [4]. |
| Normal Serum | Blocks charged sites and Fc receptors to minimize non-specific antibody binding [7] [4]. | Use 5-10% serum from the host species of the secondary antibody for 30-60 minutes before primary antibody application [7] [51]. |
| Polymer-Based Detection Reagents | Biotin-free system for high-sensitivity detection; eliminates endogenous biotin interference [51] [24]. | Ideal direct alternative to ABC/LSAB methods for biotin-rich tissues; often a faster 2-step protocol [24]. |
Experimental Protocol: Diagnostic Test for Endogenous Biotin
This protocol helps you confirm whether high background is caused by endogenous biotin.
Objective: To detect the presence and distribution of endogenous biotin in a tissue section.
Materials:
- Deparaffinized and rehydrated FFPE tissue sections OR fixed frozen sections.
- Appropriate buffer (e.g., PBS or TBS).
- Streptavidin conjugated to Horseradish Peroxidase (HRP).
- Chromogenic substrate for HRP (e.g., DAB).
- Counterstain (e.g., Hematoxylin).
- Mounting medium.
Method:
- Antigen Retrieval: Perform your standard Heat-Induced Epitope Retrieval (HIER) if using FFPE sections [1].
- Blocking (Optional): Do not perform an endogenous biotin block for this diagnostic test.
- Incubation with Streptavidin-HRP: Apply the streptavidin-HRP conjugate (at the same dilution you would use in your full IHC protocol) directly to the tissue section. Incubate for 15-30 minutes at room temperature [50].
- Washing: Wash the section thoroughly with buffer.
- Chromogenic Development: Incubate with DAB substrate according to the manufacturer's instructions. Monitor the development of a brown precipitate [50].
- Counterstaining and Mounting: Rinse, counterstain with hematoxylin, dehydrate, clear, and mount.
Interpretation:
- Positive Result: Brown staining indicates the presence of significant endogenous biotin. You must incorporate a biotin-blocking step or switch to a polymer-based system for your experiments.
- Negative Result: A lack of staining suggests endogenous biotin is not a major source of background, and you should investigate other causes like endogenous peroxidase or antibody concentration [7] [50].
Decision Workflow for Diagnosing IHC Background
The following diagram outlines the systematic process for determining the source of high background staining in IHC experiments.
Diagram Title: Systematic Workflow for Diagnosing IHC Background Staining.
Optimizing Reagent Concentrations and Incubation Times for Complete Blocking
A technical support guide for immunohistochemistry researchers
Why is blocking endogenous biotin critical in my IHC experiment?
Endogenous biotin, a vitamin and coenzyme naturally present in tissues like liver, kidney, adipose tissue, and mammary gland, can bind to streptavidin-based detection systems. This interaction generates high background staining and false-positive signals that obscure your specific antigen detection [1]. The problem is often most pronounced in frozen sections and can be exacerbated by heat-induced epitope retrieval (HIER) methods [1].
What are the optimal reagent concentrations and incubation times for complete blocking?
For effective endogenous biotin blocking, use a sequential two-step method. The following table summarizes the optimized parameters:
| Step | Reagent | Concentration | Incubation Time | Temperature | Purpose |
|---|---|---|---|---|---|
| 1 | Avidin or Streptavidin | Sufficient to coat all endogenous biotin sites [1] | 15-20 minutes [39] | Room Temperature [39] | Saturates endogenous biotin binding sites |
| 2 | Free Biotin | Excess concentration [1] | 15-20 minutes [39] | Room Temperature [39] | Blocks remaining binding sites on the avidin/streptavidin molecules |
This sequential approach ensures all endogenous biotin is bound, and all unoccupied binding sites on the strept(avidin) molecules are filled [1]. Commercial blocking kits typically include these reagents in pre-optimized concentrations [1] [39].
What is the detailed protocol for implementing this blocking method?
The blocking procedure should be integrated into your IHC protocol after peroxidase quenching and serum blocking, but before primary antibody incubation [39].
- Following peroxidase quenching with 3% H₂O₂ for 5-15 minutes and washing [39], block non-specific hydrophobic interactions by applying a serum blocking reagent for 15 minutes [39].
- Apply the avidin/streptavidin blocking reagent (from a commercial kit or prepared solution) directly to the tissue section. Ensure complete coverage and incubate for 15 minutes at room temperature [39].
- Without rinsing, apply the biotin blocking reagent. Incubate for another 15 minutes at room temperature [39].
- Rinse the sample with wash buffer before proceeding to primary antibody incubation [39].
How can I validate the effectiveness of my biotin blocking?
Include a negative control where the primary antibody is omitted. Process this control slide through the entire IHC protocol, including the blocking steps and detection system [39] [52]. Effective blocking is confirmed by the absence of staining in this control. Persistent staining indicates incomplete blocking or other background issues [52].
What essential reagents and kits are needed for this procedure?
| Reagent / Kit | Function | Example Product |
|---|---|---|
| Avidin/Biotin Blocking Kit | Pre-packaged optimized reagents for sequential blocking | Endogenous Biotin-Blocking Kit [1], ReadyProbes Avidin/Biotin Blocking Solution [7] |
| Free Streptavidin | Binds to endogenous biotin in the first blocking step | Various suppliers |
| Free Biotin | Saturates remaining binding sites in the second blocking step | Various suppliers |
| Normal Serum | Reduces non-specific antibody binding (should be from the secondary antibody host species) [53] | Normal Goat Serum, Normal Donkey Serum |
| Peroxidase Block | Quenches endogenous peroxidase activity (critical for HRP-based detection) | 3% H₂O₂ in methanol or water [7] [52] |
My background is still high after blocking. What should I do?
High background after attempted blocking suggests the need for further optimization. Follow this troubleshooting pathway to identify and resolve the issue:
For tissues exceptionally rich in endogenous biotin, consider switching from an avidin-biotin complex (ABC) detection system to a polymer-based detection system that does not rely on biotin-streptavidin chemistry, thus eliminating the problem at its source [52].
Why does high background staining often appear after Heat-Induced Epitope Retrieval (HIER), and how is this related to endogenous biotin?
Heat-Induced Epitope Retrieval (HIER) is a critical step for unmasking antigens in formalin-fixed, paraffin-embedded (FFPE) tissues. However, this process can also activate or expose endogenous tissue elements that interfere with detection systems. A primary cause of high background following HIER is the revelation of endogenous biotin [1].
Biotin is a vitamin and coenzyme present in many cells, with particularly high concentrations in tissues such as liver, kidney, mammary gland, and adipose tissue [1]. Under normal conditions, this endogenous biotin may not be accessible to the detection system. HIER, which often involves heating slides in a buffer solution, can disrupt cellular structures and release this biotin. In avidin-biotin-based detection systems, the streptavidin or avidin component then binds indiscriminately to these exposed endogenous biotin sites throughout the tissue, creating widespread, nonspecific background staining instead of a clean, specific signal at the target antigen [1] [4].
How can I systematically troubleshoot high background staining following HIER?
A structured approach is essential for identifying and resolving the root cause of high background. The flowchart below outlines a step-by-step diagnostic process, from simple checks to more complex solutions.
What is the definitive protocol for validating and blocking endogenous biotin?
For any detection system where a biotin-binding protein is a component, endogenous biotin should be blocked to avoid recognition of endogenous biotin along with the target antigen [1]. The following table provides a detailed, step-by-step protocol for this blocking process.
Table 1: Detailed Protocol for Endogenous Biotin Blocking
| Step | Reagent/Procedure | Purpose & Mechanism | Incubation & Technical Notes |
|---|---|---|---|
| 1. Preparation | Apply excess unlabeled streptavidin or avidin. | Binds to all accessible endogenous biotin molecules in the tissue, saturating the biotin-binding sites on the endogenous biotin [1] [4]. | Incubate for 10-15 minutes at room temperature. Using non-glycosylated streptavidin or NeutrAvidin over avidin is recommended to avoid lectin binding [1] [7]. |
| 2. Saturation | Apply excess free biotin. | Binds to all remaining unoccupied biotin-binding sites on the strept(avidin) molecules from Step 1, preventing subsequent detection reagents from attaching [1] [4]. | Incubate for 10-15 minutes at room temperature. This two-step sequence ensures the system is fully blocked. |
| 3. Validation | Use a no-primary-antibody control alongside the test sample. | Confirms the success of the blocking procedure. The control should show no specific staining, indicating background is eliminated [54]. | Process the control slide through the entire IHC protocol post-blocking, omitting only the primary antibody. |
| 4. Alternative | Switch to a polymer-based detection system. | Avoids the use of biotin-streptavidin chemistry entirely, eliminating the problem at its source [7] [54]. | Ideal for tissues exceptionally rich in endogenous biotin where blocking is insufficient. |
What other common causes of high background should be considered and controlled?
While endogenous biotin is a major culprit, other interfering substances require their own specific blocking strategies. The table below summarizes these key causes and their solutions.
Table 2: Troubleshooting Other Common Causes of High Background
| Cause of Background | Validation Test | Blocking or Corrective Strategy |
|---|---|---|
| Endogenous Peroxidase Activity (e.g., in RBCs, liver, kidney) | Incubate a tissue section with the DAB substrate alone. Development of a brown precipitate indicates presence of active peroxidases [1] [7]. | Quench with 0.3% hydrogen peroxide (in methanol or water) for 10-15 minutes. Higher concentrations (e.g., 3%) can be used but may be more damaging to tissues and antigens [1] [7] [55]. |
| Endogenous Alkaline Phosphatase (AP) (e.g., in intestine, kidney, bone) | Incubate a tissue section with the BCIP/NBT substrate alone. Development of a blue/purple precipitate indicates presence of endogenous AP [1] [4]. | Inhibit by adding 1 mM levamisole to the substrate solution. Levamisole inhibits most endogenous AP isoenzymes but does not affect calf intestinal AP, commonly used in detection systems [1] [4]. |
| Non-Specific Antibody Binding | Use a control with secondary antibody only. Staining here indicates cross-reactivity or nonspecific binding of the secondary antibody [7] [54]. | Block with 2-10% normal serum from the species in which the secondary antibody was raised. Ensure the primary antibody concentration is optimal—too high can cause background [7] [55]. |
The Scientist's Toolkit: Key Research Reagent Solutions
The following reagents are essential for effectively implementing the control strategies discussed in this guide.
Table 3: Essential Reagents for Blocking and Validation
| Reagent | Function in Addressing Post-HIER Background |
|---|---|
| Streptavidin (unlabeled) | The first reagent in the sequential block for endogenous biotin, it binds directly to exposed tissue biotin [1]. |
| Biotin (free, unlabeled) | The second reagent in the sequential block, it saturates all remaining binding sites on the streptavidin applied in the first step [1] [4]. |
| Hydrogen Peroxide (H₂O₂) | Used as an oxidizing agent to quench the activity of endogenous peroxidases, preventing them from reacting with the chromogenic substrate [1] [7]. |
| Levamisole | An alkaline phosphatase inhibitor that is added to the substrate solution to suppress signal from endogenous phosphatases without affecting the reporter enzyme [1] [4]. |
| Normal Serum | Used as a protein block to occupy non-specific binding sites on the tissue, minimizing non-specific attachment of antibodies. Should be from the same species as the secondary antibody [7] [4]. |
| Polymer-Based Detection System | A non-biotin, non-avidin detection system that avoids the issue of endogenous biotin entirely, serving as both a validation tool and a primary method for problematic tissues [7] [54]. |
Combining Biotin Blocking with Other Background Reduction Techniques
FAQs on Biotin Blocking and Background Reduction
What is endogenous biotin, and why does it cause background in IHC?
Endogenous biotin is a vitamin and coenzyme naturally present in many tissues, particularly rich in organs like the liver, kidney, mammary gland, and adipose tissue [1]. In IHC, detection systems often use the high-affinity interaction between biotin and proteins like streptavidin (the Avidin-Biotin Complex or ABC method). When these biotin-binding proteins are introduced, they can bind to the endogenous biotin in the tissue, generating a false-positive, non-specific background signal that obscures the specific antigen detection [1].
When should I use a biotin block, and what are my alternatives?
You should strongly consider a biotin block when using a biotin-based detection system on tissues known to be high in endogenous biotin [56]. A reliable alternative is to switch to a polymer-based detection system, which does not rely on biotin-streptavidin chemistry and therefore circumvents the problem entirely [56]. Polymer-based systems are often more sensitive and are recommended to avoid the issue of endogenous biotin [56].
My background is still high after biotin blocking. What else should I check?
High background after biotin blocking is often due to other common issues. The most frequent culprits and solutions include [8]:
- Primary Antibody Concentration is Too High: Titrate your primary antibody to find the optimal dilution that gives a strong specific signal with low background.
- Insufficient Blocking: Ensure you are performing a protein block with normal serum from the same species as your secondary antibody to prevent non-specific antibody binding [8].
- Inadequate Washing: Wash slides thoroughly 3 times for 5 minutes with a buffer containing a mild detergent like Tween-20 after each incubation step [8] [56].
- Endogenous Peroxidase Activity: If using an HRP-based detection system, quench with a 3% hydrogen peroxide solution for 10 minutes before applying the primary antibody [56].
What is the difference between a negative control and an isotype control?
Both are essential for interpreting your results, but they test for different things [57]:
- Negative Tissue Control: This is tissue known not to express the target protein. Any staining here indicates non-specific binding or a problem with the protocol.
- Isotype Control: This control uses an antibody that matches the class and host species of your primary antibody but targets an irrelevant antigen. It is processed at the same concentration as your primary antibody. Staining with the isotype control indicates that your primary antibody is binding non-specifically to tissue components.
Troubleshooting Guide: High Background Staining
This guide addresses high background even after considering biotin blocking. Follow these steps to diagnose and resolve the issue.
Step 1: Systematically Check Your Controls
First, review your control slides to pinpoint the source of the background.
| Control Type | Expected Result | What a Failed Control Indicates |
|---|---|---|
| No Primary Antibody Control [57] | No staining | Signal indicates non-specific binding of your secondary antibody or detection system. |
| Isotype Control [57] | No staining | Signal indicates non-specific binding (e.g., Fc-receptor mediated) by your primary antibody. |
| Negative Tissue Control [57] | No staining in negative areas | Signal indicates general non-specific binding or that the tissue is not truly negative. |
| Positive Tissue Control [57] | Strong specific staining | No signal indicates a fundamental problem with your protocol or reagent activity. |
Step 2: Optimize Key Protocol Parameters
If your controls point to a protocol issue, adjust these key parameters.
| Problem Area | Specific Issue | Recommended Action |
|---|---|---|
| Antibody & Detection | Primary antibody concentration too high [8] | Perform a titration experiment to find the optimal dilution. |
| Secondary antibody cross-reactivity [56] | Ensure the secondary antibody is raised against the species of your primary antibody. | |
| Inactive or old detection reagents [56] | Check expiration dates and test with a positive control. | |
| Sample & Blocking | Insufficient protein blocking [8] | Block with normal serum from the secondary antibody species for at least 30 minutes [56]. |
| Endogenous enzyme activity not quenched [8] | Use peroxidase block for HRP (3% H2O2) [56] or levamisole for alkaline phosphatase [1]. | |
| Tissue sections dried out during protocol [8] | Always use a humidity chamber for long incubations and keep sections covered in liquid. | |
| Inadequate deparaffinization [56] | Use fresh xylene and ensure complete deparaffinization before rehydration. |
Experimental Protocol: Integrated Background Reduction
This protocol combines biotin blocking with other essential background reduction steps for a comprehensive approach.
Materials Required: Research Reagent Solutions
| Reagent | Function |
|---|---|
| Unlabeled Streptavidin | Binds to and saturates endogenous biotin sites in the tissue [1]. |
| Free Biotin | Fills the remaining binding sites on the streptavidin molecules, preventing detection reagent binding [1]. |
| Normal Serum | Blocks non-specific protein-protein interactions (e.g., Fc receptors). Use serum from the species of your secondary antibody [8]. |
| Hydrogen Peroxide (3%) | Quenches endogenous peroxidase activity, critical for HRP-based detection [56]. |
| Antibody Diluent | Optimized buffer to maintain antibody stability and reduce non-specific binding. Always use the manufacturer's recommended diluent if specified [56]. |
| Wash Buffer (e.g., TBST) | Removes unbound reagent. The detergent (Tween-20) helps minimize hydrophobic interactions [8]. |
Integrated Workflow for Maximum Background Reduction
The following diagram illustrates the sequential, integrated workflow for applying multiple background reduction techniques in an IHC protocol.
Detailed Step-by-Step Methodology
Deparaffinization and Peroxidase Quenching:
Protein Blocking:
Biotin Blocking (for biotin-based detection systems):
- Incubate with unlabeled streptavidin: Apply a solution of unlabeled streptavidin (following kit or established protocol instructions) to the sections for 10-20 minutes. This saturates the endogenous biotin binding sites [1].
- Rinse briefly with buffer.
- Incubate with free biotin: Apply a solution of free biotin for 10-20 minutes. This binds to all remaining free sites on the streptavidin molecules, making them unavailable for the detection reagent [1].
- Wash slides twice with buffer before proceeding.
Primary and Secondary Antibody Incubation with Washes:
- Apply the primary antibody, diluted in the recommended diluent, and incubate according to your optimized protocol (often overnight at 4°C) [56].
- Wash slides 3 times for 5 minutes each with TBST [56].
- Apply the secondary antibody and detection system (e.g., biotinylated secondary followed by ABC complex, or a polymer-based system).
- Wash slides 3 times for 5 minutes each with TBST [56].
Detection and Visualization:
- Develop the signal with your chromogen (e.g., DAB), monitor the reaction under a microscope, and stop it as soon as a strong specific signal develops to prevent high background from over-development [8].
- Counterstain, dehydrate, and mount as usual.
How does incomplete blocking of endogenous biotin affect my IHC results, and how can I resolve it?
Incomplete blocking of endogenous biotin is a major source of high background staining in IHC, particularly when using sensitive avidin-biotin complex (ABC) detection systems. Endogenous biotin, naturally present in tissues like liver, kidney, and brain, binds to the streptavidin or avidin in your detection complex, causing widespread non-specific signal that obscures your true target [7] [58].
Solutions and Protocols:
- Use a Commercial Blocking Kit: The most effective method is sequential incubation with an avidin solution, followed by a biotin solution. The avidin blocks endogenous biotin sites, and the subsequent bioxin step blocks any remaining binding sites on the avidin itself [7] [59].
- Switch Detection Systems: If background persists, consider moving to a polymer-based, biotin-free detection system. These systems do not rely on the biotin-streptavidin interaction and are therefore immune to this specific pitfall [58].
- Optimize Blocking Time: Ensure the blocking incubation is sufficient. While times can vary, a typical blocking step may take 15-20 minutes [7].
What are the consequences of reagent incompatibility, and how can I prevent it?
Reagent incompatibility can lead to a complete lack of staining, weak signal, or high background. This pitfall encompasses issues with antibody specificity, buffer-enzyme mismatches, and endogenous enzyme activity.
Solutions and Protocols:
- Verify Antibody Compatibility: Always confirm your secondary antibody is raised against the host species of your primary antibody (e.g., use an anti-rabbit secondary for a rabbit primary) [60] [61]. For multiplexing, use cross-adsorbed secondary antibodies to prevent cross-reactivity [59].
- Quench Endogenous Enzymes: Block endogenous peroxidases by incubating tissues with 3% H₂O₂ in methanol or water for 10-15 minutes at room temperature [7] [60]. For endogenous alkaline phosphatase, use 2 mM levamisole [7] [60].
- Use Compatible Buffers: Never use sodium azide in buffers with HRP, as it inhibits the enzyme. Similarly, avoid phosphate buffers with alkaline phosphatase (AP) systems [7] [60]. Ensure the substrate buffer pH is appropriate for the enzymatic reaction [7].
Why is it critical to prevent tissue sections from drying, and how can I ensure they stay hydrated?
Allowing tissue sections to dry at any point during the IHC procedure causes irreversible non-specific antibody binding and can lead to severe edge artifacts, high background, and a "cracked" tissue morphology that is difficult to image and interpret [62] [8].
Solutions and Protocols:
- Use a Humidified Chamber: For all incubation steps, place slides in a sealed container with a moist paper towel to maintain a humid environment and prevent evaporation [42] [8].
- Keep Sections Covered: Ensure the tissue section is fully covered by liquid at all times. If you need to pause the protocol, immerse the slide in a compatible buffer like 1X PBS [62].
- Use a PAP Pen: Draw a hydrophobic barrier around the tissue section with a PAP pen to help contain small volumes of reagent and prevent them from sliding off or evaporating quickly [62].
FAQ: Troubleshooting Common IHC Pitfalls
The table below summarizes the causes and solutions for the three common pitfalls discussed.
| Problem | Specific Cause | Solution |
|---|---|---|
| High Background (Incomplete Blocking) | Endogenous biotin not blocked [7] | Use avidin/biotin blocking kit; switch to polymer-based, biotin-free detection systems [7] [58]. |
| Endogenous peroxidases active [60] | Quench with 3% H₂O₂ in methanol for 10-15 min at room temperature [7] [60]. | |
| Insufficient protein blocking [60] | Increase blocking serum concentration to 10% or extend incubation time; use serum from the secondary antibody host species [60] [59]. | |
| Weak/No Staining (Reagent Incompatibility) | Incompatible primary/secondary antibody [60] | Confirm secondary antibody is targeted to the primary's host species [60] [61]. |
| Sodium azide in HRP buffer [7] | Avoid sodium azide; use sterile PBS or antibody diluent buffer for HRP-based detection [7] [60]. | |
| Inactive enzyme-substrate reaction [7] | Test the enzyme and substrate separately; ensure substrate buffer is at correct pH [7]. | |
| Poor Morphology & High Background (Section Drying) | Tissue dried during incubation [62] | Perform all steps in a humidified chamber; never let slides dry out [62] [8]. |
| Insufficient washing [60] | Increase wash frequency, duration, and volume; add gentle agitation [60] [63]. |
The Scientist's Toolkit: Essential Research Reagent Solutions
The following table details key reagents and their functions for addressing these common IHC pitfalls.
| Reagent | Function in IHC | Key Consideration |
|---|---|---|
| Avidin/Biotin Blocking Kit [7] | Sequentially blocks endogenous biotin to prevent non-specific binding in ABC detection. | Essential for tissues with high endogenous biotin (e.g., liver, kidney). |
| Polymer-Based Detection System [58] | A biotin-free method that avoids endogenous biotin issues, often providing superior signal-to-noise. | Ideal for troubleshooting persistent biotin-related background. |
| Normal Serum [59] | Used as a blocking agent to reduce non-specific binding of secondary antibodies. | Should be from the same species as the host of the secondary antibody. |
| Enzyme Inhibitors (H₂O₂, Levamisole) [7] [60] | Quenches endogenous peroxidase or alkaline phosphatase activity to prevent false-positive signals. | Levamisole is ineffective on intestinal alkaline phosphatase. |
| Cross-Adsorbed Secondary Antibodies [59] | Secondary antibodies purified to remove cross-reactivity to immunoglobulins from other species. | Critical for multiplex experiments or when the tissue species is similar to the primary antibody host. |
Experimental Workflow for Mitigating Common IHC Pitfalls
The diagram below outlines a logical workflow for diagnosing and resolving the discussed pitfalls in an IHC experiment.
Ensuring Specificity: Validation Methods and Comparative Analysis of Blocking Techniques
In diagnostic immunohistochemistry (IHC) and biomarker research, demonstrating that observed staining results specifically from the interaction between your primary antibody and its target antigen is fundamental. Without appropriate controls, staining artifacts or non-specific binding can lead to inaccurate data interpretation and flawed scientific conclusions. This is particularly crucial when working with tissues known to have high endogenous biotin, as part of a broader research thesis on blocking these endogenous activities in IHC protocols. Proper negative controls are essential tools that provide evidence of the test's specificity by helping to identify false-positive staining reactions [64]. This guide will detail the types, applications, and interpretation of negative controls, with a special focus on the no-primary-antibody control.
Understanding Negative Controls: Core Concepts and Definitions
Negative controls are experimental steps that verify your staining is specific and not the result of non-target interactions. They are primarily used to evaluate the specificity of the IHC test to identify false-positive staining reactions [64]. The total evidence provided by a panel of IHC markers, interpreted by an experienced scientist, often contributes significantly to assessing this specificity [64].
International expert panels have standardized the terminology for negative controls in diagnostic IHC. The table below classifies the primary types of negative controls relevant to clinical practice and research:
Table 1: Classification and Purpose of Key Negative Controls in IHC
| Control Type | Preparation Method | Primary Purpose | What a Valid Result Shows |
|---|---|---|---|
| Negative Reagent Control (NRC) | Replace primary antibody with non-immune immunoglobulin from the same species and isotype, or antibody diluent alone [64] [65] [66]. | Identify false-positive staining due to non-specific binding of the primary antibody or other reagents [64]. | Staining is specific to the primary antibody, not caused by non-specific Ig binding or detection systems. |
| No Primary Antibody Control | Incubate tissue with antibody diluent alone, omitting the primary antibody, followed by the full detection protocol [65] [66]. | Confirm that the detection system (secondary antibody, enzymes, chromogen) is not binding non-specifically to tissue components. | The observed signal in the test section requires the presence of the primary antibody. |
| Negative Tissue Control (NTC) | A tissue section known not to express the target antigen [65]. | Verify the antibody does not stain tissues lacking the antigen, confirming specificity. | The antibody is specific for its intended target and does not cross-react with other epitopes. |
Implementing the No-Primary-Antibody Control
The no-primary-antibody control is one of the most fundamental and frequently used negative controls. Its implementation and interpretation are straightforward but critical.
Detailed Methodology
- Sample Preparation: A serial section from the same patient tissue block used for your test stain is placed on a separate slide [64].
- Protocol Application: The control slide undergoes the exact same experimental protocol as the test slide—including deparaffinization, antigen retrieval, and blocking steps.
- Primary Antibody Incubation: Instead of applying the specific primary antibody, the tissue is incubated with only the antibody diluent (e.g., PBS with 1% BSA) for the same duration and at the same temperature as the test slide [65] [66].
- Detection: The slide then proceeds through the identical steps of secondary antibody incubation, signal detection (e.g., HRP/DAB), and counterstaining.
Interpretation and Troubleshooting
- Valid Result: The no-primary-antibody control slide should show negligible or no staining [66]. The tissue should appear with only the counterstain (e.g., blue with hematoxylin), indicating that the detection system alone is not producing a signal.
- Invalid Result: If the control shows significant chromogenic or fluorescent signal, it indicates non-specific binding of your detection system. This high background invalidates the results from your test stain and must be addressed.
The following diagram illustrates the logical workflow for implementing and interpreting this control:
Troubleshooting High Background in Negative Controls
Finding staining in your negative controls means your protocol is producing non-specific background signal. The causes and solutions are systematic, often related to endogenous compounds or antibody concentration.
FAQ: Troubleshooting High Background
Q1: My no-primary-antibody control shows high background. What are the most common causes? A1: Background in this control indicates issues with your detection system. Common causes include:
- Endogenous Enzymes: Peroxidases or phosphatases in the tissue (e.g., in RBCs, kidney, liver) are active. Solution: Quench endogenous peroxidases with 3% H₂O₂ in methanol or water for 10-15 minutes before primary antibody incubation [7] [67] [4].
- Endogenous Biotin: Tissues like liver, kidney, and brain are rich in endogenous biotin, which binds to avidin-streptavidin in detection kits. Solution: Use an avidin/biotin blocking kit or, more effectively, switch to a polymer/multimer-based detection system that does not rely on biotin chemistry [7] [67] [4].
- Secondary Antibody Cross-reactivity: The secondary antibody is binding non-specifically to tissue components. Solution: Ensure adequate blocking with 5-10% normal serum from the species of the secondary antibody and optimize the secondary antibody concentration [7] [67].
Q2: My negative reagent control (isotype control) shows staining, but my no-primary control is clean. What does this mean? A2: This result pinpoints the problem to the primary antibody itself. The staining is caused by non-specific interactions between the primary antibody and non-target epitopes in the tissue. Solutions: Titrate your primary antibody to find a lower concentration that reduces background while preserving specific signal, or add NaCl (0.15-0.6 M) to the antibody diluent to reduce ionic interactions [7].
Q3: Are negative controls always necessary with modern polymer detection systems? A3: Expert opinion and revised guidelines (e.g., from the College of American Pathologists) indicate that the frequency of negative controls can be tailored based on the detection system. While avidin-biotin systems strongly warrant negative controls due to endogenous biotin, the use of negative reagent controls (NRCs) with polymer-based/multimer-based systems is at the discretion of the laboratory director. However, the practice of using negative tissue controls (NTCs) remains widely recommended. The key is a risk-based, "fit-for-use" approach established during assay validation [64].
The Scientist's Toolkit: Essential Reagents for Effective Controls
Successful implementation of controls requires specific reagents. The table below lists key solutions used to establish proper negative controls and troubleshoot background issues.
Table 2: Research Reagent Solutions for IHC Controls and Background Reduction
| Reagent / Kit | Function | Example Application |
|---|---|---|
| Antibody Diluent | Serves as the vehicle solution for antibodies; used in the no-primary-antibody control [65]. | Applied alone to the control slide while the primary antibody is omitted. |
| Normal Serum | Used for protein blocking; reduces non-specific binding of secondary antibodies [7] [4]. | Block with 5-10% serum from the same species as the secondary antibody. |
| Isotype Control Antibody | A non-immune antibody matched to the primary antibody's isotype and host species [65] [66]. | Used as the primary reagent in a Negative Reagent Control (NRC) slide. |
| Hydrogen Peroxide (3%) | Blocks endogenous peroxidase activity, a common source of background with HRP-based detection [7] [67] [4]. | Incubate tissue sections for 10-15 minutes at room temperature before primary antibody. |
| Avidin/Biotin Blocking Kit | Sequentially blocks endogenous biotin to prevent false-positive signals in biotin-based detection systems [7] [4]. | Critical for staining tissues with high endogenous biotin (e.g., liver, kidney). |
| Polymers/Multimers | An enzyme-linked dextran polymer system that avoids the use of biotin, eliminating interference from endogenous biotin [64] [67]. | A superior alternative to avidin-biotin complex (ABC) detection methods. |
Integrating well-designed negative controls, particularly the no-primary-antibody control, is a non-negotiable component of rigorous IHC practice. These controls are not optional but are fundamental to demonstrating the specificity of your results, thereby ensuring the integrity and reliability of your scientific data. By systematically implementing and interpreting these controls, researchers can confidently distinguish true biomarker expression from artifact, advancing the goals of reproducible science and accurate biomarker discovery.
This technical support resource is designed for researchers investigating the critical choice between biotin-streptavidin and polymer-based detection systems in immunohistochemistry (IHC). A core challenge in IHC is achieving high-sensitivity detection while minimizing background noise. This analysis is framed within a broader thesis on optimizing IHC protocols, specifically focusing on managing endogenous biotin interference. The selection of a detection system directly impacts the necessity for and efficacy of biotin-blocking steps, ultimately determining the clarity, reliability, and efficiency of your experimental results.
System Comparison at a Glance
The table below summarizes the fundamental characteristics, advantages, and disadvantages of the two primary detection systems discussed.
| Feature | Biotin-Streptavidin System | Polymer-Based System |
|---|---|---|
| Core Principle | Uses biotinylated secondary antibodies and enzyme-conjugated streptavidin to form a detection complex [68] [24]. | Uses a dextran or synthetic polymer backbone conjugated directly with numerous secondary antibodies and enzyme molecules (e.g., HRP) [68] [24]. |
| Key Steps | Multi-step (3+ steps): Primary Ab > Biotinylated Secondary Ab > Enzyme-Streptavidin Complex [24]. | Streamlined (2 steps): Primary Ab > Enzyme-Conjugated Polymer [68] [24]. |
| Endogenous Biotin Interference | High. Presence of endogenous biotin in tissues (e.g., liver, kidney) causes significant background, requiring a specific blocking step [68] [7] [24]. | None. The system is biotin-free, eliminating false positives from endogenous biotin and the need for biotin blocking [68] [24]. |
| Signal Amplification | High, due to the high enzyme-to-antibody ratio in the formed complexes [68] [24]. | Very high, as each polymer can carry dozens of enzyme molecules, leading to superior sensitivity [68] [24]. |
| Complex Size | Large complex size (especially in ABC method), which can hinder tissue penetration [68] [24]. | Variable; some dextran polymers are large, but newer systems use compact, linear polymers for better penetration [24]. |
Visual summary of detection system workflows
Troubleshooting Guide & FAQs
Frequently Asked Questions
Q1: In which tissue types is a biotin block absolutely necessary when using a biotin-based detection system? Tissues with high endogenous biotin content, such as liver, kidney, and brain, are particularly problematic [68] [7]. Frozen tissue sections also retain higher levels of endogenous biotin compared to FFPE sections [68] [24]. For these samples, a rigorous biotin-blocking step is critical to prevent false-positive signals.
Q2: I am still getting high background after a biotin block with my biotin-streptavidin system. What could be wrong? Potential causes and solutions include:
- Ineffective Blocking Reagent: Ensure you are using a fresh, validated avidin/biotin blocking kit according to the manufacturer's instructions [7].
- Lectin Binding: If your ABC complex uses avidin (a glycoprotein), it can bind non-specifically to lectins in the tissue. Switch to a system using streptavidin or NeutrAvidin, which are not glycosylated [7].
- Over-abundant Target: Extremely high signal can sometimes overwhelm the block. Titrate your primary and secondary antibodies to optimal concentrations [7].
Q3: When should I consider switching to a polymer-based system? A polymer-based system is highly recommended in the following scenarios [68] [69] [24]:
- When working with tissues known to be rich in endogenous biotin.
- When you need the highest possible sensitivity for detecting low-abundance targets.
- When protocol speed is a priority, as it requires fewer incubation steps.
- When troubleshooting persistent background issues with biotin-based methods.
Q4: Can I use a polymer-based system for multiplexing? Yes. Polymer-based systems are excellent for multiplex IHC. They are available with different enzyme conjugates (e.g., HRP and AP), allowing for sequential staining with different chromogens to visualize multiple targets on a single slide [24].
Experimental Protocols
Protocol 1: Effective Biotin Blocking for Streptavidin-Biotin Systems
This protocol is adapted from best practices for using commercial blocking kits [7].
- After completing standard blocking steps (e.g., with serum or BSA), prepare your slides.
- Prepare the Avidin/Biotin Blocking Solution per the manufacturer's instructions (e.g., ReadyProbes Avidin/Biotin Blocking Solution).
- Apply the avidin solution to the tissue section. Incubate for 15 minutes at room temperature.
- Rinse the slides gently with PBS or TBST.
- Apply the biotin solution to the tissue section. Incubate for 15 minutes at room temperature.
- Rinse the slides thoroughly with PBS or TBST before proceeding with the application of the biotinylated secondary antibody.
Note: Always include a control slide that undergoes the blocking procedure but is incubated without the primary antibody to verify the block's effectiveness.
Protocol 2: Standard Protocol for a Two-Step Polymer-Based System
This streamlined protocol highlights the key advantage of polymer systems [68] [24].
- Sample Preparation: Perform standard tissue fixation, processing, sectioning, and deparaffinization.
- Antigen Retrieval: Perform heat-induced epitope retrieval (HIER) appropriate for your target antigen and tissue [70].
- Blocking: Block endogenous peroxidases with 3% H₂O₂ for 10 minutes. Block non-specific protein binding with a protein-based block (e.g., BSA or normal serum) for 30 minutes. Note: Biotin blocking is not required. [69]
- Primary Antibody Incubation: Apply the primary antibody diluted in an appropriate diluent. Incubate according to your optimized conditions (often 1 hour at room temp or overnight at 4°C).
- Polymer Detection: Apply the enzyme-conjugated polymer (e.g., HRP-polymer) directly to the tissue. Incubate for 30 minutes at room temperature.
- Visualization: Apply your chosen chromogenic (e.g., DAB) or fluorescent substrate to develop the signal.
- Counterstaining and Mounting: Counterstain (e.g., with hematoxylin or DAPI), dehydrate, and mount the slides for imaging.
The Scientist's Toolkit
The table below lists essential reagents and their functions for the experiments and troubleshooting discussed.
| Reagent / Kit | Function / Purpose |
|---|---|
| Avidin/Biotin Blocking Kit (e.g., ReadyProbes) | Sequential application of avidin and biotin to saturate endogenous biotin binding sites, reducing background in biotin-based systems [70] [7]. |
| Polymer-Based Detection Kit (e.g., SignalStain Boost, POLYVIEW PLUS) | A biotin-free detection reagent that provides high-sensitivity signal amplification, eliminating interference from endogenous biotin [69] [24]. |
| Streptavidin-HRP Conjugate | A key component in LSAB and other biotin-based methods; preferred over avidin-HRP due to lower non-specific binding [68] [24]. |
| Hydrogen Peroxide (H₂O₂), 3% | Used to quench endogenous peroxidase activity, a essential step when using HRP-based detection systems [7] [69]. |
| Normal Serum | Used for blocking non-specific binding sites to reduce background staining from antibody interactions [70] [7]. |
| Sodium Borohydride | A chemical treatment used to reduce autofluorescence caused by aldehyde fixation, a common issue in fluorescent detection [7]. |
Troubleshooting logic for high background issues
In immunohistochemistry (IHC) research, successful blocking of endogenous biotin is quantitatively measured by the improvement in the signal-to-noise ratio (SNR). A high SNR indicates specific, unambiguous detection of the target antigen, whereas a low SNR, characterized by high background staining, obscures critical tissue features and can lead to erroneous data interpretation. [1] [71] [72] This guide provides researchers with methodologies to objectively assess the effectiveness of their endogenous biotin blocking protocols, ensuring the reliability and accuracy of their experimental outcomes.
FAQs on SNR and Background Staining
What is the signal-to-noise ratio in the context of IHC?
In IHC, the signal is the specific staining of your target antigen, while the noise is the non-specific background staining that can obscure this specific signal. [72] The signal-to-noise ratio (SNR) is a quantitative metric that compares the intensity of the specific signal to the intensity of the background. A successful experiment, particularly one involving the blocking of endogenous interferents like biotin, will result in a high SNR, where the target is clear and background is minimal. [1] [71]
Why is quantifying SNR improvement important after blocking endogenous biotin?
Endogenous biotin, prevalent in tissues like liver, kidney, and spleen, binds to streptavidin-based detection systems, generating high, non-specific background staining. [1] [9] Simply implementing a blocking step is not sufficient; you must verify its efficacy. Quantifying the SNR provides an objective measure of how much the blocking protocol has improved the clarity of your stain. This is crucial for:
- Validating protocol changes.
- Ensuring data integrity by minimizing false-positive results. [1]
- Troubleshooting persistent background issues systematically. [71] [7]
How can I tell if my background staining is caused by endogenous biotin?
You can perform a simple test:
- Prepare a tissue section known to be high in endogenous biotin (e.g., liver) and a negative control tissue.
- Skip the primary antibody incubation.
- Proceed with your standard avidin-biotin complex (ABC) or streptavidin-HRP detection and substrate development. [9] If you observe staining in the no-primary-antibody control, it strongly indicates interference from endogenous biotin or peroxidase activity. To distinguish between the two, ensure endogenous peroxidase is quenched with H₂O₂ before this test. [1] [9]
Quantitative Assessment Methods
Defining Regions of Interest for Quantification
Accurate quantification requires consistent definition of your regions of interest (ROIs). The choice of background ROI can significantly impact your calculated SNR values. [72]
Table: Regions of Interest for SNR Calculation
| Region Type | Description | Measurement Goal |
|---|---|---|
| Signal ROI | Area with known, high expression of the target antigen. | Measure mean signal intensity. |
| Background ROI 1 | Area within the same tissue section devoid of the target antigen. | Measure mean background intensity for tissue-specific noise. |
| Background ROI 2 | Area entirely outside the tissue sample (e.g., the slide background). | Measure mean background intensity for system-level noise. [72] |
Formulas for Calculating Signal-to-Noise Ratio
Different formulas are used in the field to calculate SNR. The variation highlights the need for consistency in your methodology when comparing results. [72]
Table: Common SNR and Contrast Formulas in Imaging
| Metric Name | Formula | Application Note |
|---|---|---|
| Standard SNR | ( SNR = \frac{\mu{signal}}{\sigma{background}} ) | (\mu{signal}): Mean signal intensity; (\sigma{background}): Standard deviation of background. [72] |
| Signal-to-Background Ratio (SBR) | ( SBR = \frac{\mu{signal}}{\mu{background}} ) | Provides a measure of contrast relative to the average background. [72] |
| Contrast-to-Noise Ratio (CNR) | ( CNR = \frac{\mu{signal} - \mu{background}}{\sigma_{background}} ) | Useful for evaluating the detectability of a signal against a noisy background. [72] |
A recent study demonstrated that depending on the background location and formula used, the calculated SNR for a single system can vary by up to ~35 dB, and the contrast can vary by ~8.65 arbitrary units. This underscores the critical importance of maintaining consistent ROI selection and calculation methods across experiments for comparable results. [72]
Experimental Workflow for Assessing Blocking Efficiency
The following diagram illustrates the key steps for a standardized experiment designed to quantify the improvement in SNR after blocking endogenous biotin.
Step-by-Step Protocol: Measuring SNR After Biotin Blocking
Objective
To quantitatively determine the improvement in the signal-to-noise ratio after implementing an endogenous biotin blocking protocol.
Materials
- Tissue sections: Known to be high in endogenous biotin (e.g., liver, kidney). [1] [9]
- Avidin/Biotin Blocking Kit: Commercial kit or prepared solutions (0.05% avidin and 0.005% biotin in PBS). [1] [9]
- Standard IHC reagents: Primary antibody, biotinylated secondary antibody, ABC or streptavidin-HRP complex, chromogenic substrate (e.g., DAB).
- Image acquisition system: Microscope with a digital camera.
- Image analysis software: Capable of measuring mean pixel intensity and standard deviation (e.g., ImageJ, QuPath).
Method
Tissue Preparation:
- Use two consecutive formalin-fixed, paraffin-embedded (FFPE) tissue sections from the same block.
- Deparaffinize and rehydrate both sections following standard protocols. [71] [73]
- Perform heat-induced epitope retrieval (HIER) if required. Note that HIER can increase the exposure of endogenous biotin, making blocking even more critical. [1]
Blocking Protocol:
- Section A (Test): Apply the endogenous biotin block.
- Section B (Control): Do not apply the avidin/biotin blocking reagents.
Immunostaining:
- Proceed with the exact same IHC protocol for both sections.
- Include all necessary blocking steps (e.g., protein block with serum or BSA). [4]
- Apply the primary antibody, followed by the biotinylated secondary antibody.
- Detect using an ABC complex or streptavidin-HRP and a chromogenic substrate like DAB. [1]
- Counterstain (e.g., with hematoxylin) if desired.
Image Acquisition and Analysis:
- Acquire digital images of both sections under identical lighting and exposure settings.
- Using your image analysis software, define two ROIs on each image:
- Signal ROI: An area with known specific staining.
- Background ROI: An area within the tissue that should be negative for the specific stain.
- For each ROI, record the mean pixel intensity and the standard deviation of the intensity.
SNR Calculation:
- Calculate the SNR for both Section A and Section B using one of the consistent formulas from the table above, for example:
- ( SNR = \frac{\text{Mean Intensity}{Signal}}{\text{Standard Deviation}{Background}} )
- The improvement factor can be expressed as:
- ( \text{SNR Improvement} = \frac{SNR{Section A (Blocked)}}{SNR{Section B (Unblocked)}} )
- Calculate the SNR for both Section A and Section B using one of the consistent formulas from the table above, for example:
Expected Outcome
A successful blocking protocol will result in a significantly higher SNR in Section A compared to Section B. The specific staining should appear crisp and localized, with a clear reduction in diffuse, non-specific background staining. [1]
Table: Example Results from an SNR Blocking Experiment
| Experimental Condition | Mean Signal Intensity | Background Std. Dev. | Calculated SNR | SNR Improvement |
|---|---|---|---|---|
| With Biotin Block | 185.5 | 8.2 | 22.6 | 4.7x |
| Without Biotin Block | 165.3 | 34.7 | 4.8 | --- |
Troubleshooting High Background After Blocking
If your SNR remains low after a blocking procedure, consider these common issues and solutions.
Table: Troubleshooting Persistent Background Staining
| Problem | Possible Cause | Recommended Solution |
|---|---|---|
| High background persists | Inadequate blocking reagent activity. | Use fresh avidin/biotin solutions or a new commercial kit. [9] |
| Endogenous peroxidase not quenched. | Quench with 3% H₂O₂ in methanol for 10-15 minutes before the biotin block. [1] [73] | |
| Primary antibody concentration is too high. | Titrate the antibody to find the optimal dilution. [71] [7] | |
| Spotty background | Inadequate deparaffinization. | Use fresh xylene and increase deparaffinization time. [71] [73] |
| Specific staining is weak | Over-blocking has masked the antigen. | Reduce the blocking incubation time or try a different blocking reagent. [71] |
| Detection system is insufficient. | Consider switching to a more sensitive polymer-based detection system instead of ABC. [73] |
The Scientist's Toolkit: Essential Reagents for Biotin Blocking Experiments
Table: Key Research Reagent Solutions
| Item | Function | Example Use Case |
|---|---|---|
| Avidin/Biotin Blocking Kit | Sequentially binds to and saturates endogenous biotin and its binding sites. | Essential pre-treatment for tissues like liver, kidney, and spleen when using ABC detection. [1] [9] |
| Polymer-Based Detection System | A detection method that does not rely on avidin-biotin chemistry. | Ideal alternative to avoid endogenous biotin issues entirely; no blocking step required. [73] [4] |
| Hydrogen Peroxide (3%) | Quenches endogenous peroxidase activity to prevent false-positive signals from HRP substrates. | Standard step before detection when using HRP-based systems. [1] [4] |
| Normal Serum or BSA | Blocks non-specific protein-binding sites on the tissue to reduce antibody background. | Applied before primary antibody incubation to improve specificity. [71] [4] |
| Image Analysis Software | Quantifies pixel intensity from digital micrographs to calculate mean signal and background statistics. | Critical for objective, quantitative assessment of SNR and blocking efficiency. [72] [74] |
FAQ: Why is blocking necessary in IHC experiments?
In immunohistochemistry (IHC), blocking is a critical preparatory step to prevent non-specific binding, which causes high background staining and can obscure the true signal from your target antigen. This non-specific signal can stem from endogenous enzymes, proteins, or molecules within the tissue that interact with your detection system [7] [3]. Effective blocking ensures a high signal-to-noise ratio, making your specific staining clear and interpretable [3].
FAQ: What are the common causes of high background staining?
High background can arise from several sources. Key culprits include:
- Endogenous Peroxidase Activity: Tissues like liver and kidney have high levels of endogenous peroxidase, which will react with an HRP-based detection system, producing a false-positive signal across the tissue [75] [3].
- Endogenous Biotin: Organs such as liver, kidney, heart, brain, and lung contain endogenous biotin. When using a biotin-streptavidin based detection system (e.g., ABC), this endogenous biotin will bind to the streptavidin, causing widespread non-specific staining [7] [3].
- Non-specific Antibody Binding: Antibodies can sometimes bind weakly to non-target epitopes or tissue components through ionic or other non-immunological interactions [7].
- Cross-reactive Secondary Antibodies: The secondary antibody may bind to endogenous immunoglobulins present in the tissue sample [75].
The table below summarizes the causes and effects of two major types of endogenous activity that require blocking.
| Endogenous Element | Tissues with High Expression | Effect on IHC | Visual Result without Blocking |
|---|---|---|---|
| Peroxidase [3] | Liver, kidney, and other highly vascularized tissues [3] | Reacts with HRP-conjugated detection systems and DAB chromogen [3] | Widespread, diffuse brown precipitate across the tissue [3] |
| Biotin [3] | Liver, kidney, heart, brain, lung [3] | Binds to streptavidin-biotin complexes in ABC or LSAB detection systems [7] [3] | High, non-specific background staining that can mask the specific signal [7] |
Experimental Protocol: Comparing Blocked vs. Unblocked Staining
This protocol outlines a standard method to demonstrate the effect of blocking endogenous biotin, using liver tissue as a model.
1. Tissue Preparation:
- Use formalin-fixed, paraffin-embedded (FFPE) tissue sections (e.g., human or mouse liver) mounted on slides [38].
- Deparaffinize and rehydrate the sections through a series of xylene and graded ethanol baths to water [7] [75].
2. Antigen Retrieval:
- Perform Heat-Induced Epitope Retrieval (HIER). A common method is to heat slides in a microwave for 8-15 minutes in 10 mM sodium citrate buffer (pH 6.0) [7]. Using a pressure cooker for 20 minutes is also effective [7] [38].
3. Blocking (Experimental Variable):
- For the "Unblocked" Control Slide: Proceed directly to the primary antibody step.
- For the "Blocked" Experimental Slide: Treat the slide with an Avidin/Biotin Blocking Kit according to the manufacturer's instructions [38] [76]. These kits typically involve sequential application of avidin (to bind endogenous biotin) and then free biotin (to block any remaining avidin binding sites) [3].
4. Immunostaining:
- Primary Antibody: Incubate both slides with a biotinylated primary antibody (or a primary antibody followed by a biotinylated secondary antibody) diluted in an appropriate buffer [7] [38].
- Detection: Use a streptavidin-HRP complex, followed by incubation with DAB chromogen to produce a brown precipitate [7] [38].
- Counterstaining: Counterstain both slides with hematoxylin to visualize cell nuclei, then dehydrate and mount with coverslips [7] [38].
The workflow is summarized in the diagram below.
Visual and Quantitative Data Comparison
The core of this case study is the direct comparison of the final stained slides. The expected outcomes are visually distinct.
| Experimental Condition | Visual Staining Outcome | Interpretation & Impact |
|---|---|---|
| Unblocked | High, diffuse brown DAB precipitate throughout the tissue parenchyma, often obscuring cellular details and any specific signal [3]. | False Positive/Nonspecific: The true antigen-specific signal is masked by background, making accurate analysis impossible and leading to erroneous conclusions. |
| Blocked | A clear, crisp brown DAB precipitate localized only to the specific target antigen. Cell morphology and staining specificity are easily observable [3]. | True Positive/Specific: The high signal-to-noise ratio allows for confident evaluation and quantification of the target antigen's expression and localization. |
The Scientist's Toolkit: Essential Reagents for Blocking
The following table lists key reagents used to address non-specific staining in IHC, as featured in this experiment and related troubleshooting.
| Reagent / Kit | Function / Purpose |
|---|---|
| Avidin/Biotin Blocking Kit [38] [76] | A ready-to-use solution set to sequentially block endogenous biotin and avidin-binding sites, crucial when using biotin-based detection systems. |
| Peroxidase Suppressor [7] [76] | A solution (e.g., 3% H₂O₂ in methanol) used to quench endogenous peroxidase activity before incubation with HRP-conjugated detection reagents. |
| Protein Blocking Serum [7] [3] | Normal serum from an unrelated species (e.g., goat serum) used to block non-specific protein-binding sites on the tissue before antibody incubation. |
| Polymer-based Detection System [75] | A detection reagent that does not rely on the biotin-streptavidin system, eliminating the need for endogenous biotin blocking and often providing superior sensitivity. |
Incorporating endogenous biotin blocking into standardized immunohistochemistry (IHC) protocols represents a fundamental advancement in ensuring assay validity and reproducibility. Despite the widespread use of avidin-biotin complex (ABC) methods for signal amplification in IHC, endogenous biotin present in many tissues creates a significant source of false-positive results and background staining that compromises data integrity. This technical resource center addresses the critical need for systematic biotin management within long-term IHC validation frameworks, providing researchers with comprehensive troubleshooting guides and standardized protocols to overcome this persistent challenge. Within the broader thesis of optimizing IHC protocols, establishing robust biotin blocking procedures emerges as an essential prerequisite for achieving reliable, reproducible staining outcomes in both research and diagnostic applications.
Understanding Endogenous Biotin Interference
Why Does Endogenous Biotin Cause Background Staining?
The avidin-biotin detection system exploits the exceptionally strong natural affinity (Kd ≈ 10−15 M) between biotin and avidin (or streptavidin) to achieve significant signal amplification. However, this system cannot distinguish between biotinylated antibodies intentionally introduced during staining and endogenous biotin naturally present in tissues. When unblocked, these endogenous molecules bind detection reagents, generating nonspecific background signal that obscures true antigen-specific staining [7] [77].
Which Tissues Require Special Attention?
Endogenous biotin levels vary significantly across tissue types, with certain organs exhibiting particularly high concentrations that necessitate mandatory blocking procedures. The table below summarizes tissues known for high endogenous biotin content:
Table 1: Tissues with Significant Endogenous Biotin Content
| Tissue Type | Relative Biotin Level | Primary Localization | Blocking Necessity |
|---|---|---|---|
| Liver | High | Hepatocyte cytoplasm | Essential |
| Kidney | High | Tubular epithelium | Essential |
| Spleen | Moderate to High | Various cellular compartments | Highly Recommended |
| Adipose Tissue | Moderate | Adipocytes | Recommended |
| Brain | Moderate | Neuronal populations | Recommended |
| Mammary Gland | Moderate (varies with status) | Epithelial cells | Situation-dependent |
Research indicates that endogenous biotin interference is typically more pronounced in frozen sections compared to formalin-fixed paraffin-embedded (FFPE) tissues, though heat-induced epitope retrieval (HIER) can unmask additional biotin epitopes in FFPE samples, increasing detectability [77] [9].
Troubleshooting Guide: Addressing Biotin-Related Staining Issues
Problem: Persistent High Background Despite Biotin Blocking
Table 2: Troubleshooting Persistent Background Staining
| Possible Cause | Diagnostic Approach | Recommended Solution |
|---|---|---|
| Insufficient blocking incubation | Check protocol timing; test longer blocking | Increase avidin/biotin incubation to 20-30 minutes each [9] |
| Expired or compromised blocking reagents | Test fresh reagents on control tissue | Prepare new avidin/biotin solutions; use commercial blocking kits [9] |
| Endogenous lectin binding | Compare avidin vs. streptavidin background | Switch to non-glycosylated streptavidin or NeutrAvidin instead of avidin [7] [77] |
| Heat-induced biotin exposure | Test blocking pre- vs. post-HIER | Implement blocking step immediately after HIER [77] |
| Concurrent peroxidase interference | Incubate tissue with substrate alone | Quench endogenous peroxidases with 3% H2O2 before primary antibody [78] |
Problem: Loss of Specific Signal After Biotin Blocking
When specific staining intensity decreases following biotin blocking procedures, consider these potential causes and solutions:
- Antibody concentration imbalance: Over-blocking may occur when avidin/biotin concentrations dramatically exceed endogenous levels, potentially creating steric hindrance. Titrate blocking reagents against your primary antibody to determine optimal concentrations [7].
- Epitope masking: In rare cases, blocking reagents may physically obstruct access to target epitopes. Reorder the staining sequence so biotin blocking occurs after primary antibody incubation for specific antibodies [77].
- Detection system incompatibility: Evaluate whether your detection system is functioning properly by testing with a biotinylated control antibody of known performance [78].
The Biotin Blocking Experimental Workflow
The following diagram illustrates the optimal placement of the biotin blocking procedure within a comprehensive IHC protocol:
Frequently Asked Questions (FAQs) on Biotin Blocking
Fundamental Principles
Q: Why is a two-step blocking procedure (avidin followed by biotin) necessary? A: The sequential approach ensures comprehensive blocking. The first step (avidin incubation) saturates all endogenous biotin binding sites. The second step (free biotin incubation) blocks any remaining unoccupied sites on the avidin molecules, preventing them from later binding your detection reagents [77] [9].
Q: Can I skip biotin blocking if using polymer-based detection systems? A: Yes, polymer-based systems (e.g., SignalStain Boost IHC Detection Reagents) eliminate the need for biotin blocking as they don't rely on avidin-biotin chemistry. These systems are particularly advantageous for tissues with exceptionally high endogenous biotin [78].
Q: Where should biotin blocking be placed within my IHC protocol? A: Most protocols position biotin blocking immediately after standard protein blocking and before primary antibody incubation. This placement is crucial because heat-induced epitope retrieval can expose additional biotin sites, making them available for blocking [9].
Protocol Optimization
Q: What are the recommended concentrations and incubation times for biotin blocking? A: Standard protocols typically use 0.05% avidin and 0.005% biotin in PBS, with 15-minute incubations for each step at room temperature. However, tissues with exceptionally high biotin may require longer incubations (up to 30 minutes) [9].
Q: Are there alternative blocking methods if commercial kits are unavailable? A: Yes, researchers have successfully used egg white (avidin source) and skim milk (biotin source) as economical alternatives. Note that when using egg white, rinse sections with water instead of PBS between steps to prevent precipitation [9].
Q: How can I validate that my biotin blocking is effective? A: Include a control slide where you omit the primary antibody but complete all other steps including biotin blocking and ABC detection. Any residual staining in this control indicates incomplete blocking or other sources of background [78].
Research Reagent Solutions for Endogenous Biotin Blocking
Table 3: Essential Reagents for Biotin Blocking Protocols
| Reagent Category | Specific Examples | Function & Mechanism | Application Notes |
|---|---|---|---|
| Avidin Sources | Egg white avidin, Commercial avidin reagents | Binds endogenous biotin with high affinity | Egg white avidin is glycosylated and may bind tissue lectins [77] |
| Non-Glycosylated Alternatives | Streptavidin, NeutrAvidin Protein | Binds biotin without lectin interactions | Preferred for tissues with high lectin content [7] [77] |
| Biotin Solutions | D-biotin, Commercial biotin blockers | Saturates unoccupied avidin binding sites | Free biotin must be in excess to ensure complete blocking [9] |
| Commercial Blocking Kits | ReadyProbes Avidin/Biotin Blocking Solution, Various manufacturer kits | Pre-optimized concentrations for reliable performance | Ensure compatibility with your detection system [7] |
| Alternative Detection Systems | Polymer-based systems (e.g., SignalStain Boost) | Bypasses avidin-biotin chemistry entirely | Eliminates need for biotin blocking; excellent for problematic tissues [78] |
Advanced Technical Considerations for Protocol Standardization
Integration with Automated staining Platforms
As IHC moves toward automation and standardization, incorporating biotin blocking requires special consideration. The sequential nature of the blocking procedure (avidin followed by biotin) must be precisely programmed into automated protocols, with adequate wash steps between incubations. When validating automated methods, include tissue controls with known high endogenous biotin (liver, kidney) to verify blocking efficiency across multiple runs [78].
Multicolor IHC Applications
For multiplex IHC applications employing multiple detection systems, biotin management becomes increasingly complex. In such cases, researchers may employ a combination of biotin blocking for one channel and alternative detection chemistries (such as polymer-based systems) for additional targets. Strategic planning of detection sequences can minimize interference while maintaining signal intensity across multiple markers [79].
Long-Term Protocol Validation Metrics
Incorporating biotin blocking into standardized protocols requires establishing quality control metrics. These should include regular assessment of background levels in negative controls, periodic testing of blocking reagent efficacy, and documentation of signal-to-noise ratios for reference tissues. Such metrics ensure consistent performance over time and across laboratory personnel, contributing to the overall reliability of IHC data in both research and clinical settings [78] [4].
Conclusion
Effective blocking of endogenous biotin is a critical, non-negotiable step for achieving specific and interpretable IHC results, particularly in biotin-rich tissues. Mastering this technique requires a solid understanding of the underlying biology, meticulous application of standardized protocols, rigorous troubleshooting of persistent issues, and thorough validation through appropriate controls. As IHC continues to evolve, the adoption of polymer-based detection systems offers a powerful alternative to traditional biotin-based methods, potentially simplifying workflows. Future directions should focus on developing more robust, standardized blocking reagents and integrating digital quantification tools to objectively assess blocking efficacy, ultimately enhancing reproducibility across research and clinical diagnostic applications.
References
- 1. Methods to Block Endogenous Detection [https://www.thermofisher.com/us/en/home/life-science/protein-biology/protein-biology-learning-center/protein-biology-resource-library/pierce-protein-methods/methods-block-endogenous-detection.html]
- 2. IHC Detection Systems: Advantages and Disadvantages [https://www.novusbio.com/ihc-detection?srsltid=AfmBOoqJNAN0jkDgVdwvwTTt6QdhtHePMJ8fZc0nuA6wZJOlOhs5K9EL]
- 3. IHC Blocking Non-Specific Binding [https://www.bio-techne.com/applications/imaging/immunohistochemistry/blocking-non-specific-binding]
- 4. Blocking in IHC [https://www.abcam.com/en-us/technical-resources/guides/ihc-guide/blocking-in-ihc]
- 5. Immunohistochemistry Troubleshooting | Tips & Tricks [https://www.stressmarq.com/support/technical-support/troubleshooting/immunohistochemistry-troubleshooting/?srsltid=AfmBOopaqpIC9qBNbpAYQ6UkwmBl_AG_iGUSzvFmbmW3VIPfu13HSgsV]
- 6. Immunohistochemistry (IHC) Troubleshooting Guide & the ... [https://www.cellsignal.com/learn-and-support/troubleshooting/ihc-troubleshooting-guide?srsltid=AfmBOoqUmfwVQXsj_rsdrWxzN62xZhXflUPWCj7O-TYMwBkwgJ3cz4N_]
- 7. IHC Troubleshooting Guide [https://www.thermofisher.com/us/en/home/life-science/protein-biology/protein-biology-learning-center/protein-biology-resource-library/pierce-protein-methods/ihc-troubleshooting-guide.html]
- 8. Ultimate IHC Troubleshooting Guide: Fix Weak Staining & ... [https://www.atlasantibodies.com/knowledge-hub/blog/the-ultimate-ihc-troubleshooting-guide-from-weak-staining-to-high-background/]
- 9. Blocking Endogenous Biotin [https://ihcworld.com/2024/01/27/blocking-endogenous-biotin/]
- 10. Detection and amplification systems | Abcam [https://www.abcam.com/en-us/technical-resources/guides/ihc-guide/detection-and-amplification-systems]
- 11. Avidin- Biotin Complex Method for IHC ... | Thermo Fisher Scientific - US [https://www.thermofisher.com/us/en/home/life-science/protein-biology/protein-biology-learning-center/protein-biology-resource-library/pierce-protein-methods/avidin-biotin-complex-method-ihc-detection.html]
- 12. Immunohistochemistry (IHC) Troubleshooting Guide & the ... [https://www.cellsignal.com/learn-and-support/troubleshooting/ihc-troubleshooting-guide?srsltid=AfmBOorToanvyFnd4xy-c3-unFOzBuJzyEmuGqnVcubHCZvbn69s6vOA]
- 13. Avidin-Biotin Interaction | Thermo Fisher Scientific - US [https://www.thermofisher.com/us/en/home/life-science/protein-biology/protein-biology-learning-center/protein-biology-resource-library/pierce-protein-methods/avidin-biotin-interaction.html]
- 14. All About VECTASTAIN® ABC Kits For Immunodetection [https://vectorlabs.com/blog/all-about-vectastain-abc-kits-for-immunodetection/?srsltid=AfmBOoqROaJBgkeSHGR1_79WZ0oXKXn0iCWAU_gVUOfMyjQ271h9vbaM]
- 15. 亲和素-生物素的相互作用 [https://www.thermofisher.cn/cn/zh/home/life-science/protein-biology/protein-biology-learning-center/protein-biology-resource-library/pierce-protein-methods/avidin-biotin-interaction.html]
- 16. Streptavidin/Avidin-Biotin Interaction [https://www.southernbiotech.com/biotin-avidin-streptavidin/]
- 17. Streptavidin [https://en.wikipedia.org/wiki/Streptavidin]
- 18. TechTip: Biotin and IHC Detection [https://www.thermofisher.com/us/en/home/life-science/cell-analysis/cellular-imaging/ihc/techtip-biotin-and-ihc-detection.html]
- 19. Protocol for VisUCyte™ HRP Polymer Detection Reagent [https://www.rndsystems.com/resources/protocols/protocol-visucyte-hrp-polymer-detection-reagent]
- 20. Protocol for Heat-Induced Epitope Retrieval (HIER) [https://www.rndsystems.com/resources/protocols/protocol-heat-induced-epitope-retrieval-hier]
- 21. Heat-Induced Antigen Retrieval for Immunohistochemical ... [https://pmc.ncbi.nlm.nih.gov/articles/PMC7604828/]
- 22. An Intro to Heat Induced Epitope Retrieval (HIER) in IHC [https://www.leicabiosystems.com/us/knowledge-pathway/technical-brief-of-heat-induced-epitope-retrieval/]
- 23. IHC antigen retrieval protocol [https://www.abcam.com/en-us/technical-resources/protocols/ihc-antigen-retrieval]
- 24. What are the different detection methods for IHC? [https://www.enzo.com/note/what-are-the-different-detection-methods-for-ihc/]
- 25. IHC Sample Preparation (Frozen vs. Paraffin) [https://www.novusbio.com/sample-preparation-for-ihc-experiments?srsltid=AfmBOoqUE1BkxLHrZ1gogY1IBoZdfkvn-El_c1XFPj2iFjVSy30Cgbgr]
- 26. IHC Embedding Optimization: Paraffin vs. Frozen Tissue [https://www.bosterbio.com/protocol-and-troubleshooting/ihc-optimization/embedding?srsltid=AfmBOopwNU7WbCDkjHJT_C5Ebd9Tb5pl2dHNkLeLLujuwzH1Lt-fyXB3]
- 27. Advantages and Drawbacks of Paraffin and Frozen Tissues [https://waxitinc.com/advantages-and-drawbacks-of-paraffin-and-frozen-tissues-2/]
- 28. Immunohistochemistry (IHC) Troubleshooting Guide & the ... [https://www.cellsignal.com/learn-and-support/troubleshooting/ihc-troubleshooting-guide?srsltid=AfmBOornUiHeXHYfsAz0EmM_ONZgmaJlPI2qhTfjDF-uoWNk5QNsRUxa]
- 29. Streptavidin/Biotin Blocking Kit [https://vectorlabs.com/products/streptavidin-biotin-blocking-kit/?srsltid=AfmBOootyar9N37niN5eayvOWn633RnyHrSRKPI1AVYBTVeGuA-w2Xty]
- 30. Avidin and Streptavidin Conjugates—Section 7.6 [https://www.thermofisher.com/us/en/home/references/molecular-probes-the-handbook/antibodies-avidins-lectins-and-related-products/avidin-streptavidin-neutravidin-and-captavidin-biotin-binding-proteins-and-affinity-matrices.html]
- 31. NeutrAvidin Protein [https://www.aladdinsci.com/neutravidin-protein-enzymes-for-tissue-dissociation-enzymes-proteins-by-aladdin-scientific-n638951.html]
- 32. Comparison of the chase effects of avidin, streptavidin ... [https://pubmed.ncbi.nlm.nih.gov/7744702/]
- 33. Comparison of the Chase Effects of Avidin, Streptavidin ... [https://pmc.ncbi.nlm.nih.gov/articles/PMC5920811/]
- 34. High Endogenous Avidin Binding Activity [https://pmc.ncbi.nlm.nih.gov/articles/PMC2480577/]
- 35. Vitamin H and Egg White: Streptavidin-Biotin for ... [https://bitesizebio.com/22487/vitamin-h-and-egg-white-streptavidin-biotin-for-immunohistochemistry/]
- 36. Immunohistochemistry (IHC) Troubleshooting Guide & the ... [https://www.cellsignal.com/learn-and-support/troubleshooting/ihc-troubleshooting-guide?srsltid=AfmBOoqieu0icVDWLki02wFlscBxzg8XyJI3_QIUT0427vQ6P_gVDi4G]
- 37. All About VECTASTAIN® ABC Kits For Immunodetection [https://vectorlabs.com/blog/all-about-vectastain-abc-kits-for-immunodetection/?srsltid=AfmBOorpXDdX7aOQXQkG2MWNdpm1DAzEp8GI6ZUlJuG6L8ZvR0emp9VF]
- 38. Avidin/biotin blocking kit - 15 mL (ab64212) [https://www.abcam.com/en-us/products/ihc-kits/avidin-biotin-blocking-kit-ab64212]
- 39. Protocol for the Preparation and Chromogenic IHC ... [https://www.rndsystems.com/resources/protocols/protocol-preparation-and-chromogenic-ihc-staining-frozen-tissue-sections]
- 40. Histology and immunohistochemistry [https://bio-protocol.org/exchange/minidetail?id=7526189&type=30]
- 41. Immunohistochemistry for Pathologists: Protocols, Pitfalls, ... [https://pmc.ncbi.nlm.nih.gov/articles/PMC5122731/]
- 42. Immunohistochemistry (IHC): The Complete Guide [https://www.antibodies.com/applications/immunohistochemistry]
- 43. Detection Systems in Immunohistochemistry [https://www.intechopen.com/chapters/64808]
- 44. IHC Detection Systems: Advantages and Disadvantages [https://www.novusbio.com/ihc-detection?srsltid=AfmBOoqXQZ4rrihprV5UJlZxWwZkfGezPaw19cHaqiQr9XkWd06cqq5e]
- 45. Immunohistochemistry (IHC) Troubleshooting Guide & the ... [https://www.cellsignal.com/learn-and-support/troubleshooting/ihc-troubleshooting-guide?srsltid=AfmBOoqKho7In4XdXfOGi9pmL9-HRZJHhSGqHGxVDSMI0p7Bxw_7_FpP]
- 46. Antibodies in IHC [https://www.abcam.com/en-us/technical-resources/guides/ihc-guide/antibodies-in-ihc]
- 47. Immunohistochemistry (IHC): Experimental Protocols and ... [https://www.antibodysystem.com/archive/387.html]
- 48. Immunohistochemistry (IHC) [https://www.cellsignal.com/learn-and-support/overview-of-ihc?srsltid=AfmBOopfd-SlvwPJM0ECCNSky8Hhayg-G8Tj26MXdwXUNpW44h-YD56b]
- 49. Frequently Asked Questions from Immunohistochemistry ... [https://www.cap.org/member-resources/councils-committees/immunohistochemistry-topic-center/frequently-asked-questions-from-immunohistochemistry-laboratories]
- 50. IHC Blocking Non-Specific Binding [https://www.novusbio.com/blocking-non-specific-binding?srsltid=AfmBOopSvpnCLj5BLKawMf8EWzaDJV1rHUB3H3YfI6T0ZMtbGX44g3cE]
- 51. Immunohistochemistry (IHC) Troubleshooting Guide & the ... [https://www.cellsignal.com/learn-and-support/troubleshooting/ihc-troubleshooting-guide?srsltid=AfmBOorvuj-H6j1ZuhQPxLDhUu7R6pJPSMv8_3QxNnVQSPIltdNayFMM]
- 52. Immunohistochemistry (IHC) Troubleshooting Guide & the ... [https://www.cellsignal.com/learn-and-support/troubleshooting/ihc-troubleshooting-guide?srsltid=AfmBOorCVUde4ztPaB45tdZGg_D70z-FKJu4V4nyLrLM_zXGh9FdLwm3]
- 53. Immunohistochemistry Troubleshooting [https://www.antibodies.com/applications/immunohistochemistry/ihc-troubleshooting]
- 54. Immunohistochemistry (IHC) Troubleshooting Guide & the ... [https://www.cellsignal.com/learn-and-support/troubleshooting/ihc-troubleshooting-guide?srsltid=AfmBOorD3dx_ONgfSfinxvvUGYqvS6OrmNYTEDAk8WSIP4JpgcAtOvGh]
- 55. IHC Troubleshooting Guide | Common Issues & Fixes [https://www.bosterbio.com/protocol-and-troubleshooting/ihc-troubleshooting?srsltid=AfmBOorWNCaOqjDVq320uQTDcuzZGyI6a9cLVO4RYvg-1aE79yNMwsrM]
- 56. Immunohistochemistry (IHC) Troubleshooting Guide & the ... [https://www.cellsignal.com/learn-and-support/troubleshooting/ihc-troubleshooting-guide?srsltid=AfmBOooF-_I31YCngiB9bXb07wmF9gVi59c3dbdoqPcMfH9c158L-oKd]
- 57. 6 Essential IHC Controls for Reliable Staining Results [https://www.bosterbio.com/blog/post/6-ihc-controls-you-should-know?srsltid=AfmBOoqYw57vJ2-qXY3YQ2miClJEkACM5EZvILE5uVo2QBdBVitfgP2X]
- 58. Top Considerations For Selecting Immunohistochemistry ... [https://vectorlabs.com/blog/top-considerations-for-selecting-immunohistochemistry-ihc-detection-reagents/?srsltid=AfmBOorsBhPEEJOQr7KxxiFVm68qcBs_pDUbf8vbta9-hFOIB3KZWUZZ]
- 59. Secondary detection: Indirect detection set-up [https://www.jacksonimmuno.com/secondary-antibody-resource/immuno-techniques/secondary-detection-challenges/]
- 60. IHC Troubleshooting Guide | Common Issues & Fixes [https://www.bosterbio.com/protocol-and-troubleshooting/ihc-troubleshooting?srsltid=AfmBOopn9vVmX4ffaqz89xrLtOG3tx-rtu2o4SB5Cot_YjukzPlGzkQQ]
- 61. Troubleshooting Guide: Immunohistochemistry [https://www.rndsystems.com/resources/technical/troubleshooting-guide-immunohistochemistry]
- 62. Troubleshooting Immunohistochemistry [https://bitesizebio.com/13392/troubleshooting-immunohistochemistry/]
- 63. Immunohistochemistry Frozen Troubleshooting: IHC-Fr Help [https://www.novusbio.com/support/support-by-application/immunohistochemistry-frozen/troubleshooting.html?srsltid=AfmBOoqg2VbXC2nkkoS1J85L9iYNm_4P5KO9IfamJwTKb5XVamPeKtD5]
- 64. Standardization of Negative Controls in Diagnostic ... [https://pmc.ncbi.nlm.nih.gov/articles/PMC4206554/]
- 65. Controls in IHC [https://www.abcam.com/en-us/technical-resources/guides/ihc-guide/controls-in-ihc]
- 66. What Controls are Necessary for Immunohistochemistry? [https://www.enzo.com/note/what-controls-are-necessary-for-immunohistochemistry/]
- 67. Immunohistochemistry (IHC) Troubleshooting Guide & the ... [https://www.cellsignal.com/learn-and-support/troubleshooting/ihc-troubleshooting-guide?srsltid=AfmBOorPT-bwGET91FeUO3j_mFgn360YKwi4vo2voFePQ81ZDGCxuPZP]
- 68. IHC Detection Systems: Advantages and Disadvantages [https://www.novusbio.com/ihc-detection?srsltid=AfmBOoqzEqgk5HaBPjv0_MmXxdJTmzdCY64oQZ93aICHEB962UTAjVLc]
- 69. Immunohistochemistry (IHC) Troubleshooting Guide & the ... [https://www.cellsignal.com/learn-and-support/troubleshooting/ihc-troubleshooting-guide?srsltid=AfmBOoqI8BwJSWPi8BWIVE6oUIL73mML7Ux-CyayDguArnUCm9BKaQfN]
- 70. Immunohistochemistry-IHC | Thermo Fisher Scientific - US [https://www.thermofisher.com/us/en/home/life-science/cell-analysis/cellular-imaging/ihc.html]
- 71. IHC Troubleshooting Guide | Common Issues & Fixes [https://www.bosterbio.com/protocol-and-troubleshooting/ihc-troubleshooting?srsltid=AfmBOoqhEtamCth4i6qiJ3pCVa1rp3TTsVZ0N_1pDfgHdIsSKDqqdXSu]
- 72. Impact of signal-to-noise ratio and contrast definition on the ... [https://pmc.ncbi.nlm.nih.gov/articles/PMC11256003/]
- 73. Immunohistochemistry (IHC) Troubleshooting Guide & the ... [https://www.cellsignal.com/learn-and-support/troubleshooting/ihc-troubleshooting-guide?srsltid=AfmBOop9IPfqMBTtyjtL-qSH0_87YRwsjF1ujHMroUc6ih7BzRT4tRKg]
- 74. Quantitative Assessment of Immunohistochemistry Laboratory ... [https://pubmed.ncbi.nlm.nih.gov/29595317/]
- 75. Immunohistochemistry (IHC) Troubleshooting Guide & the ... [https://www.cellsignal.com/learn-and-support/troubleshooting/ihc-troubleshooting-guide?srsltid=AfmBOoqvyCr-FsZyMT8_dgCQ5dui7J--1tzO3vXH6hmu9JbQwmN_-Vrk]
- 76. Blocking Reagents [https://biocare.net/products/ancillaries/blocking-reagent/]
- 77. Methods to Block Endogenous Detection [https://www.thermofisher.com/ht/en/home/life-science/protein-biology/protein-biology-learning-center/protein-biology-resource-library/pierce-protein-methods/methods-block-endogenous-detection.html]
- 78. Immunohistochemistry (IHC) Troubleshooting Guide & the ... [https://www.cellsignal.com/learn-and-support/troubleshooting/ihc-troubleshooting-guide?srsltid=AfmBOoqqucmRRWcDsgtcWUh9bt-VPy5AaeIR2TkUGY5CwkwuN-dqFFO9]
- 79. Ten Approaches That Improve Immunostaining: A Review of ... [https://pmc.ncbi.nlm.nih.gov/articles/PMC8836139/]