ELISA Antigen Quantification: Principles, Protocols & Best Practices for Biomarker Analysis
This comprehensive guide explores the fundamental principles and advanced applications of ELISA for precise antigen quantification in biomedical research.
ELISA Antigen Quantification: Principles, Protocols & Best Practices for Biomarker Analysis
Abstract
This comprehensive guide explores the fundamental principles and advanced applications of ELISA for precise antigen quantification in biomedical research. Covering foundational concepts, step-by-step methodology, common troubleshooting strategies, and comparative validation against modern techniques, it provides researchers and drug development professionals with essential knowledge for robust assay design, accurate data interpretation, and optimal implementation in diagnostic and therapeutic development pipelines.
Understanding ELISA Fundamentals: The Science Behind Antigen Detection and Quantification
What is ELISA? Defining the Enzyme-Linked Immunosorbent Assay
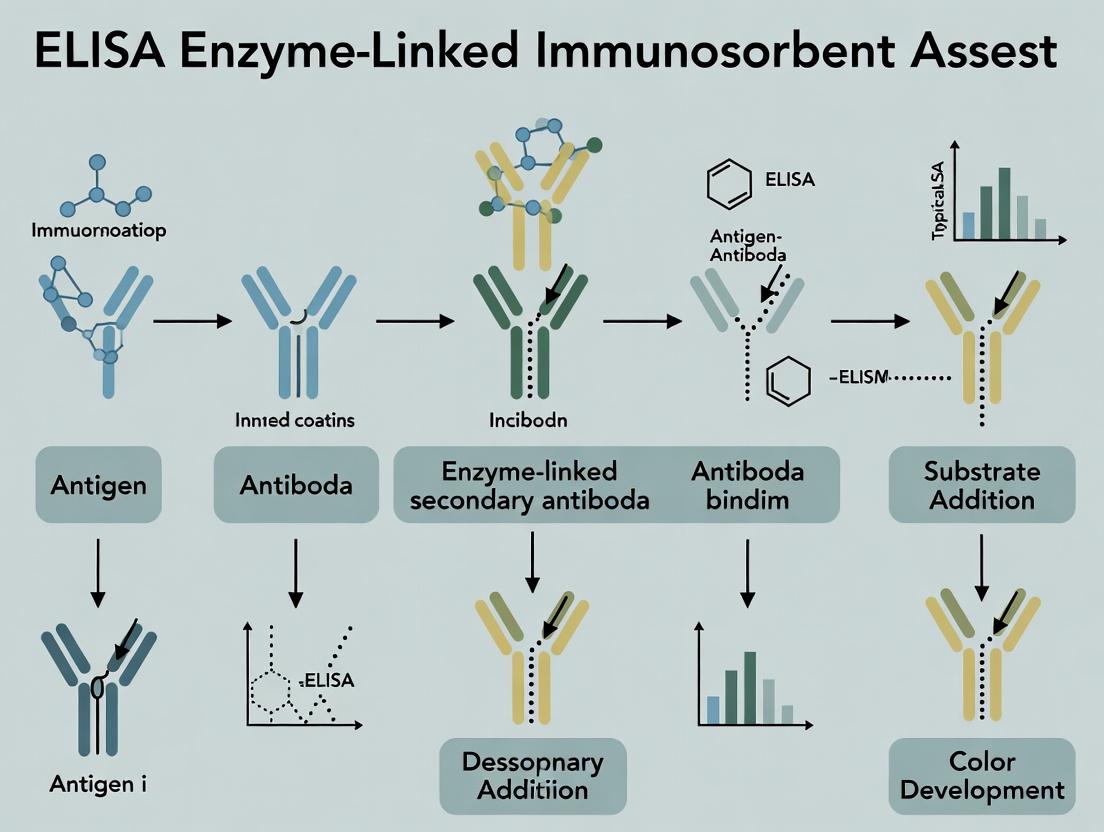
The Enzyme-Linked Immunosorbent Assay (ELISA) is a fundamental plate-based immunoassay technique for detecting and quantifying soluble substances such as peptides, proteins, antibodies, and hormones. Framed within a thesis on antigen quantification research, this document details its principles, formats, and applications, providing essential protocols and reagent toolkits for researchers and drug development professionals.
ELISA exploits the specificity of antibody-antigen binding and the sensitivity of enzyme-mediated colorimetric detection. An enzyme conjugated to an antibody catalyzes a reaction with a substrate, producing a measurable signal proportional to the target analyte concentration. Critical to quantitative research, it provides high throughput, sensitivity, and specificity for antigen quantification in complex biological matrices.
Key ELISA Formats: A Comparative Analysis
Table 1: Comparison of Primary ELISA Formats
| Format | Target | Immobilized Phase | Detection Antibody | Key Advantage | Typical Sensitivity Range |
|---|---|---|---|---|---|
| Direct | Antigen | Antigen | Enzyme-conjugated primary | Simplicity, few steps | 0.5 - 5 ng/mL |
| Indirect | Antigen | Antigen | Unconjugated primary, then enzyme-conjugated secondary | Amplification, flexibility | 0.1 - 1 ng/mL |
| Sandwich | Antigen | Capture Antibody | Enzyme-conjugated detection antibody | High specificity, suitable for complex samples | 0.01 - 0.1 ng/mL |
| Competitive | Small Antigen/Hapten | Antigen (or Antibody) | Sample antigen competes with labeled antigen | Best for small analytes, low-abundance targets | 0.01 - 1 ng/mL |
Detailed Protocol: Quantitative Sandwich ELISA for Antigen Detection
This protocol is designed for the precise quantification of a protein cytokine (e.g., IL-6) in cell culture supernatant.
Reagents & Materials:
- Coating Buffer: 0.1 M Carbonate-Bicarbonate, pH 9.6.
- Wash Buffer: PBS with 0.05% Tween 20 (PBS-T).
- Blocking Buffer: 1% Bovine Serum Albumin (BSA) in PBS.
- Capture and Detection Antibodies: Matched antibody pair specific to target antigen.
- Detection Antibody Conjugate: HRP (Horseradish Peroxidase)-conjugated.
- Substrate Solution: TMB (3,3',5,5'-Tetramethylbenzidine).
- Stop Solution: 1 M Sulfuric Acid (H₂SO₄).
- Microplate Reader: Capable of measuring absorbance at 450 nm.
Procedure:
- Coating: Dilute capture antibody in coating buffer to 1-10 µg/mL. Add 100 µL/well to a 96-well microplate. Seal and incubate overnight at 4°C.
- Washing: Aspirate liquid and wash wells 3 times with 300 µL wash buffer using a plate washer or manual pipetting. Blot plate on clean paper.
- Blocking: Add 200 µL blocking buffer per well. Incubate for 1-2 hours at room temperature (RT). Wash as in Step 2.
- Sample & Standard Incubation: Prepare serial dilutions of the antigen standard in the sample matrix (e.g., assay diluent). Add 100 µL of standards and diluted test samples per well in duplicate. Incubate for 2 hours at RT. Wash 3 times.
- Detection Antibody Incubation: Add 100 µL of HRP-conjugated detection antibody (diluted per manufacturer's instructions) per well. Incubate for 1-2 hours at RT. Wash 3-5 times thoroughly.
- Substrate Reaction: Add 100 µL of TMB substrate per well. Incubate in the dark at RT for 15-30 minutes. Monitor color development.
- Signal Stopping: Add 50 µL of stop solution per well. The blue color will turn yellow immediately.
- Data Acquisition: Measure the absorbance at 450 nm (reference 570-650 nm) within 30 minutes. Generate a standard curve (4- or 5-parameter logistic) to interpolate sample concentrations.
Diagram 1: Sandwich ELISA Workflow
The Scientist's Toolkit: Essential Research Reagent Solutions
Table 2: Key Reagents for ELISA Development & Execution
| Reagent Category | Specific Example | Function & Importance |
|---|---|---|
| Solid Phase | Polystyrene Microplates (High Binding) | Provides surface for passive adsorption of capture antibodies or antigens. |
| Coating Reagent | Anti-target Capture Antibody | Specifically immobilizes the target analyte from the sample. |
| Blocking Agent | BSA, Casein, or Proprietary Blocker | Covers unsaturated binding sites to minimize nonspecific background signal. |
| Detection Conjugate | HRP- or AP-conjugated Antibody | Binds to the captured analyte and provides enzymatic signal generation. |
| Signal Substrate | TMB (HRP) or pNPP (AP) | Enzyme substrate that yields a colored, fluorescent, or chemiluminescent product. |
| Critical Buffers | PBS-T Wash Buffer | Removes unbound reagents; Tween-20 reduces nonspecific interactions. |
| Assay Controls | Calibrated Standard, Spike/Recovery Samples | Enables standard curve generation and validation of assay accuracy. |
Data Analysis and Validation in Antigen Quantification
Accurate quantification requires robust standard curve fitting (typically logistic 4- or 5-PL) and rigorous validation.
- Assay Range: Defined by the lower limit of quantification (LLOQ) and upper LLOQ (ULOQ).
- Precision: Intra- and inter-assay coefficient of variation (CV) should be <15% (20% at LLOQ).
- Accuracy: Mean percent recovery should be 80-120% of the expected value.
- Parallelism: Demonstrates that diluted samples behave similarly to the standard, confirming matrix effect mitigation.
Diagram 2: ELISA Data Analysis & Validation Pathway
Beyond basic quantification, ELISA principles are extended to multiplex assays, cell-based ELISAs, and ultrasensitive enzymatic amplification strategies. For antigen quantification research, mastery of ELISA remains indispensable, offering a reliable, scalable, and quantitative foundation for biomarker discovery, pharmacokinetic studies, and therapeutic drug monitoring in drug development pipelines.
Within the broader thesis on ELISA principles for antigen quantification, the specific, high-affinity binding between an antigen and its complementary antibody is the indispensable cornerstone. This molecular recognition event translates a biological state into a quantifiable signal. All subsequent assay design, from plate coating to detection, is engineered to optimize and exploit this primary interaction. The following application notes and protocols detail the critical parameters governing this interaction and provide methodologies for its characterization and application in quantitative research.
Application Note: Characterizing Antibody Affinity for Assay Development
The performance of any immunoassay is directly determined by the affinity and kinetics of the antigen-antibody interaction. Precise characterization is essential for selecting optimal reagent pairs.
Key Quantitative Parameters:
- Equilibrium Dissociation Constant (KD): The antigen concentration at which half the antibody binding sites are occupied. Lower KD indicates higher affinity.
- Association Rate Constant (k_on): Speed of complex formation.
- Dissociation Rate Constant (koff): Speed of complex breakdown. KD = koff / kon.
Table 1: Representative Binding Kinetics Data for Monoclonal Antibodies
| Antibody Clone | Target Antigen | k_on (1/Ms) | k_off (1/s) | K_D (M) | Assay Application Suitability |
|---|---|---|---|---|---|
| mAb-7G12 | IL-6 | 2.1 x 10^5 | 8.5 x 10^-5 | 4.0 x 10^-10 | High-sensitivity Sandwich ELISA |
| mAb-4F2 | PSA | 1.8 x 10^5 | 1.2 x 10^-3 | 6.7 x 10^-9 | Standard Diagnostic ELISA |
| mAb-9A1 | TNF-α | 5.5 x 10^5 | 5.0 x 10^-6 | 9.1 x 10^-12 | Ultra-sensitive Capture ELISA |
Protocol 1.1: Determining Apparent K_D via ELISA Titration
Objective: To estimate the apparent affinity of a coating antibody for its soluble antigen using a direct binding format.
Materials:
- Carbonate-Bicarbonate Coating Buffer (0.05 M, pH 9.6)
- PBS-T (Phosphate-Buffered Saline with 0.05% Tween-20)
- Blocking Buffer (5% BSA in PBS)
- Purified Antigen (serial dilutions prepared in PBS)
- Primary Detection Antibody (conjugated to HRP)
- TMB Substrate Solution
- 1M H2SO4 Stop Solution
- Microplate Reader
Procedure:
- Coat a 96-well microplate with 100 µL/well of the capture antibody (2 µg/mL in coating buffer). Incubate overnight at 4°C.
- Aspirate and wash plate 3x with PBS-T.
- Block with 200 µL/well of Blocking Buffer for 2 hours at room temperature (RT). Wash 3x.
- Prepare a 2-fold serial dilution of the purified antigen across 12 wells, covering a range (e.g., 0.1 nM to 200 nM). Include a zero-antigen control. Add 100 µL/well in duplicate. Incubate 2 hours at RT. Wash 5x.
- Add 100 µL/well of HRP-conjugated detection antibody at optimal concentration. Incubate 1 hour at RT. Wash 5x.
- Add 100 µL/well TMB substrate. Incubate for 10-20 minutes in the dark.
- Stop the reaction with 50 µL/well 1M H2SO4.
- Measure absorbance at 450 nm.
- Data Analysis: Plot mean absorbance (y-axis) against antigen concentration (x-axis). Fit data to a 4-parameter logistic (sigmoidal) curve. The apparent K_D is the antigen concentration at half the maximum signal (EC50).
Application Note: Signal Amplification Strategies
Leveraging the primary antigen-antibody interaction, secondary detection systems amplify the signal, crucial for quantifying low-abundance analytes.
Table 2: Common Signal Amplification Systems
| System | Core Principle | Typical Signal Increase | Key Reagent | Best For |
|---|---|---|---|---|
| Enzymatic (HRP) | Enzyme catalyzes colorimetric/chemiluminescent reaction | 10^3 - 10^4 | HRP-Conjugated Secondary Antibody | Most routine quantitative ELISAs |
| Biotin-Streptavidin | High-affinity biotin-streptavidin binding multiplies enzyme labels | 10^4 - 10^5 | Biotinylated Antibody + Streptavidin-HRP | High-sensitivity or multiplex assays |
| Tyramide (CARD) | HRP activates tyramide, depositing numerous biotin/fluorophores | 10^6 - 10^8 | Tyramide Reagent | Extreme sensitivity, IHC/IF |
Protocol 2.1: Biotin-Streptavidin Amplification for a Sandwich ELISA
Objective: To quantify an antigen using a biotinylated detection antibody and streptavidin-enzyme conjugate for enhanced sensitivity.
Workflow:
- Coat with capture antibody.
- Block.
- Add sample/antigen standard.
- Add biotinylated detection antibody.
- Add Streptavidin-HRP conjugate.
- Add substrate and measure.
Diagram 1: Biotin-Streptavidin ELISA Workflow (7 steps)
The Scientist's Toolkit: Research Reagent Solutions
Table 3: Essential Materials for Antigen-Antibody Interaction Studies
| Item | Function & Importance in Assay Foundation |
|---|---|
| High-Binding ELISA Plates | Polystyrene plates treated for optimal passive adsorption of capture antibodies, ensuring consistent assay foundation. |
| Antigen Standards (Recombinant) | Highly purified, quantified protein for generating the standard curve, enabling absolute quantification of unknown samples. |
| Matched Antibody Pair | Two monoclonal antibodies binding distinct, non-overlapping epitopes on the target antigen; essential for specific sandwich ELISA development. |
| HRP Conjugates | Enzyme-linked secondary antibodies or streptavidin; catalyzes the conversion of substrate to detectable product, linking binding to signal. |
| TMB (3,3',5,5'-Tetramethylbenzidine) | Chromogenic HRP substrate yielding a soluble blue product measurable at 450 nm; the final readout of the antigen-antibody interaction. |
| Precision Microplate Washer | Ensures complete removal of unbound reagents, minimizing non-specific background signal, critical for signal-to-noise ratio. |
| Spectrophotometric Plate Reader | Accurately measures absorbance of each well, converting the analog biochemical signal into digital quantitative data. |
Application Note: Cross-Reactivity & Specificity Assessment
Specificity is paramount. An antibody must bind its target antigen with minimal cross-reactivity to related molecules in the sample matrix.
Protocol 4.1: Assessing Antibody Specificity via Competition ELISA
Objective: To confirm that the signal is specific to the target antigen by competing with related proteins.
Procedure:
- Coat plate with target antigen (1 µg/mL). Block.
- Pre-incubate a constant concentration of the primary antibody (at EC80 concentration) with a 10-fold molar excess of either:
- Competitor A: Target antigen (specific competitor, should inhibit).
- Competitor B: Structurally similar, unrelated protein (should not inhibit).
- Control: Buffer only (no inhibition).
- Add the pre-incubated mixtures to the antigen-coated wells.
- Continue with standard detection (secondary Ab-HRP, substrate).
- Calculate % Signal = (Abs with competitor / Abs control) x 100.
Diagram 2: Specific vs. Non-Specific Binding Competition
Application Notes: The Critical Quartet in Quantitative ELISA
Within the broader thesis on ELISA principles for antigen quantification research, the precise function and optimization of four key components—plates, antibodies, enzymes, and substrates—determine the success of any assay. This document provides current application notes and detailed protocols centered on these elements for the accurate detection of low-abundance protein targets in complex biological matrices, such as serum in drug development studies.
Plates: The Solid-Phase Foundation
The 96-well polystyrene microplate remains the standard solid phase. Its primary function is to immobilize the capture antibody or antigen through passive adsorption. Recent advances involve high-binding plates treated with specialized polymers or featuring streptavidin coatings for biotinylated capture molecules, significantly enhancing sensitivity and reproducibility.
Table 1: Comparison of Microplate Surfaces for ELISA
| Plate Type | Binding Mechanism | Typical Binding Capacity (ng IgG/cm²) | Best For | Key Consideration |
|---|---|---|---|---|
| Standard Polystyrene | Hydrophobic & ionic interactions | 100-200 | Routine assays, high-concentration targets | Potential denaturation of captured protein |
| High-Binding (Poly-L-Lysine/Cationic Polymer) | Enhanced ionic & hydrophobic | 400-500 | Low-abundance targets, improved sensitivity | Higher background if not blocked thoroughly |
| Streptavidin-Coated | Biotin-Streptavidin affinity | N/A (defined by biotinylation) | Sandwich ELISA with biotinylated Ab | Requires an extra biotinylation step; minimal denaturation |
| Covalent (Amino/ Carboxylate Activated) | Covalent linkage | Varies | Assays requiring extremely stable immobilization | Complex protocol; specific coupling chemistry needed |
Antibodies: The Specificity Architects
The antibody pair (capture and detection) dictates assay specificity and dynamic range. The trend is toward monoclonal/polyclonal pairings or matched monoclonal pairs from different host species to minimize cross-reactivity. Recombinant antibodies are increasingly favored for batch-to-batch consistency.
Enzymes & Substrates: The Signal Amplifiers
Horseradish Peroxidase (HRP) and Alkaline Phosphatase (AP) are the dominant enzymes. The choice dictates the substrate and detection method (colorimetric, chemiluminescent, fluorescent).
Table 2: Common Enzyme-Substrate Systems in ELISA
| Enzyme | Substrate Type | Example Substrate | Detection Wavelength/Output | Relative Sensitivity |
|---|---|---|---|---|
| Horseradish Peroxidase (HRP) | Colorimetric | TMB (3,3',5,5'-Tetramethylbenzidine) | 450 nm (absorbance) | Moderate (ng-pg) |
| HRP | Chemiluminescent | Luminol/H₂O₂ enhancers | Luminescence (RLU) | High (pg-fg) |
| Alkaline Phosphatase (AP) | Colorimetric | pNPP (p-Nitrophenyl Phosphate) | 405-415 nm (absorbance) | Moderate |
| AP | Chemiluminescent | CDP-Star / CSPD | Luminescence (RLU) | High |
Detailed Protocols
Protocol 1: Checkerboard Titration for Antibody Pair Optimization
Objective: To determine the optimal concentrations of capture and detection antibodies for a sandwich ELISA. Materials: High-binding 96-well plate, antigen standard, capture Ab, detection Ab, HRP-conjugated secondary Ab (if needed), TMB substrate, stop solution, plate washer, microplate reader. Procedure:
- Coating: Prepare serial dilutions of capture antibody (e.g., from 10 µg/mL to 0.1 µg/mL) in carbonate-bicarbonate coating buffer (pH 9.6). Add 100 µL/well of each concentration across the plate rows. Incubate overnight at 4°C.
- Blocking: Wash plate 3x with PBS + 0.05% Tween 20 (PBST). Add 300 µL/well of blocking buffer (e.g., 5% BSA in PBS). Incubate 1-2 hours at room temperature (RT). Wash 3x.
- Antigen Addition: Add a fixed, moderate concentration of antigen (e.g., in the middle of the expected range) in duplicate to all wells. Include negative control wells (buffer only). Incubate 2 hours at RT. Wash 3x.
- Detection Antibody Titration: Prepare serial dilutions of detection antibody (e.g., from 5 µg/mL to 0.05 µg/mL). Add 100 µL of each dilution down the plate columns. Incubate 1-2 hours at RT. Wash 3x.
- Enzyme Conjugate: Add HRP-conjugated secondary antibody (if using an unconjugated detection Ab) at manufacturer’s recommended dilution. Incubate 1 hour at RT. Wash 3-5x.
- Signal Development: Add 100 µL TMB substrate. Incubate for a fixed time (e.g., 10-15 minutes) in the dark.
- Stop & Read: Add 100 µL stop solution (1M H₂SO₄). Immediately read absorbance at 450 nm.
- Analysis: Identify the combination of capture and detection Ab concentrations yielding the highest signal-to-noise ratio (SNR > 10).
Protocol 2: Substrate Kinetic Analysis for Sensitivity Maximization
Objective: To establish the optimal substrate development time for maximizing sensitivity and linear range. Materials: ELISA plate with established assay (including a standard curve), TMB and chemiluminescent substrates, timer, plate reader. Procedure:
- Prepare Plate: Run the ELISA through to the final wash step for a standard curve and controls.
- Colorimetric (TMB) Kinetic Read:
- Add TMB substrate to all wells simultaneously.
- Immediately place plate in a reader capable of kinetic measurements.
- Read absorbance at 650 nm (or 450 nm) every 30 seconds for 15-20 minutes.
- Plot absorbance vs. time for each standard. Choose a time point where the mid-range standards are within the linear range of the reader and the background is still low.
- Chemiluminescent Kinetic Read:
- Prepare chemiluminescent substrate per manufacturer instructions.
- Inject substrate sequentially to wells with a precise delay (e.g., 30 seconds between columns).
- Read luminescence immediately after each addition for a single time point to establish a "snapshot" curve. Alternatively, use a reader with injectors to read kinetic RLU over 2-10 minutes.
- Analysis: Determine the time point that provides the greatest assay dynamic range (difference between highest standard and blank) while maintaining linearity of the standard curve.
Visualizations
The Scientist's Toolkit: Research Reagent Solutions
Table 3: Essential Materials for Quantitative ELISA Development
| Item | Function & Rationale | Key Selection Criteria |
|---|---|---|
| High-Binding 96-Well Plate | Provides the solid phase for immobilization of the capture agent. Maximizes antibody loading for sensitive detection. | Well-to-well uniformity, low autofluorescence, compatibility with plate readers. |
| Matched Antibody Pair (Capture/Detection) | Ensures specific, sensitive, and linear detection of the target antigen without cross-reactivity. | Different epitopes, high affinity (K_D < 10⁻⁹ M), validated for ELISA. |
| Recombinant Protein Standard | Provides a precise calibration curve for absolute quantification of the target in unknown samples. | >95% purity, known concentration, activity matched to native protein. |
| HRP-Conjugated Secondary Antibody | Amplifies signal when using an unconjugated detection antibody. Universal reagent for many assays. | High specificity for host species of detection Ab, minimal cross-reactivity, low endotoxin. |
| TMB (Single-Component, Stable) | Chromogenic substrate for HRP. Yields a blue product that turns yellow upon acidification, measurable at 450 nm. | Low background, high signal-to-noise, stable formulation, no need for H₂O₂ addition. |
| Chemiluminescent Substrate (Enhanced) | Provides higher sensitivity than colorimetric substrates for low-abundance targets. Output is Relative Light Units (RLU). | High luminescence intensity, stable glow signal (>30 min), suitable for injector systems. |
| Plate Sealing Films | Prevent evaporation and contamination during incubations. | Adhesive, compatible with reagents, non-leaching. |
| Automated Microplate Washer | Ensures consistent and thorough wash steps, critical for reducing background variability. | Programmable cycles, gentle but effective aspiration, minimal cross-contamination risk. |
| Precision Multichannel Pipettes | Allows for rapid, reproducible reagent addition across the 96-well format. | Ergonomic, low variability, adjustable volume range covering 5-300 µL. |
Application Notes
Within the framework of enzyme-linked immunosorbent assay (ELISA) principles for antigen quantification, the signal amplification cascade is the critical process that translates the specific capture of a target analyte into a measurable output, typically a color change. This cascade enables the detection and quantification of low-abundance antigens that would otherwise be invisible to conventional spectroscopic methods. The system relies on the enzymatic conversion of a colorless substrate into a colored product, with each enzyme molecule generating many product molecules, thereby providing significant signal gain.
The core amplification unit in most conventional ELISA formats is the horseradish peroxidase (HRP) or alkaline phosphatase (ALP) enzyme conjugated to a detection antibody. The efficiency of this cascade determines the sensitivity, dynamic range, and robustness of the assay. Key performance metrics include the enzyme's turnover number ((k{cat})), the Michaelis constant ((Km)) for its substrate, and the molar absorptivity ((ε)) of the final chromogenic product. These factors collectively define the limit of detection (LOD) for the assay.
Recent advancements focus on enhancing this cascade through novel substrates, such as precipitating or fluorogenic substrates, and through signal augmentation strategies like tyramide signal amplification (TSA). TSA, in particular, can increase sensitivity by orders of magnitude by depositing numerous enzyme-labeled tyramide molecules at the site of antigen-antibody binding, creating a localized polymerization event.
Table 1: Key Parameters of Common ELISA Enzyme-Substrate Systems
| Enzyme | Common Substrate | Product Color (λmax) | Turnover Number ((k_{cat}), s⁻¹) | Molar Absorptivity ((ε), M⁻¹cm⁻¹) | Typical LOD Enhancement vs. Direct Detection |
|---|---|---|---|---|---|
| Horseradish Peroxidase (HRP) | 3,3',5,5'-Tetramethylbenzidine (TMB) | Blue (450nm for soluble; 650nm for acidic stop) | ~1 x 10³ | ~59,000 (at 450nm) | 10³ - 10⁴ fold |
| Horseradish Peroxidase (HRP) | 2,2'-Azinobis [3-ethylbenzothiazoline-6-sulfonic acid] (ABTS) | Green (414nm) | ~3.4 x 10³ | ~36,000 (at 414nm) | 10³ - 10⁴ fold |
| Alkaline Phosphatase (ALP) | p-Nitrophenyl phosphate (pNPP) | Yellow (405nm) | ~10 - 40 | ~18,000 (at 405nm) | 10² - 10³ fold |
| Alkaline Phosphatase (ALP) | 5-Bromo-4-chloro-3-indolyl phosphate / Nitroblue tetrazolium (BCIP/NBT) | Purple/Blue (~595nm) | N/A (Precipitating) | N/A (Precipitating) | 10³ - 10⁴ fold |
Table 2: Comparison of Standard vs. Amplified ELISA Cascade
| Parameter | Standard Direct ELISA | Tyramide Signal Amplification (TSA) ELISA |
|---|---|---|
| Amplification Principle | 1 enzyme : Many substrate molecules | Enzyme generates reactive tyramide radicals that deposit numerous labels. |
| Key Reagents | Enzyme-conjugated detection Ab, Chromogenic substrate. | Enzyme-conjugated detection Ab, Hydrogen peroxide, Tyramide-biotin/fluorophore, Streptavidin-HRP (optional second cycle). |
| Typical Incubation Time for Detection Step | 5-30 minutes | 2-10 minutes (per amplification cycle) |
| Sensitivity Gain | 1x (Baseline) | 10 - 100x (can be higher with multiple cycles) |
| Best For | Moderate to high abundance antigens. | Low abundance antigens, multiplexing (with different fluorophores). |
| Primary Readout | Colorimetric (Absorbance) | Colorimetric, Chemiluminescent, or Fluorescent. |
Experimental Protocols
Protocol 1: Standard Colorimetric ELISA with HRP-TMB Detection
Objective: To quantify a specific antigen in a sample using a sandwich ELISA format with HRP-mediated signal amplification and TMB substrate.
Materials: See "The Scientist's Toolkit" below.
Procedure:
- Coating: Dilute the capture antibody to 1-10 µg/mL in carbonate-bicarbonate coating buffer (pH 9.6). Add 100 µL per well to a 96-well microplate. Seal and incubate overnight at 4°C.
- Washing: Aspirate the coating solution. Wash each well three times with 300 µL of Wash Buffer (PBS + 0.05% Tween 20). Blot plate on absorbent paper after each wash.
- Blocking: Add 300 µL of Blocking Buffer (e.g., PBS with 1% BSA or 5% non-fat dry milk) per well. Incubate for 1-2 hours at room temperature (RT) or 4°C overnight. Wash as in step 2.
- Sample/Antigen Incubation: Add 100 µL of sample or antigen standard (in a suitable matrix like dilution buffer) per well. Include blank wells (dilution buffer only). Incubate for 2 hours at RT or overnight at 4°C. Wash as in step 2.
- Detection Antibody Incubation: Add 100 µL per well of the HRP-conjugated detection antibody, diluted in Blocking/Dilution Buffer to the optimal concentration (typically 0.5-2 µg/mL). Incubate for 1-2 hours at RT. Wash as in step 2, increasing to 5 washes.
- Signal Development (Amplification Cascade): a. Prepare TMB substrate solution immediately before use by mixing equal volumes of the two components (TMB and H₂O₂). b. Add 100 µL of TMB substrate to each well. c. Incubate at RT in the dark for 5-30 minutes, monitoring for blue color development in positive wells.
- Stop Reaction: Add 100 µL of 1M H₂SO₄ or 1M HCl stop solution per well. The color will change from blue to yellow.
- Detection: Measure the absorbance of each well at 450nm (primary) and 540nm or 570nm (reference) using a microplate reader within 30 minutes.
- Data Analysis: Generate a standard curve from the serial dilutions (log[antigen] vs. absorbance) and interpolate sample concentrations.
Protocol 2: Enhanced Detection with Tyramide Signal Amplification (TSA)
Objective: To significantly increase the sensitivity of an ELISA for low-abundance antigen detection.
Materials: Include all from Protocol 1, plus Tyramide-biotin or Tyramide-fluorophore reagent, Streptavidin-HRP (if using tyramide-biotin), and appropriate amplification buffer.
Procedure:
- Perform steps 1-5 from Protocol 1 (Coating through Detection Antibody Incubation with an HRP-conjugated Ab).
- Wash: Wash plate thoroughly 5 times with Wash Buffer.
- Tyramide Amplification: a. Prepare working solution of tyramide reagent (e.g., 1:50 to 1:500 dilution in provided amplification buffer). b. Add 100 µL per well. Incubate for 2-10 minutes at RT. c. Wash plate 3 times with Wash Buffer.
- (If using Tyramide-Biotin): Add 100 µL per well of Streptavidin-HRP (diluted in blocking buffer). Incubate for 30 minutes at RT. Wash 5 times.
- Signal Development & Detection: Proceed with steps 6-9 from Protocol 1. For fluorescent tyramides, after step 3, read fluorescence at the appropriate excitation/emission wavelengths.
Diagrams
ELISA Signal Amplification Cascade
Colorimetric ELISA Workflow
The Scientist's Toolkit
Table 3: Essential Reagents for ELISA Signal Amplification Research
| Item | Function in the Amplification Cascade |
|---|---|
| Microplate (Polystyrene) | Solid phase for immobilizing capture antibody via passive adsorption. |
| Capture Antibody | High-affinity antibody specific to the target antigen; provides assay specificity by immobilizing the antigen. |
| Blocking Buffer (BSA, Casein) | Saturates remaining protein-binding sites on the plate to prevent non-specific adsorption of other components, reducing background noise. |
| Target Antigen / Standard | The analyte of interest. A purified standard is required to generate a calibration curve for quantification. |
| Detection Antibody (Biotinylated or Enzyme-Conjugated) | Binds to a different epitope on the captured antigen. Conjugation to biotin or an enzyme (HRP/ALP) is the first link to the amplification system. |
| Streptavidin-HRP/ALP | If using a biotinylated detection antibody, streptavidin-enzyme conjugates provide high-affinity binding (biotin-streptavidin interaction) and introduce the enzyme for amplification. |
| Horseradish Peroxidase (HRP) | The most common enzyme label. Catalyzes the oxidation of chromogenic substrates using H₂O₂, producing a colored, detectable product. |
| Chromogenic Substrate (TMB, ABTS) | The enzyme's target molecule. Colorless in its reduced form; oxidized by the enzyme into a colored soluble or precipitating product (e.g., blue TMB). |
| Stop Solution (Acid) | Halts the enzymatic reaction abruptly by denaturing the enzyme and shifting the absorbance maximum of the product (e.g., yellow TMB) for stable measurement. |
| Tyramide Signal Amplification (TSA) Reagent | Contains tyramide molecules conjugated to biotin or a fluorophore. HRP, in the presence of H₂O₂, converts tyramide into a highly reactive radical that covalently binds to tyrosine residues nearby, depositing numerous labels and drastically amplifying signal. |
| Plate Washer (or Manual Washer Bottle) | Critical for removing unbound material between steps, which minimizes background and maximizes the signal-to-noise ratio. |
| Microplate Reader (Spectrophotometer) | Precisely measures the absorbance (or fluorescence/chemiluminescence) of the final product in each well, providing the raw quantitative data. |
Within a research thesis focused on the principles of ELISA for antigen quantification, selecting the appropriate assay format is a critical foundational decision. This choice directly impacts the assay's sensitivity, specificity, dynamic range, and overall feasibility. These Application Notes detail the core characteristics, optimal applications, and protocols for the four primary ELISA formats to guide experimental design.
Comparative Analysis of ELISA Formats
Table 1: Key Characteristics and Applications of ELISA Formats
| Format | Principle | Sensitivity | Specificity | Antigen Requirement | Common Applications |
|---|---|---|---|---|---|
| Direct ELISA | Adsorbed antigen is detected directly by an enzyme-conjugated primary antibody. | Low | Low | Must be able to bind plate and antibody epitope simultaneously; purified/immobilized. | Quick screening of high-abundance antigens (e.g., bacterial lysates), antibody conjugation validation. |
| Indirect ELISA | Adsorbed antigen is detected by an unlabeled primary antibody, then an enzyme-conjugated secondary antibody. | High | Moderate | Must be able to bind plate and antibody epitope simultaneously. | Widely used for serology (e.g., antibody titer detection), immunogenicity testing, general antigen detection. |
| Sandwich ELISA | Antigen is captured between a plate-bound capture antibody and a detection antibody. | Very High | Very High | Must have at least two distinct epitopes. | Quantification of complex samples (serum, cell supernatants); ideal for cytokines, hormones, biomarkers. |
| Competitive ELISA | Sample antigen competes with a reference antigen for binding to a limited amount of antibody. | Moderate to High | High | Can be small (haptens) or large; does not require immobilization. | Measurement of small molecules (drugs, hormones), antigens in complex matrices, highly similar proteins. |
Table 2: Quantitative Performance Metrics (Typical Ranges)
| Format | Typical Dynamic Range | Time to Result | Cost per Sample | Sample Volume Required |
|---|---|---|---|---|
| Direct ELISA | 2-3 logs | ~2 hours | $ | 50-100 µL |
| Indirect ELISA | 3-4 logs | ~3 hours | $$ | 50-100 µL |
| Sandwich ELISA | 3-4+ logs | ~4 hours | $$$ | 50-100 µL |
| Competitive ELISA | 2-3 logs | ~3-4 hours | $$ | 25-50 µL |
Detailed Experimental Protocols
Protocol 1: Indirect ELISA for Serum Antibody Titer Determination
Application: Quantifying specific IgG in immunized mouse serum.
Key Reagents & Materials:
- Coating Buffer: 0.05 M Carbonate-Bicarbonate, pH 9.6.
- Wash Buffer: PBS with 0.05% Tween-20 (PBS-T).
- Blocking Buffer: 5% Non-fat dry milk in PBS-T.
- Target Antigen (purified).
- Test Serum (mouse) and Control Sera.
- Primary Detection Antibody: Anti-mouse IgG, unconjugated.
- Secondary Antibody: HRP-conjugated anti-mouse IgG.
- Substrate: TMB (3,3',5,5'-Tetramethylbenzidine).
- Stop Solution: 1M H₂SO₄.
Procedure:
- Coating: Dilute purified antigen to 1-10 µg/mL in coating buffer. Add 100 µL/well to a 96-well microplate. Seal and incubate overnight at 4°C.
- Washing: Aspirate wells and wash 3x with 300 µL PBS-T using a plate washer or manual squirt bottle.
- Blocking: Add 200 µL blocking buffer per well. Incubate for 1-2 hours at room temperature (RT). Wash 3x.
- Primary Antibody Incubation: Prepare serial dilutions of test serum in blocking buffer. Add 100 µL/well. Include negative and positive controls. Incubate 1-2 hours at RT. Wash 3x.
- Secondary Antibody Incubation: Add HRP-conjugated anti-mouse IgG diluted in blocking buffer (per manufacturer's recommendation, e.g., 1:5000), 100 µL/well. Incubate 1 hour at RT, protected from light. Wash 3x.
- Detection: Add 100 µL TMB substrate per well. Incubate for 5-15 minutes at RT until blue color develops.
- Stop & Read: Add 100 µL stop solution per well. Read absorbance immediately at 450 nm with a reference wavelength of 620-650 nm.
Protocol 2: Sandwich ELISA for Cytokine Quantification
Application: Measuring IL-6 concentration in cell culture supernatant.
Key Reagents & Materials:
- Matched Antibody Pair: Capture anti-IL-6 and detection anti-IL-6 (biotinylated).
- Recombinant IL-6 Standard.
- Streptavidin-HRP conjugate.
- Other buffers and substrates as in Protocol 1.
Procedure:
- Coating: Dilute capture antibody to 2-4 µg/mL in PBS (no detergent). Coat plates (100 µL/well) overnight at 4°C. Wash 3x.
- Blocking: Block with 200 µL blocking buffer for 1-2 hours at RT. Wash 3x.
- Antigen Incubation: Add 100 µL/well of standard dilutions (prepared in sample matrix) and test samples. Incubate 2 hours at RT. Wash 3x.
- Detection Antibody Incubation: Add biotinylated detection antibody at recommended dilution in blocking buffer, 100 µL/well. Incubate 1-2 hours at RT. Wash 3x.
- Enzyme Conjugate Incubation: Add streptavidin-HRP diluted in blocking buffer, 100 µL/well. Incubate 30 minutes at RT, protected from light. Wash 3x.
- Detection & Analysis: Proceed with TMB substrate, stop, and read as in Protocol 1. Generate a standard curve to interpolate sample concentrations.
Protocol 3: Competitive ELISA for Small Molecule (Hapten) Analysis
Application: Quantifying mycotoxin (e.g., Aflatoxin B1) in grain extract.
Key Reagents & Materials:
- Coating Antigen: Aflatoxin B1-protein conjugate.
- Primary Antibody: Specific anti-Aflatoxin B1 antibody.
- HRP-conjugated secondary antibody (if indirect competitive) or HRP-conjugated Aflatoxin B1 (if direct competitive).
- Aflatoxin B1 standards.
Procedure (Indirect Competitive Format):
- Coating: Coat plate with Aflatoxin B1-protein conjugate (100 µL/well, 0.5-2 µg/mL) overnight at 4°C. Wash and block as before.
- Competition: Pre-mix a constant concentration of primary antibody with serial dilutions of standard or sample in separate tubes. Incubate for 30-60 minutes at RT.
- Incubation: Transfer 100 µL of each antibody/antigen mixture to the coated wells. Incubate 1 hour at RT. Free analyte competes with plate-bound analyte for antibody binding.
- Detection: Wash 3x. Add HRP-conjugated secondary antibody, incubate, wash, and develop with TMB as in Protocol 1.
- Analysis: Absorbance is inversely proportional to analyte concentration. Higher sample analyte = less antibody bound to plate = lower signal.
Visualization of ELISA Formats and Workflows
Title: Direct and Indirect ELISA Workflow Comparison
Title: Sandwich Workflow and Competitive Principle
The Scientist's Toolkit: Essential Research Reagent Solutions
Table 3: Key Reagents for ELISA Development
| Reagent | Function & Importance | Format Specificity |
|---|---|---|
| High-Affinity Matched Antibody Pairs | A pre-optimized capture and detection antibody set targeting different epitopes on the same antigen. Critical for specificity and sensitivity in Sandwich ELISA. | Sandwich |
| Recombinant Pure Antigen | Essential for plate coating (Direct/Indirect), generating standard curves (Sandwich), and as a competitor (Competitive). Defines assay specificity. | All (except some Competitive) |
| HRP or AP Conjugation Kits | Enable labeling of primary antibodies for Direct ELISA or secondary antibodies for Indirect/Sandwich formats. Choice impacts sensitivity and substrate options. | Direct, Indirect, Sandwich |
| Biotinylation Kits | Allow for biotin tagging of detection antibodies, enabling signal amplification via streptavidin-enzyme conjugates. Increases sensitivity. | Sandwich, Indirect |
| Stable Chemiluminescent Substrate | Provides higher sensitivity and broader dynamic range compared to colorimetric substrates like TMB. Essential for low-abundance targets. | All (when high sensitivity needed) |
| Matrix-Matched Diluent/Blockers | Blocking buffers containing proteins (BSA, casein) or sera mimicking the sample matrix. Reduce background noise from non-specific binding. | All (critical for complex samples) |
| Pre-Coated Microplates | Plates pre-immobilized with capture antibody or antigen. Save time, improve reproducibility, and are ideal for high-throughput, standardized assays. | Sandwich, Competitive |
In the context of enzyme-linked immunosorbent assay (ELISA) development for antigen quantification, the critical analytical parameters of Sensitivity, Specificity, Dynamic Range, and Limit of Detection (LoD) define the assay's reliability and utility in research and diagnostics. These parameters are interdependent, dictating an ELISA's ability to accurately measure target antigen concentration in complex biological matrices, a cornerstone in biomarker validation, pharmacokinetic studies, and therapeutic drug monitoring within drug development pipelines.
Defining Critical Parameters: Theory and Quantitative Benchmarks
Parameter Definitions and Interrelationships
- Sensitivity: The lowest concentration of an analyte that an assay can reliably distinguish from zero. It is intrinsically linked to the LoD.
- Specificity: The assay's ability to measure only the target antigen without cross-reactivity from similar molecules or matrix components.
- Dynamic Range: The span of antigen concentrations over which the assay provides a quantitative response, typically from the LoD to the upper limit of quantification (LoQ).
- Limit of Detection (LoD): The lowest concentration of antigen that can be consistently distinguished from a blank sample (no analyte) at a defined confidence level (typically ≥95%).
Table 1: Typical Target Values for Critical Parameters in a Research-Grade Quantitative ELISA
| Parameter | Typical Target for Research ELISA | Calculation/Determination Method |
|---|---|---|
| Sensitivity (LoD) | 1-10 pg/mL (or 10-100x lower than expected physiological range) | Mean signal of blank + (3 x Standard Deviation of blank) |
| Specificity | >90% (or as high as possible for the target) | Assessed via cross-reactivity testing with structurally similar analogs; % cross-reactivity = (IC50 of analog / IC50 of target) x 100 |
| Dynamic Range | 3-4 logs of concentration (e.g., 10 pg/mL – 10 ng/mL) | Linear region of the standard curve where coefficient of variation (CV) is <20% (or <10% for high precision) |
| Assay Precision (CV) | Intra-assay: <10%; Inter-assay: <15% | (Standard Deviation / Mean) x 100 across replicates (within plate) and runs (between plates) |
Experimental Protocols for Parameter Determination
Protocol: Determination of Limit of Detection (LoD) and Sensitivity
Objective: To empirically determine the lowest concentration of antigen distinguishable from zero. Materials: Coated ELISA plate, assay diluent (blank matrix), antigen standard, detection antibodies, substrate, stop solution. Procedure:
- Prepare a dilution series of the antigen standard in assay diluent, including a zero-concentration sample (blank) in a high number of replicates (n≥8).
- Run the complete ELISA protocol on all replicates.
- Measure the optical density (OD) for each well.
- Calculate LoD: LoD = Mean(ODblank) + 3 x SD(ODblank). Convert this OD value to concentration using the standard curve equation.
Protocol: Assessment of Specificity via Cross-Reactivity
Objective: To evaluate assay interference from related proteins or metabolites. Materials: Target antigen, a panel of potential cross-reactants (e.g., homologous proteins, metabolites, related drug compounds), ELISA components. Procedure:
- Generate a standard inhibition/competition curve for the target antigen.
- In separate wells, incubate the ELISA with a high concentration (e.g., 1 μg/mL or 10x expected max sample concentration) of each potential cross-reactant.
- Calculate the apparent concentration of the cross-reactant from the target standard curve.
- Determine % Cross-Reactivity: (Calculated concentration of cross-reactant / Actual concentration of cross-reactant) x 100. A value <5% is generally considered acceptable.
Protocol: Defining the Dynamic Range
Objective: To establish the range of antigen concentrations that yield a precise and linear response. Materials: Antigen standard serially diluted over a broad range (e.g., 8-10 points across 4-5 logs). Procedure:
- Run the standard curve in duplicate or triplicate across multiple independent assays (n≥3).
- Plot log(concentration) vs. OD (or log(OD)) for a sigmoidal fit, or concentration vs. OD for a linear region.
- Calculate the CV for each standard point across all runs.
- The Lower Limit of Quantification (LLoQ) is the lowest standard where CV <20% and accuracy is 80-120%. The Upper Limit of Quantification (ULoQ) is the highest standard meeting the same criteria. The range between them is the dynamic range.
Visualizing ELISA Development and Validation Workflow
Title: ELISA Development & Validation Pathway
Title: Sandwich ELISA Signal Generation Pathway
The Scientist's Toolkit: Key Reagent Solutions for ELISA Optimization
Table 2: Essential Research Reagents for ELISA Development & Parameter Optimization
| Reagent / Solution | Primary Function in Parameter Optimization |
|---|---|
| High-Affinity, Matched Antibody Pair | Foundation for Sensitivity and Specificity. Minimizes non-specific binding and enables low LoD. |
| Antigen Standard (Lyophilized, Pure) | Critical for generating the standard curve to define Dynamic Range, LoD, and for precision calculations. |
| Matrix-Matched Assay Diluent | Contains blockers (BSA, casein) and detergents to reduce background, improving Sensitivity and Specificity in biological samples. |
| High-Sensitivity Chromogenic/TMA Substrate | Amplifies signal per bound enzyme, directly increasing Sensitivity and lowering the LoD. |
| Cross-Reactivity Test Panel | A panel of structurally related compounds used to empirically measure assay Specificity. |
| Precision Plates (Low-Binding) | Minimizes non-specific adsorption of reagents and analyte, improving well-to-well consistency and Sensitivity. |
Step-by-Step ELISA Protocol: From Assay Design to Data Analysis for Accurate Quantification
Within the broader thesis on ELISA principles for antigen quantification, the pre-assay planning phase is critical. The accuracy and reliability of any immunoassay are fundamentally dependent on a thorough understanding of the antigen and the subsequent selection of high-quality, matched antibody pairs. This document outlines the essential application notes and protocols for these foundational steps.
Antigen Characterization: A Prerequisite for Assay Design
A comprehensive antigen characterization informs epitope selection, assay format, and buffer conditions. Key parameters are summarized in Table 1.
Table 1: Essential Antigen Characterization Parameters
| Parameter | Description | Method(s) | Impact on ELISA Design |
|---|---|---|---|
| Molecular Identity | Protein, peptide, glycoprotein, small molecule. | Literature review, source information. | Determines need for denaturation and antibody type. |
| Molecular Weight | Size in kDa or Da. | SDS-PAGE, mass spectrometry. | Guides membrane pore size for Western blot verification. |
| Isoelectric Point (pI) | pH at which net charge is zero. | IEF, computational prediction. | Informs coating buffer pH for optimal adsorption. |
| Post-Translational Modifications (PTMs) | Glycosylation, phosphorylation, etc. | Mass spec, enzymatic treatment. | May require specific antibodies or affect antigenicity. |
| Epitope Topography | Linear vs. conformational. | Peptide mapping, denaturation experiments. | Dictates need for native vs. denatured antigen; critical for pair selection. |
| Stability Profile | pH, temperature, and buffer sensitivity. | Stability assays, aggregation analysis. | Defines handling, storage, and assay buffer conditions. |
Protocol 1.1: Determining Epitope Topography via Western Blot
Objective: To distinguish between linear (continuous) and conformational (discontinuous) epitopes recognized by a candidate antibody.
Materials:
- Purified antigen sample.
- Candidate antibody.
- SDS-PAGE system.
- Nitrocellulose/PVDF membrane.
- Western blot transfer apparatus.
- Standard Western blot reagents (blocking buffer, wash buffer, detection system).
Methodology:
- Prepare two identical aliquots of the antigen.
- Sample Denaturation: Boil one aliquot in Laemmli buffer containing SDS and β-mercaptoethanol (reducing conditions). Leave the second aliquot non-denatured (native), mixed with a non-reducing, SDS-free buffer.
- Run both samples on parallel SDS-PAGE gels.
- Transfer proteins from both gels to membranes.
- Probe both membranes with the candidate antibody using standard immuno-blotting techniques.
- Interpretation: An antibody that binds only to the denatured sample recognizes a linear epitope. An antibody that binds only to the native sample suggests a conformational epitope. Binding to both may indicate a linear epitope unaffected by mild denaturation.
Diagram Title: Epitope Topography Determination Workflow
Antibody Selection for Sandwich ELISA
The core of a robust sandwich ELISA is a matched pair of antibodies binding to distinct, non-overlapping epitopes on the target antigen.
Table 2: Criteria for Selecting Matched Antibody Pairs
| Criterion | Capture Antibody Consideration | Detection Antibody Consideration | Optimal Outcome |
|---|---|---|---|
| Epitope Specificity | High affinity for a stable, accessible epitope. | High affinity for a different, stable epitope. | No steric hindrance; simultaneous binding. |
| Clonality & Affinity | Monoclonal recommended for specificity. High affinity (K_D < 10 nM). | Polyclonal can increase signal; monoclonal preferred for reproducibility. High affinity. | Strong, specific capture and signal. |
| Species/Host | Produced in a different host than detection antibody. | Must be targetable by a secondary antibody/ conjugate distinct from capture. | Enables species-specific secondary antibody use. |
| Isotype | IgG isotypes that bind well to plastic (e.g., IgG1) or protein A/G. | Compatible with chosen conjugation method (e.g., biotin, HRP). | Efficient coating and label incorporation. |
| Validation Data | Validated in immuno-capture or coating applications. | Validated in detection applications (e.g., WB, Flow). | Proven performance in relevant contexts. |
Protocol 2.1: Checkerboard Titration for Pair Optimization
Objective: To determine the optimal working concentrations of the capture and detection antibodies for a specific antigen concentration range.
Materials:
- Capture antibody (unconjugated).
- Detection antibody (conjugated to biotin or enzyme).
- Purified antigen standard.
- ELISA plate, coating buffer, assay buffers, substrate, plate reader.
Methodology:
- Coat ELISA plate rows with a series of capture antibody concentrations (e.g., 0.5, 1, 2, 4 µg/mL) in coating buffer overnight at 4°C.
- Block plate with suitable blocking buffer (e.g., 3-5% BSA or casein).
- Add a fixed, known concentration of purified antigen to all wells. Include negative control wells (no antigen).
- Apply a series of detection antibody concentrations (e.g., 0.1, 0.25, 0.5, 1 µg/mL) down the plate columns.
- Complete the assay with appropriate secondary reagents (e.g., streptavidin-HRP) and substrate. Measure signal.
- Analysis: Identify the concentration combination that yields the highest Signal-to-Noise ratio (positive signal/background) for your target antigen level, while minimizing antibody consumption.
Diagram Title: Checkerboard Titration Protocol Steps
The Scientist's Toolkit: Key Research Reagent Solutions
Table 3: Essential Materials for Antigen & Antibody Characterization
| Item | Function in Pre-Assay Planning | Example/Note |
|---|---|---|
| Recombinant Antigen Standards | Provides a pure, quantifiable reference for assay development and antibody validation. | Essential for determining assay sensitivity (LOD/LOQ). |
| Monoclonal Antibodies (mAbs) | Offer superior specificity and lot-to-lot consistency for defining a single epitope. | Ideal for capture antibody in sandwich assays. |
| Polyclonal Antibodies (pAbs) | Recognize multiple epitopes, often increasing assay sensitivity and robustness. | Useful as detection antibodies or for capturing diverse antigen forms. |
| Biotin Conjugation Kits | Enable efficient labeling of detection antibodies for high-sensitivity amplification. | Superior to direct HRP labeling for signal flexibility. |
| Antibody Labeling Validation Tools | Size-exclusion spin columns, electrophoresis, and activity assays to confirm successful conjugation. | Ensures labeled antibody retains immunoreactivity and label function. |
| Epitope Mapping Peptide Libraries | Overlapping peptides spanning the antigen sequence to map linear epitopes. | Crucial for identifying non-overlapping antibody pairs. |
| Surface Plasmon Resonance (SPR) Systems | Provides quantitative kinetics (ka, kd, KD) for antibody-antigen interactions. | Gold-standard for affinity measurement and pair compatibility testing. |
| High-Binding ELISA Plates | Optimized polystyrene surfaces for efficient passive adsorption of capture proteins. | Different plates (e.g., C-bottom, half-area) suit specific needs. |
This application note details the fundamental protocols for Enzyme-Linked Immunosorbent Assay (ELISA), framed within a broader thesis on the principles of antigen quantification for biomedical research and drug development. The precise execution of coating, blocking, incubation, washing, and detection steps is critical for generating reliable, quantitative data on antigen concentration, antibody affinity, or biomarker presence in complex biological samples.
Core Protocols & Methodologies
Coating (Antigen or Antibody Immobilization)
- Purpose: To immobilize the capture molecule (antigen or antibody) onto the solid phase of a polystyrene microplate.
- Detailed Protocol:
- Dilute the purified capture protein (antigen for indirect/direct ELISA; antibody for sandwich ELISA) in a suitable coating buffer (typically 0.05 M – 0.1 M carbonate-bicarbonate buffer, pH 9.6).
- Dispense 50-100 µL per well into a 96-well microplate.
- Seal the plate and incubate overnight at 4°C or for 1-2 hours at 37°C.
- Following incubation, discard the coating solution.
Blocking
- Purpose: To cover any remaining unsaturated binding sites on the plastic surface to prevent non-specific adsorption of subsequent reagents.
- Detailed Protocol:
- Add 200-300 µL of blocking buffer per well. Common blockers include 1-5% Bovine Serum Albumin (BSA), 5% non-fat dry milk, or casein in PBS or Tris-based buffers.
- Incubate for 1-2 hours at room temperature or overnight at 4°C.
- Wash the plate three times with wash buffer (e.g., PBS or Tris buffer containing 0.05% Tween 20, PBST/TBST).
Incubation with Primary Detection Agent
- Purpose: To allow specific binding of the analyte or primary antibody to the immobilized capture molecule.
- Detailed Protocol:
- Prepare serial dilutions of the sample (serum, cell lysate, etc.) or primary antibody in the chosen blocking buffer or assay diluent.
- Add 50-100 µL per well to the washed, blocked plate. Include appropriate controls (blank, negative, positive).
- Seal the plate and incubate for 1-2 hours at room temperature or overnight at 4°C for increased sensitivity.
- Wash the plate 3-5 times with wash buffer.
Incubation with Secondary Antibody (If Applicable) & Washing
- Purpose: To introduce an enzyme-conjugated antibody that binds specifically to the primary antibody, enabling signal generation.
- Detailed Protocol:
- Dilute the enzyme-conjugated secondary antibody (e.g., HRP- or AP-labeled anti-species IgG) in blocking buffer.
- Add 50-100 µL per well.
- Incubate for 1-2 hours at room temperature, protected from light.
- Perform a rigorous wash step: 5-7 times with wash buffer to remove all unbound conjugate, which is critical for low background.
Detection
- Purpose: To generate a measurable signal proportional to the amount of bound analyte.
- Detailed Protocol:
- Prepare the enzyme substrate immediately before use. For HRP: TMB (3,3’,5,5’-Tetramethylbenzidine) or OPD (o-Phenylenediamine dihydrochloride). For AP: pNPP (p-Nitrophenyl Phosphate).
- Add 50-100 µL of substrate solution per well.
- Incubate at room temperature for a defined period (e.g., 5-30 minutes) until color develops adequately.
- Stop the reaction by adding an equal volume of stop solution (e.g., 1M H2SO4 for TMB, 2M NaOH for pNPP).
- Measure the absorbance immediately using a microplate reader at the appropriate wavelength (e.g., 450 nm for TMB, 405 nm for pNPP).
Table 1: Comparison of Common Coating Conditions
| Parameter | Condition 1 (Standard) | Condition 2 (High Affinity) | Condition 3 (Rapid) |
|---|---|---|---|
| Buffer | 0.05 M Carbonate-Bicarbonate, pH 9.6 | 0.01 M PBS, pH 7.4 | 0.05 M Carbonate-Bicarbonate, pH 9.6 |
| Concentration | 1-10 µg/mL | 5-20 µg/mL | 2-5 µg/mL |
| Temperature | 4°C | 37°C | 37°C |
| Time | Overnight (16-18 hrs) | 2 hours | 1 hour |
| Primary Use | Most immunoglobulins | Antigens sensitive to alkaline pH | High-throughput screening |
Table 2: Common Detection Substrates and Their Properties
| Enzyme | Substrate | Signal (Absorbance) | Stop Solution | Key Advantage | Key Disadvantage |
|---|---|---|---|---|---|
| Horseradish Peroxidase (HRP) | TMB | 450 nm (acidic stop) | 1M H2SO4 | High sensitivity, low toxicity | Light sensitive |
| Horseradish Peroxidase (HRP) | OPD | 492 nm | 1M H2SO4 | High signal yield | Carcinogenic |
| Alkaline Phosphatase (AP) | pNPP | 405 nm | 2M NaOH | Linear kinetics, stable | Slower than HRP |
Visualized Workflows and Pathways
Diagram Title: Sandwich ELISA Protocol Workflow
Diagram Title: Signal Amplification in a Sandwich ELISA
The Scientist's Toolkit: Key Research Reagent Solutions
Table 3: Essential ELISA Reagents and Materials
| Item | Function & Rationale |
|---|---|
| High-Binding Polystyrene Microplates | Solid phase with high protein affinity for efficient and consistent capture molecule immobilization. |
| Carbonate-Bicarbonate Coating Buffer (pH 9.6) | Alkaline buffer promotes passive adsorption of proteins (especially antibodies) to the plastic surface. |
| Blocking Agents (BSA, Casein, Non-fat Milk) | Proteins that occupy non-specific sites to minimize background noise and false-positive signals. |
| Wash Buffer (PBS/TBS with 0.05% Tween 20) | Buffered saline with a mild detergent (Tween) to remove unbound reagents while maintaining complex stability. |
| Antigen-Specific Antibody Pair (Matched) | A matched monoclonal or polyclonal antibody pair (capture & detection) with high affinity and specificity for the target, crucial for sandwich ELISA. |
| Horseradish Peroxidase (HRP) Conjugate | Common enzyme linked to a detection antibody or streptavidin; catalyzes colorimetric, chemiluminescent, or fluorescent signal generation. |
| TMB (3,3’,5,5’-Tetramethylbenzidine) Substrate | Sensitive, chromogenic HRP substrate yielding a blue product that turns yellow upon acidification, safe for routine use. |
| Microplate Spectrophotometer | Instrument to measure the absorbance (Optical Density) of the stopped reaction in each well for quantitative analysis. |
Within the thesis framework on ELISA principles for antigen quantification, the preparation of a precise standard curve is the foundational step determining the validity of all subsequent data. This Application Note details the protocol for preparing calibrators from a stock standard, their critical role in converting absorbance (OD) into quantitative concentration data, and the mathematical and practical considerations for robust assay performance.
In sandwich ELISA for antigen quantification, the standard curve establishes the relationship between the known concentration of the target analyte and the measured optical density. Calibrators, or standards, are serial dilutions of a known quantity of the purified antigen. This curve is not merely a procedural step; it is the assay's reference frame, allowing interpolation of unknown sample concentrations. Errors in calibrator preparation propagate throughout the entire dataset, undermining research conclusions and drug development decisions.
Materials: The Scientist's Toolkit
| Research Reagent Solution | Function in Calibrator Preparation & ELISA |
|---|---|
| Purified Antigen Stock | The quantitative reference material of known concentration and high purity. Serves as the primary standard. |
| Assay/Diluent Buffer | The matrix used to serially dilute the stock antigen. Should mimic the sample matrix to minimize matrix effects. |
| Microplate Reader | Instrument to measure the absorbance of the chromogenic product (e.g., at 450 nm with 620 nm reference). |
| Precision Pipettes & Tips | For accurate and reproducible serial dilution steps. |
| Polypropylene Tubes | For preparing and storing dilution series, minimizing analyte adhesion. |
| 4-Parameter Logistic (4PL) Curve Fitting Software | Standard software (e.g., built into plate readers, GraphPad Prism, SoftMax Pro) for modeling the sigmoidal standard curve. |
Protocol: Preparation of Calibrators for a Sandwich ELISA
Critical Pre-Planning
- Define the Range: The calibrator series should span the assay's dynamic range, typically from the Lower Limit of Quantification (LLOQ) to the Upper Limit of Quantification (ULOQ). A common range is 7-9 points in a 1:2 or 1:3 serial dilution.
- Matrix Matching: The diluent buffer must contain the same proteins (e.g., 1% BSA) or serum components as the sample diluent to ensure similar binding kinetics and background.
Step-by-Step Dilution Procedure
- Reconstitution: Reconstitute the lyophilized antigen standard per the Certificate of Analysis using the specified buffer.
- Calculate Top Concentration: Determine the concentration of the top calibrator (e.g., 1000 pg/mL). This should be at or above the expected ULOQ.
- Serial Dilution:
- Label polypropylene tubes (e.g., S1-S8).
- Add the required volume of diluent to tubes S2 through S8.
- Pipette the calculated volume of the stock or previous dilution into tube S1 (top standard) or the next tube. Mix thoroughly by vortexing or pipetting up and down 10 times.
- Perform a serial dilution by transferring from S1 to S2, mixing, then from S2 to S3, and so on.
- Include Blank: Prepare a "Zero" calibrator consisting of diluent buffer only (0 pg/mL).
- Plate Layout: In duplicate or triplicate, add calibrators to the designated wells of the microplate, typically at the beginning of the assay plate.
Data Analysis & Curve Fitting
- Measure the average OD for each calibrator.
- Plot Calibrator Concentration (x-axis, log10 scale) vs. Average OD (y-axis).
- Fit the data using a 4-Parameter Logistic (4PL) model:
- Formula:
y = d + (a - d) / (1 + (x/c)^b) - Parameters:
- a: Minimum asymptote (background signal).
- b: Hill slope (steepness of the curve).
- c: Inflection point (EC50).
- d: Maximum asymptote (plateau signal).
- Formula:
Data Presentation: Example Calibrator Set and Curve Parameters
Table 1: Example Calibrator Series for a Cytokine ELISA
| Calibrator | Concentration (pg/mL) | Mean OD (450 nm) | %CV (Replicates) |
|---|---|---|---|
| Blank | 0.0 | 0.051 | 2.5 |
| S7 | 7.8 | 0.187 | 3.1 |
| S6 | 15.6 | 0.320 | 2.8 |
| S5 | 31.3 | 0.590 | 1.9 |
| S4 | 62.5 | 1.150 | 1.5 |
| S3 | 125.0 | 1.890 | 2.0 |
| S2 | 250.0 | 2.450 | 1.7 |
| S1 (Top) | 500.0 | 2.680 | 1.8 |
Table 2: Derived 4PL Curve Fit Parameters from Table 1 Data
| Curve Parameter | Symbol | Fitted Value | Description |
|---|---|---|---|
| Minimum Asymptote | a | 0.049 | Background signal level |
| Hill Slope | b | -1.12 | Steepness of the linear range |
| EC50 | c | 58.2 pg/mL | Concentration at midpoint of curve |
| Maximum Asymptote | d | 2.72 | Signal at saturation |
| Regression Coefficient | R² | 0.9994 | Goodness of fit |
Visual Workflows
Standard Curve Calibrator Preparation Workflow
From Absorbance to Concentration: The Role of the Standard Curve
Within a broader thesis on ELISA principles for antigen quantification, sample preparation is the critical, often limiting, step. The composition of the biological matrix profoundly influences assay sensitivity, specificity, and reproducibility by affecting antigen stability, immunoreactivity, and the degree of non-specific interference. This application note details matrix-specific considerations and protocols.
Matrix Composition & Interference Profiles
Different matrices introduce unique interferents that can cause false positives or negatives in ELISA.
Table 1: Common Biological Matrices and Key Interferents
| Matrix | Key Components & Potential Interferents | Primary Considerations for ELISA |
|---|---|---|
| Serum | Clotting factors (fibrin), platelets, high immunoglobulin (IgG) levels, complement proteins, lipids, hemolyzed hemoglobin. | High risk of non-specific binding; fibrin clots can block wells; complement may interfere with antibody binding. |
| Plasma (EDTA) | All serum components except clotting factors, plus anticoagulants (EDTA, citrate, heparin). | Anticoagulants can chelate ions required for some enzyme labels (EDTA); heparin can bind to proteins. |
| Plasma (Heparin) | As above, with heparin. | Heparin can non-specifically bind to target analytes or assay antibodies. |
| Cell Lysate | Cytosolic/nuclear proteins, DNA, RNA, lipids, proteases, phosphatase enzymes. | High total protein concentration can cause hook effect; endogenous enzymes may degrade target or assay components. |
| Tissue Homogenate | All cell lysate components plus extracellular matrix proteins (collagen). | Viscosity and particulate matter are significant; requires efficient clarification. |
| Cell Culture Supernatant | Defined media components (e.g., bovine serum albumin, phenol red), secreted factors, low total protein. | High albumin can cause background; phenol red can affect absorbance readings at 450nm. |
Table 2: Quantitative Impact of Common Interferences
| Interference Type | Effect on Signal | Typical Impact on Recovery (%) | Mitigation Strategy |
|---|---|---|---|
| Hemolysis (Hb >0.5 mg/mL) | ↑ Background (450nm) | 70-85 | Ultracentrifugation, spectral correction. |
| Lipemia (Triglycerides >300 mg/dL) | ↑ Non-specific binding | 60-80 | Sample dilution in assay buffer, ultracentrifugation. |
| Heterophilic Antibodies | ↑ False positive | Varies widely | Use heterophilic blocking reagent (HBR). |
| Rheumatoid Factor (RF) | ↑ False positive | Varies widely | Use RF absorbent or Fab fragments. |
| Protease Activity | ↓ Target antigen | <50 | Add broad-spectrum protease inhibitors during lysis. |
Detailed Experimental Protocols
Protocol 1: Preparation of Platelet-Poor Plasma (PPP) for Soluble Biomarker Analysis Objective: To obtain plasma minimal in platelet-derived microparticles and factors.
- Venipuncture: Draw blood into a vacuum tube containing K2EDTA (preferred) or citrate. Do not use heparin for kinase targets.
- Gentle Inversion: Invert tube 8-10 times immediately for proper anticoagulant mixing.
- Initial Spin: Centrifuge at 1,500-2,000 x g for 15 minutes at 4°C.
- Transfer: Using a sterile pipette, carefully transfer the upper plasma layer (approximately top 2/3) to a fresh polypropylene tube, avoiding the buffy coat (white cell layer).
- Second Spin: Centrifuge the transferred plasma at 10,000 x g for 10 minutes at 4°C.
- Aliquot & Store: Transfer the supernatant to cryovials. Snap-freeze in liquid nitrogen and store at -80°C. Avoid freeze-thaw cycles.
Protocol 2: Preparation of RIPA Buffer-Based Cell Lysates for Intracellular Antigens Objective: To extract soluble intracellular proteins while inactivating degrading enzymes.
- Reagent Preparation: Prepare RIPA Lysis Buffer (25mM Tris-HCl pH 7.6, 150mM NaCl, 1% NP-40, 1% sodium deoxycholate, 0.1% SDS). Add fresh protease and phosphatase inhibitors (e.g., 1mM PMSF, 1X EDTA-free protease cocktail, 1mM Na3VO4, 10mM NaF).
- Cell Washing: Pellet 1x10^6 - 1x10^7 cells by centrifugation (500 x g, 5 min, 4°C). Wash once with ice-cold PBS.
- Lysis: Resuspend cell pellet in 100-500 µL of ice-cold RIPA buffer. Vortex briefly.
- Incubation: Incubate on ice for 30 minutes, vortexing for 15 seconds every 10 minutes.
- Clarification: Centrifuge at 14,000 x g for 15 minutes at 4°C.
- Protein Quantification: Transfer supernatant to a fresh tube. Determine total protein concentration using a BCA or Bradford assay.
- Dilution & Storage: Dilute lysates to a uniform concentration (e.g., 1 mg/mL) in lysis buffer or assay diluent. Aliquot and store at -80°C.
Protocol 3: Generic Sample Pre-treatment for Problematic Matrices (Serum/Plasma) Objective: To reduce matrix effects prior to ELISA.
- Dilution: Perform a preliminary serial dilution (e.g., 1:2, 1:5, 1:10, 1:20) of the sample in the ELISA's specified assay diluent. This often dilutes out interferents.
- Pre-Diluent Selection: Use a protein-rich, non-interfering buffer (e.g., 1% BSA, 5% non-fat dry milk, or commercial immunoassay diluent in PBS/TBS).
- Addition of Blockers: For samples suspected of containing heterophilic antibodies, pre-incubate (30 min, RT) with a commercial Heterophilic Blocking Reagent (HBR) at 1:10 volume.
- Clarification: For visibly turbid or lipemic samples, perform ultracentrifugation at 100,000 x g for 30 minutes at 4°C and use the infranatant.
- Validation: Always spike a known concentration of recombinant antigen into the matrix and a reference buffer. Calculate percent recovery:
(Measured in matrix / Measured in buffer) x 100. Recovery of 80-120% is typically acceptable.
Visualizations
Workflow for Serum & Plasma Pretreatment Prior to ELISA
Heterophilic Antibody Interference in ELISA Sandwich
The Scientist's Toolkit: Essential Research Reagent Solutions
Table 3: Key Reagents for Sample Preparation
| Reagent / Solution | Function & Rationale |
|---|---|
| Protease Inhibitor Cocktail (EDTA-free) | Broad-spectrum inhibition of serine, cysteine, aspartic, and metalloproteases. EDTA-free version is compatible with metal-dependent assays. |
| Phosphatase Inhibitor Cocktail | Inhibits serine/threonine and tyrosine phosphatases, preserving the phosphorylation state of target antigens. |
| Heterophilic Blocking Reagent (HBR) | A mixture of inactive immunoglobulin and non-immune serum to block human anti-animal antibodies, reducing false positives. |
| RIPA Lysis Buffer | A stringent, denaturing buffer effective for solubilizing membrane and cytoplasmic proteins. Ideal for phospho-targets but may disrupt some epitopes. |
| Non-Interfering Protein-Based Assay Diluent | A buffer containing inert proteins (e.g., BSA, casein) to saturate non-specific binding sites on the analyte and plate, reducing background. |
| Recombinant Antigen Standard | Highly pure, quantified protein identical to the target. Critical for generating the standard curve in the native matrix for recovery validation. |
| Spin Columns (100 kDa MWCO) | For rapid buffer exchange or desalting of samples to remove interfering small molecules (e.g., bilirubin, salts, anticoagulants). |
1.0 Introduction and Thesis Context Within the framework of a thesis on ELISA principles for antigen quantification, the accurate interpretation of absorbance data and subsequent calculation of analyte concentration constitute the critical endpoint of the assay. This protocol details the analytical workflow from raw spectrophotometric readings to validated concentration data, ensuring robust and reproducible results essential for research and drug development.
2.0 Core Principles: The Standard Curve The quantification of an unknown sample is achieved by interpolating its absorbance value against a standard curve. This curve represents the fundamental dose-response relationship of the assay, typically following a Four-Parameter Logistic (4PL) or linear model.
3.0 Experimental Protocol: Generating a Standard Curve for Antigen Quantification
3.1 Materials and Reagent Preparation
- Coated ELISA Plate: 96-well plate pre-coated with capture antibody.
- Antigen Standard: Lyophilized recombinant antigen of known concentration. Reconstitute in the specified dilution buffer to create a high-concentration stock (e.g., 1000 pg/mL). Perform a serial dilution series (e.g., 1:2 or 1:3) in assay diluent to generate 7-8 standard points, plus a blank (zero concentration).
- Test Samples: Unknown samples diluted within the anticipated dynamic range of the assay.
- Detection Reagents: Biotinylated detection antibody, streptavidin-Horseradish Peroxidase (HRP) conjugate, and appropriate wash buffer.
- Substrate: TMB (3,3',5,5'-Tetramethylbenzidine) solution.
- Stop Solution: 1M or 2M Sulfuric acid (H₂SO₄).
- Microplate Reader: Capable of reading absorbance at 450 nm (primary) and 570 nm or 630 nm (reference wavelength for correction).
3.2 Procedure
- Assay Execution: Follow your validated direct, indirect, sandwich, or competitive ELISA protocol. Include all standard points, blanks, and unknown samples in duplicate or triplicate.
- Substrate Reaction & Termination: Add TMB substrate to all wells. Incubate in the dark for the exact, optimized time (e.g., 10-20 minutes). Terminate the reaction by adding stop solution, which changes the color from blue to yellow.
- Absorbance Measurement: Wipe the bottom of the plate clean. Read the absorbance at 450 nm (primary) and 570 nm or 630 nm (reference) within 30 minutes of stopping the reaction.
3.3 Data Pre-processing
- Averaging: Calculate the mean absorbance for each standard and sample replicate.
- Blank Subtraction: Subtract the mean absorbance of the blank (standard zero) from all standard and sample mean values.
- Optional Reference Correction: Subtract the mean absorbance at the reference wavelength (e.g., 570 nm) from the mean absorbance at 450 nm for each well to correct for optical imperfections. Note: Modern plate readers often perform this step automatically.
4.0 Data Analysis Protocol
4.1 Standard Curve Construction and Model Selection
- Plot: Plot the blank-corrected mean absorbance (y-axis) against the known standard concentration (x-axis) on a log10 scale.
- Fit: Apply a non-linear regression curve fit. The Four-Parameter Logistic (4PL) model is most common for ELISA:
- Formula: y = D + (A - D) / (1 + (x/C)^B)
- A = Minimum asymptote (floor), B = Slope factor, C = Inflection point (EC50), D = Maximum asymptote (ceiling).
- Quality Assessment: The coefficient of determination (R²) should be >0.99. Visually inspect the fit.
4.2 Calculation of Unknown Concentrations
- Interpolation: Input the blank-corrected mean absorbance of each unknown sample into the 4PL equation (solved for x) to calculate its concentration.
- Dilution Factor: Multiply the interpolated concentration by the sample dilution factor used in the assay to obtain the final concentration in the original sample.
4.3 Data Presentation
Table 1: Example Standard Curve Data and 4PL Parameters
| Standard Point | Concentration (pg/mL) | Log10(Conc) | Mean Abs (450 nm) | Blank-Corrected Abs |
|---|---|---|---|---|
| Blank | 0 | N/A | 0.065 | 0.000 |
| Std 1 | 1.95 | 0.29 | 0.105 | 0.040 |
| Std 2 | 7.81 | 0.89 | 0.230 | 0.165 |
| Std 3 | 31.25 | 1.49 | 0.650 | 0.585 |
| Std 4 | 125.00 | 2.10 | 1.520 | 1.455 |
| Std 5 | 500.00 | 2.70 | 2.305 | 2.240 |
| Std 6 | 2000.00 | 3.30 | 2.610 | 2.545 |
| 4PL Fit | Parameter Value | |||
| A (Bottom) | 0.021 | |||
| B (Slope) | 1.112 | |||
| C (EC50) | 85.4 pg/mL | |||
| D (Top) | 2.581 | |||
| R² | 0.9987 |
Table 2: Example Calculation of Unknown Sample Concentrations
| Sample ID | Dilution Factor | Mean Corrected Abs | Interpolated Conc. (pg/mL) | Final Conc. (pg/mL) |
|---|---|---|---|---|
| Patient 1 | 50 | 0.950 | 62.1 | 3105 |
| Patient 2 | 50 | 1.780 | 135.2 | 6760 |
| Control | 10 | 0.405 | 35.8 | 358 |
5.0 The Scientist's Toolkit: Essential Reagent Solutions
Table 3: Key Research Reagent Solutions for Quantitative ELISA
| Item | Function in Analysis |
|---|---|
| Recombinant Antigen Standard | Provides known quantities of the target analyte to construct the standard curve, enabling absolute quantification. Must be highly pure and accurately quantified. |
| Assay Diluent (Protein-based Buffer) | Serves as the matrix for serial dilution of standards and samples. Matches the sample matrix to minimize background and matrix effects. |
| Chromogenic Substrate (e.g., TMB) | Enzymatic conversion by HRP produces a colored product. The rate of color development, measured as absorbance, is proportional to the amount of target antigen. |
| Stop Solution (e.g., 2M H₂SO₄) | Halts the enzymatic reaction at a fixed timepoint, stabilizing the absorbance signal for measurement. |
| Microplate Reader Calibration Kit | Ensures the spectrophotometer provides accurate and reproducible absorbance readings across the entire plate. |
6.0 Visualization: ELISA Data Analysis Workflow
ELISA Quantification Data Analysis Workflow
Application Notes
1.1 Biomarker Validation for Clinical Research ELISA is the cornerstone of biomarker validation, quantifying protein biomarkers in biological matrices. This is critical for diagnostic development, patient stratification, and monitoring therapeutic response. The primary parameters in a validation study are summarized below:
Table 1: Key Assay Performance Parameters for Biomarker Validation
| Parameter | Typical Acceptance Criterion | Example from a Recent Cardiac Troponin I Assay Validation |
|---|---|---|
| Lower Limit of Quantification (LLOQ) | CV ≤20%, Accuracy 80-120% | 1.5 pg/mL |
| Dynamic Range | Covers expected physiological/pathological levels | 1.5 - 10,000 pg/mL |
| Precision (Intra-assay) | CV <10% | CV = 5.2% |
| Precision (Inter-assay) | CV <15% | CV = 8.7% |
| Accuracy/Recovery | 80-120% mean recovery | 94% recovery in serum |
| Specificity | No significant cross-reactivity with homologs | <0.1% cross-reactivity with TnT |
| Stability | Consistent recovery after freeze-thaw cycles | Stable for 5 cycles at -80°C |
1.2 Pharmacokinetic/Pharmacodynamic (PK/PD) Studies ELISAs are indispensable for PK/PD modeling by quantifying drug concentration (PK) and target engagement or downstream biomarkers (PD) over time. The data directly informs dosing regimens and efficacy.
Table 2: Example PK/PD Data from a Preclinical Study of a Monoclonal Antibody
| Time Point (hours) | Serum Drug Concentration (µg/mL) | Target Soluble Receptor PD Biomarker (ng/mL) | Observed Effect |
|---|---|---|---|
| 1 (Post-dose) | 45.2 | 105.0 (Baseline) | No change |
| 24 | 38.7 | 22.3 | >80% suppression |
| 72 | 12.1 | 18.5 | Sustained suppression |
| 168 (1 week) | 1.5 | 85.6 | Return to near baseline |
1.3 Biologics Potency Assays As a critical quality attribute (CQA), the potency of biologics (e.g., cytokines, growth factors, therapeutic antibodies) is often measured by ELISA. The assay quantifies the active drug's ability to bind its target, correlating with its biological activity.
Detailed Experimental Protocols
Protocol 1: Validating a Serum Biomarker ELISA
Aim: To establish a quantitative ELISA for a novel inflammatory cytokine (Target Cytokine X) in human serum. Principle: Sandwich ELISA using matched antibody pairs.
Materials & Reagent Solutions (The Scientist's Toolkit):
| Item | Function/Explanation |
|---|---|
| Matched Antibody Pair (Capture/Detection) | Ensures high specificity and sensitivity for the target analyte. |
| Recombinant Target Cytokine X Standard | Provides a calibrated reference for generating the standard curve. |
| Pre-coated 96-well Microplate | Solid phase for assay; often pre-coated with capture antibody for workflow efficiency. |
| Biotinylated Detection Antibody | Binds the captured analyte, enabling streptavidin-enzyme conjugation. |
| Streptavidin-Horseradish Peroxidase (HRP) | High-affinity conjugate that binds biotin, catalyzing the colorimetric reaction. |
| TMB (3,3',5,5'-Tetramethylbenzidine) Substrate | Chromogenic substrate for HRP, producing a blue color proportional to analyte. |
| Stop Solution (1M H2SO4) | Halts the enzymatic reaction, changing color to yellow for stable measurement. |
| Plate Reader (450 nm with 570 nm reference) | Quantifies the absorbance of the stopped reaction. |
| Serum Sample Diluent (with blockers) | Matrix designed to minimize non-specific binding and matrix effects in serum samples. |
| Wash Buffer (PBS with 0.05% Tween-20) | Removes unbound reagents, reducing background signal. |
Procedure:
- Preparation: Reconstitute standards and prepare serial dilutions in analyte-free serum or specified diluent to create a standard curve (e.g., 1000, 500, 250, 125, 62.5, 31.3, 15.6 pg/mL). Dilute test serum samples as determined during assay development (e.g., 1:10).
- Assay: Add 100 µL of standards and prepared samples to the pre-coated plate wells. Incubate for 2 hours at room temperature (RT) on a plate shaker.
- Wash: Aspirate and wash each well 4 times with 300 µL wash buffer.
- Detection: Add 100 µL of biotinylated detection antibody (diluted as per manufacturer's protocol). Incubate for 1 hour at RT. Wash as in step 3.
- Enzyme Conjugate: Add 100 µL of Streptavidin-HRP. Incubate for 30 minutes at RT, protected from light. Wash as in step 3.
- Detection: Add 100 µL of TMB substrate. Incubate for 15-20 minutes at RT, protected from light.
- Stop: Add 100 µL of stop solution. Gently tap the plate to mix.
- Read: Measure absorbance at 450 nm (reference 570-650 nm) within 30 minutes.
Data Analysis:
- Generate a 4- or 5-parameter logistic (4PL/5PL) standard curve using softwares like SoftMax Pro or GraphPad Prism.
- Interpolate unknown sample concentrations from the curve, applying the dilution factor.
Protocol 2: PK/PD ELISA for a Therapeutic Antibody
Aim: To quantify drug concentration (PK) and a downstream phospho-protein biomarker (PD) in preclinical study serum samples. Principle: Two separate but parallel sandwich ELISAs.
Materials: Similar to Protocol 1, with specific reagents:
- PK Assay: Anti-idiotype antibody for capture, target antigen for detection (or vice-versa).
- PD Assay: Capture antibody for total protein, phospho-specific detection antibody for activated form.
Procedure:
- Sample Handling: Aliquot serum from dosed animals collected at predetermined time points. Store at -80°C until analysis.
- Parallel Assays: Run the PK and PD ELISA protocols simultaneously on different plates. Use appropriate standard curves: purified drug for PK assay, recombinant phosphorylated protein for PD assay.
- Matrix Controls: Include control serum from untreated animals to establish baseline PD levels.
- Follow steps analogous to Protocol 1 for each assay.
- Data Correlation: Plot drug concentration vs. time (PK curve) and PD biomarker level vs. time on the same graph to model the relationship.
Protocol 3: Potency ELISA for a VEGF Inhibitor
Aim: To measure the binding activity of a VEGF-neutralizing monoclonal antibody drug product. Principle: Antigen-capture ELISA.
Procedure:
- Coat a high-binding 96-well plate with 100 µL/well of recombinant VEGF antigen (2 µg/mL in PBS). Incubate overnight at 4°C. Wash.
- Block with 300 µL/well of assay diluent (e.g., PBS with 1% BSA) for 1 hour at RT. Wash.
- Add 100 µL/well of the drug sample (test) and a reference standard, both serially diluted in assay diluent. Incubate 2 hours at RT. Wash.
- Add 100 µL/well of an HRP-conjugated anti-human IgG antibody. Incubate 1 hour at RT. Wash.
- Develop with TMB and stop as in Protocol 1.
- Analysis: The concentration of drug that gives 50% of the maximum signal (EC50) is calculated for both test and reference standard. Potency is expressed as a relative percentage (Test EC50 / Reference EC50 x 100%).
Visualizations
Title: Sandwich ELISA Workflow for Biomarker Quantification
Title: Integrated PK/PD Study Design Using ELISA
ELISA Troubleshooting Guide: Solving Common Problems and Optimizing Assay Performance
Within the framework of ELISA principles for antigen quantification research, achieving optimal sensitivity is paramount for accurate detection and quantification of low-abundance analytes. Poor sensitivity or weak signal output compromises data integrity, leading to false negatives and unreliable conclusions in both research and drug development pipelines. This application note details the systematic diagnosis of common issues and provides validated protocols for remediation.
Common Causes and Diagnostic Framework
The following table categorizes primary causes of poor ELISA sensitivity, their manifestations, and initial diagnostic checks.
Table 1: Root Causes of Poor ELISA Sensitivity
| Category | Specific Cause | Typical Symptom | Quick Diagnostic Check |
|---|---|---|---|
| Assay Design | Inefficient antibody pairing (low affinity/avidity) | Low signal across all standards/samples | Review antibody specifications and matching; test alternative pairs. |
| Suboptimal coating concentration/conditions | Shallow standard curve, high background | Perform antibody/antigen coating titration. | |
| Reagent Issues | Degraded or inactivated detection enzyme (HRP/AP) | Weak signal despite high analyte concentration | Test enzyme substrate independently with a control. |
| Expired or improperly prepared substrate | Delayed or no color development | Prepare fresh substrate; ensure correct formulation. | |
| Inadequate conjugate concentration or dilution error | Uniformly low signal | Titrate the detection conjugate. | |
| Protocol Execution | Insufficient incubation times/temperatures | Incomplete binding, high CV | Validate all incubation steps with recommended times. |
| Overly stringent wash conditions (e.g., high detergent) | Loss of captured analyte or antibody | Reduce wash buffer stringency; check number of washes. | |
| Improper plate sealing/evaporation | Edge effects, high well-to-well variation | Ensure proper plate sealing during incubations. | |
| Instrumentation | Incorrect microplate reader settings (filter, gain) | Signal below detection threshold | Read known positive control with verified settings. |
| Contaminated or scratched optics | Spurious low readings across plates | Perform instrument maintenance and calibration. | |
| Sample & Matrix | Matrix interference (e.g., serum proteases) | Signal suppression in samples vs. buffer | Spike-and-recovery experiment in sample matrix. |
| Antigen degradation or instability | Inconsistent results between fresh/old samples | Use fresh samples with protease/phosphatase inhibitors. |
Detailed Experimental Protocols for Diagnosis and Optimization
Protocol 1: Checkerboard Titration for Antibody Pair Optimization
Purpose: To determine the optimal concentrations of capture and detection antibodies for maximal signal-to-noise ratio. Materials: Coating antibody, detection antibody, target antigen (standard), ELISA plate, relevant buffers. Procedure:
- Prepare serial dilutions of the capture antibody in coating buffer (e.g., 10, 5, 2.5, 1.25 µg/mL). Coat the plate, 100 µL/well, overnight at 4°C.
- Wash plate 3x with Wash Buffer (PBS + 0.05% Tween-20). Block with 300 µL/well of blocking buffer (e.g., 5% BSA in PBS) for 1-2 hours at RT.
- Wash 3x. Add a fixed, known concentration of antigen (e.g., mid-point of expected range) in duplicate to all wells. Incubate 2 hours at RT.
- Wash 3x. Prepare serial dilutions of the detection antibody (e.g., 1:1000 to 1:8000) in antibody dilution buffer. Add to plate, 100 µL/well. Incubate 1-2 hours at RT.
- Wash 3x. Add enzyme-conjugated secondary (if needed) at recommended dilution. Incubate 1 hour at RT.
- Wash 3x. Add substrate (TMB or other), incubate for precise time. Stop reaction.
- Read absorbance. Identify the combination of capture and detection antibody concentrations yielding the highest signal with the lowest background (blank).
Protocol 2: Spike-and-Recovery Experiment for Matrix Interference
Purpose: To assess the extent to which the sample matrix affects antigen detection and recovery. Materials: Purified target antigen, matched sample matrix (e.g., serum, cell lysate), assay buffer. Procedure:
- Prepare a dilution series of the purified antigen in: a) Assay Buffer (standard curve), and b) The sample matrix (spiked matrix).
- Run both sets through the standard ELISA protocol.
- Plot the standard curves and calculate the concentration for each spiked matrix sample from the assay buffer standard curve.
- Calculate percent recovery:
(Calculated Concentration of Spike in Matrix / Known Spiked Concentration) x 100. - Recovery outside 80-120% indicates significant matrix interference. Mitigation may require sample dilution, additional purification, or use of a matrix-matched standard curve.
Visualizing the Diagnostic Workflow
Diagram Title: ELISA Weak Signal Diagnostic Decision Tree
The Scientist's Toolkit: Key Research Reagent Solutions
Table 2: Essential Reagents for ELISA Troubleshooting
| Reagent / Material | Primary Function | Key Consideration for Sensitivity |
|---|---|---|
| High-Affinity Matched Antibody Pair | Specific capture and detection of target antigen. | Affinity constants (KD); ensure epitopes do not overlap. |
| Stable Antigen Standard | Generation of a quantitative standard curve. | Purity and known concentration; matrix-matched if possible. |
| Low-Autofluorescence Microplate | Solid phase for assay with minimal background. | High protein binding capacity for coating; clear for colorimetric/chemiluminescent readout. |
| Enzyme Conjugate (HRP/AP) | Catalyzes signal generation from substrate. | High Specific Activity; minimal lot-to-lot variation. |
| High-Sensitivity Substrate (e.g., Ultra TMB, Chemiluminescent) | Provides amplified, detectable signal upon enzyme action. | Low background, high signal-to-noise ratio; linear range. |
| Blocking Buffer (e.g., BSA, Casein, Specialty Blockers) | Reduces non-specific binding of reagents to plate. | Must be compatible with antibodies/antigen; can mitigate matrix effects. |
| Plate Washer & Precision Pipettes | Ensures consistent liquid handling and wash stringency. | Critical for reducing variability and background signal. |
| Sample Diluent / Matrix | Dilutes samples to fall within assay range. | Should minimize interference; may contain heterophile antibody blockers. |
Addressing High Background Noise and Non-Specific Binding
Within the framework of a thesis on ELISA principles for antigen quantification, managing background noise and non-specific binding (NSB) is paramount for achieving high sensitivity and specificity. These artifacts distort the true signal, compromising the accuracy of kinetic assays and absolute quantification crucial in drug development. This document presents current strategies and protocols to mitigate these challenges.
The following table categorizes common sources and their typical impact on assay performance.
Table 1: Common Sources and Impact of ELISA Background & Non-Specific Binding
| Source Category | Specific Cause | Typical Signal Increase | Impact on CV |
|---|---|---|---|
| Plate Surface | High-binding polystyrene | Up to 0.5 OD above low-bind | Can increase by >10% |
| Sample Matrix | 10% Serum/Plasma | 0.2 - 0.8 OD (vs. buffer) | Highly variable (>15%) |
| Antibody Quality | Low specificity/purity | 0.3 - 1.0 OD above specific | Increases significantly |
| Wash Stringency | Inadequate washing steps | 0.1 - 0.4 OD per missed wash | Moderate (5-10%) |
| Detection System | Polymer/Enzyme precipitation | Can increase sensitivity & noise | Requires optimization |
| Blocking Efficacy | Incomplete or wrong blocker | 0.4 - 1.2 OD above optimal | High (>12%) |
Optimized Experimental Protocols
Protocol 1: Systematic Optimization of Blocking Conditions
Objective: To identify the optimal blocking buffer for a specific antigen-antibody pair in a complex matrix.
Materials:
- Coated ELISA plate (antigen of interest)
- Test blocking buffers: 1% BSA/PBS, 5% Non-fat dry milk/PBS, 3% Fish Gelatin/PBS, 1% Casein/PBS, Commercial Protein-Free blocker.
- Detection antibodies (primary and labeled secondary)
- Wash buffer (0.05% Tween-20 in PBS)
- Substrate and Stop solution
Method:
- Coat plates with antigen overnight at 4°C. Wash 3x.
- Divide plate. Add a different blocking buffer to each section (300 µL/well).
- Incubate for 2 hours at room temperature (RT) with gentle shaking.
- Wash plate 5x with wash buffer.
- Add sample dilutions (in respective blocking buffers) and negative controls (blocker only). Incubate 1-2h at RT.
- Wash 5x. Add detection antibodies as per standard protocol.
- Develop and read. Calculate signal-to-noise (S/N) ratio for each blocker: (Mean Sample OD) / (Mean Negative Control OD).
Protocol 2: High-Stringency Washing to Minimize NSB
Objective: To implement a wash protocol that effectively removes loosely bound proteins without disrupting specific interactions.
Materials:
- ELISA plate after incubation step.
- Wash Buffer: PBS with 0.05% - 0.1% Tween-20. For high NSB, consider additives: 0.35M NaCl (for ionic interference) or 0.05% Triton X-100 (stronger detergent).
- Plate washer or manual multichannel pipette with reservoir.
Method:
- Aspiration: Invert plate promptly and tap firmly on clean lint-free towels. For critical steps, use a multi-port aspirator for complete removal.
- Dispensing: Fill wells completely with wash buffer (≈350 µL for a 96-well plate). Allow to soak for 30 seconds to 1 minute to dissociate NSB.
- Cycle Number: Perform a minimum of 5 washes post-blocking and post-primary antibody. Increase to 5-7 washes post-secondary antibody if background remains high.
- Final Wash: Use a final wash with PBS only (no detergent) to remove detergent micelles that could interfere with enzymatic detection.
- Blotting: After final wash, blot plate thoroughly on paper towels to remove residual droplets.
The Scientist's Toolkit: Research Reagent Solutions
Table 2: Essential Reagents for Reducing ELISA Background
| Reagent Category | Specific Example | Function & Rationale |
|---|---|---|
| Alternative Blockers | Thermo Fisher SuperBlock, Vector Background Sniper | Protein-free or polymer-based blockers offer low intrinsic background vs. traditional proteins. |
| High-Fidelity Antibodies | Recombinant Monoclonals, F(ab')2 Fragments | Defined specificity reduces polyclonal cross-reactivity; Fc fragments minimize binding to plate/Fc receptors. |
| Wash Buffer Additives | Tween-20, Triton X-100, CHAPS | Detergents disrupt hydrophobic interactions. Varying strength and type allows stringency tuning. |
| Plate Types | Medium-Binding, Primate Protein-Binding, Maleic Anhydride | Lower surface charge/hydrophobicity than high-binding plates inherently reduces passive protein adsorption. |
| Signal Detection | Streptavidin-Poly-HRP, Amplification Systems (TSA) | Increases S/N by boosting specific signal more than background, enabling lower antibody concentrations. |
| Sample Diluent | Heterophilic Blocking Reagents (HBR) | Contains inert immunoglobulins to block interfering antibodies (e.g., HAMA, RF) in biological samples. |
Visualizing Optimization Pathways and Workflows
Diagram 1: ELISA Background Troubleshooting Decision Tree
Diagram 2: Optimized Low-Backburn ELISA Protocol Workflow
Optimizing Antibody Concentrations and Incubation Times
Within the broader thesis on ELISA principles for antigen quantification research, the optimization of reagent concentrations and incubation kinetics is foundational. The binding equilibrium between antigen, capture antibody, and detection antibody directly dictates the assay's sensitivity, dynamic range, and reproducibility. Suboptimal parameters lead to high background, low signal, and wasted reagents. These Application Notes provide a systematic framework for determining the ideal conditions for a quantitative sandwich ELISA, a cornerstone technique in both basic research and biopharmaceutical development.
Experimental Protocols
Protocol 1: Checkerboard Titration for Capture and Detection Antibody Pair
Objective: To simultaneously determine the optimal working concentrations for the matched antibody pair.
Materials:
- Antigen stock at known concentration (for standard curve).
- Capture antibody (unlabeled) stock.
- Detection antibody (conjugated to enzyme, e.g., HRP) stock.
- ELISA microplate (high-binding).
- Coating Buffer (0.05 M Carbonate-Bicarbonate, pH 9.6).
- Blocking Buffer (e.g., 1-5% BSA or non-fat dry milk in PBS-T).
- PBS-T (Phosphate-Buffered Saline with 0.05% Tween 20).
- Substrate solution (e.g., TMB).
- Stop Solution (e.g., 1M H₂SO₄).
- Plate reader.
Procedure:
- Capture Antibody Coating: Prepare a 2-fold serial dilution of the capture antibody in coating buffer across a range (e.g., 0.5 to 10 µg/mL). Add 100 µL per well down the columns of the plate. Incubate overnight at 4°C.
- Blocking: Wash plate 3x with PBS-T. Add 300 µL of blocking buffer per well. Incubate for 1-2 hours at room temperature (RT). Wash 3x.
- Antigen Addition: Add 100 µL of a fixed, moderate concentration of antigen (within the expected detection range) to all wells. Incubate for 2 hours at RT. Wash 3-5x.
- Detection Antibody Titration: Prepare a 2-fold serial dilution of the detection antibody in blocking buffer across a range (e.g., 0.1 to 2 µg/mL). Add 100 µL per well across the rows of the plate. Incubate for 1-2 hours at RT. Wash 5x.
- Signal Development: Add substrate. Incubate for a fixed, optimal time (determined separately). Stop the reaction.
- Analysis: Read absorbance. Optimal concentrations are identified as the pair yielding the highest signal-to-background (S/B) ratio, where the signal is at the upper plateau of the dynamic range and background (no-antigen control) is minimal.
Protocol 2: Kinetic Study of Incubation Steps
Objective: To define the minimal incubation time required to reach binding equilibrium for each assay step.
Materials: As in Protocol 1, using optimized antibody concentrations.
Procedure:
- Perform capture antibody coating and blocking as standard.
- Antigen Incubation Kinetics: Add antigen to wells. Include replicate plates or use a staggered start. Remove plates at time points (e.g., 30 min, 1, 2, 4, 6 hours). Immediately wash all plates and proceed with the detection antibody (using a standard, longer incubation time).
- Detection Antibody Incubation Kinetics: Using a single optimal antigen incubation time, repeat with varying detection antibody incubation times (e.g., 30 min, 1, 2, 3 hours).
- Develop signal for a fixed time, stop, and read.
- Analysis: Plot signal vs. time for each step. The optimal time is at the beginning of the signal plateau, indicating binding saturation, maximizing efficiency.
Data Presentation
Table 1: Checkerboard Titration Results (Absorbance at 450 nm) Antigen concentration fixed at 50 ng/mL. Background (no Ag) values in parentheses.
| [Capture Ab] (µg/mL) ↓ \ [Detection Ab] (µg/mL) → | 0.25 | 0.5 | 1.0 | 2.0 |
|---|---|---|---|---|
| 1.0 | 0.85 (0.05) | 1.25 (0.08) | 1.45 (0.12) | 1.50 (0.18) |
| 2.0 | 1.10 (0.06) | 1.65 (0.09) | 2.10 (0.15) | 2.15 (0.22) |
| 4.0 | 1.25 (0.08) | 1.95 (0.11) | 2.40 (0.13) | 2.45 (0.25) |
| 8.0 | 1.20 (0.12) | 1.80 (0.18) | 2.20 (0.20) | 2.30 (0.30) |
Optimal Pair: 4 µg/mL Capture Antibody and 1 µg/mL Detection Antibody (highlighted), offering the best S/B ratio.
Table 2: Incubation Time Kinetics Data Using optimized antibody concentrations from Table 1.
| Step | Time Point | Mean Signal (A450) | % of Max Signal |
|---|---|---|---|
| Antigen Binding | 30 min | 1.20 | 50% |
| 1 hour | 1.85 | 77% | |
| 2 hours | 2.35 | 98% | |
| 4 hours | 2.40 | 100% | |
| Detection Ab Binding | 30 min | 1.65 | 69% |
| 1 hour | 2.25 | 94% | |
| 2 hours | 2.40 | 100% | |
| 3 hours | 2.38 | 99% |
Recommended Times: Antigen = 2 hours, Detection Antibody = 1 hour (highlighted), balancing assay speed and maximum signal.
Visualizations
Diagram 1: Sequential ELISA Optimization Workflow
Diagram 2: Key Binding Events in Sandwich ELISA
The Scientist's Toolkit: Essential Research Reagent Solutions
| Item | Function in Optimization |
|---|---|
| High-Binding ELISA Plates | Polystyrene plates with surface treatment for maximal protein adsorption, ensuring consistent capture antibody immobilization. |
| Antibody Pairs (Matched) | Pre-validated capture and detection antibodies targeting non-overlapping epitopes on the antigen, minimizing cross-reactivity. |
| Recombinant Antigen Standard | Highly purified, quantifiable antigen for generating the standard curve and for use in optimization experiments. |
| Blocking Agents (BSA, Casein) | Proteins used to saturate non-specific binding sites on the plate well, reducing background noise. |
| HRP or AP Conjugates | Enzymes (Horseradish Peroxidase or Alkaline Phosphatase) linked to the detection antibody; choice influences substrate options and kinetics. |
| Chromogenic/TMB Substrate | Solution that produces a measurable color change upon enzymatic reaction; TMB is common for HRP due to sensitivity and low toxicity. |
| Precision Multichannel Pipettes | Essential for accurate, reproducible transfer of reagents during serial dilutions and plate washing steps. |
| Microplate Washer | Automates the washing process, drastically improving consistency and removing unbound reagents more effectively than manual washing. |
| Plate Reader (Absorbance) | Spectrophotometer designed to read 96- or 384-well plates, quantifying the colorimetric signal at specific wavelengths (e.g., 450 nm for TMB). |
1. Introduction Within the framework of ELISA principles for antigen quantification research, the washing step is a fundamental determinant of data fidelity. Inadequate washing leads to high background noise and false-positive signals from non-specifically bound proteins, enzymes, or detection reagents, while overly aggressive washing can elute specifically bound antigen-antibody complexes, yielding false negatives. This application note details protocols and data underscoring the critical impact of standardized washing on inter-assay reproducibility and quantitative accuracy.
2. Quantitative Impact of Washing Parameters The following tables summarize experimental data from recent studies evaluating washing efficiency in sandwich ELISA formats.
Table 1: Effect of Wash Volume and Cycle Number on Signal-to-Noise Ratio (SNR)
| Wash Buffer per Well | Number of Cycles | Mean Signal (Positive Control) | Mean Background (Negative Control) | Signal-to-Noise Ratio |
|---|---|---|---|---|
| 200 µL | 3 | 2.450 OD | 0.210 OD | 11.7 |
| 300 µL | 3 | 2.430 OD | 0.125 OD | 19.4 |
| 300 µL | 5 | 2.410 OD | 0.095 OD | 25.4 |
| 400 µL | 5 | 2.385 OD | 0.082 OD | 29.1 |
| No Wash | 0 | 3.100 OD | 1.850 OD | 1.7 |
Data adapted from controlled assays using HRP-based detection. OD measured at 450 nm.
Table 2: Coefficient of Variation (CV%) Linked to Wash Technique
| Washing Method | Intra-Assay CV% (n=12) | Inter-Assay CV% (n=3 plates) | Comment |
|---|---|---|---|
| Manual (Pipette) | 15.2% | 22.7% | High variability in aspiration efficiency. |
| Semi-Automated Washer | 8.5% | 12.1% | Improved but dependent on user calibration. |
| Fully Automated Washer | 4.3% | 6.8% | Highest reproducibility with consistent dwell time and aspiration. |
3. Detailed Protocols for Optimized Washing
Protocol 3.1: Standardized Manual Washing for 96-Well Plate Objective: To remove unbound reagents while preserving specific immunocomplexes. Materials: Coated ELISA plate, wash buffer (e.g., PBS with 0.05% Tween 20), multichannel pipette, reservoir, absorbent paper.
- Aspiration: After incubation, invert plate to decant liquid. Swiftly tap plate onto absorbent paper 3-5 times to remove residual droplets.
- Dispensing: Using a multichannel pipette, fill each well completely with wash buffer (300-400 µL). Ensure no air bubbles are introduced at the well bottom.
- Dwell Time: Allow the buffer to sit in wells for 30-60 seconds to dissociate weakly bound material.
- Aspiration/Decanting: Repeat step 1. This constitutes one wash cycle.
- Repetition: Repeat steps 2-4 for a total of 3-5 cycles as determined by optimization (see Table 1).
- Final Removal: After the last cycle, tap plate thoroughly on absorbent paper until no visible moisture remains. Proceed immediately to the next assay step to prevent wells from drying.
Protocol 3.2: Calibration and Use of an Automated Plate Washer Objective: To achieve highly reproducible washing with minimal user-induced variability. Materials: Automated microplate washer, calibrated vacuum/pressure system, filtered wash buffer.
- Pre-Run Calibration:
- Check all dispensing nozzles for clogs and ensure even liquid stream.
- Calibrate aspiration height to ~0.5-1.0 mm above the well bottom to avoid damaging the coated base.
- Verify that waste aspiration is complete after each cycle.
- Programming Parameters:
- Set wash volume to 300-400 µL per well per cycle.
- Set number of cycles to 5.
- Include a 10-15 second dwell time after each fill.
- Set aspiration speed to "medium" to prevent well stripping.
- Execution: Load plate, initiate protocol. After completion, immediately tap plate on absorbent paper and proceed to next step.
4. The Scientist's Toolkit: Research Reagent Solutions
| Item | Function & Importance |
|---|---|
| PBS with 0.05% Tween 20 | Standard wash buffer. PBS maintains physiological pH and ionic strength; Tween 20 (a non-ionic detergent) reduces hydrophobic interactions, facilitating removal of non-specifically bound proteins. |
| Automated Microplate Washer | Dispenses and aspirates buffer with precise, programmable control over volume, cycles, dwell time, and aspiration points. Critical for reducing CV% in high-throughput or GxP environments. |
| Non-Foaming Wash Buffer Concentrate | Commercial concentrates designed for automated systems, minimizing foam generation that can interfere with consistent aspiration and lead to carryover. |
| Plate Sealers & Adhesive Covers | Used during incubation steps to prevent evaporation and well-to-well contamination, which can alter reagent concentration and impact subsequent washing efficiency. |
| Pre-coated ELISA Plates | Plates coated with capture antibody under optimized conditions. Consistent coating quality is a prerequisite for effective washing, as poor coating can lead to aberrant elution of the capture layer. |
5. Visualizing the Role of Washing in ELISA
Title: ELISA Workflow with Washing Steps and Impact of Failure
Title: Variables Influencing ELISA Washing Efficiency
Handling Hook Effect and Assay Linearity Issues
Within the broader thesis on ELISA principles for antigen quantification research, understanding and mitigating the hook effect and assay nonlinearity is paramount. These phenomena compromise the accuracy of diagnostic and research immunoassays, leading to falsely low reported concentrations of high-abundance analytes and unreliable data in drug development. This document provides detailed application notes and protocols for their identification and resolution.
Background and Mechanisms
The hook effect, or the "prozone effect," occurs in sandwich immunoassays when an excess of antigen saturates both the capture and detection antibodies, preventing the formation of the requisite "sandwich" complex. This leads to a characteristic hook-shaped calibration curve where signal decreases at very high antigen concentrations. Assay linearity issues often stem from reagent limitations, matrix interferences, or suboptimal incubation conditions, causing deviation from the expected dose-response relationship.
Table 1: Common Indicators of Hook Effect and Linearity Issues
| Parameter | Typical Acceptable Range | Indicator of Problem | Common Assay Type Affected |
|---|---|---|---|
| Dose-Response Curve R² | >0.99 | <0.98 | All quantitative ELISAs |
| % Recovery in Linearity-of-Dilution | 80-120% | <80% or >120% | Sandwich ELISA |
| Hook Effect Onset Concentration | Not applicable | 10-100x Upper Limit of Quantitation (ULOQ) | Sandwich ELISA (e.g., CRP, PSA, IL-6 assays) |
| Inter-assay Precision (CV) at High Conc. | <15% | >20% | All quantitative ELISAs |
Table 2: Results from a Hypothetical Linearity-of-Dilution Experiment
| Sample ID | Nominal Conc. (ng/mL) | Measured Conc. (ng/mL) | % Recovery | Conclusion |
|---|---|---|---|---|
| High-1 (Neat) | 500 | 275 | 55 | Hook Effect Suspected |
| High-1 (1:2 Dil) | 250 | 260 | 104 | Recovery restored |
| High-1 (1:4 Dil) | 125 | 128 | 102 | Recovery restored |
| Mid-1 (Neat) | 50 | 52 | 104 | Acceptable linearity |
| Mid-1 (1:2 Dil) | 25 | 24.5 | 98 | Acceptable linearity |
Experimental Protocols
Protocol 1: Identification of Hook Effect via Sample Dilution
Objective: To determine if a falsely low result is due to the hook effect. Materials: See "The Scientist's Toolkit" below. Procedure:
- Select the sample yielding an unexpectedly low or plateauing signal.
- Prepare a series of dilutions (e.g., 1:2, 1:5, 1:10, 1:50) of the sample using the assay's recommended diluent.
- Re-assay the diluted samples alongside the original calibration curve.
- Data Analysis: Multiply the measured concentration of each dilution by its dilution factor to obtain the estimated concentration in the original sample.
- Interpretation: If the calculated concentration increases with higher dilution factors and eventually plateaus at a significantly higher value, a hook effect is confirmed.
Protocol 2: Assessment of Assay Linearity-of-Dilution
Objective: To validate the assay's performance across its claimed measuring range and identify nonlinearity. Materials: See "The Scientist's Toolkit" below. Procedure:
- Prepare a high-concentration sample near the suspected ULOQ or above.
- Create a serial dilution series (e.g., 1:1, 1:2, 1:4, 1:8, 1:16) in the appropriate matrix.
- Assay all dilutions in duplicate.
- Data Analysis: Plot the observed concentration vs. the expected (theoretical) concentration. Calculate the slope, intercept, and R². Determine % recovery for each point: (Observed Conc. / Expected Conc.) * 100.
- Interpretation: The assay is linear if R² ≥ 0.99 and all recovery values are within 80-120%.
Protocol 3: Optimization to Mitigate Hook Effect (Increased Antibody Concentration)
Objective: To reformulate an assay to shift the hook effect onset beyond clinically/relevantly expected concentrations. Procedure:
- Using a checkerboard titration, systematically increase the concentration of both the capture and detection antibodies (e.g., in 1.5x increments).
- Re-run the calibration curve using a high-concentration antigen standard that previously induced the hook effect.
- Compare the signal at the high antigen concentration before and after optimization. The goal is to restore a monotonic increase in signal.
- Validate the optimized assay with linearity-of-dilution and precision profiles.
Visualization of Concepts and Workflows
Diagram 1: Hook Effect Mechanism in Sandwich ELISA
Diagram 2: Linearity and Hook Effect Troubleshooting
The Scientist's Toolkit
Table 3: Essential Research Reagent Solutions for Linearity and Hook Effect Studies
| Item | Function | Example/Catalog Consideration |
|---|---|---|
| High-Abundant Antigen Standard | Serves as positive control for hook effect induction and linearity testing. | Recombinant protein at >ULOQ concentration. |
| Assay-Specific Diluent | Matrix-matched diluent for serial dilution to minimize matrix interference. | Commercial ELISA diluent or kit-specific buffer. |
| High-Binding ELISA Plates | Ensure consistent antibody coating for assay optimization protocols. | Polystyrene, C-bottom, 96-well plates. |
| Capture & Detection Antibody Pair | Critical reagents for assay optimization to overcome hook effect. | Monoclonal pair targeting non-overlapping epitopes. |
| Signal Detection Reagent | For colorimetric, chemiluminescent, or fluorescent readout of the assay. | HRP-Streptavidin with TMB or Luminescent substrate. |
| Precision Pipettes & Tips | Essential for accurate serial dilution and reagent dispensing. | Calibrated pipettes (2-20µL, 20-200µL, 100-1000µL). |
| Microplate Reader | To measure the final assay signal (Absorbance, RLU, RFU). | Filter-based or monochromator-based reader. |
| Data Analysis Software | For curve fitting, linearity, and recovery calculations. | GraphPad Prism, SoftMax Pro, or R/Python scripts. |
Best Practices for Precision, Accuracy, and Inter-Assay Consistency
Within the critical framework of ELISA-based antigen quantification research, ensuring data reliability is paramount. Precision (repeatability), accuracy (trueness), and inter-assay consistency are foundational to generating valid, publishable, and regulatory-compliant results. These metrics directly impact the interpretation of biological phenomena and the progression of drug candidates. This application note delineates best practices and protocols to optimize these parameters in quantitative ELISA workflows.
Defining Core Metrics
Accuracy refers to the closeness of agreement between the measured value and the true value of the analyte. Precision describes the closeness of agreement between independent measurements obtained under stipulated conditions, often subdivided into repeatability (within-run) and reproducibility (between-run, between-labs). Inter-assay consistency is a measure of precision across multiple independent assay runs over time.
| Metric | Definition | Typical Target (for Validated ELISA) | Influencing Factors |
|---|---|---|---|
| Accuracy | % Recovery of known standard/spike | 80-120% recovery | Standard purity, matrix effects, calibration curve model |
| Precision (Repeatability) | %CV within a single plate/run | <10% CV (often <15% for LLOQ) | Pipetting, plate homogeneity, incubation conditions |
| Precision (Intermediate Precision) | %CV across runs, days, analysts | <15% CV (often <20% for LLOQ) | Reagent lot changes, environmental drift, analyst technique |
| Inter-Assay Consistency | Agreement of QC sample results across runs | QC values within ±2SD of historical mean | Standard curve stability, reagent degradation, protocol adherence |
Protocols for Validation and Monitoring
Protocol 1: Establishing a Robust Standard Curve
Objective: To generate a reliable calibration curve that accurately reflects the concentration-response relationship.
- Standard Reconstitution: Use the recommended buffer. Allow standards to equilibrate to room temperature (RT) for 30 min before use.
- Serial Dilution: Perform a serial dilution (e.g., 1:2 or 1:3) in the assay diluent identical to the sample matrix whenever possible (e.g., 1% BSA/PBS). Use low-protein-binding tubes.
- Plate Layout: Include a minimum of 6 non-zero standard points run in duplicate. Distribute standards across the plate to assess plate uniformity.
- Curve Fitting: Use a 4- or 5-parameter logistic (4PL/5PL) nonlinear regression model. Do not force through zero. The coefficient of determination (R²) should be ≥0.99.
- Acceptance Criteria: Mean back-calculated standard concentrations should be within 15% of nominal value (20% at LLOQ).
Protocol 2: Assessing Precision and Accuracy (Spike-and-Recovery)
Objective: To evaluate the assay's ability to accurately measure analyte in the presence of sample matrix.
- Spike Preparation: Prepare a known, mid-range concentration of purified antigen in assay diluent. Serially dilute this spike into a minimum of three different negative sample matrices (e.g., serum, plasma, cell lysate) at 2-3 relevant concentrations.
- Sample Analysis: Run spiked samples and unspiked matrix controls in the same assay. Calculate recovery for each sample: Recovery % = [(Measured concentration in spiked sample – Measured in unspiked) / Known spike concentration] x 100.
- Interpretation: Mean recovery of 80-120% indicates acceptable accuracy and minimal matrix interference.
Protocol 3: Monitoring Inter-Assay Consistency with Quality Controls (QCs)
Objective: To ensure longitudinal reliability of assay performance across multiple runs.
- QC Pool Creation: Prepare a large, homogeneous pool of sample containing analyte at low, medium, and high concentrations. Aliquot and store at ≤ -70°C.
- Run Inclusion: In every assay run, include these three QC samples in duplicate at fixed positions.
- Tracking: Establish a Levey-Jennings chart. Plot the mean concentration of each QC per run against the run sequence or date. Calculate the grand mean and standard deviation (SD) from at least 20 initial runs.
- Acceptance Criteria: For a run to be valid, at least 2 out of 3 QC samples must fall within ±2SD of their historical mean. Investigate any run where a QC fails this criterion or shows a systematic shift.
The Scientist's Toolkit: Key Research Reagent Solutions
| Item | Function & Criticality |
|---|---|
| High-Affinity, Matched Antibody Pair | Capture and detection antibodies with non-overlapping epitopes minimize interference and maximize specificity. Critical for sensitivity. |
| Certified Reference Standard | Lyophilized, well-characterized antigen of known purity and concentration. The cornerstone for an accurate calibration curve. |
| Matrix-Matched Assay Diluent | Diluent that approximates the sample matrix (e.g., with equivalent protein, salt content). Reduces matrix effects, improving accuracy. |
| Stable, Low-Noise Detection Substrate (e.g., TMB) | Provides consistent enzymatic signal generation. Low lot-to-lot variability is essential for inter-assay consistency. |
| Precision Microplate Washer | Consistent and thorough washing is vital to reduce background (noise) and improve the signal-to-noise ratio, directly affecting precision. |
| Calibrated, High-Precision Pipettes | Accurate liquid handling is the single greatest technical factor influencing both precision and accuracy. Regular calibration is mandatory. |
| Temperature-Controlled Incubator/Shaker | Ensures uniform binding kinetics across all wells and runs. Inconsistent incubation is a major source of inter-assay variability. |
| Validated Analysis Software | Software capable of 4PL/5PL curve fitting with appropriate weighting. Ensures consistent data reduction across all users and runs. |
Visualizing Key Workflows and Relationships
ELISA Data Generation and Validation Workflow
Key Factors Driving ELISA Performance Metrics
Validating Your ELISA: Ensuring Reliability and Comparing to Alternative Platforms
Within the broader thesis on the principles of enzyme-linked immunosorbent assay (ELISA) for antigen quantification research, rigorous validation of the analytical method is paramount. Validation ensures that the generated data are reliable, reproducible, and fit for purpose in drug development and clinical research. This document provides detailed application notes and protocols for assessing four critical validation parameters: Precision, Accuracy, Robustness, and Stability.
Precision
Definition: The closeness of agreement between a series of measurements obtained from multiple sampling of the same homogeneous sample under prescribed conditions. It is typically expressed as relative standard deviation (RSD, %).
Protocol: Intra-assay and Inter-assay Precision
- Objective: To determine repeatability (within-run) and intermediate precision (between-run, between-day, between-analyst).
- Materials: Homogeneous antigen sample at High, Medium, and Low concentrations within the calibration range.
- Method:
- Prepare a calibration curve as per the standard ELISA protocol.
- For intra-assay precision, analyze each QC concentration (H, M, L) in a minimum of 6 replicates within a single assay plate/run.
- For inter-assay precision, analyze each QC concentration in duplicate across a minimum of 3 independent assay runs performed on different days, ideally by different analysts.
- Calculate the mean concentration, standard deviation (SD), and %RSD for each level.
- Acceptance Criteria: For quantitative antigen ELISAs, intra-assay precision should typically be ≤15% RSD, and inter-assay precision ≤20% RSD (≤25% at the lower limit of quantification, LLOQ).
Table 1: Representative Precision Data for an IL-6 Quantification ELISA
| Precision Type | QC Level (pg/mL) | Mean Observed (pg/mL) | SD (pg/mL) | %RSD | n |
|---|---|---|---|---|---|
| Intra-assay | 10 (Low) | 10.5 | 0.8 | 7.6% | 6 |
| 100 (Mid) | 102.3 | 6.1 | 6.0% | 6 | |
| 800 (High) | 790.4 | 45.2 | 5.7% | 6 | |
| Inter-assay | 10 (Low) | 10.8 | 1.9 | 17.6% | 6 runs |
| 100 (Mid) | 98.7 | 8.5 | 8.6% | 6 runs | |
| 800 (High) | 815.0 | 62.0 | 7.6% | 6 runs |
Accuracy
Definition: The closeness of agreement between the value found and the value that is accepted as a conventional true value or an accepted reference value. It is often assessed through spike-and-recovery experiments.
Protocol: Accuracy via Spike-and-Recovery
- Objective: To determine the ability of the assay to accurately measure antigen spiked into a relevant biological matrix.
- Materials: Known concentration of purified antigen, pooled matrix (e.g., serum, plasma, cell culture medium), assay buffer.
- Method:
- Prepare three pools of the matrix: undiluted, and two relevant dilutions (e.g., 1:2, 1:4) with assay buffer.
- Spike each matrix pool with the antigen at three levels (Low, Mid, High).
- Prepare an equivalent set of spikes in assay buffer (non-matrix) to serve as the 100% recovery control.
- Analyze all samples in duplicate alongside a calibration curve.
- Calculate %Recovery: (Concentration in matrix / Concentration in buffer) x 100%.
- Acceptance Criteria: Mean recovery is generally acceptable within 80-120%, with RSD ≤20%.
Table 2: Accuracy/Recovery Data for an Antigen in Human Serum
| Matrix Dilution | Spiked Conc. (pg/mL) | Measured Conc. (pg/mL) | % Recovery |
|---|---|---|---|
| Neat Serum | 25 | 23.5 | 94.0% |
| 250 | 238 | 95.2% | |
| 1000 | 1120 | 112.0% | |
| 1:2 Serum | 25 | 24.8 | 99.2% |
| 250 | 245 | 98.0% | |
| 1000 | 1015 | 101.5% |
Robustness
Definition: A measure of the assay's capacity to remain unaffected by small, deliberate variations in method parameters.
Protocol: Robustness Testing via Factorial Design
- Objective: To evaluate the impact of minor procedural changes on assay performance.
- Method:
- Identify critical protocol steps (e.g., incubation times, temperatures, reagent batch changes, wash volumes).
- Using a mid-level QC sample, test a small deviation from the standard protocol for each parameter.
- A simplified factorial design (e.g., testing two factors at two levels each) is efficient.
- Compare the measured concentration of the QC sample under varied conditions to the result under standard conditions.
- Acceptance Criteria: The measured concentration should remain within ±15% of the value obtained under standard conditions.
Table 3: Robustness Testing of an ELISA Protocol
| Varied Parameter | Standard Condition | Test Condition | QC Result (Test) | % Deviation |
|---|---|---|---|---|
| Coating Incubation | Overnight, 4°C | 2 hours, 37°C | 105 pg/mL | +5.0% |
| Sample Incubation | 2 hours, RT | 1.5 hours, RT | 97 pg/mL | -3.0% |
| Detection Ab Incubation | 1 hour, RT | 45 min, RT | 108 pg/mL | +8.0% |
| Wash Buffer (New Lot) | Lot A | Lot B | 101 pg/mL | +1.0% |
Stability
Definition: The chemical stability of an analyte in a given matrix under specific conditions for given time intervals. Includes analyte stability in matrix and reagent stability.
Protocol: Antigen Stability in Matrix
- Objective: To determine short-term (bench-top), long-term (storage at -80°C), and freeze-thaw stability.
- Method:
- Prepare QC samples (Low and High) in the relevant matrix.
- Short-term: Leave samples at room temperature for 2, 4, and 6 hours. Analyze against a freshly prepared calibration curve.
- Freeze-thaw: Subject samples to 1, 3, and 5 freeze (-80°C) and thaw (room temperature) cycles. Analyze.
- Long-term: Store samples at -80°C for 1, 3, 6, and 12 months. Analyze.
- Compare results to a freshly prepared QC sample (time-zero control).
- Acceptance Criteria: The mean concentration should be within ±15% of the nominal concentration (time-zero control).
Table 4: Stability Profile of Antigen X in EDTA Plasma
| Stability Condition | Duration/Cycles | Low QC (% of Nominal) | High QC (% of Nominal) |
|---|---|---|---|
| Bench-top, RT | 4 hours | 98% | 102% |
| 6 hours | 93% | 96% | |
| Freeze-Thaw | 3 cycles | 101% | 104% |
| 5 cycles | 88% | 92% | |
| Long-term, -80°C | 3 months | 105% | 98% |
| 6 months | 97% | 95% |
The Scientist's Toolkit: Key Reagent Solutions for ELISA Validation
| Item | Function in Validation |
|---|---|
| Recombinant Antigen Standard | Provides the primary calibrator for constructing the quantitative standard curve. Must be highly pure and well-characterized. |
| QC Sample Pools (H, M, L) | Prepared in the target matrix. Used to monitor precision, accuracy, and stability across validation experiments. |
| Matrix (e.g., Human Serum) | The biological fluid of interest. Used for spike-recovery and stability studies to assess matrix effects. |
| Assay/Diluent Buffer | Used for diluting standards, samples, and reagents. Its composition (blockers, salts) is critical for specificity and sensitivity. |
| Capture & Detection Antibodies | The critical pair defining assay specificity. Robustness may be tested using different lots or concentrations. |
| Enzyme Conjugate (e.g., HRP) | Conjugated to the detection antibody. Stability of this reagent over time is a key validation parameter. |
| Chromogenic/ Chemiluminescent Substrate | Generates the measurable signal. Must be stable and demonstrate consistent kinetics within the assay timeline. |
| Stop Solution | Terminates the enzymatic reaction at a defined time point, critical for precision and robustness. |
Visualization
ELISA Validation Parameter Relationships
ELISA Validation Experiment Workflow
Stability Study Design for ELISA
This document, framed within a broader thesis on ELISA principles for antigen quantification research, details the formal validation of Enzyme-Linked Immunosorbent Assays (ELISAs). Validation is the process of establishing documented evidence that a method does what it is intended to do. For researchers and drug development professionals, adherence to guidelines from the International Council for Harmonisation of Technical Requirements for Pharmaceuticals for Human Use (ICH), the Clinical and Laboratory Standards Institute (CLSI), and industry standards is critical for generating reliable, reproducible, and defensible data for preclinical studies, clinical trials, and quality control.
Core Validation Parameters: Guidelines Comparison
The ICH Q2(R2) guideline "Validation of Analytical Procedures" (2023) and the CLSI guideline EP17-A2 provide the foundational framework. Industry standards often build upon these for specific contexts (e.g., immunogenicity assays).
| Validation Parameter | ICH Q2(R2) / Industry Standard Definition | Typical Acceptance Criteria for Quantitative ELISA | CLSI EP17 Additional Consideration |
|---|---|---|---|
| Precision | Closeness of agreement between a series of measurements. | Repeatability (Within-run): CV < 15-20%. Intermediate Precision (Between-run): CV < 20-25%. | Defines measurement uncertainty near the limit of quantification. |
| Accuracy | Closeness of agreement between test result and accepted reference value. | Mean recovery of 80-120% for spiked samples. Correlation with reference method (R² > 0.95). | |
| Specificity/ Selectivity | Ability to assess the analyte unequivocally in the presence of expected components. | Recovery within ±20% in presence of matrix (e.g., serum, lysate), cross-reactivity with analogs < 20%. | Interference testing (hemolysis, lipemia, bilirubin). |
| Linearity | Ability to obtain test results proportional to analyte concentration. | R² > 0.99 for calibration curve. Visual inspection of residual plots. | |
| Range | Interval between upper and lower concentrations with suitable precision, accuracy, and linearity. | Defined by the Lower Limit of Quantification (LLOQ) and Upper Limit of Quantification (ULOQ). | |
| Limit of Detection (LOD) | Lowest amount detectable, not necessarily quantifiable. | Signal > Mean blank + 3(SD blank). | EP17 provides protocols for determining low-end performance. |
| Limit of Quantification (LOQ) | Lowest amount quantifiable with acceptable precision and accuracy. | Signal > Mean blank + 10(SD blank). CV and accuracy at LLOQ ≤ 20-25%. | |
| Robustness | Capacity to remain unaffected by small, deliberate variations in procedural parameters. | Key parameters (incubation time/temp, reagent lot, analyst) show minimal impact (e.g., CV < predetermined limit). |
Detailed Experimental Protocols
Protocol 1: Determination of Precision (Repeatability & Intermediate Precision)
Objective: To evaluate the within-run and between-run variability of the ELISA. Materials: ELISA kit or validated reagents, reference standard, control samples (Low, Mid, High QC concentrations), appropriate matrix. Procedure:
- Prepare a dilution series of the reference standard and three QC samples in the relevant matrix.
- Repeatability: On the same day, with the same operator and equipment, run the ELISA in a minimum of 6 replicates for each QC level.
- Intermediate Precision: Repeat the assay on three different days, with potentially different operators and reagent lots. Analyze the same QC samples in duplicates or triplicates each day.
- Calculate the mean concentration and Coefficient of Variation (CV%) for each QC level for both within-run and total (between-run) data.
- Acceptance: CV% should generally be ≤15-20% for all QC levels.
Protocol 2: Determination of Accuracy (Spike/Recovery)
Objective: To assess the agreement between measured and expected analyte concentration. Materials: Analyte stock of known concentration, analyte-free matrix, ELISA reagents. Procedure:
- Prepare three different spike concentrations (covering Low, Mid, High range) by adding a known amount of analyte stock to the matrix.
- Prepare corresponding unspiked matrix blanks and calibration standards.
- Analyze all samples in triplicate using the ELISA protocol.
- Calculate the observed concentration for each spike level from the standard curve.
- Determine percent recovery: (Observed Concentration / Expected Spiked Concentration) x 100%.
- Acceptance: Mean recovery should be within 80-120%.
Protocol 3: Determination of LOD and LOQ
Objective: To establish the lowest detectable and reliably quantifiable concentration. Materials: Analyte-free matrix (for blank), very low concentration analyte samples. Procedure:
- Analyze at least 20 independent replicates of the blank (matrix-only) sample.
- Calculate the mean and standard deviation (SD) of the blank signal.
- LOD Calculation: LOD = Mean(blank) + 3 x SD(blank). Convert this signal to concentration using the standard curve.
- LOQ Determination: Prepare and analyze at least 6 replicates of a sample at or near the estimated LOD. The LOQ is the lowest concentration where the CV% ≤ 20-25% and recovery is within 80-120%.
Visualization of Workflows and Relationships
Diagram 1: ELISA Validation Parameter Decision Pathway
Diagram 2: Key ELISA Signaling Pathway (Direct Sandwich)
The Scientist's Toolkit: Key Research Reagent Solutions
Table 2: Essential Materials for ELISA Validation
| Item | Function in Validation |
|---|---|
| Reference Standard | Highly characterized analyte of known purity and concentration. Serves as the primary benchmark for accuracy, linearity, and calibration. |
| Quality Control (QC) Samples | Stable, matrix-matched samples with known analyte concentrations (Low, Mid, High). Used to monitor precision and accuracy across runs. |
| Analyte-Free Matrix | The biological fluid or buffer without the target analyte (e.g., charcoal-stripped serum). Critical for specificity, LOD/LOQ, and preparing calibration standards. |
| Interference Substances | Prepared stocks of common interferents (e.g., hemolysate, lipids, rheumatoid factor, biotin). Used to test assay specificity/selectivity. |
| High-Binding Microplates | 96-well plates designed for optimal protein adsorption. Plate uniformity is critical for robust, reproducible results. |
| Validated Antibody Pair | Matched capture and detection antibodies with demonstrated specificity and affinity for the target antigen. The core of assay performance. |
| Precision Pipettes & Calibrators | Accurate liquid handling is non-negotiable. Regular calibration of pipettes is part of robustness and general quality assurance. |
| Plate Reader with Controlled Temperature | For measuring absorbance (or chemiluminescence/fluorescence). Instrument qualification and stable temperature during reading are part of method robustness. |
| Data Analysis Software | Software capable of 4- or 5-parameter logistic (4PL/5PL) curve fitting for the standard curve and statistical analysis of validation data (CV%, recovery). |
Application Notes Within the context of antigen quantification research, the classical ELISA remains a cornerstone due to its simplicity, cost-effectiveness, and robustness. However, technological advancements have led to the development of alternative platforms that address specific limitations of ELISA, such as multiplexing capability, dynamic range, and sample throughput. This analysis compares ELISA to three prominent platforms: Meso Scale Discovery (MSD) electrochemiluminescence (ECL), Luminex xMAP, and Simple Western.
Table 1: Platform Comparison for Antigen Quantification
| Feature | Traditional ELISA | MSD/ECL | Luminex/xMAP | Simple Western (Capillary Western) |
|---|---|---|---|---|
| Core Principle | Colorimetric detection on plate | Electrochemiluminescence on carbon electrode spots | Fluorescent detection on color-coded magnetic beads | Automated capillary-based immunodetection & size separation |
| Multiplexing | Low (Typically 1 analyte/well) | Medium (Up to 10-plex on a single plate) | High (Up to 500-plex in a single well) | Low (1 analyte/capillary, 12-96 capillaries/run) |
| Dynamic Range | ~2 logs | 3-4 logs | 3-4 logs | 3-4 logs |
| Sample Volume | 50-100 µL | 25-50 µL | 25-50 µL | 3-5 µL |
| Throughput | Medium | High | Very High | Medium (Hands-off automation) |
| Key Advantage | Low cost, established protocols | Wider dynamic range, reduced background | High multiplex capability | No manual gels/blotting, quantitative, provides molecular weight |
| Primary Limitation | Limited multiplexing, narrow dynamic range | Higher instrument/reagent cost | Bead aggregation interference, complex data analysis | Lower multiplexing, higher cost per sample |
Detailed Methodologies
1. MSD/ECL Protocol for Cytokine Quantification (Duplex) Principle: Capture antibodies are patterned onto carbon electrode spots within each well. An electrochemiluminescent label (Sulfo-Tag) emits light upon electrochemical stimulation, which is measured. Workflow: A. Plate Coating: MSD MULTI-ARRAY 96-well plates are pre-coated with capture antibodies for two distinct cytokines (e.g., IL-6 and TNF-α). B. Sample & Standard Incubation: Add 25 µL of sample or calibrator per well. Seal, shake (700 rpm), and incubate for 2 hours at room temperature (RT). C. Detection Antibody Incubation: Aspirate and wash 3x with PBS + 0.05% Tween-20. Add 25 µL of Sulfo-Tag-labeled detection antibody cocktail. Incubate for 1 hour at RT with shaking. D. Readout: Aspirate, wash 3x, add 150 µL of MSD GOLD Read Buffer. Immediately measure electrochemiluminescence signal using an MSD SECTOR instrument.
2. Luminex/xMAP Protocol for Phosphoprotein Multiplexing Principle: Magnetic beads embedded with distinct ratios of two fluorescent dyes are each conjugated to a unique capture antibody. A phycoerythrin (PE)-labeled detection antibody provides the quantitative signal. Workflow: A. Bead Preparation: Vortex and sonicate magnetic bead set (e.g., 10-plex phospho-kinase panel) for 30 seconds. B. Assay Assembly: In a 96-well plate, combine 25 µL of sample (cell lysate), 25 µL of mixed beads, and 25 µL of assay buffer. Seal and incubate overnight at 4°C on a plate shaker. C. Detection: Wash beads 3x using a magnetic plate washer. Add 25 µL of biotinylated detection antibody cocktail. Incubate for 1 hour at RT. Wash, then add 25 µL of streptavidin-PE. Incubate for 30 minutes at RT. D. Readout: Wash, resuspend beads in 100 µL of drive fluid. Analyze on a Luminex analyzer (e.g., MAGPIX). The instrument identifies the bead region (analyte) via its internal dye signature and quantifies the PE median fluorescence intensity (MFI).
3. Simple Western Protocol for Chemokine Receptor Quantification Principle: Automated size-based separation of proteins in a capillary, followed by in-capillary immunoprobing and chemiluminescent detection. Workflow: A. Sample Preparation: Dilute cell lysate samples to 0.5 mg/mL total protein in 0.1x Sample Buffer. Denature at 95°C for 5 minutes. Combine with fluorescent ladder. B. Assay Setup: In a 96-well plate, load 3-5 µL of prepared sample, primary antibody (e.g., anti-CCR5), HRP-conjugated secondary antibody, chemiluminescent substrate, and wash buffer into designated wells. C. Automated Run: The Jess/Wes instrument automatically performs capillary loading, separation, immobilization, blocking, antibody incubations, washing, and detection. D. Analysis: Software generates an electropherogram (peak signal vs. molecular weight) and provides quantitative peak area data for the target protein.
Visualizations
Title: Standard Sandwich ELISA Protocol Steps
Title: MSD Electrochemiluminescence Detection Principle
Title: Luminex Bead-Based Multiplexing in a Single Well
Title: Simple Western Automated Capillary Workflow
The Scientist's Toolkit: Essential Research Reagent Solutions
| Item | Function & Application |
|---|---|
| MSD GOLD 96-Well Plates | Pre-coated plates with patterned carbon electrodes for immobilizing capture antibodies in MSD assays. |
| Sulfo-Tag NHS-Ester | Label for covalent conjugation to detection antibodies, generates ECL signal upon electrochemical stimulation. |
| MSD GOLD Read Buffer | Contains tripropylamine (TPA) coreactant, essential for initiating the ECL reaction at the electrode. |
| Luminex Magnetic Bead Sets | Spectrally distinct bead populations, each conjugated to a unique capture antibody for multiplex assays. |
| Biotinylated Detection Antibodies | Enable signal amplification via streptavidin-PE binding in Luminex assays. |
| Streptavidin-Phycoerythrin (SA-PE) | Fluorescent reporter that binds biotin, providing the quantitative signal on Luminex beads. |
| Simple Western Sample Buffer | Contains reagents for protein denaturation and a fluorescent marker for size calibration. |
| Simple Western HRP-Conjugated Secondary Ab | Compatible with in-capillary chemiluminescent detection on the automated system. |
| Simple Western Chemiluminescent Substrate | Luminol/peroxide-based substrate for HRP, generates light signal proportional to target abundance. |
Application Notes
Within a research thesis focused on ELISA principles for antigen quantification, the selection of an appropriate analytical method is a foundational decision. This document outlines the critical scenarios where the Enzyme-Linked Immunosorbent Assay (ELISA) is the optimal choice, emphasizing its core advantages in simplicity, throughput, and cost-effectiveness relative to more complex techniques like Western Blot, Flow Cytometry, or LC-MS/MS.
ELISA excels in projects requiring the quantitative measurement of specific antigens—such as cytokines, hormones, antibodies, or soluble receptors—from a large number of samples in complex matrices like serum, plasma, or cell culture supernatant. Its primary utility is in screening applications, longitudinal studies, and comparative analyses where relative concentration changes are more critical than absolute structural characterization.
The decision matrix below summarizes key quantitative and qualitative factors favoring ELISA over common alternative methods.
Table 1: Comparative Method Selection for Antigen Quantification
| Parameter | ELISA | Western Blot | Flow Cytometry | LC-MS/MS |
|---|---|---|---|---|
| Sample Throughput | High (96/384-well plates) | Low (1-12 samples/gel) | Medium | Low to Medium |
| Time to Result | ~2-5 hours (hands-off incubation) | 1-2 days (hands-on) | ~1-3 hours | 0.5-1 day + analysis |
| Cost per Sample | Low ($2 - $10) | Medium ($10 - $30) | High ($20 - $100+) | Very High ($50 - $200+) |
| Ease of Automation | Excellent (full plate handling) | Poor | Good (plate-based) | Excellent |
| Multiplexing Capacity | Low (1-10 plex with kits) | Low (1-3 targets) | High (10-40+ parameters) | Medium (10-100s with MRM) |
| Specificity Source | Two antibodies (sandwich) | Single antibody + size | Antibody + light scatter | Mass/charge + fragmentation |
| Information Gained | Concentration only | Size & relative amount | Cellular source & phenotype | Absolute mass, modifications |
Key Decision Points for Choosing ELISA:
- High-Volume Screening: When processing 100s to 1000s of samples, ELISA's plate-based format and standardized protocols are unparalleled.
- Budget Constraints: For grant-funded academic research or early-stage development, ELISA provides robust data at a fraction of the cost of high-end instrumentation.
- Simplicity & Training: Laboratories with diverse skill sets can reliably perform ELISA with minimal specialized training, ensuring reproducibility.
- Regulatory Compliance: Many ELISA kits are produced under ISO 13485 or with FDA 510(k) clearance, providing validated methods for preclinical and clinical sample analysis.
Experimental Protocols
Protocol 1: Quantitative Sandwich ELISA for Cytokine Detection in Cell Culture Supernatants
This protocol details a standard sandwich ELISA for quantifying a target cytokine (e.g., IL-6) and is a core methodology for the referenced thesis research.
I. Research Reagent Solutions & Materials
| Item | Function & Specification |
|---|---|
| Coated 96-Well Plate | Polystyrene plate pre-coated with capture antibody specific to the target antigen. |
| Recombinant Standard | Precisely quantified antigen for generating the standard curve. |
| Detection Antibody | Biotin-conjugated antibody targeting a different epitope on the antigen. |
| Streptavidin-HRP | Conjugate that binds biotin, providing enzymatic (Horseradish Peroxidase) signal amplification. |
| TMB Substrate | Colorimetric enzyme substrate (3,3',5,5'-Tetramethylbenzidine) that yields a blue product upon HRP catalysis. |
| Stop Solution | 1M Sulfuric Acid (H₂SO₄) or 2M Phosphoric Acid to halt the enzyme reaction, turning TMB yellow. |
| Wash Buffer | PBS or Tris-based buffer with 0.05% Tween 20 (PBST) to remove unbound materials. |
| Plate Reader | Spectrophotometer capable of measuring absorbance at 450 nm (and 570/630 nm for reference). |
II. Step-by-Step Procedure
- Reagent & Sample Preparation: Thaw all components and bring to room temperature. Dilute samples and standards in the provided assay diluent. Centrifuge cell culture supernatants at 1000 × g for 10 minutes to remove debris.
- Plate Layout: Designate wells for blanks, standard curve points (run in duplicate or triplicate), and test samples.
- Add Standards & Samples: Add 100 µL of each standard and prepared sample to their respective wells. Cover the plate and incubate for 2 hours at room temperature on a plate shaker.
- Wash: Aspirate liquid and wash each well 4 times with 300 µL wash buffer using a multichannel pipette or plate washer. Blot plate on clean absorbent paper.
- Add Detection Antibody: Add 100 µL of the biotinylated detection antibody working solution to each well. Incubate for 1 hour at room temperature. Wash as in Step 4.
- Add Enzyme Conjugate: Add 100 µL of Streptavidin-HRP working solution to each well. Incubate for 30 minutes at room temperature, protected from light. Wash as in Step 4.
- Substrate Reaction: Add 100 µL of TMB substrate solution to each well. Incubate for 10-20 minutes at room temperature, protected from light, until the standard curve shows a clear gradient of blue color.
- Stop Reaction: Add 100 µL of stop solution to each well. The color will change from blue to yellow. Gently tap the plate to mix.
- Measurement: Measure the optical density (OD) at 450 nm within 30 minutes using a plate reader. Subtract the reference wavelength (570 or 630 nm) readings to correct for optical imperfections.
- Data Analysis: Generate a standard curve by plotting the mean OD of each standard against its concentration. Use a 4- or 5-parameter logistic (4PL/5PL) curve fit. Interpolate sample concentrations from the curve.
Visualization
Diagram 1: Sandwich ELISA Workflow
Diagram 2: ELISA vs. Alternative Methods Decision Logic
Limitations of ELISA and Scenarios Requiring Higher-Plex or More Sensitive Methods
Article Context: This Application Note is presented as part of a broader thesis on ELISA principles for antigen quantification research, detailing inherent methodological constraints and advanced alternatives.
Key Limitations of Standard ELISA
While ELISA remains a cornerstone for antigen quantification, its limitations are critical to recognize in modern research and drug development. The primary constraints are multiplexing capacity, dynamic range, sensitivity, and sample volume requirements.
Table 1: Quantitative Comparison of Standard ELISA Limitations vs. Advanced Method Capabilities
| Parameter | Standard Sandwich ELISA | Multiplex Bead Array (e.g., Luminex) | Single-Molecule Array (Simoa) |
|---|---|---|---|
| Multiplexing Capacity | Single analyte per well | Up to 500 analytes per well | Typically 1-6 analytes per well |
| Typical Sensitivity (LLoQ) | 1-10 pg/mL | 0.1-10 pg/mL | 0.01-0.1 fg/mL |
| Dynamic Range | 2-3 logs | 3-4 logs | >4 logs |
| Sample Volume Required | 50-100 µL | 25-50 µL | <25 µL |
| Assay Time (Hands-on) | High (serial testing) | Moderate (parallel testing) | Moderate to High |
| Throughput for Multi-Analyte Panels | Low | Very High | Medium |
Scenarios Necessitating Higher-Plex Methods
Standard ELISA fails in scenarios requiring concurrent measurement of multiple analytes from a single, limited sample. Key application scenarios include:
- Cytokine Storm Profiling: Monitoring immune therapies (e.g., CAR-T) requires simultaneous quantitation of IL-6, IL-10, IFN-γ, TNF-α, and others to rapidly assess immune activation.
- Comprehensive Biomarker Discovery: Validation of diagnostic panels for complex diseases (e.g., Alzheimer's, various cancers) demands correlating dozens of proteins from precious biobank samples.
- Pathway-Centric Analysis: Understanding signaling pathway activation (e.g., MAPK/ERK, JAK-STAT) requires measuring multiple phosphorylated and total proteins.
Experimental Protocol: Multiplex Bead Array for Cytokine Profiling
Title: Protocol for High-Plex Cytokine Quantification from Serum Using Magnetic Bead Array.
1. Reagent Preparation:
- Thaw serum samples on ice. Prepare assay buffer (PBS, 1% BSA, 0.05% Tween-20, pH 7.4).
- Vortex and sonicate premixed magnetic bead set conjugated to capture antibodies against IL-2, IL-4, IL-6, IL-10, TNF-α, IFN-γ for 30 seconds.
2. Assay Procedure:
- Add 50 µL of standards (serial dilution in matrix) or samples to a 96-well filter plate.
- Add 50 µL of mixed beads to each well. Seal and incubate on a plate shaker (850 rpm) for 2 hours at RT, protected from light.
- Wash plate 3x with 100 µL wash buffer using a magnetic plate washer.
- Add 50 µL of biotinylated detection antibody cocktail. Incubate with shaking for 1 hour.
- Wash 3x. Add 50 µL of Streptavidin-PE. Incubate with shaking for 30 minutes.
- Wash 3x. Resuspend beads in 100 µL of reading buffer. Analyze immediately on a multiplex bead reader (e.g., Luminex MAGPIX).
3. Data Analysis:
- Use instrument software to calculate median fluorescence intensity (MFI) for each bead region.
- Generate a 5-parameter logistic (5PL) standard curve for each analyte.
- Interpolate sample concentrations from the respective standard curves.
Scenarios Requiring Ultra-Sensitive Methods
ELISA sensitivity is often insufficient for detecting low-abundance biomarkers. Critical scenarios include:
- Early Disease Detection: Measuring neurological biomarkers (e.g., plasma pTau-181, GFAP) at sub-pg/mL levels for early Alzheimer's diagnosis.
- Liquid Biopsy Applications: Detecting low levels of circulating tumor antigens or exosomal proteins in early-stage cancer.
- Pharmacokinetics (PK) of Biologics: Quantifying ultra-low serum drug concentrations during sub-therapeutic washout periods.
Experimental Protocol: Single-Molecule ELISA (Simoa) for Neurological Biomarkers
Title: Protocol for Ultra-Sensitive GFAP Quantification in Plasma via Simoa.
1. Reagent and Sample Preparation:
- Prepare calibrators by serially diluting recombinant GFAP in analyte diluent.
- Dilute plasma samples 1:4 in sample diluent to minimize matrix effects.
- Equilibrate all reagents to room temperature.
2. Assay Procedure:
- Pipette 100 µL of standards or diluted samples into the sample wells of a Simoa HD-1 assay plate.
- Add 100 µL of a mixture containing anti-GFAP capture antibody-coated beads and biotinylated anti-GFAP detection antibody to each well.
- Seal the plate and incubate for 1 hour at 30°C with shaking (900 rpm).
- Wash the beads 3x using the automated washer to remove unbound material.
- Resuspend beads in 100 µL of Streptavidin-β-galactosidase (SBG) solution. Incubate for 5 minutes at 30°C.
- Wash the beads 4x to remove excess SBG.
- Resuspend beads in 25 µL of resorufin β-D-galactopyranoside (RDG) substrate. Immediately load the bead suspension into the Simoa disc.
- Run the disc on the HD-1 Analyzer. The instrument isolates single beads in microwells, images fluorescence from enzymatic conversion, and calculates average enzymes per bead (AEB).
3. Data Analysis:
- The instrument software fits a 4PL curve to the calibrator AEB vs. concentration.
- It automatically interpolates sample concentrations from the curve, applying the pre-programmed dilution factor.
The Scientist's Toolkit: Research Reagent Solutions
Table 2: Essential Materials for Advanced Protein Quantification Assays
| Item | Function in Assay | Example/Note |
|---|---|---|
| Multiplex Bead Set | Solid-phase capture matrix with spectrally unique beads for multiplexing. | Magnetic or polystyrene beads with distinct fluorescent signatures (e.g., Luminex xMAP). |
| Magnetic Plate Washer | Efficiently washes magnetic bead-based assays in 96-well format. | Critical for reducing background in bead assays. |
| Biotinylated Detection Antibody Cocktail | Binds captured analyte; detected via streptavidin-conjugate. | Requires validation for minimal cross-reactivity in multiplex. |
| Streptavidin-Phycoerythrin (S-PE) | Fluorescent reporter for bead-based assays. | Amplifies signal due to multiple PE per streptavidin. |
| Simoa HD-1 Analyzer | Fully automated system for single-molecule digital ELISA. | Performs bead capture, washing, imaging, and quantification. |
| Capture Bead Conjugates | Paramagnetic beads coated with capture antibody for Simoa. | Beads are ~2.7 µm in diameter. |
| Streptavidin-β-Galactosidase (SBG) | Enzyme conjugate for Simoa; generates fluorescent product from single molecules. | Key to digital detection. |
| Resorufin β-D-Galactopyranoside (RDG) | Fluorescent substrate for SBG in Simoa. | Conversion to resorufin produces measurable fluorescence. |
Visualizations
Title: Decision Pathway: ELISA Limitations to Advanced Methods
Title: Multiplex Bead Array Assay Workflow
Title: Simoa Digital ELISA Assay Workflow
This case study is presented as a critical applied chapter within a thesis exploring the fundamental principles of Enzyme-Linked Immunosorbent Assays (ELISAs) for precise antigen quantification. It transitions from theoretical principles to the rigorous, regulated application of a validated immunoassay for measuring a clinical biomarker, Serum Amyloid A (SAA), in human plasma. SAA, an acute-phase protein, is a validated biomarker for monitoring inflammatory diseases and treatment response, necessitating a robust, quantitative assay.
Biomarker & Assay Rationale
- Biomarker: Serum Amyloid A (SAA).
- Clinical Utility: Monitoring systemic inflammation, infection, graft rejection, and therapeutic efficacy in autoimmune diseases.
- Assay Format: Sandwich ELISA (Quantitative).
- Justification: The sandwich format provides high specificity and sensitivity, essential for detecting SAA across a wide dynamic range in complex biological matrices like plasma.
The assay validation followed ICH Q2(R1) and CLSI guidelines. Key parameters are summarized below.
Table 1: Assay Validation Performance Summary
| Validation Parameter | Result | Acceptance Criterion |
|---|---|---|
| Lower Limit of Quantification (LLOQ) | 1.56 ng/mL | CV <20%, Accuracy 80-120% |
| Upper Limit of Quantification (ULOQ) | 100 ng/mL | CV <20%, Accuracy 80-120% |
| Precision (Intra-assay) | CV ≤ 8.5% (across all QC levels) | CV ≤ 15% |
| Precision (Inter-assay) | CV ≤ 12.3% (across all QC levels) | CV ≤ 20% |
| Accuracy (Spike Recovery) | 94% - 106% | 85% - 115% |
| Dilutional Linearity | 92% - 108% recovery after 1:8 dilution | 85% - 115% |
| Specificity (Cross-reactivity) | <0.5% with CRP, Albumin | <5% interference |
| Sample Stability | 95% recovery after 3 freeze-thaw cycles | ≥85% recovery |
Detailed Experimental Protocols
Protocol 1: Core SAA Sandwich ELISA Procedure
- Principle: A capture antibody specific to SAA is coated onto a microplate. SAA in samples binds and is subsequently detected by a biotinylated detection antibody, followed by Streptavidin-HRP and a colorimetric TMB substrate.
- Materials: Coated plate (anti-SAA mAb), assay diluent, SAA standard (recombinant human, 100 ng/mL), QC samples (low, mid, high), human plasma samples (heparin/EDTA), detection antibody (biotin-anti-SAA), Streptavidin-HRP, wash buffer (PBS + 0.05% Tween-20), TMB substrate, stop solution (1M H₂SO₄).
- Workflow:
- Preparation: Bring all reagents to room temperature. Prepare serial standard dilutions (100, 50, 25, 12.5, 6.25, 3.125, 1.56 ng/mL) and pre-dilute samples/QC as needed.
- Assay: Add 100 µL of standard, QC, or sample per well. Cover and incubate 2 hours at room temperature (RT) on a plate shaker.
- Wash: Aspirate and wash each well 4x with 300 µL wash buffer.
- Detection: Add 100 µL of biotinylated detection antibody (diluted per manufacturer). Incubate 1 hour at RT on a shaker. Wash 4x.
- Signal Amplification: Add 100 µL of Streptavidin-HRP solution. Incubate 30 minutes at RT, protected from light. Wash 4x.
- Development: Add 100 µL of TMB substrate. Incubate for exactly 15 minutes at RT, protected from light.
- Stop & Read: Add 100 µL of stop solution. Read absorbance immediately at 450 nm with 570 nm or 620 nm reference wavelength.
Protocol 2: Critical Parallelism Testing
- Objective: To confirm similar immunoreactivity between the recombinant standard and endogenous analyte in the sample matrix.
- Procedure:
- Select a high-concentration patient sample.
- Prepare a series of dilutions (e.g., 1:2, 1:4, 1:8, 1:16) using the assay's specified diluent.
- Assay these dilutions alongside the standard curve in the same run.
- Calculate the observed concentration for each dilution and multiply by the dilution factor.
- Acceptance: The back-calculated concentrations should be constant (CV <20%). A fitted line of observed vs. expected values should have a slope of 1.0 ± 0.1.
Visualization of Workflows and Pathways
Diagram 1: SAA ELISA Experimental Workflow
Diagram 2: Molecular Mechanism of Sandwich ELISA
The Scientist's Toolkit: Key Research Reagent Solutions
Table 2: Essential Materials for Clinical Biomarker ELISA
| Item | Function & Importance |
|---|---|
| High-Affinity Matched Antibody Pair | Mouse/rabbit monoclonal antibodies targeting non-overlapping epitopes on SAA. Critical for specificity and sensitivity in sandwich format. |
| Recombinant Human SAA Protein | Precisely quantified standard for generating the calibration curve. Must be highly pure and immunologically identical to native protein. |
| Matrix-Matched Quality Controls (QC) | Pooled human plasma with low, mid, and high SAA levels. Essential for monitoring inter-assay precision and accuracy in the target sample matrix. |
| Stable, Low-Peroxide TMB Substrate | Chromogenic substrate for HRP. Provides sensitive, linear color development. Low background is crucial for low-end sensitivity. |
| Streptavidin-HRP Conjugate | High-specificity-activity conjugate for signal amplification. Links biotinylated detection Ab to the enzyme. |
| Validated Sample Diluent | Buffer designed to neutralize matrix effects (e.g., from plasma proteins), maintaining analyte immunoreactivity and parallelity to the standard curve. |
Conclusion
ELISA remains a cornerstone technique for antigen quantification due to its robust principle, versatility, and accessibility. Mastering its fundamentals, as explored in Intent 1, is essential for effective assay design. A meticulous methodological approach (Intent 2) ensures reliable data generation, while proactive troubleshooting (Intent 3) safeguards assay performance. Finally, rigorous validation and a clear understanding of its position among modern platforms (Intent 4) guarantee that ELISA data is credible and fit-for-purpose. As biomedical research evolves, the principles of ELISA continue to underpin emerging multiplexed and automated immunoassays, securing its enduring relevance in biomarker discovery, diagnostic development, and therapeutic monitoring. Future directions include integration with digital readouts and microfluidics, further enhancing its utility in precision medicine.