Mastering IHC: A Complete Step-by-Step Protocol and Troubleshooting Guide for FFPE Tissues
This comprehensive guide provides researchers, scientists, and drug development professionals with a complete framework for executing successful immunohistochemistry (IHC) on formalin-fixed paraffin-embedded (FFPE) tissues.
Mastering IHC: A Complete Step-by-Step Protocol and Troubleshooting Guide for FFPE Tissues
Abstract
This comprehensive guide provides researchers, scientists, and drug development professionals with a complete framework for executing successful immunohistochemistry (IHC) on formalin-fixed paraffin-embedded (FFPE) tissues. Covering foundational principles through advanced applications, the article details a robust step-by-step protocol for chromogenic and fluorescent detection, offers systematic troubleshooting for common issues like weak staining and high background, and explores validation standards and emerging comparative technologies like LC-MS. The content synthesizes current best practices to ensure reliable, reproducible results in both research and clinical settings.
Understanding FFPE IHC: Principles, Preparation, and Critical Reagents
The Foundation of FFPE IHC: Preservation at a Cost
Formalin-Fixed Paraffin-Embedding (FFPE) has remained the gold standard for tissue preservation in pathology and research for decades. This method provides exceptional morphological preservation, allowing tissues to be stored at room temperature for years while maintaining cellular architecture. However, this preservation comes with a significant biochemical challenge: antigen masking. The formalin fixation process creates methylene bridges through protein cross-links, which effectively obscures antigenic sites and makes them inaccessible to antibodies. Understanding this fundamental tradeoff—excellent morphology versus compromised antigen accessibility—is crucial for successful immunohistochemistry (IHC) [1].
The process of antigen retrieval, which reverses these formaldehyde-induced cross-links, represents one of the most critical breakthroughs in IHC methodology. By breaking these methylene bridges, antigen retrieval techniques restore antibody binding capability without sacrificing the structural preservation that makes FFPE tissues so valuable for diagnostic and research applications. The effectiveness of this retrieval process directly determines the sensitivity, specificity, and overall quality of IHC staining [1].
The Biochemical Basis of Antigen Masking
Formalin fixation works by creating covalent cross-links between protein molecules, primarily through methylene bridge (-CH2-) formation. These cross-links stabilize tissue structure but physically block antibody access to epitopes. The chemistry involves formaldehyde reacting with basic amino acids such as lysine, arginine, and histidine, creating a network of cross-linked proteins that masks antigenic sites [1].
The exact mechanism by which antigen retrieval reverses this process is multifaceted and may involve several chemical processes:
- Hydrolytic cleavage of formaldehyde cross-links
- Calcium ion extraction from protein complexes
- Epitope unfolding to restore native conformation
- Rehydration of protein structures altered by dehydration steps [1]
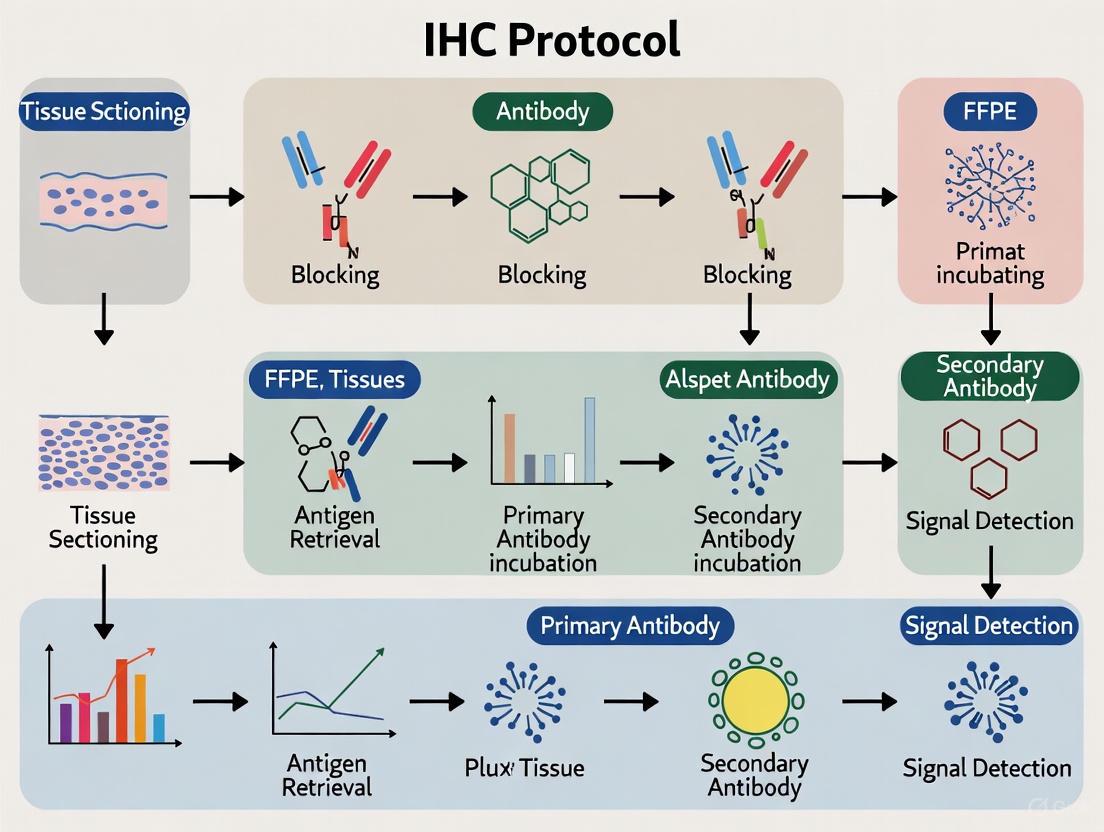
The following diagram illustrates the relationship between tissue processing and its consequences for IHC:
Essential Protocols for FFPE IHC
Sample Preparation and Sectioning
Proper sample preparation begins with appropriate fixation. While perfusion fixation provides optimal preservation, immersion fixation is more commonly used for human tissue samples:
- Fixation: Immerse tissue in 4% paraformaldehyde for 2-24 hours at 4°C or room temperature [2]
- Dehydration: Process through a graded ethanol series (50%, 70%, 80%, 95%, 100%) for 30 minutes each [2]
- Clearing: Transfer through three changes of xylene for 20 minutes each [2]
- Infiltration: Incubate with three changes of 60°C paraffin for 1 hour each [2]
- Embedding: Orient tissue in paraffin blocks and allow to solidify [2]
- Sectioning: Cut 5-15 μm thick sections using a microtome and transfer to charged glass slides [2]
Deparaffinization and Rehydration
Before antigen retrieval or staining, paraffin must be completely removed and tissues rehydrated:
Table 1: Standard Deparaffinization and Rehydration Protocol
| Step | Reagent | Duration | Notes |
|---|---|---|---|
| 1 | Xylene | 2 changes of 3 minutes each | Complete removal is essential |
| 2 | 100% Ethanol | 3 minutes | Ensures dehydration |
| 3 | 100% Ethanol | 3 minutes | - |
| 4 | 95% Ethanol | 3 minutes | - |
| 5 | 70% Ethanol | 3 minutes | - |
| 6 | 50% Ethanol | 3 minutes | - |
| 7 | Running Water | 10 minutes | Do not let slides dry afterward [2] |
Antigen Retrieval Methods
Two primary approaches exist for antigen retrieval: heat-induced and enzyme-induced methods. The choice depends on the specific antigen and antibody being used.
Heat-Induced Epitope Retrieval (HIER)
HIER uses elevated temperature and specific buffer systems to break protein cross-links:
Table 2: Heat-Induced Epitope Retrieval Buffer Comparison
| Buffer | pH | Typical Incubation | Best For |
|---|---|---|---|
| Sodium Citrate | 6.0 | 20 minutes at 98°C | Many nuclear and cytoplasmic antigens [2] [1] |
| Tris-EDTA | 9.0 | 20 minutes at 98°C | Phosphorylated epitopes, membrane proteins [2] [1] |
| EDTA | 8.0 | 15 minutes at 98°C | Challenging nuclear antigens [2] [1] |
Standardized HIER Protocol Using a Pressure Cooker:
- Add appropriate antigen retrieval buffer to the pressure cooker
- Place on hotplate at full power until boiling
- Transfer deparaffinized, rehydrated slides to boiling buffer
- Secure lid and maintain at full pressure for 3 minutes
- Release pressure and run cold water over cooker for 10 minutes
- Cool slides completely before proceeding with staining [1]
Alternative heating methods include microwave treatment (20 minutes at 98°C) or steamers (20 minutes at 95-100°C), though these may provide less consistent results than pressure cooking [1].
Protease-Induced Epitope Retrieval (PIER)
Enzymatic retrieval uses proteases to digest proteins and expose epitopes:
- Draw a barrier around each tissue section using a hydrophobic pen
- Prepare protease working solution (e.g., 0.05% trypsin or 0.5% pepsin)
- Apply protease solution to tissue sections
- Incubate in humidity chamber at 37°C for 10 minutes
- Rinse slides in running water for 3 minutes [2]
Enzymatic retrieval may damage tissue morphology more than HIER and requires careful optimization of concentration and incubation time [1].
The Scientist's Toolkit: Essential Reagents for FFPE IHC
Table 3: Essential Research Reagent Solutions for FFPE IHC
| Reagent | Function | Examples & Notes |
|---|---|---|
| Fixatives | Preserves tissue architecture | 4% Paraformaldehyde; avoid over-fixation [2] |
| Antigen Retrieval Buffers | Unmasks hidden epitopes | Citrate (pH 6.0), Tris-EDTA (pH 9.0); choice affects staining [2] [1] |
| Blocking Reagents | Reduces non-specific binding | Normal serum (10%, 1 hour) or BSA (1-5%, 30 minutes) [3] |
| Primary Antibody Diluent | Maintains antibody stability | Manufacturer-recommended diluents optimize signal [4] |
| Detection Systems | Visualizes antibody binding | Polymer-based systems offer superior sensitivity vs. biotin-based [4] |
| Chromogens | Generates visible signal | DAB (brown) with hematoxylin (blue) counterstain [2] |
| Mounting Media | Preserves and protects staining | Aqueous for fluorescence; organic for chromogenic [2] |
Troubleshooting Common FFPE IHC Challenges
Even with proper technique, FFPE IHC presents specific challenges that require systematic troubleshooting:
Weak or No Staining
Weak staining represents one of the most common challenges in FFPE IHC. Key solutions include:
- Fresh sectioning: Slides lose signal over time during storage; cut fresh sections and store at 4°C [4] [3]
- Antigen retrieval optimization: Extend retrieval time, try different buffers, or switch heating methods [3]
- Antibody validation: Ensure antibodies are validated for IHC applications and specific to FFPE tissues [3]
- Detection system enhancement: Use polymer-based detection systems for greater sensitivity [4]
High Background Staining
Excessive background can obscure specific signal and reduce result quality:
- Blocking optimization: Increase blocking time or change blocking reagents [3]
- Antibody titration: Reduce primary antibody concentration that is too high [4] [3]
- Endogenous enzyme quenching: Use 3% H₂O₂ for peroxidase or levamisole for phosphatase [3]
- Enhanced washing: Increase wash time and number of washes between steps [4]
Quality Control and Validation Strategies
Implementing rigorous quality control measures ensures reproducible and reliable FFPE IHC results:
- Control tissues: Include known positive and negative controls with each staining run [4]
- Liquid controls: Novel controls in liquid form (CLFs) from genetically modified cell lines provide standardized quality control without consuming scarce patient tissue [5]
- Protocol standardization: Automated staining systems improve reproducibility compared to manual methods [5]
- Validation frameworks: For clinical applications, follow CLIA standards and IVDR requirements for assay validation [6]
The following workflow diagram summarizes the complete FFPE IHC process with critical decision points:
Successful FFPE IHC requires understanding the fundamental compromise between tissue preservation and antigen accessibility. The critical breakthrough lies in effective antigen retrieval strategies that reverse formaldehyde-induced cross-links without damaging tissue morphology. By implementing optimized protocols for sample preparation, antigen retrieval, and detection, while incorporating appropriate controls and troubleshooting methods, researchers can reliably unlock the vast biological information preserved in FFPE tissues. This enables both retrospective studies of archived materials and robust contemporary analyses for drug development and clinical research.
Core Principles of Formalin Fixation and Paraffin Embedding
Formalin-Fixed Paraffin-Embedding (FFPE) is a cornerstone technique in histology, providing a reliable method for preserving tissue architecture and biomolecules for diagnostic, research, and drug development applications. The core principle of this process involves stabilizing tissue structure through chemical cross-linking followed by infiltration with a supportive medium to enable thin-sectioning for downstream analyses, most notably immunohistochemistry (IHC) [7] [8]. When properly executed, this method yields tissue blocks that are stable for decades at room temperature, creating an invaluable resource for biomedical research and clinical pathology [8]. This application note details the essential principles and protocols for optimal FFPE tissue preparation, framed within the context of a comprehensive IHC workflow.
Core Principles and Critical Parameters
The transformation of fresh tissue into a high-quality FFPE block relies on several foundational principles and requires meticulous attention to key parameters.
The Principle of Fixation
Fixation aims to preserve tissue in a life-like state by halting autolysis and putrefaction, and stabilizing the structural and molecular components of cells and extracellular matrix [7] [9]. The most common fixative, 10% Neutral Buffered Formalin (NBF), works through formaldehyde forming methylene bridges (-CH2-) between proteins, and between proteins and nucleic acids, creating a rigid, cross-linked network that maintains tissue architecture [9]. This cross-linking, while excellent for morphology, can mask epitopes, a challenge that must be addressed later in the IHC protocol through antigen retrieval [10] [11].
Principles of Dehydration, Clearing, and Infiltration
Following fixation, three sequential processes prepare the tissue for embedding:
- Dehydration: The removal of all water from the tissue using a graded series of alcohols (e.g., ethanol) [8] [12]. This is essential because paraffin wax is immiscible with water.
- Clearing: The removal of alcohol using a hydrophobic agent (e.g., xylene) that is miscible with both alcohol and molten paraffin [8] [12]. This "clears" the tissue, creating a pathway for wax infiltration.
- Infiltration and Embedding: The displacement of the clearing agent with molten paraffin wax, which then solidifies upon cooling, providing a rigid support matrix that allows for the cutting of thin tissue sections [7] [8].
Critical Parameters for Success
Table 1: Critical Parameters for Optimal FFPE Tissue Preparation
| Parameter | Optimal Condition | Rationale & Consequences of Deviation |
|---|---|---|
| Ischemic Time | ≤ 1 hour from tissue removal to fixation [7] | Prolonged time causes cellular degradation (autolysis), compromising molecular and structural integrity [8]. |
| Tissue Dimensions | Trim to 2-3 mm thickness [7] | Formalin penetrates tissue slowly; thicker pieces will be under-fixed in the center, leading to poor preservation. |
| Fixative Volume | Minimum 20:1 ratio (fixative:tissue) [7] | Ensures sufficient fixative concentration for complete and uniform penetration. |
| Fixation Time | 6-72 hours at room temperature (size-dependent) [7] | Under-fixation causes poor preservation; over-fixation causes excessive cross-linking, complicating epitope retrieval [8] [11]. |
| Fixative Type | 10% Neutral Buffered Formalin (NBF) for most applications [7] [11] | Buffering prevents acidity that could damage tissue and harm subsequent molecular analyses. |
The following workflow diagram summarizes the entire FFPE preparation process and its integration with the subsequent IHC protocol.
Detailed Experimental Protocols
Stage 1: Fixation
Objective: To preserve tissue morphology and prevent degradation.
Materials:
- Fresh tissue specimen
- 10% Neutral Buffered Formalin (NBF) or 4% Paraformaldehyde (PFA) [11]
- Phosphate-Buffered Saline (PBS)
- Specimen container
Method (Immersion Fixation):
- Dissection & Trimming: Immediately after excision, place tissue on ice. Using a sharp blade, trim the tissue to a thickness of 2-3 mm [7].
- Immersion: Place the tissue in a volume of 10% NBF that is at least 20 times the volume of the tissue [7].
- Fixation Duration: Fix for 18-24 hours at 4°C for standardized results, though the time can be adjusted from 6 to 72 hours based on tissue size [7] [11].
- Post-Fixation Wash: Rinse the fixed tissue three times with PBS to remove excess fixative [11].
Note: Perfusion fixation is an alternative for superior preservation in animal studies, where fixative is delivered via the vascular system [11] [9].
Stage 2: Processing, Dehydration, Clearing, and Embedding
Objective: To prepare fixed tissue for infiltration and embedding in paraffin wax.
Materials:
- Fixed tissue samples
- Graded ethanol series (70%, 85%, 95%, 100%)
- Clearing agent (Xylene or less toxic alternative)
- Molten paraffin wax (≈60°C)
- Tissue processing cassettes and embedding molds
- Vacuum oven or automated tissue processor
Method:
- Dehydration: Process the tissue through a graded ethanol series to gradually remove all water. This can be done manually in Coplin jars or using an automated processor [11].
Example Manual Incubation Times (Room Temperature):
- 70% Ethanol: 1-2 hours
- 85% Ethanol: 20-30 minutes
- 95% Ethanol: 20-30 minutes (repeat twice)
- 100% Ethanol: 20-30 minutes (repeat twice) [11]
Clearing: Immerse the dehydrated tissue in a clearing agent to displace the ethanol.
- Xylene: 10-20 minutes (repeat twice) [11]
Infiltration and Embedding:
- Transfer the tissue to molten paraffin wax (≈60°C) in a vacuum oven or automated processor. Perform three exchanges of wax (40 mins, 1 hr, 1 hr) to ensure complete infiltration [11].
- Orient the tissue in an embedding mold filled with fresh paraffin. Anchor with a cassette lid and allow the block to solidify on a cold plate or in a refrigerator [7] [11].
Stage 3: Sectioning and Slide Preparation
Objective: To produce thin, wrinkle-free tissue sections mounted on slides.
Materials:
- Paraffin-embedded tissue block
- Microtome and sharp blade
- Warm water bath (40-45°C)
- Charged or coated glass microscope slides
- Slide drying oven or rack
Method:
- Block Trimming: Chill the FFPE block on ice. Using a microtome, trim the block face to expose the tissue at a thickness of 10-30 µm.
- Sectioning: Cut serial sections of 3-10 µm thickness. Sections will float on the water bath as ribbons.
- Floating and Mounting: Float the ribbons on a warm water bath (40-45°C) to smooth out wrinkles. Carefully pick up the sections onto glass slides.
- Drying: Dry the mounted sections overnight at 37°C to ensure adhesion without damaging heat-sensitive antigens [11]. Slides can be stored at room temperature until use.
The Scientist's Toolkit: Essential Research Reagents
Table 2: Key Research Reagent Solutions for FFPE Preparation and IHC
| Reagent / Material | Function / Application | Technical Notes |
|---|---|---|
| 10% NBF (Neutral Buffered Formalin) | Primary fixative for cross-linking proteins and nucleic acids. | The standard fixative for most IHC applications; buffering prevents acidification [7] [11]. |
| Paraffin Wax | Embedding medium that provides structural support for microtomy. | Different grades exist; melting point typically 56-58°C. Must be water-free [8]. |
| Ethanol Series | Dehydrating agent to remove water from fixed tissue. | A graded series (e.g., 70%-100%) prevents excessive tissue shrinkage and hardening [8] [12]. |
| Xylene / Alternatives | Clearing agent to remove alcohol and prepare tissue for wax infiltration. | Xylene is toxic; safer alternatives like isopropanol are available [8] [11]. |
| Antigen Retrieval Buffers | To break cross-links and unmask epitopes after deparaffinization. | Citrate Buffer (pH 6.0) and EDTA (pH 8.0-9.0) are most common. The optimal pH is antibody-dependent [10] [11]. |
| Primary Antibodies (IHC-Validated) | For specific detection of the target protein in IHC. | Must be validated for IHC on FFPE tissue. Check datasheet for recommended antigen retrieval methods [10]. |
| Detection Systems (e.g., HRP-DAB) | To visualize the antibody-antigen interaction. | Enzyme-conjugated secondary antibodies generate a colored precipitate (chromogenic) or signal (fluorescent) at the target site [10] [9]. |
Quality Control and Troubleshooting
Ensuring the quality of FFPE tissue is paramount for successful downstream IHC. Key quality control measures include:
- Controlled Ischemic and Fixation Times: Adherence to recommended times is the most critical factor for preserving biomolecules [7] [8].
- Proper Embedding Orientation: Consistent orientation per RITA/NACAD guidelines is crucial for reproducible morphological analysis [7].
- Use of Controls: Incorporation of positive and negative control tissues in every IHC run is essential for validating staining results [5]. Novel automated systems now use Controls in Liquid Form (CLFs) from genetically modified cell lines as a tissue-saving quality control method [5].
Table 3: Common FFPE Preparation Challenges and Solutions
| Challenge | Potential Cause | Corrective Action |
|---|---|---|
| Poor Morphology | Delayed fixation, improper dehydration/clearing. | Minimize ischemic time; ensure graded ethanol and xylene steps are performed correctly [7] [8]. |
| Difficulty Sectioning | Incomplete wax infiltration, hard/ brittle tissue. | Ensure proper dehydration/clearing; adjust wax temperature/vacuum; use a sharper blade [8]. |
| Excessive Cross-linking | Prolonged formalin fixation. | Standardize fixation time; optimize antigen retrieval (increase heating time, try different pH buffers) [10] [11]. |
| High Background in IHC | Non-specific antibody binding, endogenous enzymes. | Optimize antibody concentrations; use blocking sera; quench endogenous peroxidases with H₂O₂ [13]. |
| Weak Target Staining | Over-fixation, suboptimal antigen retrieval, low antibody potency. | Perform antigen retrieval optimization (test citrate vs. EDTA buffers, microwave vs. pressure cooker); validate antibody on known positive control [10] [13]. |
Essential Reagents and Equipment for the IHC Workflow
Immunohistochemistry (IHC) is an antibody-based technique used to characterize protein expression in tissue whose structure and organization has been preserved [14]. This application note, framed within a broader thesis on step-by-step IHC protocol for FFPE (Formalin-Fixed Paraffin-Embedded) tissues research, details the essential reagents and equipment required for a reliable IHC workflow. The fundamental principle of IHC lies in the specific recognition of an epitope by an antibody, enabling researchers and drug development professionals to visualize protein localization and abundance within proper tissue context [15] [9]. A successful IHC assay depends on a system of high-quality components working together, from tissue preparation through detection and imaging [16]. This guide provides a comprehensive overview of these critical elements, ensuring researchers can achieve consistent, interpretable, and reproducible results.
The Scientist's Toolkit: Essential Reagents and Equipment
A robust IHC workflow relies on specialized reagents and equipment designed to maintain tissue integrity, enable specific antigen detection, and minimize artifacts. The table below categorizes these essential components, providing researchers with a foundational checklist for laboratory setup.
Table 1: Essential Reagents and Equipment for the IHC Workflow
| Category | Item | Primary Function |
|---|---|---|
| Sample Preparation | Fixatives (e.g., 10% NBF, 4% PFA) [11] | Preserves tissue morphology and prevents degradation [9] |
| Paraffin Wax [11] | Embeds tissue for microtomy and long-term storage [14] | |
| Microtome [11] | Cuts thin tissue sections (3-10 µm) from paraffin blocks [11] | |
| Slide Drying Oven/Rack [11] | Dries mounted sections to prevent detachment | |
| Deparaffinization & Retrieval | Xylene (or alternatives) & Ethanol Series [11] [17] | Removes paraffin wax and rehydrates tissue sections |
| Antigen Retrieval Buffers (e.g., Citrate, EDTA) [16] [14] | Unmasks epitopes cross-linked during fixation [14] | |
| Pressure Cooker, Water Bath, or Microwave Oven [14] [18] | Applies heat for Heat-Induced Epitope Retrieval (HIER) | |
| Staining & Detection | Blocking Buffers (e.g., Serum, BSA) [16] [18] | Reduces nonspecific antibody binding [9] |
| Primary Antibodies [16] | Specifically binds to the target protein antigen [14] | |
| Secondary Antibodies & Detection Kits (e.g., Polymer-HRP) [16] [18] | Amplifies and detects the primary antibody signal | |
| Chromogenic Substrates (e.g., DAB) [16] [18] | Produces a colored precipitate at the antigen site | |
| Fluorophore-Conjugated Antibodies [17] | Provides a fluorescent signal for detection | |
| Controls & Validation | Positive/Negative Control Tissues [15] | Validates assay performance and antibody specificity |
| Isotype Controls [15] | Distinguishes specific signal from nonspecific background | |
| No Primary Antibody Controls [15] | Assesses nonspecific binding of the secondary antibody | |
| Mounting & Imaging | Mounting Media (Aqueous or Permanent) [17] [19] | Preserves staining and creates optimal refractive index |
| Coverslips & Sealant (e.g., Nail Polish, CoverGrip) [17] [19] | Protects specimen for microscopy | |
| Microscope (Bright-field or Fluorescence) [9] | Visualizes and images the stained tissue section |
The Complete IHC Workflow for FFPE Tissues
The following diagram outlines the core workflow for immunohistochemistry using paraffin-embedded samples (IHC-P), from sample preparation to final analysis.
Detailed Protocol for Key Experimental Steps
Sample Preparation: Fixation and Embedding
Proper sample preparation is critical for preserving tissue morphology and antigenicity.
- Fixation: For most proteins, immerse a small block of tissue (≤10 mm) in 10% Neutral Buffered Formalin (NBF) or 4% Paraformaldehyde (PFA) for 18–24 hours at 4°C [11]. Note: Under-fixation can lead to proteolytic degradation, while over-fixation can mask epitopes through excessive cross-linking, though antigen retrieval can help overcome this [11] [9].
- Dehydration and Clearing: After washing with PBS to remove fixative, dehydrate the tissue through a graded series of ethanol (e.g., 50%, 75%, 85%, 95%, 100%) followed by clearing in xylene or a less hazardous alternative [11].
- Embedding: Infiltrate the tissue with molten paraffin wax at 50–60°C in a vacuum oven or automated system, then orient the tissue in a mold filled with fresh paraffin and allow it to harden [11].
Sectioning and Slide Preparation
- Sectioning: Chill the paraffin block on ice. Using a microtome, trim the block and then cut sections 3–10 µm thick. Float the resulting ribbons on a 40–45°C water bath to flatten them before picking them up onto microscope slides [11].
- Drying: Dry the mounted sections on a slide rack or in an oven. Drying at 37°C overnight is recommended to prevent damage to heat-sensitive antigens [11].
Deparaffinization and Antigen Retrieval
Before immunostaining, paraffin must be completely removed and masked epitopes must be retrieved.
- Deparaffinization/Rehydration: Process slides through the following sequence [11] [17]:
- Xylene (or alternative): 2 x 10-15 minutes
- 100% Ethanol: 2 x 5 minutes
- 95% Ethanol: 2 x 5 minutes
- 70-85% Ethanol: 1-2 x 5 minutes
- Water: 5 minutes
- Heat-Induced Epitope Retrieval (HIER): This is the most common antigen retrieval method [14].
- Protocol (High pH): Submerge slides in pre-heated IHC Antigen Retrieval Solution (High pH, e.g., EDTA pH 8.0). Heat in a water bath, pressure cooker, or microwave oven at 98°C for 20 minutes. Let the slides cool to room temperature in the solution for about 20 minutes [17] [14]. The optimal buffer (e.g., Citrate pH 6.0 vs. EDTA pH 8.0) and heating method should be determined empirically for each antibody [14].
- Alternative Urea Unmasking: An alternate method uses a 1M Tris-HCl, 5% Urea pH 9.5 solution. Microwave slides in this solution at 30% power for 15 minutes, then let cool for 15 minutes before washing [18].
Immunostaining and Detection
This core process involves specific labeling of the target protein.
- Blocking: To minimize nonspecific background, cover the tissue with a blocking reagent for 1 hour at room temperature. A typical block consists of 5% serum (from the host species of the secondary antibody), 1% BSA, and 0.1% Triton X-100 in PBS [17] [18].
- Primary Antibody Incubation:
- Dilute the primary antibody in a suitable diluent or blocking buffer at the manufacturer's recommended concentration. Antibody diluent can dramatically affect signal strength [16].
- Incubate the slides with the primary antibody solution. For direct detection, use a fluorophore-conjugated primary antibody overnight at 4°C [17]. For indirect detection, incubation times may vary (e.g., 45-60 minutes at 37°C) [18].
- Detection (Indirect Method):
- After washing, apply a secondary antibody conjugated to an enzyme (e.g., Horseradish Peroxidase - HRP) or a fluorophore. Polymer-based detection systems are more sensitive than biotin-based systems and avoid background from endogenous biotin [16].
- For chromogenic detection with HRP, use a DAB Substrate Kit. Incubate slides with the DAB reaction mixture for 5-10 minutes in the dark, monitoring development, then stop the reaction by washing with water [18].
Counterstaining, Mounting, and Visualization
- Counterstaining: Briefly counterstain with hematoxylin (for chromogenic detection) to visualize nuclei or with DAPI (for fluorescence) to contextualize cellular location [14] [18].
- Dehydration and Mounting (for chromogenic/DAB): Dehydrate the slides through a graded ethanol series (e.g., 50%, 70%, 95%, 100%) and clear with xylene. Apply a drop of permanent mounting medium (e.g., Permount) and carefully lower a coverslip [18].
- Mounting (for fluorescence): After the final wash, mount slides using an aqueous mounting medium (e.g., Fluoromount-G), coverslip, and seal the edges with clear nail polish or a specialized sealant like CoverGrip to preserve fluorescence [17] [19].
Critical Controls for Validating IHC Results
Incorporating appropriate controls is non-negotiable for producing reliable and interpretable data. Controls help differentiate true positive signals from artefacts [15].
Table 2: Essential IHC Controls for Experimental Validation
| Control Type | Description | Purpose | Interpretation of Result |
|---|---|---|---|
| Positive Tissue Control [15] | A tissue known to express the target antigen. | Verifies the entire IHC protocol is functioning correctly. | Staining Observed: Assay is working. No Staining: Protocol requires troubleshooting. |
| Negative Tissue Control [15] | A tissue known not to express the target antigen (e.g., Knockout/Knockdown tissue). | Reveals non-specific binding and false positives. | No Staining: Ideal. Staining Observed: Suggests antibody non-specificity or protocol issue. |
| No Primary Antibody Control [15] | The primary antibody is omitted and replaced with antibody diluent or buffer. | Assesses nonspecific binding of the secondary antibody and detection system. | No Staining: Ideal. Staining Observed: Indicates nonspecific secondary antibody binding. |
| Isotype Control [15] | An antibody with the same isotype and host species as the primary, but no target specificity. | Distinguishes specific antibody binding from nonspecific Fc receptor or protein interactions. | No Staining: Confirms signal in test sample is specific. Staining Observed: Suggests nonspecific interactions. |
The reliability of IHC data is directly dependent on the quality of reagents, the precision of equipment, and the rigor of the protocol, including the use of essential controls. This application note provides a detailed framework for establishing a robust IHC workflow for FFPE tissues, from initial tissue fixation to final imaging. By meticulously selecting high-specificity primary antibodies [16], optimizing antigen retrieval conditions [14], employing sensitive detection systems [16], and systematically implementing validation controls [15], researchers and drug development professionals can generate consistent, high-quality data that accurately reflects protein localization and expression within the tissue microenvironment.
The Critical Role of Fixation in Preserving Morphology and Antigenicity
Tissue fixation is the foundational step in preparing specimens for immunohistochemical (IHC) analysis, serving to preserve tissue architecture and prevent degradation. For Formalin-Fixed, Paraffin-Embedded (FFPE) tissues, this process maintains the structural integrity of cells, cellular components, and molecular targets, enabling accurate morphological examination and biomarker localization [7]. The critical importance of fixation lies in its direct impact on the reliability of IHC results, which are increasingly used for both diagnostic and predictive testing in clinical and research settings [20] [21]. Inadequate fixation can compromise tissue morphology and antigenicity, leading to false-negative results or inaccurate biomarker quantification that may affect research conclusions or clinical decisions [20] [22].
The fixation process primarily functions by forming cross-links between proteins, effectively "freezing" the tissue in a state that closely resembles its living condition. This stabilization prevents autolysis and putrefaction while protecting epitopes—the specific regions antibodies recognize—from degradation. However, the same cross-linking that preserves tissue structure can also mask these critical epitopes, creating a delicate balance that must be carefully managed through optimized fixation protocols [7] [23].
Quantitative Impact of Fixation on IHC Results
Effects of Fixation Timing
Research demonstrates that fixation parameters significantly influence immunohistochemical staining quality and intensity. The timing of fixation initiation and duration both play crucial roles in preserving antigenicity for accurate biomarker detection and quantification.
Table 1: Impact of Delayed Fixation on IHC Marker Expression in NSCLC
| IHC Marker | Category | Impact of Delayed Fixation | Statistical Significance |
|---|---|---|---|
| CK 7 | Diagnostic | Reduced expression | p < 0.01 [20] |
| KER MNF116 | Diagnostic | Reduced expression | p = 0.001 [22] |
| CAM 5.2 | Diagnostic | Reduced expression | Significant [20] |
| p40 | Diagnostic | Reduced expression (H-score 293 vs 248) | p = 0.028 [22] |
| TTF-1 | Diagnostic | Reduced expression | Significant [20] |
| PD-L1 | Predictive | Reduced expression (H-score 123 vs 6) | p = 0.001 [22] |
| C-MET | Predictive | Reduced expression (H-score 99 vs 20) | p < 0.001 [22] |
| Napsin A | Diagnostic | Reduced expression (H-score 268 vs 130) | p = 0.005 [22] |
Delayed fixation (exceeding 1 hour cold ischemia time) consistently demonstrates detrimental effects on IHC staining across multiple markers. Studies on non-small cell lung cancer (NSCLC) resection specimens reveal significantly higher H-scores in adequately fixed tumor areas compared to inadequately fixed regions [20] [22]. This is particularly critical for predictive markers like PD-L1, where staining intensity directly influences diagnostic categories and subsequent treatment decisions [20]. Specimens with delayed fixation also show increased loss of tissue microarrays (TMA) cores during processing (35% vs 27% in prolonged fixation), further compromising analytical outcomes [20].
Table 2: Effects of Prolonged Formalin Fixation on IHC Quality
| Parameter | Standard Fixation (24-48h) | Prolonged Fixation (>72h) | Impact |
|---|---|---|---|
| Tissue Morphology | Well-preserved | Well-preserved | Minimal difference [7] |
| Core Retention | 73% | 73% | No significant loss [20] |
| Staining Intensity | Optimal | Maintained | No significant reduction [20] |
| Epitope Masking | Moderate | Increased | May require extended retrieval [7] |
| Recommendation | Gold standard | Acceptable | Superior to delayed fixation [20] |
In contrast to delayed fixation, prolonged formalin fixation (up to 7 days) shows no significant loss of TMA cores or deterioration in staining quality for most markers [20]. This suggests that extended fixation in 10% Neutral Buffered Formalin (10% NBF) is preferable to inadequate fixation, though standard fixation times of 24-48 hours remain optimal for most applications [7].
Environmental Factors Affecting Stored FFPE Sections
Storage conditions of FFPE tissue sections significantly impact antigen preservation, particularly for sensitive markers like PD-L1. Accelerated instability testing reveals that increased humidity and temperature dramatically accelerate immunoreactivity loss, while controlled environments with desiccant protection mitigate these effects [24].
Table 3: Environmental Impact on PD-L1 Immunoreactivity in FFPE Sections
| Environmental Factor | Standard Condition | Accelerated Degradation | Effect on PD-L1 IHC |
|---|---|---|---|
| Temperature | 20-22°C (RT) | 37°C | 33-58% signal reduction [24] |
| Relative Humidity | 14.4-80.5% (avg 46.8%) | ~80% | Significant signal loss [24] |
| Oxygen Concentration | Atmospheric | 100% | Accelerated degradation |
| Desiccant Use | No | Yes | Mitigates signal loss [24] |
| Section Storage Time | <1 month | >6 months | Not recommended for PD-L1 [24] |
Mass spectrometry analyses confirm that PD-L1 protein quantity remains stable even in sections with significant IHC signal loss, indicating that environmental factors cause structural distortion of epitopes rather than protein degradation [24]. This epitope masking renders targets unsuitable for antibody binding despite antigen presence, highlighting the necessity of proper storage conditions for archived tissues.
Pre-Analytical Protocols for Optimal Fixation
Comprehensive Fixation Workflow
The following workflow outlines the critical steps for ensuring optimal tissue fixation for IHC applications:
Detailed Fixation Protocol for FFPE Tissues
Principle: Proper fixation preserves tissue architecture, cellular components, and molecular targets while preventing degradation [7].
Materials:
- 10% Neutral Buffered Formalin (10% NBF)
- Tissue cassettes
- Specimen containers
- Scale or ruler
- Timing device
Procedure:
Tissue Collection and Cold Ischemia Time
- Record exact time of tissue removal from source
- Ensure cold ischemia time does not exceed 60 minutes [7]
- Place tissue in appropriate container for transport to pathology
Tissue Preparation
- Trim tissue to uniform 2-3mm thickness using sharp scalpel [7]
- Avoid crushing or distorting tissue architecture
- For larger specimens, create slices to allow adequate fixative penetration
Fixative Application
- Use 10% NBF as primary fixative
- Maintain minimum fixative-to-tissue ratio of 20:1 [7]
- Ensure tissue is completely submerged and free-floating
- Use containers of appropriate size to prevent overcrowding
Fixation Duration
- Fix for 6-72 hours at room temperature [7]
- Adjust fixation time based on tissue size:
- Small biopsies (2-3mm): 6-24 hours
- Standard specimens: 24-48 hours
- Large specimens: 48-72 hours
- Do not exceed 72 hours for most applications
Post-Fixation Storage
- Transfer tissues to 70% ethanol for storage if necessary
- Note: This is not recommended for brain or neurological samples [7]
- For long-term storage, process to paraffin blocks
Troubleshooting Tips:
- Inadequate Fixation: If tissue shows autolysis or poor morphology, reduce cold ischemia time and ensure proper fixative volume
- Over-fixation: If epitopes are masked despite antigen retrieval, reduce fixation duration
- Uneven Fixation: Ensure tissue slices are uniform and fixative can penetrate all areas
Experimental Validation of Fixation Quality
Assessment Methodology for Fixation Efficacy
Validating fixation quality requires multiparametric assessment to ensure both morphological preservation and antigenicity retention. The following protocol outlines a comprehensive approach:
Principle: Evaluate fixation quality through morphological assessment and IHC staining intensity comparison between adequately and inadequately fixed tissue areas [22].
Materials:
- H&E stained sections
- IHC panels relevant to tissue type (e.g., CK7, p40, TTF-1 for lung)
- Digital pathology scanner
- Image analysis software
- DNA extraction and quantification equipment
Procedure:
Morphological Assessment
- Prepare H&E stained sections from FFPE blocks
- Microscopically identify adequately and inadequately fixed areas based on:
- Basement membrane detachment
- Nuclear detail preservation
- Cytoplasmic retraction
- Demarcate regions of interest for comparative analysis
Immunohistochemical Staining
- Select 3-5 IHC markers representing different cellular compartments
- Include both diagnostic (e.g., cytokeratins) and predictive (e.g., PD-L1) markers
- Process all samples under identical IHC conditions
- Use validated antibodies with appropriate positive and negative controls
Quantitative Analysis
- Scan slides using digital pathology system
- Calculate H-scores for each marker in adequately and inadequately fixed areas:
- H-score = Σ(1 × % weak positive) + (2 × % moderate positive) + (3 × % strong positive)
- Compare staining intensities using appropriate statistical tests (e.g., Wilcoxon signed rank test)
Molecular Integrity Assessment
- Extract DNA from matched tissue areas
- Measure DNA fragmentation using gel electrophoresis or bioanalyzer
- Quantify fragments of 300bp and 400bp as indicators of preservation quality
Validation Criteria:
- Adequately fixed areas should show significantly higher H-scores for most markers [22]
- DNA fragments should exceed 300bp in adequately fixed specimens [22]
- <10% variation in staining intensity between similar fixation conditions
Research Reagent Solutions for IHC Fixation
Table 4: Essential Research Reagents for Optimal Tissue Fixation
| Reagent/Category | Specific Examples | Function & Application Notes |
|---|---|---|
| Primary Fixative | 10% Neutral Buffered Formalin (NBF) | Gold standard for morphology; preserves proteins, DNA, mRNA; requires controlled fixation time [7] |
| Alternative Fixatives | 4% Paraformaldehyde (PFA), Ethanol-based | When formalin incompatible; PFA for delicate antigens; ethanol for molecular studies [23] |
| Antigen Retrieval Buffers | Citrate (pH 6.0), EDTA (pH 8.0), Tris-EDTA (pH 9.0) | Reverse formalin cross-linking; citrate for broad applications; EDTA/Tris-EDTA for challenging epitopes [23] [2] |
| Processing Reagents | Ethanol series, Xylene, Paraffin wax | Dehydrate, clear, and infiltrate tissue for embedding; critical for section quality [2] |
| Detection Antibodies | PD-L1 clones (22C3, 28-8, E1L3N, SP142) | Clone-specific variability to fixation; E1L3N most robust to storage effects [24] |
| Control Tissues | Tonsil, Placenta, Cell Lines | Validation of fixation and staining quality; essential for assay standardization [24] |
Optimal tissue fixation represents a critical pre-analytical variable that directly influences the reliability of IHC results for both research and clinical applications. The evidence demonstrates that delayed fixation beyond 60 minutes significantly compromises antigenicity across multiple important biomarkers, particularly affecting predictive markers like PD-L1 that guide therapeutic decisions. In contrast, prolonged formalin fixation shows minimal detrimental effects compared to delayed fixation. Proper fixation protocols, combined with controlled storage conditions for FFPE sections, ensure preservation of both morphological detail and antigen integrity. Implementation of standardized fixation workflows and validation procedures, as outlined in these application notes, provides the foundation for robust and reproducible IHC outcomes essential for high-quality research and accurate diagnostic outcomes.
Formalin-fixed, paraffin-embedded (FFPE) tissue preparation is a cornerstone technique in biomedical research and clinical diagnostics, enabling detailed morphological examination and immunohistochemical analysis. The dehydration and embedding process is critical for preserving tissue architecture and antigen integrity, forming the foundation for any subsequent staining or molecular analysis within a comprehensive IHC research thesis. This protocol outlines the standardized procedures for transitioning fixed tissues into stable paraffin blocks, ensuring optimal specimen quality for downstream applications.
The journey from a fixed tissue specimen to a ready-to-section paraffin block involves a meticulous sequence of steps to replace water with paraffin. The following diagram illustrates this core workflow.
Dehydration and Clearing Protocols
Quantitative Dehydration Parameters
Successful dehydration requires precise transitions through increasing ethanol concentrations to remove water without causing excessive tissue hardening or distortion. The following table summarizes standard protocols from major research suppliers.
Table 1: Comparative Dehydration and Clearing Protocols
| Processing Step | Solution Concentration | Incubation Time | Temperature | Purpose | Protocol Source |
|---|---|---|---|---|---|
| Dehydration | 50%, 70%, 80%, 95% Ethanol | 30 minutes - 2 hours each | Room Temperature | Gradual water removal | [2] [11] |
| Final Dehydration | 100% Ethanol | 2-3 changes, 20-30 minutes each | Room Temperature | Complete residual water removal | [2] [11] [25] |
| Clearing | Xylene or Histoclear | 2-3 changes, 10-20 minutes each | Room Temperature | Ethanol removal; paraffin miscibility | [2] [11] [26] |
Detailed Procedural Notes
- Dehydration Progression: Begin with lower ethanol concentrations (50-70%) to prevent sudden tissue shrinkage and distortion. Gradual progression to 100% ethanol ensures complete dehydration [2] [25].
- Time Considerations: Larger tissue specimens may require extended incubation times (up to 2 hours) for adequate processing, while standard biopsies (≤10mm) can be processed with shorter intervals [11].
- Clearing Verification: Properly cleared tissue appears translucent. Incomplete clearing is evidenced by persistent cloudiness, which will impair paraffin infiltration [11].
Paraffin Infiltration and Embedding
Paraffin Infiltration Protocol
Following dehydration and clearing, tissues undergo paraffin infiltration to replace clearing agents with paraffin wax, which provides structural support for microtomy sectioning.
Table 2: Paraffin Infiltration and Embedding Parameters
| Processing Step | Material | Incubation Time | Temperature | Key Considerations |
|---|---|---|---|---|
| Paraffin Infiltration | Molten Paraffin Wax | 3 changes, 40-60 minutes each | 50-60°C | Use vacuum oven for improved penetration [11] |
| Embedding | Fresh Paraffin Wax | Until solidified | 50-60°C → 4°C | Correct tissue orientation is critical [11] |
| Block Storage | Finished FFPE Block | Indefinitely | Room Temperature | Stable for several years [2] [25] |
Step-by-Step Methodology
- Transfer to Paraffin: Use forceps to move cleared tissues to a vessel containing molten paraffin wax maintained at 55-60°C [11].
- Vacuum Infiltration: Process tissues through 3-4 changes of molten paraffin under vacuum. Vacuum assistance removes residual clearing agent and facilitates complete wax infiltration, especially for dense tissues [11].
- Embedding Mold Preparation:
- Select an appropriate-sized metal or plastic mold.
- Fill halfway with molten paraffin from the embedding center [11].
- Tissue Orientation:
- Quickly transfer the infiltrated tissue to the mold using warm forceps.
- Orient the tissue to ensure the desired cutting plane faces the bottom of the mold. Proper orientation is crucial for obtaining representative sections during microtomy [11].
- Block Completion:
- Place an embedding cassette on top of the mold as a backing.
- Fill the assembly completely with molten paraffin.
- Transfer to a cold plate or refrigerated unit (4°C) for approximately 10-15 minutes to solidify [11].
- Storage: Once solidified, separate the block from the mold. FFPE blocks can be stored at room temperature protected from light for several years [2].
The Scientist's Toolkit: Essential Reagents and Materials
Table 3: Key Research Reagent Solutions for FFPE Processing
| Reagent/Material | Primary Function | Technical Specifications | Alternative Options |
|---|---|---|---|
| Ethanol Series | Tissue dehydration through graded concentrations | 50%, 70%, 80%, 95%, 100% (Histology grade) | Methanol can be used for specific antigens [11] |
| Xylene | Clearing agent; bridges ethanol and paraffin | Mixed isomers, histology grade | Less hazardous substitutes (e.g., Histoclear) [11] [26] |
| Paraffin Wax | Tissue infiltration and structural support | High-grade, 52-58°C melting point | Various commercial blends with polymer additives |
| Embedding Molds/Cassettes | Creates paraffin block with identifying information | Standard or custom sizes | Cassettes anchor block during microtomy [11] |
| Processing Equipment | Automated tissue processing | Vacuum oven or automated processor | Standardizes processing for reproducibility [11] |
Quality Control and Troubleshooting
- Incomplete Dehydration: Evidence of water droplets during sectioning indicates inadequate dehydration. Ensure sufficient time in 100% ethanol changes and use fresh ethanol solutions [11].
- Improper Clearing: Cloudy tissue appearance after clearing suggests residual ethanol. Extend xylene incubation times or refresh clearing solutions [11].
- Poor Infiltration: Difficult sectioning with tissue crumbling may result from insufficient paraffin infiltration. Ensure proper vacuum function during infiltration and extend paraffin incubation times for dense tissues [11].
- Optimal Block Characteristics: A properly processed block sections smoothly at 3-5µm thickness without cracking, crumbling, or separation from the paraffin [11].
The standardized protocols for tissue dehydration, clearing, and paraffin embedding detailed in this application note provide the foundational steps for generating high-quality FFPE tissue blocks. Mastery of these techniques ensures preservation of tissue morphology and antigenicity, which is paramount for obtaining reliable and reproducible data in subsequent immunohistochemical analyses within a research thesis framework. Attention to timing, reagent quality, and technical precision at this early stage prevents analytical complications in downstream experimental phases.
Sectioning and Slide Preparation for Optimal Tissue Adhesion
Within the comprehensive workflow of immunohistochemistry (IHC) for Formalin-Fixed Paraffin-Embedded (FFPE) tissues, sectioning and slide preparation constitute a critical foundation. The integrity of all subsequent staining and analysis phases hinges upon optimal tissue adhesion to microscope slides. Inadequate adhesion during processing can lead to tissue detachment, folding, or loss, compromising experimental results and wasting valuable samples [27]. This application note details standardized protocols and material selections designed to ensure robust tissue adhesion throughout the IHC process, thereby enhancing the reliability and reproducibility of research data.
The Scientist's Toolkit: Essential Materials for Tissue Adhesion
The following table catalogues the essential reagents and tools required for effective sectioning and slide preparation.
Table 1: Research Reagent Solutions for Sectioning and Slide Preparation
| Item | Function & Importance |
|---|---|
| Positively Charged or Silanized Slides [2] | Microscope slides coated with a positive charge or silane to create an electrostatic attraction with the negatively charged tissue sections, significantly enhancing adhesion. |
| Specialized Adhesives (e.g., Poly-L-Lysine, Histoweld) [27] | Aqueous solutions used to coat standard slides, creating a sticky, polymeric layer that entraps tissue sections and prevents floatation during stringent processing steps. |
| Cryo-Embedding Media (O.C.T.) [2] | A water-soluble glycol and resin compound used for embedding tissues before frozen sectioning. It provides structural support during cutting and facilitates adhesion to the slide. |
| Hydrophobic Barrier Pen [28] [29] | Used to draw a water-repellent barrier around the tissue section on the slide. This creates a well that confines antibodies and reagents, reducing volume requirements and preventing cross-contamination. |
| Histoclear II / Xylene [26] | Clearing agents used to dissolve and remove paraffin wax from tissue sections during the deparaffinization process, which is essential for rehydration and antibody penetration. |
| Ethanol Series (100%, 95%, 70%, 50%) [26] [2] | Used in a graded series for rehydrating tissue sections after deparaffinization and dehydrating them prior to mounting. Proper rehydration is critical for maintaining tissue architecture. |
Quantitative Evaluation of Slide Adhesives
Selecting an appropriate slide adhesive is a primary determinant of success. A recent non-inferiority study quantitatively evaluated a novel adhesive, Histoweld, against the routinely used poly-L-lysine. A total of 33 routinely used IHC antibodies specific for 11 different organs were used for the evaluation [27].
Table 2: Comparative Performance of Microscope Slide Adhesives
| Parameter | Poly-L-Lysine (Adhesive II) | Histoweld (Adhesive I) |
|---|---|---|
| Tissue Loss During HIER | No significant loss [27] | No significant loss [27] |
| Overall Immunostaining Quality | Comparable staining in all antibodies [27] | Optimal and comparable staining in 100% of selected antibodies [27] |
| Staining Intensity for IDH1, Bcl-2, P53 | Standard Intensity | Stronger (3+) staining intensity [27] |
| Background Staining (Bcl-2) | Not reported | Mild (1+) homogeneous background [27] |
| Cost-Efficiency & Conclusion | Standard | A cost-effective and reliable alternative with excellent performance [27] |
Detailed Experimental Protocol for Sectioning and Slide Mounting
This protocol outlines the steps for sectioning FFPE tissue blocks and mounting sections onto slides with optimal adhesion in mind.
Materials and Reagents
- Paraffin-embedded tissue block [11]
- Microtome [11]
- Microtome blades [11]
- Positively charged, silanized, or pre-coated adhesive slides (see Table 1) [2] [27]
- Water bath, filled with ultrapure water and heated to 40–45°C [11]
- Slide warming oven or drying rack [11]
- Ice container [11]
Step-by-Step Methodology
- Block Chilling: Chill the paraffin-embedded tissue block on ice. Cold wax provides better support for harder tissue elements, allowing for thinner sections to be cut. The slight moisture from the melting ice also makes the tissue easier to section [11].
- Microtome Setup: Set up the microtome and blade according to the manufacturer's instructions, ensuring the blade clearance angle is adjusted for optimum performance [11].
- Block Trimming: Insert the chilled block into the microtome and orient it. Trim the block face to expose the tissue surface at a thickness of 10–30 µm. This ensures that subsequent sections are representative of the entire tissue sample [11].
- Sectioning: Cut thin sections to a thickness of 3–10 µm. Properly cut sections will come off the block as ribbons. The first few sections may contain holes from trimming and should be discarded [11].
- Section Floating and Spreading: Carefully float the ribbon of sections on the surface of the heated water bath (40–45°C) to allow them to flatten out completely. Use tweezers to gently separate individual sections [11].
- Slide Mounting: Pick up the flattened sections from the water bath onto a prepared microscope slide (positively charged or adhesive-coated). Ensure the section is centered and free of bubbles [2] [11].
- Slide Drying: Dry the mounted sections thoroughly. Drying at 37°C overnight is recommended as it is less likely to damage heat-sensitive antigens compared to higher temperatures. This drying step is critical for securing the tissue to the slide surface [11].
Workflow Integration in FFPE IHC Processing
The process of sectioning and slide preparation is an integral step within the larger FFPE IHC workflow, as illustrated in the following diagram.
Troubleshooting Common Adhesion Issues
Even with careful preparation, adhesion problems can occur. The following flowchart guides the systematic diagnosis and resolution of common tissue detachment issues.
Concluding Remarks
Meticulous attention to sectioning and slide preparation is a prerequisite for successful and reproducible IHC outcomes. The choice of slide surface, consistent application of mounting techniques, and careful management of the slides through the initial stages of the protocol are paramount. By integrating the standardized protocols and material selections outlined in this document, researchers can significantly mitigate the risk of tissue loss, thereby ensuring the integrity of their IHC data and advancing the reliability of their research in drug development and biomedical science.
Executing the Protocol: A Detailed Step-by-Step Guide for FFPE IHC
Within the broader context of a complete immunohistochemistry (IHC) protocol for Formalin-Fixed, Paraffin-Embedded (FFPE) tissues, the initial steps of deparaffinization and rehydration are critically important. FFPE preservation is a cornerstone of histology, providing excellent morphological detail and long-term stability for tissue specimens [30]. However, the paraffin wax used in embedding must be completely removed to allow aqueous-based reagents, such as antibodies and stains, to penetrate the tissue and access their targets [30] [11]. Incomplete or improper removal of paraffin is a primary source of assay failure, leading to poor staining, high background noise, and unreliable results in downstream analyses like IHC or molecular techniques [30] [26]. This application note details a standardized protocol to ensure consistent and effective deparaffinization and rehydration, forming a reliable foundation for all subsequent procedures.
Materials and Reagents
Research Reagent Solutions
The following table lists the essential materials required for the deparaffinization and rehydration protocol.
| Item | Function/Description |
|---|---|
| Xylene or Xylene Substitute | Organic solvent used to dissolve and remove paraffin wax from tissue sections. It is typically used in multiple baths to ensure complete deparaffinization [30] [26]. |
| 100%, 95%, 70%, and 50% Ethanol | A series of ethanol solutions used for rehydrating the tissue through a graded series, preventing damage from abrupt water exposure [30] [2]. |
| Histoclear II | A less hazardous, commercially available alternative to xylene for deparaffinization [26]. |
| Distilled or Deionized Water | Used for the final hydration step before antigen retrieval or staining. Slides must not dry out after this point [26] [11]. |
| Glass Coplin Jars or Automated Stainer | Containers for holding solvents during manual processing or an automated instrument for standardized, high-throughput processing [26] [11]. |
| Superfrost Plus Microscope Slides | Charged or adhesive-coated glass slides to ensure tissue sections remain securely attached throughout the rigorous process [30] [26]. |
Experimental Protocol: Workflow & Methodologies
Graphical Workflow
The diagram below outlines the complete sequence for deparaffinization and rehydration.
Detailed Step-by-Step Methodology
This protocol is designed for manual processing using Coplin jars but can be adapted for automated stainers.
Paraffin Melting (Optional but Recommended):
Deparaffinization in Xylene:
- Immerse the slides in a first bath of fresh xylene or a xylene substitute for 10 minutes [30] [11]. Agitate the slide holder gently to ensure complete coverage and to dislodge any air bubbles [26].
- Transfer the slides to a second bath of fresh xylene for another 10 minutes [30] [11]. This second bath ensures the complete dissolution of any residual paraffin.
- Optional Third Bath: For thicker tissue sections (>5 μm) or older, more heavily cross-linked archival blocks, a third xylene bath for 10 minutes is recommended to guarantee complete paraffin removal [30].
Rehydration via a Graded Ethanol Series:
Final Hydration:
Proceed to Next Step:
Protocol Variations in Published Literature
Different protocols may suggest slight variations in incubation times. The table below summarizes these alternatives for comparison.
| Protocol Step | Standard Protocol (Superior BioDiagnostics) [30] | IHC-P Protocol (abcam) [11] | Thermofisher Protocol [26] |
|---|---|---|---|
| Xylene 1 | 5-10 minutes | 10-15 minutes | 5 minutes |
| Xylene 2 | 5-10 minutes | 10-15 minutes | 5 minutes |
| Xylene 3 | Optional, 5-10 minutes | Not specified | 5 minutes |
| 100% Ethanol | 5 minutes | 2 x 5 minutes | 2 x 5 minutes |
| 95% Ethanol | 5 minutes | 2 x 5 minutes | 1 x 5 minutes |
| 70% Ethanol | 5 minutes | 2 x 5 minutes | 1 x 5 minutes |
| 50% Ethanol | 5 minutes | 2 x 5 minutes | Not specified |
| Final Rinse | Hydration complete | Water, 3x | Water, 1x 5 minutes |
Technical Notes and Best Practices
- Adequate Immersion Time: Ensure slides remain in xylene long enough to fully dissolve the paraffin. However, excessive exposure can make delicate tissues brittle [30].
- Solvent Quality: Always use fresh, high-quality solvents. Reusing xylene baths too many times can lead to paraffin contamination and inefficient deparaffinization.
- Safety Considerations: Xylene is toxic and volatile. All procedures should be performed in a well-ventilated fume hood while wearing appropriate personal protective equipment (PPE) such as gloves and lab coats [30]. Consider using less hazardous commercial alternatives to xylene where possible [26] [11].
- Troubleshooting: Poor or patchy staining in downstream IHC is often a direct result of incomplete deparaffinization. If this occurs, verify that xylene baths are fresh and that incubation times are strictly followed.
In the context of a complete immunohistochemistry (IHC) protocol for formalin-fixed, paraffin-embedded (FFPE) tissues, antigen retrieval represents a critical step for successful protein detection. Formalin fixation creates methylene bridges that cross-link proteins, thereby masking epitopes and impairing antibody binding [31] [32]. Antigen retrieval methods reverse these crosslinks to restore epitope accessibility. For researchers and drug development professionals, selecting the appropriate retrieval method—Heat-Induced Epitope Retrieval (HIER) or Proteolytic-Induced Epitope Retrieval (PIER)—is fundamental to achieving specific, reproducible, and high-quality staining results. This application note provides a detailed comparison of these techniques and offers optimized protocols for implementation.
Method Comparison: HIER vs. PIER
The two primary antigen retrieval methods operate through distinct mechanisms. Understanding their differences is the first step in selecting the right approach for a specific antigen and tissue type.
Core Principles and Selection Guide
The following table summarizes the fundamental characteristics of each method to guide your initial selection.
Table 1: Core Characteristics of HIER and PIER
| Feature | Heat-Induced Epitope Retrieval (HIER) | Proteolytic-Induced Epitope Retrieval (PIER) |
|---|---|---|
| What it is | The use of heat to retrieve antigen and restore antigenicity [31] | The use of enzymes to retrieve antigen and restore antigenicity [31] |
| How it works | Heat causes crosslinked protein to unfold [31]. It disrupts crosslinks through thermal unfolding, often aided by calcium ion chelation in buffer [32]. | Enzymes degrade protein crosslinks [31] [32]. |
| Typical Agents | Heated buffer solutions (Citrate, EDTA, Tris-EDTA) [2] [33] | Proteolytic enzymes (Trypsin, Proteinase K, Pepsin) [2] [34] [32] |
| Advantages | - Generally preferred and widely applicable [31] [32]- Superior for most targets [32]- Better preservation of tissue morphology [32] | - Can be more effective for certain antigens in dense tissues (e.g., cartilage) [34]- Does not require specialized heating equipment |
| Disadvantages & Risks | - Potential for tissue detachment or damage if overheated [34]- Can destroy heat-labile epitopes [34]- Requires precise control of time and temperature [31] | - High risk of destroying epitopes and tissue morphology if over-digested [32]- More difficult to standardize and control [32]- Can cause false-positive staining and high background [32] |
Detailed Experimental Protocols
Heat-Induced Epitope Retrieval (HIER) Protocol
HIER utilizes heat to break the methylene crosslinks formed during formalin fixation. The following protocol is a consolidated guide from several sources [2] [33] [26].
Workflow Overview:
Step-by-Step Methodology:
Deparaffinization and Rehydration: Begin with fully deparaffinized and rehydrated tissue sections on slides. Ensure slides are hydrated in distilled water before proceeding. Do not allow slides to dry out at any point from this step forward, as this causes non-specific antibody binding and high background staining [11].
Buffer Preparation: Prepare a sufficient volume of antigen retrieval buffer to completely submerge the slides during heating. The choice of buffer is antigen-dependent. The most common buffers are:
- Citrate Buffer (10 mM, pH 6.0): A low-pH, all-purpose option effective for a wide range of epitopes [2] [33] [26].
- EDTA Buffer (1 mM, pH 8.0): A high-pH buffer often required for phosphorylated targets and some nuclear antigens [2] [33].
- Tris-EDTA Buffer (10 mM Tris/1 mM EDTA, pH 9.0): Another high-pH alternative that can be superior for certain targets [2] [35].
Heating: Place the slides in a coplin jar or appropriate container filled with the pre-heated or room temperature retrieval buffer. Heat the container using one of the following common methods until the buffer reaches and maintains the target temperature:
- Microwave Oven: Heat until boiling and then maintain at approximately 98°C for 15-20 minutes [2] [26]. Avoid boiling dry.
- Pressure Cooker: Bring to full pressure (approximately 120°C) and maintain for 1-5 minutes [31] [32].
- Water Bath: Maintain slides at 92-95°C for 5-10 minutes [31] [32].
- Steamer: Maintain at approximately 98°C for 20 minutes [2].
Cooling: After the heating period, remove the container from the heat source and allow it to cool at room temperature for approximately 20 minutes. This slow cooling is essential for maintaining the unfolded protein structure and allowing antibody access [2] [26].
Rinsing: Gently wash the slides in PBS (pH 7.4) or TBS for 5 minutes before proceeding to the blocking and immunostaining steps [26].
Proteolytic-Induced Epitope Retrieval (PIER) Protocol
PIER uses enzymes to cleave peptide bonds and break the crosslinks masking the epitopes. This method requires careful optimization to avoid tissue damage.
Step-by-Step Methodology:
Deparaffinization and Rehydration: As with HIER, start with deparaffinized and rehydrated tissue sections.
Enzyme Solution Preparation: Prepare the proteolytic enzyme solution fresh. Common enzymes and their working concentrations are listed in Table 3. The solution should be pre-warmed to the incubation temperature if a shorter incubation is used.
Enzyme Digestion: Apply the pre-warmed enzyme solution to the tissue sections and incubate in a humidity chamber to prevent evaporation. A typical incubation is 10-20 minutes at 37°C [2] [26]. For dense tissues like cartilage, longer incubations (e.g., 90 minutes) may be necessary, but this must be rigorously optimized [34].
Termination: Rinse the slides thoroughly in running distilled water for 3-5 minutes to stop the enzymatic reaction [2].
Rinsing: Proceed with a gentle wash in PBS or TBS before moving to the immunostaining workflow [26].
Buffer and Reagent Selection
The choice of retrieval solution is a critical variable that requires empirical testing. The optimal pH and chemical composition depend on the specific antibody-epitope interaction.
Table 2: HIER Buffer Comparison
| Retrieval Buffer | pH | Commonly Used For / Notes | Example Protocol |
|---|---|---|---|
| Sodium Citrate [2] | 6.0 | A versatile, all-purpose buffer. A good starting point for most antigens. | Boil slides in 10 mM sodium citrate buffer and maintain at ~98°C for 20 minutes [2]. |
| EDTA [2] [33] | 8.0 - 9.0 | Often required for phosphorylated antigens, nuclear antigens, and some membrane proteins. Provides a stronger retrieval effect. | Boil slides in 1 mM EDTA (pH 8.0) and maintain at ~98°C for 15 minutes [2]. |
| Tris-EDTA [2] [35] | 9.0 | An alternative high-pH buffer. Can be superior for specific targets and in complex tissues. | Boil slides in 10 mM Tris/1 mM EDTA (pH 9.0) and maintain at ~98°C for 20 minutes [2]. |
Table 3: PIER Enzyme Comparison
| Enzyme | Typical Working Concentration | Buffer / Conditions | Incubation Example |
|---|---|---|---|
| Trypsin [2] [26] | 0.05% | 0.1% Calcium Chloride (pH 7.8) | 10-20 minutes at 37°C [2] |
| Pepsin [2] [34] | 0.4% - 0.5% | 10 mM HCl (pH 2.0) or HEPES-buffered medium | 10 minutes at 37°C [2] |
| Proteinase K [34] [26] | 10 - 30 µg/mL | TE Buffer (pH 8.0) or Tris/CaCl2 (pH 6.0) | 45-90 minutes at 37°C [34] |
The Scientist's Toolkit: Essential Research Reagents
Table 4: Key Reagent Solutions for Antigen Retrieval
| Reagent / Solution | Function | Example Formulation / Notes |
|---|---|---|
| Sodium Citrate Buffer | A low-pH retrieval solution for HIER. Unmasks a broad range of epitopes via heat [2]. | 10 mM sodium citrate, pH 6.0. Can be prepared as a 10x stock for storage. |
| Tris-EDTA Buffer | A high-pH retrieval solution for HIER. Crucial for unmasking challenging epitopes, like phosphorylated sites [2] [33]. | 10 mM Tris Base, 1 mM EDTA, pH 9.0. |
| Proteinase K | A broad-spectrum serine protease for PIER. Effective for digesting crosslinks in dense tissues [34] [26]. | 20-30 µg/mL in an appropriate buffer (e.g., TE buffer, pH 8.0). Requires precise time/temp control. |
| Trypsin | A proteolytic enzyme for PIER. Cleaves peptide bonds at lysine and arginine residues [2] [26]. | 0.05% in 0.1% CaCl₂, pH 7.8. The calcium stabilizes the enzyme. |
| Normal Serum | Blocking agent. Used after retrieval to prevent non-specific binding of antibodies to the tissue [26]. | 10% normal serum from the species in which the secondary antibody was raised, in PBS. |
Optimization and Troubleshooting
Systematic Optimization Strategy
A systematic approach is essential for developing a robust antigen retrieval protocol, especially for a novel antibody or tissue type.
- Start with HIER: Begin optimization using HIER with both a low-pH buffer (Citrate, pH 6.0) and a high-pH buffer (Tris-EDTA, pH 9.0) [32]. This covers the needs of a majority of antigens.
- Evaluate PIER if HIER Fails: If HIER yields weak or no signal, test PIER using different enzymes (e.g., Proteinase K, Trypsin) [32]. This is particularly relevant for dense extracellular matrix tissues, as demonstrated by a 2024 study on osteoarthritis cartilage where PIER provided superior results for detecting the CILP-2 glycoprotein compared to HIER [34].
- Conduct Matrix Studies: Systematically test combinations of key variables, including heating time, temperature, and buffer pH for HIER, or enzyme concentration and digestion time for PIER [31] [32].
Troubleshooting Common Issues
- Weak or No Staining: This is often caused by under-retrieval [32]. Solution: Increase the heating time (in 5-minute increments up to 30 minutes) [2] or switch to a higher-pH retrieval buffer [32]. For PIER, a slight increase in enzyme concentration or digestion time may be needed.
- High Background Staining: This can result from over-retrieval or tissue damage [32]. Solution: For HIER, reduce the heating time or temperature. For PIER, which is particularly prone to this, reduce the enzyme concentration or incubation time [32].
- Tissue Detachment: Over-heating during HIER or over-digestion during PIER can cause sections to detach from the slide [34]. Solution: Use positively charged or adhesive-coated slides and ensure retrieval conditions are not excessively harsh.
In the immunohistochemistry (IHC) workflow for formalin-fixed paraffin-embedded (FFPE) tissues, the blocking step is a critical preparatory stage that occurs after antigen retrieval and before antibody incubation. Its primary purpose is to minimize non-specific signals and background staining, thereby enhancing the signal-to-noise ratio for accurate interpretation of results [36]. Effective blocking ensures that the subsequent antibody binding is specific to the target antigen rather than resulting from interactions with endogenous enzymes, non-target tissue proteins, or other reactive sites [13]. For researchers and drug development professionals, proper execution of this step is fundamental to obtaining reliable, reproducible, and publication-quality data.
Background and Principles
Non-specific background in IHC stems from several sources that must be addressed during the blocking process:
- Endogenous Enzymes: Tissues naturally contain enzymes such as peroxidases and phosphatases that can react with chromogenic substrates (e.g., DAB), producing false-positive signals [13].
- Endogenous Biotin: Particularly prevalent in tissues like liver, kidney, and brain, endogenous biotin can bind to avidin or streptavidin components in detection systems, leading to widespread background staining [13].
- Non-Specific Protein Interactions: Antibodies may weakly bind to charged tissue components, Fc receptors on cells, or other non-target epitopes through hydrophobic or ionic interactions [36].
- Tissue Damage: Improper handling or sectioning can create artificial binding sites that attract antibodies non-specifically [13].
Core Blocking Principles
The fundamental principle of blocking involves pre-incubating tissue sections with solutions that occupy these non-specific binding sites without interfering with the specific antigen-antibody interaction. This is typically achieved through two sequential procedures: first, quenching endogenous enzyme activities, followed by blocking non-specific protein-binding sites [26] [37]. The specific blocking reagents selected must be compatible with both the tissue type and the detection methodology employed.
Experimental Protocols
Standard Protocol for Blocking Endogenous Peroxidases
Peroxidases are abundant in various tissues, particularly red blood cells, and must be inactivated when using HRP-based detection systems.
Table 1: Endogenous Peroxidase Blocking Reagents and Conditions
| Reagent | Concentration | Incubation Time | Temperature | Notes |
|---|---|---|---|---|
| Hydrogen Peroxide (H₂O₂) | 0.3% - 3.0% in methanol or water [26] [13] [37] | 15 - 40 minutes [26] [13] | Room Temperature | Methanol is avoided for frozen sections to preserve tissue integrity |
Procedure:
- Following antigen retrieval and washing steps, prepare fresh hydrogen peroxide solution in methanol or deionized water [26] [37].
- Completely submerge tissue sections in the hydrogen peroxide solution using a Coplin jar or similar container.
- Incubate for the recommended time (typically 15-40 minutes), optimizing for specific tissue types based on their endogenous peroxidase content [26].
- Wash slides thoroughly with PBS or TBS (3 × 5 minutes each) to remove all traces of hydrogen peroxide before proceeding to the next step [26].
Standard Protocol for Blocking Non-Specific Binding Sites
This step prevents non-specific antibody binding through protein-based blocking solutions.
Table 2: Blocking Reagents for Non-Specific Sites
| Reagent | Concentration | Incubation Time | Temperature | Notes |
|---|---|---|---|---|
| Normal Serum | 5% - 10% in PBS [26] [38] [37] | 30 - 60 minutes [26] [38] | Room Temperature | Must match the host species of the secondary antibody [38] [39] |
| BSA | 1% - 5% in PBS [13] | 30 - 60 minutes | Room Temperature | Often used in combination with serum |
| Non-Fat Dry Milk | 1% - 5% in PBS | 30 - 60 minutes | Room Temperature | Less common for IHC due to potential biotin content |
Procedure:
- Prepare blocking solution using serum from the same species as the secondary antibody. For example, use goat serum when using a goat anti-mouse secondary antibody [38] [39].
- Remove excess buffer from slides and carefully apply enough blocking solution (typically 100-150 μL depending on tissue size) to completely cover the tissue section [26].
- To ensure even distribution and prevent evaporation, gently overlay the tissue section with a piece of Parafilm cut slightly larger than the tissue area, avoiding air bubbles [26].
- Incubate in a humidified chamber for the recommended time (30-60 minutes) at room temperature [26] [38].
- Remove the Parafilm carefully and wash slides once with PBS (5 minutes) before applying the primary antibody [26].
Specialized Blocking Protocols
Blocking Endogenous Biotin
For avidin-biotin complex (ABC) detection systems, endogenous biotin must be blocked.
Procedure:
- Following peroxidase quenching and washing, apply commercially available avidin/biotin blocking solutions according to manufacturer instructions [13].
- Typically, this involves sequential application of avidin solution (incubate 15 minutes), wash, followed by biotin solution (incubate 15 minutes), and final wash [13].
- As an alternative to avidin, use streptavidin or NeutrAvidin, which are not glycosylated and therefore don't bind to endogenous lectins [13].
Blocking Endogenous Phosphatases
When using alkaline phosphatase (AP)-based detection systems:
Procedure:
- Prepare 1-2 mM levamisole in the substrate buffer [13].
- Apply to tissue sections and incubate for 30-60 minutes at room temperature.
- Levamisole inhibits intestinal-type alkaline phosphatase but does not affect bacterial alkaline phosphatase used in some detection systems.
Blocking for Fluorescent Detection
For fluorescent IHC, additional considerations include:
- Use serum-based blocking solutions as described above [38].
- Consider adding 0.2-0.3 M glycine to reduce aldehyde-induced fluorescence if paraformaldehyde fixation was used [13].
- For tissue autofluorescence, treatments with dyes like Pontamine sky blue, Sudan black, or Trypan blue may be necessary [13].
Research Reagent Solutions
Table 3: Essential Reagents for Blocking in IHC
| Reagent | Function | Application Notes |
|---|---|---|
| Hydrogen Peroxide | Quenches endogenous peroxidase activity | Use fresh solutions; concentration and incubation time require optimization based on tissue type [26] [13] |
| Normal Serum | Blocks non-specific protein binding sites | Must match secondary antibody host species; common choices include goat, horse, or donkey serum [38] [39] |
| Avidin/Biotin Blocking Solution | Blocks endogenous biotin | Essential when using ABC detection systems; particularly important for liver, kidney, and brain tissues [13] |
| Levamisole | Inhibits endogenous alkaline phosphatase | Used for AP-based detection systems; does not affect bacterial AP [13] |
| Bovine Serum Albumin (BSA) | Blocks non-specific binding | Often used as a protein stabilizer in antibody dilution buffers [13] |
| Triton X-100 or Tween-20 | Permeabilization and reduction of hydrophobic interactions | Helps antibody penetration and reduces hydrophobic binding; typically used at 0.025%-0.3% [38] [2] |
Workflow Integration
The following diagram illustrates how the blocking step integrates into the complete IHC workflow for FFPE tissues:
Troubleshooting and Optimization
Table 4: Troubleshooting Common Blocking Problems
| Problem | Possible Cause | Solution | Preventive Measures |
|---|---|---|---|
| High Background Staining | Incomplete blocking of endogenous peroxidases | Increase H₂O₂ concentration (up to 3%) or incubation time; use commercial peroxidase blocking solutions [13] | Always include a no-primary-antibody control to test effectiveness |
| Spotty or Irregular Background | Endogenous biotin not adequately blocked | Use avidin/biotin blocking kit; switch to streptavidin-based detection systems [13] | Pre-test tissues known to have high biotin content (liver, kidney) |
| Persistent Background Despite Blocking | Secondary antibody cross-reactivity | Increase serum concentration to 10%; ensure secondary antibody is cross-adsorbed; try different secondary antibody [13] | Use secondary antibodies that are cross-adsorbed against serum proteins from multiple species |
| Weak Specific Signal | Over-blocking or inappropriate blocking serum | Reduce serum concentration; ensure blocking serum does not contain antibodies against target antigen | Optimize blocking time and concentration for each new antibody |
| High Fluorescent Background | Autofluorescence | Treat with autofluorescence quenching dyes (Sudan black, Trypan blue); use far-red fluorophores [13] | Test untreated tissue for autofluorescence before beginning experiment |
Optimization Strategies
- Serum Selection: Always use serum from the same species as the secondary antibody for most effective blocking [38] [39].
- Salt Concentration: For antibodies with high non-specific binding, adding NaCl (0.15-0.6 M) to the blocking buffer can reduce ionic interactions [13].
- Detergent Optimization: Include low concentrations of detergent (0.025%-0.1% Triton X-100 or Tween-20) in blocking and antibody solutions to reduce hydrophobic interactions [38] [2].
- Control Experiments: Always include appropriate controls: no-primary antibody control, isotype control, and absorption control to verify blocking effectiveness.
Proper execution of the blocking step for endogenous enzymes and non-specific binding sites is a fundamental requirement for successful IHC experiments using FFPE tissues. By understanding the principles behind different blocking methods, implementing the appropriate protocols, and utilizing systematic troubleshooting approaches, researchers can significantly improve the quality and reliability of their IHC data. This careful attention to the blocking step ensures that subsequent staining patterns accurately reflect true antigen distribution and expression levels, providing meaningful results for both research and diagnostic applications.
Core Principles of Primary Antibody Incubation
The primary antibody incubation step is a critical determinant of success in immunohistochemistry (IHC), balancing specific signal detection against non-specific background staining. This step involves applying a precisely diluted antibody to the target epitope within the formalin-fixed paraffin-embedded (FFPE) tissue section. Optimal incubation depends on three interdependent parameters: antibody concentration (dilution), time, and temperature. Finding the correct balance is essential, as under-incubation can yield weak signals while over-incubation increases background noise and potential non-specific binding [2].
For FFPE tissues that have undergone antigen retrieval, the primary antibody must successfully bind to the newly exposed epitopes. The fundamental goal is to achieve a high signal-to-noise ratio through systematic optimization of these key variables [40].
Optimization Strategies and Parameters
Dilution and Concentration Optimization
Identifying the correct antibody dilution is paramount for specific staining. The optimal dilution varies significantly between antibodies and must be determined empirically for each antibody-antigen pair.
Table 1: Primary Antibody Dilution and Incubation Guidelines
| Parameter | Typical Range | Optimal Starting Point | Special Considerations |
|---|---|---|---|
| Antibody Dilution | 1:50 – 1:1,000,000 [2] [28] | Manufacturer's recommended dilution or 2-5 µg/mL [28] | High-affinity antibodies can be used at higher dilutions (e.g., 1:10,000) [41] |
| Incubation Time (Room Temperature) | 1 – 2 hours [28] | 2 hours [26] | Suitable for many abundant antigens |
| Incubation Time (4°C) | Up to 12 hours (overnight) [26] [42] | Overnight [42] [2] | Essential for low-abundance antigens; improves penetration and specificity [26] |
| Blocking Buffer | 1-10% normal serum or BSA in PBS [26] [2] [28] | 1% serum in PBS [28] | Match serum species to secondary antibody host [28] |
A standard optimization approach involves running a dilution series. Test the manufacturer's recommended concentration alongside concentrations above and below it [40]. For a monoclonal antibody, a typical starting range is 1-10 µg/mL, while polyclonal antisera may require higher dilutions from 1:500 to 1:2,000 [2].
Time and Temperature Optimization
Incubation time and temperature are intrinsically linked. While room temperature incubation for 1-2 hours is convenient, overnight incubation at 4°C is widely recommended for optimal results [42] [2]. The colder temperature slows kinetic binding, which allows the antibody to bind with greater specificity and often yields a superior signal-to-noise ratio, particularly for low-abundance or challenging targets [26].
Experimental Protocol for Optimization
This protocol provides a detailed methodology for determining the optimal primary antibody dilution and incubation conditions for a novel antibody or new FFPE tissue type.
Materials and Reagents
- FFPE tissue sections mounted on charged slides
- Primary antibody of interest
- Positive control tissue known to express the target antigen (e.g., tonsil for immune markers) [40]
- Blocking solution (e.g., 1-10% normal serum or 1% BSA in PBS)
- Antibody diluent (blocking solution)
- Humidity chamber
- Pipettes and tips
- Parafilm
Step-by-Step Methodology
- Slide Preparation: Process FFPE slides through standard deparaffinization, rehydration, and antigen retrieval steps appropriate for your target [26] [2].
- Blocking: Apply blocking solution to cover the entire tissue section. Incubate for 1 hour at room temperature in a humidified chamber to prevent drying [26] [28].
- Antibody Dilution Series: Prepare a series of primary antibody dilutions in the chosen blocking buffer or diluent. A suggested series is: 1:50, 1:100, 1:250, 1:500, 1:1000. Include a negative control slide where the primary antibody is replaced with diluent alone or an isotype control [40] [2].
- Application and Incubation:
- Remove the blocking solution and apply the diluted primary antibodies to their respective tissue sections.
- To ensure even coverage and minimize evaporation, gently overlay the tissue section with a piece of Parafilm cut to size [26] [42].
- Place slides in a humidity chamber and incubate. For initial testing, perform parallel incubations: one set for 2 hours at room temperature and a duplicate set overnight (approx. 12 hours) at 4°C [26] [28].
- Washing: After incubation, carefully remove the Parafilm and wash the slides 3 times in PBS or TBS for 5 minutes each with gentle agitation [26] [42].
- Visualization: Proceed with the appropriate detection system for your protocol (e.g., application of secondary antibody, amplification, and chromogenic or fluorescent visualization) [2].
Workflow Diagram
The following diagram illustrates the logical decision-making process for optimizing primary antibody incubation.
Data Analysis and Interpretation
Following the staining procedure, analyze the results under a microscope to identify the optimal conditions.
- Optimal Staining: The ideal condition displays strong, specific signal in the expected cellular compartment (e.g., nucleus, membrane, cytoplasm) with minimal to no background staining across the tissue. The negative control should be clean.
- Weak Staining: Indicates under-incubation or an antibody concentration that is too dilute. To resolve, increase the antibody concentration and/or extend the incubation time (prioritize overnight at 4°C).
- High Background: Results from non-specific binding, often due to over-incubation or an antibody concentration that is too high. To resolve, further dilute the antibody and/or shorten the incubation time. Re-evaluate the blocking conditions and ensure thorough washing [2].
The Scientist's Toolkit: Essential Reagents
Table 2: Key Research Reagent Solutions for Primary Antibody Incubation
| Reagent | Function | Key Considerations |
|---|---|---|
| Normal Serum | Blocks non-specific binding sites to reduce background. | Should be from the same species as the secondary antibody host [28]. |
| Bovine Serum Albumin (BSA) | Alternative blocking agent; used in antibody diluent. | A common, inexpensive option at 1-5% concentration [2]. |
| Hydrophobic Barrier Pen | Creates a liquid barrier around the tissue. | Prevents reagent spread, reduces volumes used, and helps maintain tissue hydration [41]. |
| Antibody Diluent | Stable buffer for antibody dilution. | Often a low-protein buffer (e.g., 1% BSA in PBS) to prevent aggregation [40] [2]. |
| Humidity Chamber | Enclosed container that maintains a humid environment. | Critical for preventing slide evaporation during long incubations [26] [42]. |
Following the application of a primary antibody, the immunohistochemistry (IHC) protocol for formalin-fixed paraffin-embedded (FFPE) tissues proceeds to a critical amplification and visualization stage: the application of a secondary antibody and detection system. This step is fundamental for rendering the antigen-antibody complex visible under a microscope. The selection of an appropriate detection method directly influences the sensitivity, specificity, and multiplexing capability of the assay [43]. This section details the principles, protocols, and key considerations for this pivotal phase in IHC.
Core Principles of Detection Systems
In IHC, antigens are detected indirectly through systems that generate either a colored precipitate (chromogenic) or emit light of a specific wavelength (fluorescent) [44].
- Chromogenic Detection: This method relies on enzymes conjugated to the detection system, such as Horseradish Peroxidase (HRP) or Alkaline Phosphatase (AP), which convert soluble substrates into an insoluble, colored precipitate at the site of the target antigen [44]. Chromogenic detection is typically more sensitive due to signal amplification and produces a stable, permanent stain that can be visualized with a standard light microscope [44] [43].
- Fluorescent Detection: This method uses fluorochromes conjugated directly to the primary antibody or, more commonly, to a secondary antibody. When excited by light of a specific wavelength, these fluorochromes emit light of a longer wavelength, which is then detected [44]. Fluorescent detection offers superior resolution for subcellular localization and is the preferred method for multiplexing, or labeling multiple antigens simultaneously on a single section [45].
Detection Methodologies
Several methodological approaches are employed to link the secondary antibody to the visualization signal, each with distinct advantages.
- Avidin-Biotin Complex (ABC) Method: An early and highly sensitive method that uses biotinylated secondary antibodies followed by a pre-formed complex of avidin and biotinylated enzyme (e.g., HRP). The large complex size results in significant signal amplification [44].
- Labeled Streptavidin-Biotin (LSAB) Method: A refinement of the ABC method that uses streptavidin, which is less prone to non-specific tissue binding than avidin due to its neutral isoelectric point and lack of glycosylation. A biotinylated secondary antibody is followed by an enzyme-conjugated streptavidin molecule [44].
- Polymer Methods: These non-biotin systems use a dextran or synthetic polymer backbone to which multiple enzyme molecules and secondary antibodies are attached. This design provides high sensitivity and amplification while avoiding background staining from endogenous biotin, a significant concern in certain tissues like brain and frozen sections [44] [43]. Modern micro-polymer methods offer compact complexes for better tissue penetration and reduced background [44].
The following workflow outlines the key decision points and steps in selecting and applying a secondary antibody and detection system for FFPE tissues:
Detailed Experimental Protocols
Protocol A: Chromogenic Detection for FFPE Sections (Indirect Method)
This protocol is adapted for a polymer-based HRP system, a common and sensitive non-biotin approach [42] [44].
Materials:
- Phosphate buffered saline (PBS)
- Blocking buffer (e.g., 3% BSA in PBS or commercial protein block)
- HRP-blocking solution (e.g., 3% H₂O₂ in methanol)
- Secondary antibody: HRP-conjugated polymer (anti-host of primary antibody)
- Chromogen substrate (e.g., DAB, AEC)
- Hematoxylin counterstain
- Appropriate mounting medium (organic for DAB; aqueous for AEC) [44]
Method:
- Block Endogenous Peroxidase: After antigen retrieval and cooling, quench endogenous peroxidase activity by incubating slides in HRP-blocking solution for 10-15 minutes at room temperature [43]. Wash slides gently with PBS.
- Apply Protein Block: Cover the tissue section with an appropriate protein-blocking reagent (e.g., 3% BSA, 10% normal serum) for 30 minutes at room temperature to minimize non-specific background staining [46] [42].
- Apply Primary Antibody: Tap off blocking reagent and apply the optimized dilution of primary antibody in blocking buffer. Incubate as required (often 1 hour at room temperature or overnight at 4°C in a humidified chamber) [42].
- Wash: Wash slides 3 times with PBS for 5 minutes each under gentle agitation [42].
- Apply HRP-Polymer Secondary Antibody: Apply the HRP-conjugated polymer secondary antibody, directed against the host species of the primary antibody. Incubate for 30-60 minutes at room temperature in a humidified chamber [42] [43].
- Wash: Wash slides 3 times with PBS for 5 minutes each.
- Apply Chromogen: Prepare the chromogen substrate according to the manufacturer's instructions (e.g., dissolve DAB tablet in buffer). Apply to the tissue section and monitor development under a microscope. Typical development time is 5-10 minutes [44].
- Stop Reaction: Immerse slides in distilled water to stop the chromogen reaction.
- Counterstain: Immerse slides in hematoxylin for 20-60 seconds to stain nuclei. Differentiate and blue according to standard histology protocols.
- Dehydrate and Mount: Dehydrate sections through a graded series of alcohols and xylene (or xylene-substitute). Mount with an organic, non-aqueous mounting medium for permanent preservation [44].
Protocol B: Immunofluorescence Detection for FFPE Sections
This protocol is optimized for high-resolution imaging of FFPE tissues using confocal microscopy [45] [28].
Materials:
- PBS
- Permeabilization/Blocking buffer: PBS containing 0.1-0.3% Triton X-100 and 5% normal serum from the host species of the secondary antibody [28]
- Primary antibody
- Fluorophore-conjugated secondary antibody (e.g., Alexa Fluor dyes)
- Nuclear counterstain (e.g., DAPI)
- Fluorescence-compatible, anti-fade aqueous mounting medium
Method:
- Permeabilization and Blocking: After antigen retrieval and cooling, permeabilize and block non-specific binding by incubating slides in permeabilization/blocking buffer for 1 hour at room temperature [28].
- Apply Primary Antibody: Dilute the primary antibody in PBS containing 1% serum and 0.05-0.1% Triton X-100. Apply to the section and incubate overnight at 4°C in a light-tight, humidified chamber [28].
- Wash: Wash slides 3 times with PBS for 10 minutes each.
- Apply Fluorophore-Conjugated Secondary Antibody: Dilute the secondary antibody in the same buffer as the primary antibody. Apply to the section and incubate for 1-2 hours at room temperature, protected from light [28].
- Wash: Wash slides 3 times with PBS for 10 minutes each, protected from light.
- Optional Nuclear Staining: Incubate with DAPI (e.g., 1 µg/mL in PBS) for 5-10 minutes at room temperature [42] [28].
- Final Wash: Wash slides once with PBS for 5 minutes.
- Mount: Tap off excess PBS and apply a drop of anti-fade mounting medium. Carefully lower a coverslip and seal the edges with clear nail polish to prevent evaporation and movement. Store slides at 4°C or -20°C protected from light until imaging [45] [28].
The Scientist's Toolkit: Research Reagent Solutions
Table 1: Essential Reagents for Secondary Antibody and Detection System Application.
| Reagent / Solution | Function / Purpose | Key Considerations |
|---|---|---|
| Secondary Antibody | Binds to the primary antibody to enable signal detection and amplification. | Must be raised against the host species of the primary antibody (e.g., anti-mouse, anti-rabbit). Conjugated to an enzyme (HRP/AP) or a fluorophore [43]. |
| Enzyme Polymers (HRP/AP) | Dextran-based polymers conjugated with multiple enzyme and antibody molecules for high-sensitivity detection without endogenous biotin interference [44]. | Preferred over biotin-based systems for tissues with high endogenous biotin (e.g., liver, kidney). |
| Chromogen Substrates | Enzymatic conversion produces an insoluble colored precipitate at the antigen site. | DAB: Brown, permanent, alcohol-insoluble. AEC: Red, alcohol-soluble, requires aqueous mounting. Choose based on color and compatibility [44]. |
| Fluorophores | Fluorescent dyes that emit light upon excitation for detection. | e.g., Alexa Fluor dyes. Bright, stable, and tailored to microscope laser lines. For multiplexing, select dyes with minimal spectral overlap [44] [45]. |
| Blocking Sera | Reduces non-specific binding of secondary antibodies to tissue. | Normal serum from the species in which the secondary antibody was raised (e.g., use goat serum for a goat anti-rabbit secondary) [46] [28]. |
| Enzyme Blockers | Quenches activity of endogenous enzymes that could catalyze the chromogen, causing background. | Peroxidase blocker (H₂O₂) for HRP; Phosphatase blocker for AP. Critical for tissues with high endogenous levels (e.g., erythrocytes) [46] [43]. |
| Biotin Blockers | Blocks endogenous biotin to prevent non-specific staining in avidin-biotin systems. | Essential when using ABC or LSAB methods, particularly on frozen sections [46] [44]. |
| Mounting Media | Preserves the stain and adheres the coverslip for microscopy. | Organic (e.g., Permount): For DAB and other alcohol-fast chromogens. Aqueous Anti-fade (e.g., Fluoromount-G): Essential for preserving fluorescence [42] [44]. |
Quantitative Data and Comparison Tables
Table 2: Comparison of Common Chromogens for Immunohistochemistry.
| Enzyme | Chromogen | Color | Mounting Media | Advantages & Disadvantages |
|---|---|---|---|---|
| HRP | DAB | Brown | Organic | + Intense, permanent stain. - Common color, may contrast poorly with pigment [44]. |
| HRP | AEC | Red | Aqueous | + Intense color, contrasts well with blue in double staining. - Prone to fading, not permanent [44]. |
| AP | BCIP/NBT | Blue/Black | Organic | + Intense color. - Endogenous AP must be thoroughly blocked [44]. |
| AP | Fast Red | Red | Aqueous | + Good for double staining. - Prone to fading; requires aqueous mounting [44]. |
Table 3: Common Counterstains for IHC.
| Type | Dye | Target | Color |
|---|---|---|---|
| Chromogenic | Hematoxylin | Nuclei | Blue to violet |
| Chromogenic | Nuclear Fast Red | Nucleic acids | Red |
| Fluorescent | DAPI | Nucleic acids | Blue |
| Fluorescent | Propidium Iodide | Nucleic acids | Red [44] |
Troubleshooting and Best Practices
- High Background Staining: Can result from non-specific antibody binding, incomplete blocking, or over-amplification. Ensure thorough blocking of endogenous enzymes and proteins. Titrate antibody concentrations and incubation times. For fluorescent IHC, ensure adequate washing and consider using a polymer system to avoid endogenous biotin [44] [43].
- Weak or No Signal: May be due to insufficient epitope retrieval, degraded antibodies, or incorrect detection system choice. Verify antibody activity with a positive control. Optimize antigen retrieval parameters (pH, time). Consider switching to a more sensitive detection system (e.g., from a biotin-based method to a high-sensitivity polymer) [43].
- Inconsistent Staining Between Runs: Often caused by variability in washing steps, reagent incubation times, or preparation of solutions. Standardize all washing steps (duration, volume, agitation) across operators and runs. Use automated stainers where possible for improved consistency [43].
- Specific to Fluorescent Detection:
- Photobleaching: Minimize light exposure during and after staining. Use anti-fade mounting medium and store slides in the dark at -20°C [28].
- Autofluorescence: Can be mitigated by using a confocal microscope, which reduces the volume of tissue contributing to the signal and uses narrow-bandwidth laser light. Reagents like Sudan Black B can also be used to quench autofluorescence [46] [45].
Workflow Diagram
The following diagram outlines the core procedural workflow for chromogenic development and counterstaining.
Detailed Experimental Protocol
Chromogenic Detection with DAB
Principle: The enzyme Horseradish Peroxidase (HRP), conjugated to the secondary detection system, catalyzes the oxidation of the 3,3'-Diaminobenzidine (DAB) chromogen in the presence of hydrogen peroxide. This oxidation produces an insoluble, dark brown precipitate at the site of antigen-antibody binding [47] [48].
Procedure:
- Preparation: Prepare the DAB working solution according to the manufacturer's instructions. Note: DAB is a suspected carcinogen. Always wear gloves and work in a fume hood. Deactivate and clean the work area after use [49] [50]. A typical preparation involves adding 500 µL of a 1% DAB stock and 2.5 µL of 30% H₂O₂ to 50 mL of 1X PBS, pH 7.4 [26].
- Application: Apply enough DAB substrate solution to completely cover the tissue section (approximately 100-200 µL) [49].
- Incubation and Monitoring: Incubate the slides at room temperature for 1 to 10 minutes. The development time must be determined empirically and monitored closely [47].
- Microscopic Observation: Observe the staining intensity under a bright-field microscope. Development should be stopped when the specific signal is strong and the background remains low [47] [49].
- Stopping the Reaction: Once optimal staining is achieved, stop the reaction by immersing the slides in deionized water for 1-2 minutes [47] [50].
Nuclear Counterstaining with Hematoxylin
Principle: Hematoxylin is a basic dye that binds to nucleic acids in the cell nucleus, producing a blue stain. This provides morphological context, allowing for better visualization of tissue architecture and aiding in the localization of the DAB signal [49] [26].
Procedure:
- Application: Apply Hematoxylin solution (e.g., Mayer's Modified Hematoxylin) to the tissue section according to the manufacturer's instructions [47].
- Incubation: Incubate for a brief, optimized duration (typically 30 seconds to a few minutes) to achieve a light blue nuclear stain. Over-staining can obscure the DAB signal.
- Rinsing and "Bluing": Rinse the slides thoroughly in deionized water. Subsequently, immerse the slides in a "bluing" solution, such as tap water or a weak ammonia solution, to shift the nuclear stain from red/purple to a permanent blue color [49].
- Rinse: Perform a final rinse in deionized water for 1 minute [47].
Dehydration, Clearing, and Mounting
Principle: This process removes water from the tissue, clears the section with a xylene substitute to achieve optical clarity, and permanently seals the coverslip using a mounting medium compatible with the organic solvents and the DAB precipitate [47] [26].
Procedure: Dehydrate and clear the tissue sections by moving slides through the following series of solutions [47] [49]:
- Dehydration:
- Clearing:
- Xylene (or xylene substitute): 3 x 2 minutes [47]
- Mounting:
Research Reagent Solutions
The following table details key reagents used in this protocol step and their specific functions.
Table 1: Essential Reagents for DAB Development and Counterstaining
| Reagent | Function & Principle | Key Considerations |
|---|---|---|
| DAB Substrate Kit (e.g., ImmPACT DAB [47]) | Contains DAB chromogen and H₂O₂. HRP catalyzes oxidation, producing an insoluble brown precipitate at the antigen site [48]. | Carcinogenic; handle in fume hood with gloves. Monitor development microscopically (1-10 min) [47] [49]. |
| Hematoxylin (e.g., Mayer's Modified [47]) | Nuclear counterstain. A basic dye that binds to nucleic acids, staining nuclei blue for morphological context [49]. | Avoid over-staining. A "bluing" step in tap or ammoniated water finalizes the stain color [49]. |
| Ethanol Series (70%, 80%, 90%, 100%) | Dehydration. Removes water from the tissue section progressively to prevent tissue damage. | Use fresh solutions for effective dehydration. Incomplete dehydration can cause clouding after mounting [47] [11]. |
| Xylene or Substitute | Clearing agent. Ethanol-dehydrated tissue is immersed in xylene, which is miscible with both ethanol and mounting media, rendering the tissue transparent. | Essential for optical clarity. Requires proper hazardous waste disposal [47] [26]. |
| Non-aqueous Mounting Medium (e.g., Permount [26]) | Permanent sealant. A synthetic resin dissolved in xylene that dries clear and is compatible with organic solvents and DAB's stability. | Do not use aqueous mounting media for DAB-stained slides following organic solvent clearing [47] [50]. |
| DAB Enhancer (Optional [49]) | Signal intensifier. Can be used to increase the contrast and intensity of the DAB signal. | Use according to manufacturer's instructions; may require optimization. |
Troubleshooting and Data Interpretation
Table 2: Troubleshooting Common Issues in DAB Development and Counterstaining
| Problem | Potential Cause | Recommended Solution |
|---|---|---|
| Weak or No Staining | DAB substrate is inactive or improperly prepared. | Prepare fresh DAB solution and ensure H₂O₂ is active. Deionized water may contain peroxidase inhibitors; use a different water source [13]. |
| Excessive Background Stain | DAB development time too long. | Monitor staining microscopically and stop reaction promptly. Optimize incubation time for each new antibody [47] [51]. |
| High Background from Previous Steps | Issues with blocking, primary antibody concentration, or endogenous biotin. | Review previous protocol steps: ensure adequate blocking, titrate primary antibody, and use avidin/biotin blocking kits for problematic tissues [47] [13]. |
| Over-counterstained Nuclei | Hematoxylin incubation too long. | Reduce hematoxylin incubation time. Destain briefly in acid alcohol if over-stained, then return to bluing step [49]. |
| Precipitate on Tissue | DAB solution is old, contaminated, or filtered improperly. | Always filter DAB working solution before use or use a commercial, ready-to-use kit. Ensure slides are adequately washed before development [51]. |
| Tissue Appears Cloudy | Incomplete dehydration or clearing. | Replace ethanol and xylene with fresh solutions. Ensure adequate incubation times in clearing agents [11] [51]. |
Following successful immunohistochemical staining and counterstaining of Formalin-Fixed, Paraffin-Embedded (FFPE) tissue sections, the final critical steps involve dehydrating the tissue, clearing it, and applying a mounting medium. This process ensures the long-term preservation of the stained specimen and prepares it for high-quality microscopic analysis [2] [26].
Experimental Protocol
The procedures for dehydration, clearing, and mounting differ based on the detection method used: chromogenic or fluorescent.
Chromogenic Detection Protocol
For protocols using chromogenic substrates like DAB (3,3'-Diaminobenzidine), the following steps are recommended to create a permanent, stable slide [2] [26].
- Dehydration: After the final water rinse, dehydrate the tissue sections by passing them through a graded series of ethanol solutions.
- Clearing: Clear the dehydrated sections in xylene or a xylene-substitute to render the tissue transparent.
- Mounting: Apply a permanent, organic mounting medium (e.g., Permount) and carefully lower a coverslip onto the section.
Table: Dehydration and Clearing Sequence for Chromogenic Staining
| Step | Solution | Incubation Time | Notes |
|---|---|---|---|
| 1 | 70% Ethanol | 10 seconds - 5 minutes | The first step in removing water from the tissue [2] [26]. |
| 2 | 95% Ethanol | 10 seconds - 5 minutes | Further dehydration [2] [26]. |
| 3 | 100% Ethanol | 10 seconds - 5 minutes | Complete dehydration. This step is often repeated twice to ensure no water remains [2] [26]. |
| 4 | 100% Ethanol | 10 seconds - 5 minutes | Ensures complete dehydration [2] [26]. |
| 5 | Xylene (or substitute) | 3 - 20 minutes | Clears the tissue, making it transparent. This step is often repeated [2] [26] [11]. |
| 6 | Xylene (or substitute) | 3 - 20 minutes | Ensures complete clearing [2] [26] [11]. |
Fluorescent Detection Protocol
For fluorescence-based IHC, the protocol is simpler but requires specific mounting media to prevent signal quenching [2] [52].
- Rinse: After the final wash buffer step, briefly rinse the slides in distilled water to remove salts that could crystallize [2].
- Mounting: Dab away excess moisture and apply an anti-fade mounting medium to preserve the fluorescent signal. Gently lower a coverslip onto the section [2].
- Sealing (Optional): Seal the edges of the coverslip with nail polish to stabilize it and prevent drying, particularly if using an inverted microscope [2].
- Storage: Store the finished slides at 4°C in the dark to protect the fluorophores from degradation [2].
The Scientist's Toolkit: Research Reagent Solutions
Table: Essential Reagents for Dehydration, Clearing, and Mounting
| Item | Function | Examples & Notes |
|---|---|---|
| Ethanol Series | Dehydrates the tissue by displacing water. Incomplete dehydration will prevent proper clearing and mounting. | 70%, 95%, 100% concentrations. 100% ethanol should be used in two successive changes to guarantee anhydrous conditions [2] [26] [11]. |
| Xylene / Clearing Agent | Clears the tissue by removing alcohol and making it transparent. This step is essential for light microscopy. | Xylene, Histoclear II [26] [11]. Note: Several less hazardous commercial alternatives to xylene are available [11]. |
| Organic Mounting Medium | Creates a permanent, hard-setting seal for chromogen-stained slides under a coverslip. | Permount [26]. These are typically synthetic resins. |
| Aqueous Anti-fade Mounting Medium | Preserves fluorescent signal by reducing photobleaching caused by exposure to excitation light. | Various commercial formulas (e.g., with Mowiol, Vectashield). Required for fluorescence detection, but not for chromogenic [2] [52]. |
Critical Procedure Notes
- Prevent Drying: From the moment slides are deparaffinized and rehydrated until they are finally mounted, the tissue sections must not be allowed to dry out. Drying causes severe non-specific antibody binding and high background staining, which can ruin the experiment [11].
- Aqueous vs. Organic Mounting: Using an aqueous mounting medium on a dehydrated and cleared section will cause clouding and ruin the sample. Always use an organic mounting medium for dehydrated slides [26]. Conversely, use an aqueous, anti-fade medium for fluorescent slides that have not undergone the full dehydration series [2].
Workflow Visualization
The following diagram illustrates the decision-making and procedural workflow for this final stage of the IHC protocol.
Immunohistochemistry (IHC) is a critical technique that combines immunological and histological methods to localize specific antigens within tissues. When applied to Formalin-Fixed Paraffin-Embedded (FFPE) tissues, IHC provides a powerful tool for investigating cellular composition, protein expression, and spatial relationships in both research and diagnostic contexts. The evolution from chromogenic to fluorescent detection has significantly enhanced the capability for multiplexing, allowing researchers to visualize multiple targets simultaneously within a single sample. This application note details the optimized protocols for fluorescent IHC staining of FFPE tissues, framed within a broader thesis on establishing a reliable, step-by-step IHC methodology. The procedures outlined herein are designed to meet the rigorous demands of scientists and drug development professionals working in biomarker discovery, therapeutic target validation, and diagnostic development. By comparing protocol variations and providing structured quantitative data, this guide serves as a comprehensive resource for implementing robust and reproducible fluorescent IHC in the laboratory.
Experimental Workflow and Signaling Pathways
The successful execution of fluorescent IHC relies on a series of carefully optimized steps to ensure the preservation of tissue morphology and antigenicity while minimizing non-specific background signal. The following diagram illustrates the core workflow, from sample preparation to final imaging, highlighting the critical decision points and procedural flow.
Figure 1: Core workflow for fluorescent IHC of FFPE tissues, showing key steps and decision points for antigen retrieval and multiplexing.
The visualization of the target antigen through fluorescence is achieved via a specific signaling cascade. The core detection methodology relies on the precise binding of a primary antibody to the target epitope, followed by a fluorescently-labeled secondary antibody that recognizes the primary antibody's host species. This creates a detectable signal upon excitation with the appropriate wavelength of light. The following diagram outlines this fundamental detection pathway.
Figure 2: The core detection pathway in fluorescent IHC, from antigen binding to signal generation, including an optional amplification step.
Methodology and Protocol Variations
Core Protocol: Fluorescent IHC Staining of FFPE Sections
The following protocol represents a consensus from multiple sources, optimized for reliability and clarity [25] [38] [53].
Reagents and Materials
- Primary Antibodies against target antigens.
- Fluorescently-labeled Secondary Antibodies raised against the species of the primary antibody.
- Wash Buffer: 1X Phosphate Buffered Saline (PBS).
- Incubation/Blocking Buffer: 1% Bovine Serum Albumin (BSA) or 1-5% normal serum from the host species of the secondary antibody in PBS. 0.1-0.4% Triton X-100 can be added for permeabilization (PBS-T) [38] [53].
- Antigen Retrieval Buffer: 10 mM Sodium Citrate (pH 6.0) or Tris-EDTA (pH 9.0).
- Nuclear Counterstain: DAPI (4',6-diamidino-2-phenylindole).
- Anti-fade Mounting Medium.
Step-by-Step Procedure
Deparaffinization and Rehydration:
- Immerse slides in Xylene (mixed isomers), three times for 5 minutes each [38].
- Transfer through a graded ethanol series: 100% ethanol (twice, 5-10 minutes), 95% ethanol (5 minutes), 70% ethanol (5 minutes), and 50% ethanol (5 minutes) [25] [53].
- Rinse slides in deionized water. Do not allow sections to dry out from this point forward.
Antigen Retrieval (Heat-Induced Epitope Retrieval - HIER):
- Submerge slides in preheated antigen retrieval buffer (e.g., 10 mM Sodium Citrate, pH 6.0).
- Heat using a microwave, pressure cooker, or steamer until boiling, then maintain at a sub-boiling temperature for 10-20 minutes [38] [2].
- Let slides cool in the buffer for 20-30 minutes at room temperature.
- Wash slides with deionized water followed by a wash buffer (PBS) for 5-10 minutes.
Permeabilization and Blocking:
Primary Antibody Incubation:
- Apply primary antibody diluted in incubation buffer (e.g., 1% BSA in PBS).
- Incubate overnight at 2-8°C in a humidified chamber for optimal specific binding and reduced background [25]. Alternatively, incubate for 1-2 hours at room temperature [38].
- Wash slides 3 times in wash buffer (PBS or PBS-T), for 5-15 minutes each wash [25] [38].
Secondary Antibody Incubation:
Counterstaining and Mounting:
- (Optional) Incubate with DAPI solution (e.g., 0.5 µg/mL) for 2-5 minutes to stain nuclei [25] [2].
- Rinse briefly with PBS or deionized water.
- Tap off excess liquid and apply a drop of anti-fade mounting medium.
- Carefully lower a coverslip, avoiding air bubbles. Seal edges with clear nail polish if necessary for long-term storage [38] [53].
Visualization and Storage:
- Visualize using a fluorescence microscope equipped with appropriate filter sets.
- Store slides at 4°C or -20°C in the dark to preserve fluorescence [38].
Comparative Analysis of Protocol Variables
Different laboratories and commercial providers often optimize specific steps of the IHC protocol. The tables below summarize key variations in timing, reagent composition, and methodological choices to aid in experimental planning and troubleshooting.
Table 1: Comparison of Key Procedural Steps Across Different Protocols
| Step | R&D Systems Protocol [25] | NovusBio Protocol [38] | PMC Protocol (Jove) [54] |
|---|---|---|---|
| Deparaffinization | Xylene: 2x10 min | Xylene: 3x5 min | Xylene: 3x5 min |
| Antigen Retrieval | Not specified in detail | HIER: 10 min sub-boiling | HIER (Tris-EDTA): 10 min sub-boiling |
| Blocking Serum | 1% Horse Serum, 30 min | 5% Animal Serum, 30 min | Not specified |
| Primary Ab Incubation | Overnight, 2-8°C | 1-2h RT + Overnight 4°C | Overnight, RT |
| Secondary Ab Incubation | 30-60 min, RT | 1-2h, RT | 1h, RT |
| Washes Post-Ab | 3x15 min PBS | 2x10 min PBS-T | 3x5 min PBS |
| Nuclear Stain | DAPI, 2-5 min | DAPI (optional) | DAPI in mounting medium |
Table 2: Variations in Antigen Retrieval and Detection Methods
| Parameter | Heat-Induced Epitope Retrieval (HIER) [38] [2] | Protease-Induced Epitope Retrieval (PIER) [2] |
|---|---|---|
| Principle | Uses heat to reverse formaldehyde cross-links | Uses enzymes (e.g., Trypsin, Proteinase K) to cleave proteins and expose epitopes |
| Common Buffers | Sodium Citrate (pH 6.0), Tris-EDTA (pH 9.0) | Trypsin (0.05%), Pepsin (0.5%) |
| Typical Incubation | 10-20 min at sub-boiling temperature | 10-20 min at 37°C |
| Advantages | Broader efficacy for many antigens; less damaging to morphology | Effective for some heat-labile antigens |
| Disadvantages | Can destroy some epitopes; requires optimization of buffer and pH | Over-digestion can damage tissue morphology |
The Scientist's Toolkit: Essential Reagents and Materials
A successful fluorescent IHC experiment depends on a suite of carefully selected reagents and tools. The following table details the essential components of the "Scientist's Toolkit" for this application.
Table 3: Essential Research Reagent Solutions for Fluorescent IHC
| Item | Function/Purpose | Key Considerations |
|---|---|---|
| FFPE Tissue Sections | The sample matrix for analysis; formalin fixation preserves morphology, paraffin embedding enables thin sectioning. | Section thickness typically 4-5 µm [54]; use charged or coated slides for optimal adhesion [25]. |
| Primary Antibodies | Bind specifically to the target antigen of interest. | Must be validated for IHC on FFPE tissue; concentration and incubation time require optimization [25] [38]. |
| Fluorophore-conjugated Secondary Antibodies | Bind to the primary antibody and provide the detectable signal. | Must be raised against the host species of the primary antibody; choose fluorophores with non-overlapping emission spectra for multiplexing [54]. |
| Antigen Retrieval Buffers | Reverse formaldehyde-induced cross-links to expose hidden epitopes. | Choice of buffer (e.g., citrate vs. Tris-EDTA) and pH is antigen-dependent and requires empirical testing [2]. |
| Blocking Serum | Reduces non-specific binding of antibodies to tissue, minimizing background. | Typically 1-5% serum from the same species as the secondary antibody [38] [26]. |
| Triton X-100 | A detergent used to permeabilize cell membranes, allowing antibodies access to intracellular targets. | Commonly used at 0.05%-0.4% in PBS (PBS-T) [38] [2]. |
| DAPI | A fluorescent DNA-binding dye used as a nuclear counterstain. | Helps visualize tissue architecture and cell localization; emission should not overlap with other fluorophores used [25] [54]. |
| Anti-fade Mounting Medium | Preserves fluorescence by reducing photobleaching during microscopy and storage. | Critical for maintaining signal intensity over time; use aqueous-based media for fluorescent applications [38] [53]. |
Troubleshooting and Optimization
Even with a standardized protocol, challenges can arise. The table below outlines common issues, their potential causes, and recommended solutions to guide optimization efforts.
Table 4: Troubleshooting Common Issues in Fluorescent IHC
| Problem | Potential Causes | Suggested Solutions |
|---|---|---|
| Weak or No Staining | Inadequate antigen retrieval, inactive antibodies, insufficient primary antibody concentration, over-fixation. | Optimize antigen retrieval method and time [2]; use validated antibodies and check viability; perform antibody titration to find optimal dilution [55]. |
| High Background | Inadequate blocking, primary antibody concentration too high, non-specific secondary antibody binding, slides dried during procedure. | Increase blocking serum concentration or time; titrate down primary antibody concentration; include appropriate serum controls; ensure sections remain hydrated [55]. |
| Excessive/Over-staining | Primary antibody concentration too high, incubation time/temperature too long/high. | Reduce antibody concentration or incubation time; perform reactions at room temperature instead of 37°C [55]. |
| Tissue Autofluorescence | Intrinsic fluorescence from molecules like collagen, elastin, or erythrocytes in the tissue. | Use a reagent like Vector TrueVIEW Autofluorescence Quenching Kit; image processing can also help subtract background autofluorescence [54]. |
| Photobleaching | Prolonged or intense exposure to excitation light. | Use an anti-fade mounting medium; limit exposure time during microscopy; store slides in the dark at 4°C or -20°C [38] [53]. |
Concluding Remarks
Fluorescent IHC for FFPE tissues is a versatile and powerful technique that, when executed with careful attention to protocol details, provides invaluable insights into protein expression and localization within a morphological context. This application note has synthesized a core protocol from established sources and highlighted key areas of variation to empower researchers in optimizing their own experiments. The integration of structured data tables, essential reagent toolkits, and troubleshooting guides is intended to streamline the implementation process. As the field advances, particularly in the realm of high-plex spatial biology, the foundational principles outlined here—rigorous validation, appropriate controls, and systematic optimization—will remain paramount. Adherence to these detailed methodologies ensures the generation of high-quality, reproducible data that is critical for both basic research and the development of novel therapeutics.
IHC Troubleshooting: Diagnosing and Fixing Common Staining Problems
In the meticulous process of developing a step-by-step immunohistochemistry (IHC) protocol for formalin-fixed, paraffin-embedded (FFPE) tissues, encountering weak or absent staining represents a significant and common obstacle. This issue not only delays research progress but can also lead to misinterpretation of biological data, particularly in critical fields like drug development and patient stratification. Achieving publication-quality staining requires a systematic approach to troubleshooting, as the root cause can originate from numerous points in the complex IHC workflow, from initial tissue fixation to final chromogen development [56] [57]. This application note provides a detailed, evidence-based guide to diagnosing and resolving the causes of weak or no staining, equipping researchers with actionable protocols and solutions to restore robust signal detection in their FFPE tissue experiments.
Systematic Troubleshooting: Causes and Solutions
Weak or null staining typically stems from issues falling into several key categories. The following table provides a structured checklist to systematically identify and correct the most frequent problems.
Table 1: Comprehensive Troubleshooting Guide for Weak or No Staining
| Category | Possible Cause | Recommended Solution | Supporting Experimental Protocol |
|---|---|---|---|
| Antibody & Detection | Primary antibody not validated for IHC or target epitope masked [56] [58] | Use antibodies rigorously validated for IHC on FFPE tissue [57]. Perform a western blot to confirm native form detection [58]. | Antibody Validation Assay: Stain a positive control tissue (e.g., FFPE cell pellet) known to express the target concurrently with your experimental sample [13] [57]. |
| Inactive antibody due to improper storage or repeated freeze-thaw [56] [58] | Aliquot antibodies for single use. Store according to manufacturer specifications. Test antibody potency via a titration series [13]. | Antibody Titration: Test the primary antibody at several dilutions (e.g., 1:50, 1:100, 1:200) on a control tissue to determine the optimal concentration [56]. | |
| Incompatible or inactive detection system [56] [13] | Ensure secondary antibody host species matches the primary antibody. Use polymer-based detection reagents for enhanced sensitivity [57]. Test substrate activity separately [13]. | Detection System Test: Place a drop of the enzyme (e.g., HRP) onto nitrocellulose and immerse in substrate. A colored spot should form immediately if components are active [13]. | |
| Tissue & Epitope Integrity | Over-fixation or epitope masking from formalin cross-links [56] [59] | Standardize fixation time (e.g., 18-48 hours in 10% NBF) [60]. Optimize and perform Heat-Induced Epitope Retrieval (HIER) [56] [57]. | Heat-Induced Epitope Retrieval (HIER): Boil slides in 10 mM Sodium Citrate buffer (pH 6.0) in a microwave or pressure cooker for 15-20 minutes. Cool slides for 30 minutes before proceeding [2] [57]. |
| Inadequate deparaffinization [58] [57] | Ensure complete paraffin removal by using fresh xylene or xylene substitutes in two changes, for at least 3 minutes each [2] [57]. | Deparaffinization & Rehydration: Process slides through two washes of xylene, then a graded ethanol series (100%, 100%, 95%, 70%, 50%), and finally running water [2]. | |
| Protocol Execution | Insufficient antibody concentration or incubation time [56] [58] | Increase primary antibody concentration. Extend primary antibody incubation to overnight at 4°C for better binding [58] [57]. | Overnight Incubation: Dilute primary antibody in recommended diluent. Apply to tissue sections and incubate in a humidified chamber at 4°C for 16-18 hours [2] [57]. |
| Tissue drying during protocol [56] [58] | Ensure tissue sections remain covered with liquid at all times during incubation and washing steps. Use a humidity chamber for long incubations [56]. | N/A | |
| Low target protein abundance [58] | Include a signal amplification step in your protocol, such as using a tyramide-based amplification system. | N/A |
The following workflow diagram synthesizes this troubleshooting information into a logical, step-by-step diagnostic procedure.
Figure 1: A logical workflow for diagnosing the root cause of weak or no IHC staining.
Detailed Experimental Protocols for Resolution
Protocol 1: Heat-Induced Epitope Retrieval (HIER)
A critical step for unmasking epitopes cross-linked by formalin fixation [59].
- Deparaffinize and Hydrate: After deparaffinization in xylene and rehydration through a graded ethanol series, rinse slides in deionized water [2].
- Prepare Retrieval Buffer: Choose an appropriate buffer based on the primary antibody's datasheet. Common buffers include:
- Perform Retrieval:
- Place the slides in a coplin jar filled with the preheated retrieval buffer.
- Using a microwave, heat the jar until the buffer boils, then maintain at a sub-boiling temperature (~98°C) for 20 minutes. Alternatively, a pressure cooker can be used for 15 minutes for more challenging targets [2] [57].
- Caution: Antigen retrieval using a water bath is not recommended due to suboptimal performance [57].
- Cool Slides: Remove the jar from the heat source and allow it to cool at room temperature for 30 minutes to enable proper re-folding of proteins and epitope stability [2].
- Rinse and Proceed: Rinse the slides gently in wash buffer (e.g., PBS or TBS) and proceed immediately with the blocking and staining steps. Do not allow sections to dry out [2].
Protocol 2: Antibody Titration and Validation
Determining the optimal primary antibody concentration is crucial for balancing strong specific signal with low background [56] [13].
- Select Positive Control Tissue: Use a FFPE tissue section known to express the target protein at moderate levels (e.g., human tonsil for many immune markers) [58] [57].
- Prepare Antibody Dilutions: Prepare a series of primary antibody dilutions. A typical range can be 1:50, 1:100, 1:200, and 1:500, using the antibody diluent recommended by the manufacturer [56] [57].
- Stain in Parallel: Process all slides with the different antibody dilutions simultaneously, using the same batches of all other reagents (buffer, detection system, DAB) to ensure consistency.
- Evaluate Staining: Examine the stained slides under a microscope. The optimal dilution will provide the strongest specific signal with the cleanest background (lowest non-specific staining). Select this concentration for future experiments on experimental tissues [56].
The Scientist's Toolkit: Essential Research Reagents
The following table lists key reagents that are fundamental for successful IHC staining and for implementing the troubleshooting solutions outlined above.
Table 2: Key Research Reagent Solutions for IHC Troubleshooting
| Reagent | Function/Application | Key Considerations |
|---|---|---|
| Validated Primary Antibodies [56] [57] | Specific binding to the target antigen. | Must be validated for IHC on FFPE tissue. "Advanced Verification" badges indicate higher specificity standards [13] [57]. |
| Polymer-Based Detection System [57] | Signal amplification and detection. | Offers higher sensitivity than avidin-biotin (ABC) systems and avoids background from endogenous biotin [57]. |
| Antigen Retrieval Buffers (e.g., Citrate, Tris-EDTA) [56] [2] | Unmasking epitopes cross-linked by formalin fixation. | Buffer pH and retrieval method (microwave vs. pressure cooker) must be optimized for each antibody-target pair [57]. |
| SignalStain Antibody Diluent [57] | Diluting the primary antibody to working concentration. | Superior to generic buffers like TBST/5% NGS for some antibodies, as it is formulated to stabilize antibodies and reduce background [57]. |
| Enzyme Blocking Solutions (3% H₂O₂, Levamisole) [13] [58] | Quenching endogenous peroxidase or phosphatase activity. | Essential for reducing high background when using enzyme-based detection systems [56] [13]. |
| Normal Serum from Secondary Host [13] | Blocking non-specific binding of the secondary antibody. | Using 5-10% normal serum from the species in which the secondary was raised is crucial for minimizing background [13]. |
Diagnosing weak or no staining in IHC for FFPE tissues is a methodical process that demands a rigorous investigation of the entire workflow. By systematically addressing variables—from verifying antibody integrity and optimizing antigen retrieval to严格执行标准化实验方案—researchers can effectively overcome this challenge. The protocols and reagents detailed in this application note provide a clear pathway to robust, reproducible, and publication-quality IHC results, thereby enhancing the reliability of data in both basic research and clinical drug development.
Resolving High Background and Non-Specific Staining
In immunohistochemistry (IHC), high background and non-specific staining present frequent challenges that compromise data interpretation, particularly when working with formalin-fixed, paraffin-embedded (FFPE) tissues. These artifacts obscure specific signal, reduce signal-to-noise ratio, and can lead to erroneous conclusions in both research and diagnostic settings. This application note systematically addresses the root causes of these issues and provides validated protocols to achieve clean, reliable staining essential for rigorous scientific investigation. The guidance focuses specifically on the FFPE tissue workflow, from initial sample preparation through final detection, highlighting critical optimization points that significantly impact staining quality.
Root Causes and Systematic Solutions
The following table categorizes the primary causes of high background and non-specific staining alongside targeted solutions compiled from extensive troubleshooting guides [61] [13] [56].
Table 1: Troubleshooting High Background and Non-Specific Staining
| Category | Specific Cause | Recommended Solution |
|---|---|---|
| Antibody-Related Issues | Primary antibody concentration too high [56] [62] | Titrate antibody to find optimal dilution; reduce incubation time or incubate at 4°C [62]. |
| Non-specific binding of secondary antibody [61] [13] | Include a no-primary control; use antibodies pre-adsorbed against the sample species; ensure proper blocking with 5-10% normal serum from the secondary host species [61] [13] [62]. | |
| Sample Preparation & Endogenous Activities | Inadequate blocking [56] [62] | Extend blocking time; use 10% normal serum or 1-5% BSA; for fluorescent IHC, use commercial autofluorescence quenchers like Sudan Black [56] [62]. |
| Endogenous peroxidase activity [61] [13] | Quench with 3% H2O2 in methanol or water for 10-15 minutes prior to primary antibody incubation [61] [13] [26]. | |
| Endogenous biotin [61] [13] | Use a polymer-based detection system instead of avidin-biotin; or, perform an avidin/biotin blocking step prior to primary antibody incubation [61] [13]. | |
| Tissue over-fixation or cross-linking [9] [56] | Optimize fixation time; enhance antigen retrieval (longer heating, different buffer pH) [9] [56]. | |
| Technical Protocol Errors | Inadequate deparaffinization [61] [62] | Use fresh xylene or substitutes; increase deparaffinization time [61] [62]. |
| Tissue section drying [56] [62] | Keep sections covered in liquid at all times; use a humidity chamber for incubations [56] [62]. | |
| Insufficient washing [61] [62] | Wash slides 3 times for 5 minutes with TBST or PBST after primary and secondary antibody incubations [61] [62]. | |
| Over-development of chromogen [56] | Closely monitor DAB or other chromogen development under a microscope; stop reaction as soon as specific signal is clear [56]. |
Optimized Protocols for Clean Staining
Enhanced Deparaffinization and Antigen Retrieval Protocol
Proper sample preparation is the foundation for reducing non-specific background. The following protocol is adapted from detailed IHC guides [2] [26] [11].
Deparaffinization and Rehydration:
- Incubate slides in xylene (or a less hazardous substitute) for 10-15 minutes. Repeat with fresh xylene [11].
- Dehydrate through a graded ethanol series: 100% ethanol (2 x 5 mins), 95% ethanol (2 x 5 mins), 85% ethanol (2 x 5 mins), 75% ethanol (2 x 5 mins) [2] [11].
- Rinse slides thoroughly in distilled water. Critical: Do not allow slides to dry out from this point forward [11] [62].
Heat-Induced Epitope Retrieval (HIER):
- Completely submerge slides in a coplin jar filled with antigen retrieval buffer (e.g., 10 mM Sodium Citrate, pH 6.0, or 1 mM EDTA, pH 8.0) [2] [63].
- Using a microwave, heat the jar until boiling and then maintain a sub-boiling temperature (~98°C) for 15-20 minutes. A pressure cooker can also be used and may enhance signal for some targets [61] [63].
- Cool the slides in the buffer at room temperature for 20-30 minutes [2] [26].
- Proceed to blocking and immunostaining.
Comprehensive Blocking and Immunostaining Protocol
This protocol incorporates critical steps to minimize non-specific interactions [61] [2] [26].
Endogenous Enzyme Blocking and Protein Blocking:
- After antigen retrieval, wash slides 2-3 times in PBS or TBST for 5 minutes each [61].
- For HRP-based detection: Quench endogenous peroxidase activity by incubating slides in 0.3-3% H2O2 in methanol or water for 10-15 minutes at room temperature [13] [26].
- Wash slides 3 times in PBS or TBST for 5 minutes each [26].
- To block non-specific protein binding, incubate sections with a blocking solution for 1 hour at room temperature. A recommended solution is 10% normal serum (from the species in which the secondary antibody was raised) in PBS or 1-5% BSA [26] [62]. For mouse primary antibodies on mouse tissue, use a mouse-on-mouse (M.O.M.) blocking kit.
Antibody Incubation and Washes:
- Dilute the primary antibody in the recommended diluent or blocking buffer to the optimized concentration. Do not use sodium azide with HRP-conjugated antibodies [13] [62].
- Apply primary antibody to sections and incubate overnight at 4°C in a humidified chamber [61] [2].
- The next day, wash slides 3 times for 5 minutes each with TBST or PBST (PBS with 0.05% Tween-20) under gentle agitation [61] [13].
- Apply the appropriately conjugated secondary antibody, diluted in blocking buffer, for 1 hour at room temperature.
- Wash slides 3 times for 5 minutes each with TBST or PBST [61].
Visual Workflow for Problem Resolution
The following diagram illustrates the logical decision-making process for diagnosing and resolving the root causes of high background staining.
The Scientist's Toolkit: Essential Reagents for Clean IHC
The following table lists key reagents and their specific roles in minimizing background and non-specific staining.
Table 2: Research Reagent Solutions for Reducing Background
| Reagent | Function & Rationale | Specific Usage Notes |
|---|---|---|
| Normal Serum | Blocks non-specific binding sites on tissue. Use serum from the same species as the secondary antibody host [61] [13]. | Incubate for 30-60 minutes at RT at 5-10% concentration in PBS/TBS [26] [62]. |
| Hydrogen Peroxide (H₂O₂) | Quenches endogenous peroxidase activity, preventing false-positive signal in HRP-based detection [61] [13]. | Use 0.3-3% solution in water or methanol for 10-15 minutes [13] [26]. |
| Avidin/Biotin Blocking Kit | Blocks endogenous biotin, prevalent in tissues like liver and kidney, which otherwise binds avidin-biotin complexes [61] [13]. | Apply before primary antibody incubation according to kit instructions [61] [13]. |
| Polymer-Based Detection System | Replaces avidin-biotin (ABC) systems, eliminating background from endogenous biotin and often providing superior sensitivity [61]. | Use as a direct substitute for ABC systems; follow manufacturer's protocol [61]. |
| Tween-20 / Triton X-100 | Detergents in wash buffers (e.g., TBST) reduce hydrophobic and ionic non-specific binding [2] [56]. | Use at 0.025-0.1% in PBS or TBS for all washes and antibody diluents [2] [56]. |
| Specific Antigen Retrieval Buffers | Unmask epitopes cross-linked by formalin fixation. Buffer pH is critical for success [2] [63]. | Citrate (pH 6.0) is a common start; EDTA/Tris-EDTA (pH 8-9) may be needed for some targets [2] [63]. |
Addressing Overstaining and Excessive Signal Development
Overstaining and excessive signal development are common challenges in immunohistochemistry (IHC) that can compromise data interpretation by reducing specificity and obscuring critical morphological details. In formalin-fixed paraffin-embedded (FFPE) tissues, these issues manifest as high background staining, non-specific signal, or overpowering chromogenic precipitation, ultimately leading to poor signal-to-noise ratios [13]. Addressing these artifacts is essential for producing publication-quality data and ensuring accurate biological conclusions. This application note provides a systematic framework for identifying, troubleshooting, and preventing overstaining through optimized protocols and validated reagent systems tailored for FFPE tissue research.
Systematic Troubleshooting of Overstaining
A methodical approach to identifying the root causes of overstaining is fundamental to implementing an effective corrective strategy. The following sections provide structured guidance for diagnosing and resolving the primary contributors to excessive signal development.
Primary Troubleshooting Guide
Table 1: Primary Causes and Solutions for Overstaining
| Problem Category | Specific Cause | Recommended Solution |
|---|---|---|
| Antibody-Related Issues | Primary antibody concentration too high | Titrate antibody to optimal concentration; dilute further and incubate at 4°C [64] [65]. |
| Secondary antibody cross-reactivity | Use secondary antibodies pre-adsorbed against the immunoglobulin of the sample species; include secondary-only control [13] [65]. | |
| Antibody binding to non-target epitopes | Add NaCl (0.15 M - 0.6 M) to antibody diluent to reduce ionic interactions [13]. | |
| Detection System Issues | Over-amplification from detection system | Reduce amplification incubation time; dilute secondary antibody [64]. |
| Endogenous enzyme activity not blocked | Quench endogenous peroxidases with 3% H2O2 in methanol for 10-15 minutes; inhibit alkaline phosphatase with levamisole [13] [65]. | |
| Endogenous biotin in tissues (e.g., liver, kidney) | Use a polymer-based detection system instead of avidin-biotin; perform biotin block [13] [65]. | |
| Excessive chromogen/substrate incubation | Reduce substrate incubation time; dilute DAB or other chromogenic substrates further [64]. | |
| Sample Preparation Issues | Inadequate blocking | Increase serum block concentration to 10%; extend blocking time [13] [64]. |
| Insufficient washing | Increase washing stringency (3 washes of 5 min each with TBST); add detergent (0.05% Tween-20) to wash buffers [64] [65]. | |
| Inadequate deparaffinization | Use fresh xylene for deparaffinization; ensure complete rehydration before staining [64] [65]. | |
| Tissue sections dried during processing | Maintain slides in a humidified chamber throughout the procedure; do not allow sections to dry [64]. |
Advanced Problem Resolution
For persistent overstaining, more specialized investigative approaches and solutions are required.
- Investigate Primary Antibody Specificity: Antibodies may exhibit off-target binding. Centrifuge antibody solutions before use to remove aggregates that can cause non-specific staining [64]. For monoclonal antibodies, consider that they can sometimes recognize similar epitopes on unrelated proteins.
- Address Autofluorescence in Immunofluorescence (IF): For fluorescent detection, aldehyde fixation can induce autofluorescence. Treat samples with ice-cold sodium borohydride (1 mg/mL) or fluorescence-quenching dyes like Pontamine sky blue or Sudan black [13]. Alternatively, switch to near-infrared fluorescent markers (e.g., Alexa Fluor 750), which are less affected by tissue autofluorescence [13].
- Optimize Antigen Retrieval: Over-fixation or inappropriate antigen retrieval can contribute to background. Optimize the heat-induced epitope retrieval (HIER) buffer pH and method (pressure cooker, microwave, or steamer) for your specific antigen [1] [66]. Excessive retrieval can sometimes damage tissue and increase non-specific binding.
Experimental Protocols for Signal Optimization
The following validated protocols provide a foundation for achieving balanced signal development in FFPE tissues.
Standardized IHC Protocol for FFPE Tissues
This core protocol incorporates critical steps for minimizing background.
Deparaffinization and Rehydration:
- Immerse slides in xylene, three washes for 5 minutes each.
- Hydrate through a graded ethanol series: 100% ethanol (two washes, 10 min each), 95% ethanol (two washes, 10 min), 70% ethanol (two washes, 10 min), and 50% ethanol (two washes, 10 min).
- Rinse in deionized water, two washes for 5 minutes each [28].
Antigen Retrieval (Heat-Induced Epitope Retrieval - HIER):
- Buffer Selection: Choose based on the primary antibody's validation. Common options include 10 mM Sodium Citrate (pH 6.0) or Tris-EDTA (pH 9.0) [1].
- Pressure Cooker Method:
- Bring a sufficient volume of antigen retrieval buffer to a boil in a pressure cooker.
- Place deparaffinized slides into the buffer, secure the lid, and heat until full pressure is achieved.
- Maintain at full pressure for 3 minutes [1] or 20 minutes [13], depending on antigen and buffer.
- Carefully depressurize and cool the cooker by running cold water over it for 10 minutes.
- Remove slides and proceed to washing.
Blocking and Permeabilization:
- Wash slides in PBS for 5 minutes.
- (For IF) Permeabilize with 0.4% Triton X-100 in PBS for 10 minutes [28].
- Block endogenous peroxidase activity by incubating with 3% H2O2 in methanol or water for 10-15 minutes at room temperature [13] [65].
- Wash with PBS.
- Block non-specific protein binding by incubating with 5% normal serum (from the secondary antibody host species) in PBS for 30-60 minutes at room temperature [65] [28].
Antibody Incubation and Detection:
- Apply primary antibody diluted in a recommended diluent or 1% serum in PBS. Incubate in a humidified chamber. Overnight incubation at 4°C is often optimal [65].
- Wash slides 3 times for 5 minutes each with TBST or PBS-T [65].
- Apply a polymer-based detection system (e.g., HRP-polymer conjugate) for 30-60 minutes at room temperature. Note: Polymer systems are more sensitive and produce less background than avidin-biotin systems [65].
- Wash slides 3 times for 5 minutes each with TBST.
Chromogenic Development (DAB as an example):
- Prepare DAB substrate solution according to the manufacturer's instructions immediately before use.
- Apply substrate to the tissue section and monitor development under a microscope. Typical development time is 30 seconds to 5 minutes.
- Critical Step: Stop the reaction by immersing the slide in deionized water as soon as the desired stain intensity is achieved. Do not over-incubate.
- Counterstain (if desired), dehydrate, clear, and mount [13].
Protocol for Multiplex IHC Using Novel Oligonucleotide Technology
Multiplex IHC (mIHC) is particularly prone to overstaining due to signal spillover and antibody cross-reactivity. Traditional methods like tyramide signal amplification (TSA) are time-consuming and can cause epitope loss or excessive tyrosine deposits, leading to high background [67]. Emerging technologies offer solutions.
- Technology Principle: SignalStar Multiplex IHC uses oligonucleotide-conjugated antibodies and complementary fluorophore-labeled DNA strands for signal amplification. This method allows simultaneous labeling of up to eight targets in a single FFPE tissue section with minimal cross-reactivity and background [67].
- Key Advantage for Signal Control: This technology avoids the issue of reduced tyrosine residues from repeated TSA cycles, which can inhibit subsequent fluorophore deposition and cause uneven signal. The oligonucleotide-based system provides a more controlled and linear amplification, reducing overstaining risks and enabling reliable quantification [67].
- Workflow: The process is typically automated on platforms like the Leica BOND RX. Researchers can use pre-validated antibody panels, which eliminates weeks of optimization and validation required for traditional mIHC, ensuring balanced signal across all channels from the outset [67].
The Scientist's Toolkit: Key Research Reagent Solutions
The selection of appropriate reagents is critical for successful IHC with minimal background. The following table details essential materials and their functions.
Table 2: Essential Reagents for Controlling Overstaining
| Reagent Category | Specific Example | Function in Preventing Overstaining |
|---|---|---|
| Blocking Reagents | Normal Goat/Donkey Serum (5-10%) | Blocks non-specific binding sites on tissue to reduce background [65]. |
| H2O2 (3%) | Quenches endogenous peroxidase activity, preventing false-positive signals in HRP-based detection [13] [65]. | |
| Endogenous Biotin Blocking Kit | Blocks endogenous biotin in tissues like liver and kidney, critical when using ABC detection methods [13]. | |
| Detection Systems | Polymer-based HRP Detection Kits | Provides high sensitivity without using biotin, eliminating background from endogenous biotin [65]. |
| SignalStar Multiplex IHC Kits | Oligonucleotide-based detection minimizes cross-reactivity and non-specific signal in complex multiplex panels [67]. | |
| Antibody Diluents | Commercial Antibody Diluents | Optimized for antibody stability and often contain additives to minimize non-specific ionic interactions [65]. |
| Slide Adhesion | VECTABOND Reagent | Chemically modifies glass slides to create a highly adherent, positively charged surface, preventing tissue loss during stringent antigen retrieval and washing steps [68]. |
| Hydrophobic Barriers | ImmEdge Hydrophobic Barrier Pen | Creates a barrier around tissue sections, localizing reagents, reducing volumes required, and preventing cross-contamination [68]. |
Workflow Diagram for Systematic Signal Troubleshooting
The following diagram outlines a logical, step-by-step decision-making process for diagnosing and correcting overstaining.
Optimizing Antigen Retrieval for Difficult Targets
In immunohistochemistry (IHC) performed on formalin-fixed paraffin-embedded (FFPE) tissues, antigen retrieval (AR) is a critical procedural step that reverses the formaldehyde-induced cross-linking of proteins that occurs during fixation. This cross-linking masks antigenic epitopes, preventing antibody binding. For difficult targets—such as those with low abundance, sensitive conformational epitopes, or those deeply embedded in tissue matrices—standard AR conditions often prove insufficient, leading to false-negative results and compromised data.
The significance of optimized AR extends beyond mere signal detection; it directly impacts the reliability and reproducibility of research findings. This application note provides a structured framework for developing and validating effective AR protocols, specifically tailored for challenging antigens, to ensure robust and quantifiable results in FFPE-based research.
Strategic Optimization of Antigen Retrieval
Core Principles and Buffer Selection
The efficacy of AR hinges on two primary mechanisms: heat-induced epitope retrieval (HIER) and proteolytic-induced epitope retrieval (PIER). HIER, the most common approach, uses heat and a specific buffer solution to break protein cross-links. The pH of the retrieval buffer is a paramount factor, as it determines which epitopes are effectively unmasked.
- High-pH Buffers (pH 8-10): Tris-EDTA at pH 9.0 is frequently recommended for a wide range of targets. This alkaline environment is particularly effective for many nuclear antigens and phosphorylated epitopes [69] [40].
- Low-pH Buffers (pH 6): Citrate-based buffers at approximately pH 6 are often better suited for certain cytoplasmic and membrane antigens [40].
For exceptionally difficult targets, a combination of HIER and PIER, or the use of specialized retrieval solutions containing detergents or other additives, may be necessary.
Quantitative Impact of AR Optimization
The table below summarizes data from published studies demonstrating the critical effect of optimized AR conditions on assay sensitivity and specificity.
Table 1: Impact of Antigen Retrieval Optimization on Assay Performance
| Target / Context | Suboptimal AR | Optimized AR | Performance Improvement | Source |
|---|---|---|---|---|
| BRAF V600E (IHC) | Variable sensitivity & specificity | Standardized HIER (pH 9) | Increased accuracy to 79.2%; resolved inter-lab variability [70] | Proficiency Testing |
| MyHC 2x (IF on FFPE) | Incompatible with standard multiplex IF | Alternate AR protocol (specific pH not stated) | Enabled direct detection of type 2x fibers [69] | Protocol Adaptation |
| INSM1 (Neuroendocrine Marker) | Suboptimal performance | Optimized AR on automated platform | Achieved 96.8% sensitivity and 92.3% specificity [71] | Assay Development |
| General Nuclear Epitopes | Inconsistent staining | HIER with high-pH buffer (pH 9) | Recommended starting condition [40] | Method Optimization |
Detailed Experimental Protocol for AR Optimization
This protocol provides a systematic approach for determining the optimal AR conditions for a difficult target.
Materials and Reagents
Research Reagent Solutions
Item Function/Application in AR Optimization Tris-EDTA Buffer (pH 9.0) High-pH retrieval buffer for nuclear antigens and many phosphorylated epitopes [69]. Citrate Buffer (pH 6.0) Low-pH retrieval buffer for various cytoplasmic and membrane antigens [40]. EDTA Buffer Chelating agent used in retrieval buffers; can be effective for some nuclear antigens. Proteinase K Enzyme for Proteolytic-Induced Epitope Retrieval (PIER), an alternative to HIER for specific targets. Normal Serum or BSA Used in blocking buffer to reduce non-specific antibody binding post-AR. Primary Antibody Antibody specific for the "difficult" target of interest. DAB Chromogen Chromogen for visualizing antibody binding in IHC staining [72]. Hematoxylin Counterstain for visualizing tissue morphology and cell nuclei [72]. Equipment
- Pressure cooker, commercial decloaking chamber, or microwave oven suitable for laboratory use.
- Slide racks and heat-resistant containers.
- pH meter.
- Heated stir plate for buffer preparation.
Step-by-Step AR Optimization Workflow
Sectioning and Deparaffinization
- Cut FFPE tissue blocks into 4-6 µm sections and mount on charged slides. Bake slides at 60°C for 1 hour to ensure adhesion [40].
- Deparaffinize and rehydrate slides by sequential immersion in:
Antigen Retrieval
- Prepare at least three different retrieval buffers in advance (e.g., Citrate pH 6, Tris-EDTA pH 8, Tris-EDTA pH 9).
- For each buffer condition, place the slides in a rack and submerge them in the preheated retrieval buffer within a heat-resistant container.
- Using a pressure cooker or decloaking chamber is highly recommended for difficult targets, as the higher temperature achieved (120-125°C) is more effective at breaking cross-links. Heat for 10-15 minutes at high pressure.
- If using a microwave, heat the slides for 45 seconds at 100% power, followed by 15 minutes at 20% power, ensuring the slides do not dry out [40].
- After heating, carefully remove the container and allow it to cool at room temperature for 20-30 minutes.
Immunostaining
- Wash slides in deionized water for 2 minutes, followed by a wash in Tris-buffered saline with 0.1% Tween 20 (TBST) for 2 minutes [40].
- Proceed with standard IHC or immunofluorescence protocols: apply peroxidase block (if needed), block with serum or BSA, incubate with primary antibody, then species-appropriate HRP-conjugated secondary antibody.
- Develop with DAB chromogen and counterstain with hematoxylin [72].
- Dehydrate, clear, and coverslip.
Validation and Analysis
- Examine all stained slides under a microscope, comparing the signal intensity and background staining for each AR condition.
- Include known positive and negative control tissues in the experiment.
- For quantitative analysis, digital image analysis can be employed. Using Fiji/ImageJ software, deconvolute the DAB and hematoxylin signals, set a consistent threshold, and quantify the DAB-positive area or intensity to objectively determine the optimal condition [72].
The following diagram illustrates the logical workflow and decision points in this optimization process.
Diagram 1: Antigen Retrieval Optimization Workflow. This flowchart outlines the key steps and decision points for testing different AR conditions on FFPE tissue sections.
Troubleshooting and Quality Control
Even with a structured protocol, challenges can arise. The table below outlines common problems and their solutions.
Table 2: Troubleshooting Guide for Antigen Retrieval
| Problem | Potential Cause | Corrective Action |
|---|---|---|
| Weak or No Staining | Insufficient retrieval; wrong buffer pH. | Increase retrieval time/temperature; test different buffer pH (especially pH 9); consider a combined HIER-PIER approach. |
| High Background | Over-retrieval; non-specific antibody binding. | Reduce retrieval time/temperature; optimize antibody dilution; ensure adequate blocking. |
| Tissue Damage | Excessive heat; enzymatic digestion too harsh. | For HIER, ensure slides are fully submerged. For PIER, titrate enzyme concentration and incubation time. |
| Inconsistent Staining Between Runs | Uncontrolled variables in the AR step. | Standardize heating method, buffer volume, and cooling time. Use a calibrated pH meter for buffer preparation. |
Implementing rigorous quality control is essential. The use of standardized control cell lines, where available, and the application of automated image analysis with artificial intelligence (AI) algorithms can provide objective, quantitative assessment of staining quality and help identify technical variations that may be missed by visual inspection alone [73].
Optimizing antigen retrieval is a non-negotiable prerequisite for successful detection of difficult targets in FFPE tissues. A methodical approach—systematically testing retrieval buffers across a pH spectrum (with emphasis on high-pH conditions for many challenging antigens) and employing robust heating methods—is fundamental to unlocking high-quality, reproducible data. By integrating the strategies and detailed protocols outlined in this document, researchers can significantly enhance the sensitivity and reliability of their IHC assays, thereby advancing the accuracy of their scientific conclusions in drug development and basic research.
Managing Tissue Autofluorescence in Fluorescent IHC
Tissue autofluorescence is a prevalent challenge in fluorescent immunohistochemistry (IHC) that can significantly compromise data quality and interpretation by reducing the signal-to-noise ratio [74] [75]. This phenomenon is characterized by the natural emission of light by endogenous molecules within tissue sections when excited by specific wavelengths, creating a background glow that can obscure specific antibody-derived signals [74]. In the context of formalin-fixed paraffin-embedded (FFPE) tissue research, managing autofluorescence is particularly crucial for ensuring the accuracy and reliability of quantitative imaging and analysis, which forms the foundation of robust scientific conclusions in drug development and basic research [75].
The primary sources of autofluorescence in FFPE tissues include endogenous fluorophores such as lipofuscin, collagen and elastin fibers, NAD(P)H, and flavins [74]. Furthermore, the chemical fixation process itself, especially when using aldehyde-based fixatives like formalin, can introduce fluorescent cross-links that exacerbate this issue [9]. This application note provides detailed methodologies for effectively reducing or eliminating autofluorescence, thereby enhancing the quality of fluorescent IHC data derived from FFPE tissues.
Understanding the biological and technical origins of autofluorescence is essential for selecting appropriate countermeasures. The following diagram illustrates the primary sources and their impacts on IHC imaging.
The mechanisms underlying autofluorescence involve both natural tissue components and artifacts introduced during sample preparation [74]:
- Endogenous fluorophores: Lipofuscin, found predominantly in neuronal and cardiac tissues, exhibits broad emission spectra that overlap with common fluorophores like FITC and TRITC. Collagen and elastin in connective tissue contribute significantly to blue-green autofluorescence when excited by violet or blue light [74].
- Fixative-induced fluorescence: Aldehyde-based fixatives, particularly glutaraldehyde and to a lesser extent formalin, create fluorescent cross-links between proteins. These cross-links emit light across a broad spectrum when excited, complicating multicolor fluorescence detection [9].
- Exogenous factors: Incomplete perfusion leaving red blood cells in tissue, or suboptimal tissue processing conditions, can introduce additional sources of background signal that interfere with specific detection [9].
Quantitative Impact of Autofluorescence
The effect of autofluorescence on imaging quality can be quantitatively assessed through signal-to-noise ratio (SNR) measurements. The following table summarizes the typical impact of various sources on fluorescence detection.
Table 1: Common Autofluorescence Sources and Their Impact on IHC
| Source Type | Excitation/Emission Max | Primary Tissue Locations | Impact on SNR |
|---|---|---|---|
| Lipofuscin | ~340-395 nm/~540-660 nm | Neuronal, cardiac, hepatic | High (can reduce SNR by 50-80%) |
| Collagen/Elastin | ~325-375 nm/~430-460 nm | Connective tissue, blood vessels | Moderate-High |
| NAD(P)H | ~340 nm/~450-470 nm | All metabolically active cells | Variable (tissue-dependent) |
| Formalin cross-links | Broad spectrum | Throughout FFPE tissue | Moderate |
| Red blood cells | ~415 nm/~550-600 nm | Vascular compartments | High in poorly perfused tissues |
The quantitative impact of autofluorescence becomes particularly problematic when attempting to detect low-abundance antigens or when performing multiplexed experiments where signal bleed-through can occur between channels. In worst-case scenarios, autofluorescence can reduce the effective signal-to-noise ratio by 50-80%, potentially leading to false positive or false negative interpretations [75].
Comprehensive Protocol for Autofluorescence Reduction
This optimized protocol integrates multiple strategies for effective autofluorescence management in FFPE tissues, with procedural workflow outlined in the following diagram.
Materials and Reagents
Table 2: Research Reagent Solutions for Autofluorescence Management
| Reagent/Category | Specific Examples | Function/Purpose |
|---|---|---|
| Photobleaching Agents | Glycine, Acetamide, Sodium Azide in PBS | Reduces autofluorescence through free radical generation and chemical bleaching of endogenous fluorophores [75]. |
| Light Source | AgroMax T5 Finisher Bulb (10000K) or equivalent | Provides high-intensity, full-spectrum light for effective photobleaching of autofluorescent compounds [75]. |
| Blocking Reagents | Normal Goat Serum (or species-appropriate), BSA, Triton X-100 | Reduces non-specific antibody binding and permeabilizes membranes for improved antibody penetration [74] [28]. |
| Mounting Media | Mowiol 4-88 with AF-300, commercial anti-fade mountants | Preserves fluorescence signal and provides anti-fade properties; specific formulations can further reduce background [75]. |
| Washing Buffers | Phosphate-Buffered Saline (PBS), PBS with Triton X-100 (PBS-T) | Removes unbound reagents and decreases background staining through effective washing steps [28]. |
Step-by-Step Protocol
Day 1: Deparaffinization, Antigen Retrieval, and Light Treatment
Deparaffinization and Rehydration [28]:
- Immerse slides in xylene (or less hazardous alternative), three washes of 5 minutes each.
- Transfer through graded ethanol series: 100% ethanol (two washes, 10 minutes each), 95% ethanol (two washes, 10 minutes each), 70% ethanol (two washes, 10 minutes each), 50% ethanol (two washes, 10 minutes each).
- Rinse in deionized water, two washes of 5 minutes each.
- Carefully mark around tissue with a hydrophobic barrier pen.
Heat-Induced Antigen Retrieval [11] [74] [28]:
- Prepare 10 mM sodium citrate buffer (pH 6.0) or Tris-EDTA buffer (pH 9.0).
- Place slides in retrieval buffer and heat using a microwave, water bath, or pressure cooker until sub-boiling temperatures are reached.
- Maintain at sub-boiling temperature for 10-20 minutes.
- Cool slides on bench top for 30 minutes.
- Rinse with distilled water for 5 minutes.
Light Treatment for Autofluorescence Reduction [75]:
- Prepare light treatment buffer: 1X PBS containing 4% glycine and 4% acetamide, with 0.05% sodium azide.
- Incubate tissue sections in light treatment buffer in a clear-bottomed tissue culture plate.
- Seal the plate with clear, adhesive tape to prevent evaporation.
- Position the plate directly above high-intensity light bulbs (≥400 Lux measured at bulb surface).
- Expose tissues to light for 40-48 hours at room temperature.
- Following treatment, rinse tissue sections three times in 1X PBS for 5 minutes each.
Day 2: Blocking and Antibody Incubation
Blocking Non-Specific Binding [74] [28]:
- Prepare blocking buffer: 20% normal serum (from the species of your secondary antibody) with 0.3% Triton X-100 and 0.02% sodium azide in 1X PBS.
- Centrifuge blocking buffer at 17,500 × g for 5 minutes before use to remove aggregates.
- Incubate tissue sections in blocking buffer for 1 hour at room temperature.
Primary Antibody Application [75]:
- Prepare primary antibody master mixes at 3× the final target concentration in antibody dilution buffer (10% normal serum, 0.3% Triton X-100, 0.02% sodium azide in 1X PBS).
- Combine master mixes with each other for multiplex detection or with antibody buffer for single labeling.
- Centrifuge all final antibody mixtures at 17,500 × g for 5 minutes.
- Remove blocking buffer from slides and apply primary antibody mixtures.
- Incubate slides in a humidified chamber for 64-72 hours at 4°C on a gentle shaker, protected from light.
Day 3: Secondary Antibody and Counterstaining
Secondary Antibody Application:
- Rinse slides three times in 1X PBS for 5 minutes each.
- Prepare secondary antibody mixtures in 10% normal serum with 0.3% Triton X-100 and 0.02% sodium azide in 1X PBS.
- Centrifuge secondary antibody mixtures at 17,500 × g for 5 minutes.
- Apply secondary antibodies to tissues and incubate for 18-24 hours at 4°C on a gentle shaker, protected from light.
Nuclear Counterstaining and Mounting [75] [28]:
- Rinse slides three times in 1X PBS with 0.3% Triton X-100 for 15 minutes each.
- Incubate tissues with DAPI (1:50,000 dilution in PBS) for 10-20 minutes.
- Rinse slides twice in 1X PBS for 15 minutes each.
- Mount sections on charged histology slides using Mowiol 4-88 mounting media mixed with AF-300 in a 9:1 ratio.
- Apply coverslips and allow mounting media to cure for 24 hours protected from light; 3-7 days of curing is recommended for optimal results.
Alternative Autofluorescence Reduction Methods
While the photobleaching method described above is highly effective, several alternative approaches can be employed depending on tissue type and experimental constraints:
- Chemical quenching: Treatment with 0.1-1.0% sodium borohydride in PBS for 30 minutes can reduce aldehyde-induced fluorescence, particularly in tissues fixed with glutaraldehyde [9].
- Ammonium ethanol treatment: Incubation in 0.5-1.0% ammonium chloride in 70% ethanol for 30-60 minutes can help reduce background from aldehyde groups [9].
- Commercial quenching kits: Prepared reagents such as the ReadyProbes Tissue Autofluorescence Quenching Kit provide standardized approaches for rapid background reduction [74].
- Spectral unmixing: For equipment with spectral imaging capabilities, computational approaches can separate autofluorescence from specific signals based on their spectral signatures, though this works best when autofluorescence is moderate.
Validation and Quality Control
For research with potential diagnostic implications, rigorous validation of autofluorescence reduction methods is essential. The College of American Pathologists (CAP) recommends specific validation protocols for IHC assays to ensure reliability and reproducibility [21]. Key validation steps include:
- Signal-to-noise ratio assessment: Compare fluorescence intensity in target areas versus negative controls or non-expressing tissue regions.
- Specificity verification: Include controls without primary antibody to confirm that residual signal is specific.
- Reproducibility testing: Perform replicates across different days and operators to ensure consistent performance of the autofluorescence reduction protocol.
- Comparison with established methods: Validate new protocols against previously validated methods to ensure equivalent or superior performance.
Effective management of tissue autofluorescence is an essential component of robust fluorescent IHC in FFPE tissue research. The integrated protocol presented here, combining chemical treatment with high-intensity light exposure, provides a reliable method for significantly reducing background fluorescence while preserving specific antigen signals. Implementation of these techniques enables researchers and drug development professionals to obtain higher quality data with improved signal-to-noise ratios, facilitating more accurate quantification and interpretation of protein expression patterns in tissue contexts.
Preventing Tissue Loss and Damage During Processing
Within immunohistochemistry (IHC) research, the integrity of tissue samples is paramount. For formalin-fixed paraffin-embedded (FFPE) tissues, the multi-step processing workflow presents numerous opportunities for tissue loss and damage, potentially compromising experimental results and devaluing precious samples. This application note provides detailed protocols and strategic guidance to help researchers, scientists, and drug development professionals maintain tissue integrity throughout the FFPE processing pipeline. By implementing these standardized procedures, laboratories can significantly improve staining quality, data reproducibility, and analytical reliability in IHC studies.
Critical Stage 1: Sample Preparation and Fixation
Proper sample preparation establishes the foundation for preserving tissue architecture and antigenicity throughout subsequent processing stages.
Fixation Protocol for Optimal Preservation
- Fixative Selection: For most proteins, peptides, and low molecular weight enzymes, use 10% Neutral-Buffered Formalin (NBF) or 4% paraformaldehyde (PFA). For large protein antigens such as immunoglobulins, 100% acetone or methanol is recommended [11].
- Immersion Fixation Procedure:
- Dissect tissue and wash in phosphate-buffered saline (PBS)
- Immerse tissue block in sufficient fixative (volume should be approximately 50 times greater than tissue size)
- Incubate for 18-24 hours at 4°C [11]
- Wash tissue three times with PBS to remove residual fixative
- Perfusion Fixation Alternative: For superior preservation, particularly for neural tissues, perform vascular perfusion with 4% PFA followed by post-dissection immersion fixation [11].
- Fixation Optimization: Under-fixation manifests as edge staining with strong signal on section edges and no signal centrally. Over-fixation causes epitope masking, though this can sometimes be reversed through antigen retrieval techniques [11].
Table 1: Troubleshooting Fixation Issues
| Problem | Appearance | Solution |
|---|---|---|
| Under-fixation | Strong edge staining, weak central signal | Increase fixation time; ensure adequate fixative volume |
| Over-fixation | Weak or absent staining throughout | Optimize fixation time; employ antigen retrieval |
| Non-uniform fixation | Variable staining across tissue | Ensure tissue size <10mm; consider perfusion fixation |
Critical Stage 2: Embedding and Sectioning
The transition from fixed tissue to mounted sections represents a high-risk phase for tissue damage and loss.
Paraffin Embedding Methodology
- Dehydration Series: Process tissue through graded ethanol series to gradually remove water [2]:
- 50%, 70%, 80%, 95% ethanol (20-30 minutes each)
- 100% ethanol (two changes, 20-30 minutes each)
- Clearing: Transfer tissue to xylene or commercial alternatives (two changes, 10-20 minutes each) [11]
- Infiltrate with Paraffin: Exchange tissue through three changes of molten paraffin (50-60°C):
- First paraffin: 40 minutes
- Second paraffin: 60 minutes
- Third paraffin: 60 minutes [11]
- Embedding Orientation: Position tissue in mold with careful attention to desired cutting plane, then anchor with embedding cassette
Sectioning and Slide Mounting
- Block Preparation: Chill paraffin-embedded tissue blocks on ice before sectioning to improve support for harder tissue elements [11]
- Microtomy Parameters:
- Trim block at 10-30µm thickness to expose tissue surface
- Cut sections at 3-10µm thickness using a properly adjusted microtome [11]
- Section Mounting:
- Slide Drying: Dry mounted sections overnight at 37°C or for 20-60 minutes at 50-60°C. Monitor carefully as extended high-temperature drying may decrease immunogenicity [26] [76].
The following workflow diagram illustrates the optimal steps for FFPE tissue processing from fixation to mounted slides:
Critical Stage 3: Deparaffinization and Antigen Retrieval
Deparaffinization and Rehydration Protocol
Incomplete paraffin removal represents a common cause of poor staining and tissue damage. Follow this standardized protocol:
- Deparaffinization:
- Xylene (or commercial alternative): 2 changes, 10-15 minutes each [11]
- Rehydration through graded ethanol:
- 100% ethanol: 2 changes, 5 minutes each
- 95% ethanol: 2 changes, 5 minutes each
- 85% ethanol: 2 changes, 5 minutes each
- 75% ethanol: 2 changes, 5 minutes each [2]
- Final hydration: Rinse slides three times with water [11]
Critical Note: After rehydration, never allow slides to dry completely as this causes irreversible non-specific antibody binding and high background staining [11].
Antigen Retrieval Techniques
Formalin fixation creates methylene bridges that cross-link proteins and mask antigenic sites. Antigen retrieval methods reverse these cross-links to restore epitope accessibility [11].
Heat-Induced Epitope Retrieval (HIER):
Protease-Induced Epitope Retrieval (PIER):
Table 2: Antigen Retrieval Method Selection Guide
| Condition | Recommended Method | Typical Incubation | Key Considerations |
|---|---|---|---|
| Epitopes susceptible to crosslinking | HIER | 15-20 minutes at 98°C | Multiple buffer options (citrate, EDTA, Tris-EDTA) |
| Heat-sensitive antigens | PIER | 10-20 minutes at 37°C | Monitor digestion time carefully to prevent tissue damage |
| Novel antigens | Test both HIER and no retrieval | Varies | Requires optimization for specific antibodies |
IHC Staging and Reagent Localization
Preventing Reagent Loss and Managing Volume
During staining procedures, proper reagent containment is essential for consistent results and cost management.
- Hydrophobic Barrier Application:
- Use ImmEdge Hydrophobic Barrier PAP Pen or equivalent to create containment boundaries around tissue sections
- Shake pen well before use and depress tip against slide several times until saturated
- Draw continuous line around each sample, ensuring complete enclosure
- Allow barrier to dry for 2 minutes before applying aqueous solutions [76]
- Benefits: Reduces reagent volumes by up to 80%, enables different staining conditions on single slides, and improves staining uniformity
Blocking and Antibody Incubation
- Blocking Non-Specific Binding:
- Apply 100-150µL of blocking solution (e.g., 10% normal serum from secondary antibody species) per slide
- Cover with Parafilm cut to tissue dimensions to ensure even distribution and limit evaporation
- Incubate for 1 hour at room temperature in humidified chamber [26]
- Primary Antibody Application:
- Dilute primary antibody in blocking reagent at manufacturer's recommended concentration
- For low abundance antigens, extend incubation to 12 hours at 4°C [26]
- Washing Protocol: Wash slides 3 times in PBS for 5 minutes each using Coplin jar and orbital shaker set to low speed [26]
The Scientist's Toolkit: Essential Research Reagent Solutions
Table 3: Key Reagents for Preventing Tissue Loss and Damage
| Reagent/Category | Specific Examples | Function & Application Notes |
|---|---|---|
| Slide Adhesives | VECTABOND Reagent | Chemically modifies glass with positive charges to enhance tissue adhesion for both FFPE and frozen sections [76] |
| Hydrophobic Barriers | ImmEdge Hydrophobic Barrier PAP Pen | Creates liquid containment barrier around sections, enabling reduced reagent volumes and different conditions on single slides [76] |
| Blocking Reagents | Normal serum, BSA | Reduces non-specific antibody binding; use serum from secondary antibody species at 2-10% concentration [26] [77] |
| Endogenous Enzyme Blockers | Peroxidase Suppressor, ReadyProbes HRP Blocking Solution | Quenches endogenous peroxidase activity; use 0.3% H₂O₂ in methanol or water for 15-40 minutes [77] |
| Endogenous Biotin Blockers | Avidin/Biotin Blocking Solution | Blocks endogenous biotin to prevent false positive signal in avidin-biotin detection systems [77] |
| Mounting Media | Anti-fade mounting medium (fluorescence), Permount (chromogenic) | Presves fluorescent signal and prevents photobleaching (fluorescence) or provides permanent mounting (chromogenic) [26] [25] |
Advanced Applications and Future Directions
The integrity of FFPE tissue processing directly enables advanced analytical techniques that provide deeper biological insights.
Super-Resolution Microscopy of FFPE Tissues
Optical super-resolution microscopy (SRM) techniques now enable nanoscale visualization of FFPE tissue sections, bypassing the resolution limitations of conventional microscopy (~250nm) [78]. These methods include:
- Structured Illumination Microscopy (SIM): Enhances resolution approximately two-fold through patterned illumination and computational reconstruction
- Stimulated Emission Depletion (STED): Uses donut-shaped depletion beam to narrow point spread function
- Single-Molecule Localization Microscopy (SMLM): Achieves ~20nm resolution by temporal separation of individual fluorophore signals
- Expansion Microscopy (ExM): Physically expands tissue-hydrogel composites to achieve effective resolution increase [78]
Spatial Proteomics Integration
Filter-aided expansion proteomics (FAXP) represents an emerging technology that combines hydrogel-based tissue expansion with mass spectrometry for spatial proteomics analysis of archived FFPE specimens [79]. This approach:
- Achieves 14.5-fold increase in volumetric resolution compared to conventional methods
- Generates 255% more protein identifications while reducing processing time by 50%
- Enables integration with laser capture microdissection for single-subcellular organelle proteomics under image guidance [79]
The following diagram illustrates how proper FFPE processing enables these advanced analytical techniques:
Preventing tissue loss and damage during FFPE processing requires meticulous attention to each step of the workflow, from initial fixation through final staining. By implementing the standardized protocols outlined in this application note—including optimized fixation parameters, enhanced slide adhesion strategies, controlled antigen retrieval methods, and proper reagent containment—researchers can significantly improve tissue integrity preservation. These practices directly translate to enhanced data quality, improved reproducibility, and more reliable research outcomes in immunohistochemistry and related spatial biology techniques. As advanced applications like super-resolution microscopy and spatial proteomics continue to evolve, the foundational importance of proper tissue processing only grows more critical for generating meaningful biological insights from precious clinical and research specimens.
Ensuring Accuracy: Validation Standards and Comparative Technologies in IHC
Principles of Analytical Validation for IHC Assays
Immunohistochemistry (IHC) serves as a critical technique in pathology and drug development, providing spatial context for protein expression within tissue architecture. The analytical validation of these assays ensures their accuracy, reproducibility, and clinical reliability. For researchers and drug development professionals working with formalin-fixed, paraffin-embedded (FFPE) tissues, implementing rigorous validation principles is fundamental to generating credible data. This application note delineates the current principles of analytic validation for IHC assays, incorporating the latest guideline updates and providing detailed protocols tailored for FFPE tissue research.
The College of American Pathologists (CAP) updated its evidence-based guidelines in 2024, affirming and expanding upon the original 2014 publication to ensure accuracy and reduce variation in IHC laboratory practices [21]. This document frames these principles within the context of a step-by-step FFPE protocol, providing a comprehensive framework for researchers to validate their IHC assays effectively.
Core Principles of IHC Assay Validation
Key Validation Requirements
Analytical validation establishes that an IHC test performs according to its intended purpose by defining its performance characteristics. The 2024 CAP guideline update introduces several critical recommendations that researchers must incorporate into their validation strategies [21]:
Validation of Assay-Scoring System Combinations: Laboratories must separately validate/verify each unique assay-scoring system combination, particularly relevant for predictive markers like PD-L1 and HER2 that employ distinct scoring systems based on tumor site and/or clinical indication [21].
Harmonized Concordance Requirements: While earlier guidelines outlined varying concordance requirements for different markers, the updated guideline harmonizes these requirements to a uniform 90% concordance for all IHC assays, simplifying validation targets while maintaining rigorous standards [21].
Cytology Specimen Validation: For IHC performed on cytology specimens not fixed identically to tissues used for initial validation, separate validations are now required with a minimum of 10 positive and 10 negative cases [21]. This addresses literature demonstrating variable sensitivity of IHC assays performed on specimens fixed with alternative fixatives compared with standard FFPE tissues.
Verification of FDA-Approved Assays: The update provides more explicit verification requirements for unmodified United States Food and Drug Administration (FDA) approved/cleared assays, offering clearer guidance for laboratories implementing commercially developed tests [21].
Validation Study Design Comparators
The CAP guidelines provide a hierarchy of comparators for validation study design, ordered here from most to least stringent [21]:
Table 1: Validation Comparators for IHC Assay Design
| Comparator Type | Description | Stringency Level |
|---|---|---|
| Protein Calibrators | Comparison to IHC results from cell lines containing known amounts of target protein | Most Stringent |
| Non-IHC Methods | Comparison with flow cytometry or FISH results | High |
| External Laboratory Testing | Comparison with results from another laboratory using validated assay | Medium-High |
| Prior Testing in Same Lab | Comparison with previous validated testing on same tissues | Medium |
| Clinical Trial Laboratory | Comparison with testing from clinical trial laboratories | Medium |
| Antigen Localization | Comparison with expected architectural and subcellular antigen patterns | Medium-Low |
| Published Clinical Data | Comparison against percent positive rates in clinical trials | Low |
| Proficiency Testing | Comparison with formal proficiency testing program challenges | Least Stringent |
These comparators provide flexibility for researchers to design validation studies appropriate for their specific assay requirements and available resources while maintaining scientific rigor.
Quantitative Analysis in IHC Validation
Performance Metrics for Biomarker Assays
Incorporating quantitative analysis strengthens IHC assay validation by providing objective performance metrics. Research on esophageal squamous carcinoma (ESCC) biomarkers demonstrates the utility of quantitative IHC approaches, where H-score analysis revealed statistically significant differences in protein expression [80].
The H-score calculation formula: H-score = Σpi(i+1), where "pi" represents the percentage of positive cell counts in total cell counts, and "i" represents the staining intensity (typically scored as 0, 1+, 2+, or 3+) [80]. This quantitative approach facilitates more precise assay validation and performance monitoring.
Table 2: Quantitative Performance Metrics for IHC Biomarkers
| Biomarker | AUC Value | Sensitivity | Specificity | Research Context |
|---|---|---|---|---|
| EGFR | 0.74 | Moderate | Moderate | ESCC vs. non-ESCC [80] |
| PCNA | 0.80 | High | Moderate | ESCC vs. non-ESCC [80] |
| VEGF | 0.70 | Moderate | Moderate | ESCC vs. non-ESCC [80] |
| Triple Combination | 0.86 | High | High | ESCC vs. non-ESCC [80] |
The data demonstrates that biomarker combinations frequently enhance assay performance compared to individual markers, providing valuable insights for researchers designing validation panels.
Automated Quantitative Analysis
Advanced automated methods using deep learning techniques and image processing algorithms now enable precise quantification of nuclear, membrane, and cytoplasmic expressions in whole-slide images [81]. These systems employ optical density separation to differentiate hematoxylin and 3,3'-diaminobenzidine (DAB) staining components, combined with segmentation algorithms like CellViT for nuclear identification and region-growing algorithms for membrane and cytoplasm analysis [81]. Implementation of such automated quantitative approaches during validation provides objective, reproducible data that surpasses traditional manual interpretation in accuracy for specific quantitative metrics.
Experimental Protocols for FFPE IHC
Standard Chromogenic IHC Protocol for FFPE Tissues
The following detailed protocol ensures proper IHC staining for FFPE tissues, adapted from established methods [26]:
Materials Required:
- Phosphate buffered saline (PBS): 137mM NaCl, 2.7mM KCl, 10mM Na2HPO4, 1.76mM KH2PO4, pH 7.4
- Clearing and rehydration reagents: Histoclear II, Ethanol (100%, 90%, 70%)
- Antigen retrieval reagent: 10mM Sodium citrate buffer, pH 6.0, or proteinase K (20μg/mL)
- Blocking reagent: 10% normal serum from secondary antibody host species
- Primary antibody specific to target antigen
- Secondary antibody: Biotinylated antibody against primary antibody host species
- Amplification reagent: Avidin-biotin complex with horseradish peroxidase
- Visualization reagent: DAB solution (0.05% DAB, 0.015% H2O2 in PBS)
- Nuclear counterstain: Hematoxylin
- Mounting medium: Permount
Procedure:
Sectioning and Mounting
- Cut paraffin-embedded specimens at 4-5μm thickness and mount on charged slides (e.g., Superfrost Plus).
- Heat slides for 20 minutes at 50-60°C to facilitate tissue attachment. Critical: Do not exceed 60°C to prevent antigen damage [26].
Deparaffinization and Rehydration
- Process slides through the following sequence with immersions:
- Histoclear II: 3 × 5 minutes
- 100% Ethanol: 2 × 5 minutes
- 90% Ethanol: 1 × 5 minutes
- 70% Ethanol: 1 × 5 minutes
- Deionized water: 1 × 5 minutes
- Note: Ensure complete deparaffinization; additional xylene immersion may be needed if wax traces remain [28].
- Process slides through the following sequence with immersions:
Antigen Retrieval
- Heat-Induced Epitope Retrieval (HIER): Submerge slides in preheated sodium citrate buffer (pH 6.0), heat until boiling, then maintain sub-boiling temperature for 15 minutes. Cool to room temperature (20 minutes) [26].
- Alternative enzymatic retrieval: Submerge in proteinase K (20μg/mL) or trypsin (0.05%) for 10-20 minutes at 37°C [26].
- Note: Optimization is essential as retrieval method depends on target antigen and fixation conditions.
Peroxidase Blocking and Protein Block
- Incubate slides in 0.3% H2O2 in PBS for 15-40 minutes at room temperature to quench endogenous peroxidase activity.
- Wash 3× in PBS (5 minutes/wash).
- Block non-specific binding with 10% normal serum in PBS for 1 hour at room temperature.
Primary Antibody Incubation
- Apply primary antibody diluted in blocking reagent at manufacturer's recommended concentration.
- Incubate for 2 hours at room temperature or overnight at 4°C for low-abundance antigens.
- Wash 3× in PBS (5 minutes/wash).
Detection and Visualization
- Apply biotinylated secondary antibody for 1 hour at room temperature.
- Wash 3× in PBS (5 minutes/wash).
- Apply avidin-biotin-HRP complex for 30 minutes at room temperature.
- Wash 3× in PBS (5 minutes/wash).
- Prepare DAB solution immediately before use: Add 500μL DAB stock and 2.5μL 30% H2O2 to 50mL PBS.
- Incubate slides in DAB until brown color develops (monitor microscopically).
- Stop reaction by immersing in deionized water.
Counterstaining and Mounting
- Counterstain with hematoxylin for 30-60 seconds.
- Rinse in running tap water for 5 minutes.
- Dehydrate through graded alcohols (70%, 90%, 100% ethanol) and clear in Histoclear II (3×5 minutes each).
- Mount with Permount and apply coverslips.
Fluorescent IHC Protocol for FFPE Tissues
For researchers requiring multiplexing capabilities, fluorescent IHC provides an alternative detection method:
Materials Required:
- Permeabilization buffer: 1% animal serum, 0.4% Triton X-100 in PBS
- Blocking reagent: 5% animal serum in PBS-T
- Primary antibody: Fluorophore-conjugated or compatible with fluorescent secondary antibodies
- Secondary antibody: Fluorophore-conjugated (e.g., Alexa Fluor dyes)
- Nuclear counterstain: DAPI or DRAQ5
- Mounting medium: Fluoromount-G or similar anti-fade mounting medium
Procedure:
- Deparaffinization and Rehydration (as in chromogenic protocol)
- Antigen Retrieval using high-pH buffer (IHC Antigen Retrieval Solution-High pH) at 98°C for 20 minutes in a water bath [17]
- Permeabilization and Blocking
- Permeabilize with 1% serum, 0.4% Triton X-100 in PBS for 2 × 10 minutes
- Block with 5% animal serum in PBS-T for 30 minutes at room temperature
- Primary Antibody Incubation
- Apply fluorophore-conjugated primary antibody diluted in 1% serum PBS
- Incubate 1-2 hours at room temperature, then overnight at 4°C in humidified chamber protected from light
- Washing and Nuclear Staining
- Wash 2× with 1% serum PBS-T for 10 minutes each
- Apply DAPI (1μg/mL) for 5 minutes if not included in mounting medium
- Mounting and Storage
- Apply anti-fade mounting medium
- Coverslip and seal edges with clear nail polish
- Store at 4°C protected from light
The Scientist's Toolkit: Research Reagent Solutions
Table 3: Essential Reagents for IHC Validation Studies
| Reagent Category | Specific Examples | Function & Importance | Validation Considerations |
|---|---|---|---|
| Fixation Media | 10% Neutral Buffered Formalin | Preserves tissue architecture and antigen integrity | Fixation time must be standardized; affects antigen retrieval requirements [82] |
| Antigen Retrieval Reagents | Sodium Citrate Buffer (pH 6.0), High-pH EDTA Buffer | Reverses formaldehyde-induced crosslinks | Method and pH must be optimized for each antibody [26] [17] |
| Blocking Reagents | Normal Serum, BSA, IHC/ICC Blocking Buffer | Reduces non-specific antibody binding | Serum should match secondary antibody host species [26] [28] |
| Primary Antibodies | Monoclonal/Polyclonal, FDA-cleared or LDT | Specifically binds target antigen | Optimal dilution must be determined via checkerboard titration [82] |
| Detection Systems | Avidin-Biotin Complex (ABC), Polymer-HRP | Amplifies signal for visualization | Sensitivity varies between systems; must be validated [26] |
| Chromogens | DAB, AEC, Vector NovaRED | Produces visible reaction product | DAB provides permanent staining; intensity correlates with antigen abundance [80] |
| Counterstains | Hematoxylin, DAPI, DRAQ5 | Provides morphological context | Hematoxylin for brightfield, DAPI for fluorescence [26] [17] |
| Mounting Media | Permount, Fluoromount-G | Preserves staining and optimizes microscopy | Aqueous for fluorescence, organic for chromogenic [26] [17] |
Critical Considerations for IHC-Based Studies
Histopathological Context in Validation
Proper validation requires that quantitative IHC data be interpreted within accurate histopathological context. While quantitative IHC provides numerical measures of antibody binding, it cannot distinguish between on-target and off-target binding without expert pathological evaluation [82]. The study pathologist must evaluate routine H&E sections to define pathological processes and qualitatively assess IHC slides to verify staining specificity before quantitative data can be properly interpreted [82].
Tissue Collection and Processing Controls
To minimize pre-analytical variables that compromise validation:
- Collect tissue samples promptly after euthanasia (ideally within 30 minutes)
- Use consistent fixation protocols (24-48 hours in 10% NBF for most tissues)
- Ensure similar tissue representation across all experimental groups
- Document cold ischemia time and fixation duration precisely
- Process tissues with standardized trimming and embedding protocols [82]
Variations in tissue collection, especially between different organ regions with physiological differences (e.g., different liver lobes), can significantly impact protein expression and must be controlled during validation [82].
Antibody Validation and Optimization
Each antibody used in IHC requires specific validation, whether commercially available or proprietary [82]. Key factors include:
- Checkerboard Titration: Determine optimal primary antibody concentration using known positive and negative tissues
- Isotype Controls: Use control antibodies of the same class as the test antibody to establish specific vs. non-specific binding
- Antigen Retrieval Optimization: Test both enzymatic and heat-induced methods at different pH conditions
- Blocking Strategies: Optimize serum concentration and incubation time to maximize signal-to-noise ratio
Robust analytical validation of IHC assays requires meticulous attention to both technical protocols and broader principles of assay validation. The updated 2024 CAP guidelines provide a structured framework for establishing IHC assay reliability, with specific requirements for concordance rates, cytology specimens, and predictive markers with distinct scoring systems. By implementing the detailed protocols and validation strategies outlined in this application note, researchers can ensure their IHC data meets rigorous standards for scientific and regulatory purposes, ultimately supporting accurate conclusions in drug development and basic research contexts.
CAP Guidelines for Clinical IHC Assay Validation
The College of American Pathologists (CAP) has updated the "Principles of Analytic Validation of Immunohistochemical Assays" to ensure accuracy and reduce variation in immunohistochemistry (IHC) laboratory practices [21]. This guideline update, released in early 2024, affirms and expands upon the 2014 publication, addressing the evolving field of clinical immunohistochemistry [21]. These protocols are particularly crucial for predictive markers that guide therapeutic decisions in cancer treatment, such as HER2, PD-L1, and hormone receptors [83]. The updated recommendations provide essential guidance for researchers, scientists, and drug development professionals implementing IHC assays within their institutions, with particular focus on validation requirements for assays performed on cytology specimens and those with distinct scoring systems [21].
Key Updates in the 2024 CAP Guideline
The CAP guideline revision introduces several important modifications based on a systematic review of medical literature published since the original 2014 guideline [21]. While many original recommendations remain unchanged, several key updates merit attention:
- Validation of Cytology Specimens: New recommendations address validation/verification of IHC assays performed on cytology specimens that may not be fixed identically to tissues used for initial assay validation [21].
- Harmonized Requirements for Predictive Markers: The original guideline outlined distinct requirements for validation/verification of HER2, ER, and PR predictive markers. The update harmonizes validation requirements for all predictive markers [21].
- Assays with Distinct Scoring Systems: Guidance is now provided for validating predictive markers with distinct scoring systems employed depending on tumor site and/or clinical indication (e.g., PD-L1 and HER2) [21].
A significant numerical update in the guideline is the uniform setting of concordance requirements to 90% for all IHC assays, replacing previously variable concordance requirements for estrogen receptor, progesterone receptor, and HER2 IHC performed on breast carcinomas [21].
Analytic Validation Requirements for IHC Assays
Core Validation Principles
The CAP guidelines provide specific, evidence-based recommendations for the analytic validation of IHC assays. The update includes two strong recommendations, one conditional recommendation, and twelve good practice statements developed through rigorous and transparent development principles [21]. A fundamental requirement is that laboratories should separately validate/verify each assay-scoring system combination, particularly relevant for predictive markers like HER2 and PD-L1 that employ different scoring systems based on tumor site and/or tumor type [21].
For IHC assays performed on specimens fixed in alternative fixatives (such as those often used in cytology laboratories), the guidelines now recommend separate validations with a minimum of 10 positive and 10 negative cases [21]. The guideline panel recognizes this imposes an added burden to laboratories but notes literature has shown variable sensitivity of IHC assays performed on these specimens compared with formalin-fixed, paraffin-embedded (FFPE) tissues [21].
Validation Comparators and Study Design
The CAP guidelines provide flexibility in validation study design through various comparator options, ordered here from most to least stringent [21]:
Table: Validation Comparator Options for IHC Assays
| Comparator Type | Description |
|---|---|
| Protein Calibrators | Comparing new assay results to IHC results from cell lines containing known amounts of protein |
| Non-IHC Methods | Comparing with results from a different methodological approach (e.g., flow cytometry, FISH) |
| External Laboratory | Comparing with results of testing same tissues in another laboratory using a validated assay |
| Intra-laboratory | Comparing with results of prior testing of same tissues with a validated assay in the same laboratory |
| Clinical Trial Laboratory | Comparing with results from testing in a laboratory that performed testing for a clinical trial |
| Antigen Localization | Comparing with expected architectural and subcellular localization of the antigen |
| Published Rates | Comparing against percent positive rates documented in published clinical trials |
| Proficiency Testing | Comparing with formal proficiency testing program challenges |
Quantitative Validation Requirements
Table: Summary of Key Validation Requirements from CAP Guidelines
| Validation Parameter | Requirement | Notes |
|---|---|---|
| Overall Concordance | 90% | Applies to all IHC assays, including ER, PR, and HER2 on breast cancer tissues |
| Alternative Fixatives | 10 positive and 10 negative cases | Required for IHC performed on specimens fixed differently from initial validation |
| Assay-Scoring System | Separate validation for each combination | Particularly for predictive markers (e.g., PD-L1, HER2) with multiple scoring systems |
| Regulatory Compliance | Follow current LAP Checklist | CAP-accredited laboratories must comply with current edition requirements |
Comprehensive IHC Protocol for FFPE Tissues
Deparaffinization and Rehydration
The initial critical steps in IHC staining of FFPE tissues involve removing the paraffin embedding medium and rehydrating the tissue sections [28] [84]:
- Deparaffinization: Immerse slides in xylene through three washes of 5 minutes each [28] [84].
- Rehydration: Transfer slides through a series of ethanol solutions with decreasing concentrations:
- Final Rinse: Place slides in deionized water through two washes for 5 minutes each [28] [84].
Technical Note: Complete deparaffinization is essential before moving to alcohol grades. If traces of wax remain, additional immersion in xylene for 5 minutes is recommended [28].
Antigen Retrieval
Antigen retrieval is crucial for reversing formaldehyde-induced crosslinks that mask epitopes [26]:
- Heat-Induced Epitope Retrieval (HIER):
- Cooling: Allow slides to cool on the benchtop for 30 minutes [28].
- Rinse: Wash sections by immersing in distilled water for 5 minutes [28].
Alternative Method: For antigens susceptible to crosslinking during fixation, protein digestion with Proteinase K (20μg/mL in TE buffer, pH 8.0) or Trypsin (0.05% with 0.1% CaCl, pH 7.8) for 10-20 minutes at 37°C may be employed [26].
Permeabilization and Blocking
- Endogenous Peroxidase Blocking (for chromogenic detection with HRP):
- Permeabilization:
- Wash sections twice for 10 minutes each with permeabilization buffer containing 1% animal serum and 0.4% Triton X-100 in PBS (PBS-T) [28].
- Blocking Non-specific Binding:
Antibody Staining and Detection
- Primary Antibody Incubation:
- Apply primary antibody diluted in 1% animal serum in PBS (with or without 0.05-0.1% Triton X-100) [28].
- Incubate at room temperature for 1-2 hours, then continue overnight at 4°C in a humidified chamber [28] [84].
- Use manufacturer's recommended dilution; typical starting dilution is 2-5 μg/mL if not specified [28].
- Washing:
- Wash sections twice with 1% serum in PBS-T for 10 minutes each [28].
- Secondary Antibody Incubation:
- Amplification (for biotinylated primary antibodies):
Visualization and Mounting
- Chromogenic Development:
- Prepare working solution of DAB (500 μL of DAB stock + 2.5 μL 30% H₂O₂ in 50 mL 1X PBS, pH 7.4) [26].
- Apply to tissue sections and monitor development until brown staining appears (seconds to 10 minutes) [84].
- Safety Note: DAB is a suspected carcinogen; wear gloves and work in a fume hood with proper handling and disposal [26] [84].
- Counterstaining:
- Apply hematoxylin according to manufacturer's instructions for nuclear counterstaining [26].
- Dehydration and Mounting:
Experimental Workflow and Signaling Pathways
IHC Experimental Workflow for FFPE Tissues
The Scientist's Toolkit: Essential Research Reagents
Table: Essential Reagents for IHC Validation and Staining
| Reagent Category | Specific Examples | Function |
|---|---|---|
| Tissue Processing | Xylene, Ethanol series (50%, 70%, 95%, 100%) | Deparaffinization and rehydration of FFPE sections |
| Antigen Retrieval | 10 mM Sodium Citrate buffer (pH 6.0), Proteinase K, Trypsin | Reverse formaldehyde cross-linking and expose epitopes |
| Blocking Reagents | Normal serum (species-matched), Triton X-100 | Reduce non-specific background staining |
| Primary Antibodies | Target-specific monoclonal or polyclonal antibodies | Specifically bind to target antigen of interest |
| Detection Systems | Biotinylated secondary antibodies, ABC-HRP, HRP-polymer | Amplify signal and enable visualization |
| Chromogens | DAB (3,3'-Diaminobenzidine), AEC, Fast Red | Produce colored precipitate at antigen site |
| Counterstains | Hematoxylin, DAPI | Provide contrasting nuclear staining |
| Mounting Media | Permount, aqueous mounting media | Preserve stained slides for microscopic analysis |
Implementation Considerations for Compliance
When implementing these guidelines, laboratories should note that while evidence-based guidelines are not mandatory, CAP-accredited laboratories must comply with the current edition of the Laboratory Accreditation Program (LAP) Checklist requirements [21]. The major changes in the 2024 guideline are not currently required by LAP or any regulatory/accrediting agency, but laboratories are encouraged to adopt these evidence-based recommendations to increase the quality and safety of clinically important assays [21].
For laboratories implementing IHC on cytology specimens, the guideline does not mandate revalidation of all currently performed assays. However, some validation study should have been performed on cytology specimens whose tissues were not fixed in the same manner as tissues used for original assay validation. If documentation of such a study does not exist, the laboratory may not be in compliance with an accrediting agency [21].
The Clinical Laboratory Improvement Amendments of 1988 (CLIA) requires laboratories to validate/verify the performance characteristics of all assays before issuing patient results. Thus, even for assays in clinical use, lack of documentation of previous analytic validation may result in citation by an accrediting agency [21].
In immunohistochemistry (IHC), the observed staining pattern is only as reliable as the controls that validate it. Appropriate controls are not merely supplementary; they are essential components that confirm the specificity of antibody-antigen interactions, verify protocol effectiveness, and identify non-specific signals or background interference [85]. For researchers working with Formalin-Fixed Paraffin-Embedded (FFPE) tissues, where fixation-induced epitope masking and elevated background are common challenges, implementing a comprehensive control strategy is particularly critical. This application note details the establishment and interpretation of positive, negative, and isotype controls, providing a structured framework to ensure the integrity and reproducibility of IHC data within drug development and research settings [86].
The Critical Role of Controls in IHC
Controls serve as internal checks that differentiate true positive signals from artefacts caused by non-specific binding, autofluorescence, or procedural errors [86]. In the context of a multi-step IHC protocol for FFPE tissues, each stage introduces potential variables that can compromise result interpretation. Without proper controls, researchers risk drawing erroneous conclusions, potentially misidentifying the presence, location, or abundance of a target protein.
The consequences of inadequate controls include false-positive results from non-specific antibody binding and false-negative results from suboptimal protocol conditions [85]. A robust experimental design incorporates controls to confirm that the detected signal genuinely represents the target antigen and that any negative findings are accurate. Furthermore, the use of validated controls is a cornerstone of experimental reproducibility, a fundamental requirement for scientific credibility and the translational application of research findings in drug development [87].
Essential IHC Controls: Principles and Protocols
A complete IHC control strategy involves multiple control types, each designed to address a specific question regarding the validity of the staining result. The most fundamental controls for ensuring antibody specificity are the positive tissue control, negative tissue control, and isotype control.
Table 1: Overview of Essential IHC Controls
| Control Type | Purpose | Interpretation of Valid Result | Key Considerations |
|---|---|---|---|
| Positive Tissue Control [85] | Verifies that the entire IHC protocol is functioning correctly. | Specific staining is observed in the control tissue. | Tissue must be known to express the target antigen. |
| Negative Tissue Control [85] [86] | Checks for non-specific signals and false-positive results. | No specific staining is observed in the control tissue. | Tissue must be known not to express the target protein. |
| Isotype Control [85] | Checks for non-specific staining caused by the primary antibody's isotype interacting with tissue components. | Staining is negligible or distinct from the specific signal. | Must match the primary antibody's host species, isotype, and concentration. |
| No Primary Control [85] [86] | Assesses non-specific binding of the secondary antibody and detection system. | No staining is observed. | Primary antibody is omitted; only antibody diluent is used. |
| Endogenous Background Control [85] | Identifies inherent tissue properties that cause background staining. | No endogenous fluorescence or chromogenic signal is present. | A section is examined before antibody application. |
| Absorption Control [85] [86] | Demonstrates that the primary antibody binds specifically to the intended antigen. | Little to no staining is observed. | Antibody is pre-absorbed (neutralized) with its immunogen. |
Positive Tissue Controls
A positive control consists of a tissue section known to express the protein of interest, processed in parallel with the test samples using the identical IHC protocol [85]. This control verifies that every step of the procedure—from antigen retrieval to detection—is working optimally. If the test sample shows negative staining, a positive result from the positive control indicates that the procedure is working and the negative result in the test sample is likely valid [85].
Protocol: Implementation of a Positive Tissue Control
- Selection: Identify a tissue type with well-documented expression of your target protein. Antibody datasheets or public protein databases (often linked via Uniprot IDs provided by manufacturers) are reliable sources for this information [86].
- Preparation: The control tissue should be fixed, processed, and embedded (FFPE) using the same methods as your experimental samples to ensure consistency [43].
- Staining: Process the positive control slide alongside every batch of experimental slides, using the same reagents, dilutions, and incubation times.
- Interpretation: The expected outcome is a clear, specific staining pattern in the positive control. The absence of staining indicates a problem with the protocol that requires troubleshooting [86].
Negative Tissue Controls
A negative control is a tissue section known not to express the target antigen [85]. This control is used to identify non-specific binding of antibodies or detection reagents that could lead to false-positive results in the test samples. Any staining observed in a true negative control suggests issues with antibody specificity or protocol conditions that need to be addressed.
Protocol: Implementation of a Negative Tissue Control
- Selection: Source a tissue type confirmed to lack expression of the target protein. Genetically engineered knockout (KO) or knockdown (KD) tissues, which eliminate or significantly reduce the target protein, represent the most reliable form of negative control [86].
- Preparation: The negative control tissue should be an FFPE block, prepared identically to the test samples.
- Staining: Process the negative control slide in the same run as the experimental slides.
- Interpretation: A valid result shows no specific staining. Any significant staining indicates non-specific binding, prompting optimization of blocking conditions, antibody concentration, or washing stringency [85] [86].
Isotype Controls
An isotype control is used to distinguish specific antigen-mediated staining from background staining caused by non-specific interactions of the primary antibody's Fc region or other hydrophobic/electrostatic interactions with tissue components [85]. This control is particularly important when working with monoclonal antibodies.
Protocol: Implementation of an Isotype Control
- Selection: Obtain a non-immune antibody that matches the primary antibody's host species, immunoglobulin class (e.g., IgG1, IgG2a), clonality (monoclonal or polyclonal), and conjugate (e.g., biotinylated, fluorescent) [85] [86].
- Preparation: Dilute the isotype control antibody to the same concentration as the specific primary antibody [85].
- Staining: On a consecutive section of the test tissue, replace the specific primary antibody with the isotype control antibody. All other steps in the protocol remain unchanged.
- Interpretation: A lack of staining in the isotype control confirms that the signal observed with the primary antibody is specific to the target antigen. Background staining in the isotype control that mirrors the test sample suggests non-specific binding [86].
The following workflow diagram illustrates how these essential controls are integrated into a standard IHC experiment.
The Scientist's Toolkit: Key Reagent Solutions
The reliability of IHC controls is dependent on the quality and appropriateness of the reagents used. The following table details essential materials and their functions for successful IHC control experiments.
Table 2: Essential Research Reagent Solutions for IHC Controls
| Reagent Category | Specific Examples | Function in Control Experiments |
|---|---|---|
| Antigen Retrieval Reagents | Citrate Buffer (pH 6.0) [26], EDTA Buffer (pH 8.0/9.0) [87] [2], Proteinase K [26] | Reverse formaldehyde cross-links to expose epitopes. Critical for consistent results in both test and control FFPE samples. |
| Blocking Buffers | Normal Serum [26], Animal-Free Blocking Solution [87], IHC/ICC Blocking Buffer [17] | Reduce non-specific background binding of antibodies, a key factor in validating negative and isotype controls. |
| Antibody Diluent | SignalStain Antibody Diluent [87], Commercial Antibody Diluents | Optimizes antibody stability and signal-to-noise ratio. Using the same diluent for primary and isotype controls is essential. |
| Validated Primary Antibodies | Phospho-specific Antibodies [87], Total Protein Antibodies | The foundation of specificity. Using highly validated antibodies reduces the risk of false positives that controls must detect. |
| Isotype Control Antibodies | Rabbit Monoclonal IgG Isotype Control, Mouse Monoclonal IgG1 Isotype Control | Matched to the primary antibody to accurately assess non-specific Fc receptor binding. |
| Detection Systems | Polymer-based HRP Detection [87], Biotin-Free Systems [87] | Amplify signal while minimizing background (e.g., from endogenous biotin), crucial for clean negative controls. |
| Chromogens | DAB Substrate Kits [87] | Produce an insoluble colored precipitate at the antigen site. Consistent performance is vital for comparing test and control slides. |
Integrating a comprehensive set of controls is a non-negotiable practice for generating robust, reliable, and interpretable IHC data. Positive, negative, and isotype controls each provide unique and critical information that, when combined, instill high confidence in experimental outcomes. For researchers and drug development professionals relying on FFPE tissues, adhering to the detailed protocols and reagent selection guidelines outlined in this application note will significantly enhance the validity of their findings, support rigorous scientific inquiry, and contribute to reproducible research.
Formalin-fixed, paraffin-embedded (FFPE) tissues represent a vast and invaluable resource for biomedical research, particularly in translational studies and drug development. These archived samples, often linked with long-term clinical data, are essential for retrospective biomarker discovery and validation. The accurate quantification of protein targets within these tissues is crucial for understanding disease mechanisms and therapeutic efficacy. Two principal technologies are employed for this purpose: immunohistochemistry (IHC) and liquid chromatography-mass spectrometry (LC-MS). Each method offers distinct advantages and limitations, making the choice between them dependent on the specific research objectives, required sensitivity, and desired throughput. This application note provides a detailed comparative analysis of IHC and LC-MS for protein quantification in FFPE tissues, presenting structured experimental protocols, performance metrics, and practical implementation workflows to guide researchers in selecting and optimizing the appropriate methodology for their investigations.
Fundamental Principles and Capabilities
Immunohistochemistry (IHC) is an immunoassay that uses enzyme-labeled or fluorescently-labeled antibodies to visually identify and localize specific protein antigens within tissue sections. The technique provides spatial context, allowing researchers to assess protein expression within specific histological regions or cell types. The traditional output of IHC is semi-quantitative, often based on pathologist visual scoring of staining intensity and distribution [28] [88] [89].
Liquid Chromatography-Mass Spectrometry (LC-MS) for proteomic analysis involves the extraction and proteolytic digestion of proteins from FFPE tissue, followed by chromatographic separation and mass spectrometric detection of resulting peptides. This method provides absolute or relative quantification of hundreds to thousands of proteins simultaneously in an unbiased manner, without the need for specific antibodies [90] [91] [92].
Quantitative Comparison of Performance Characteristics
Table 1: Direct Comparison of IHC and LC-MS Performance for FFPE Tissue Analysis
| Performance Characteristic | IHC | LC-MS/MS |
|---|---|---|
| Throughput | Medium to High (can be automated) | Medium (increasing with new instrumentation) |
| Sensitivity | High (for specific targets) | Variable (dependent on target abundance and instrumentation) |
| Multiplexing Capacity | Low to Medium (typically 1-4 targets per section) | High (thousands of proteins per run) |
| Spatial Resolution | Excellent (cellular/subcellular) | Poor (typically requires tissue homogenization) |
| Quantification Type | Semi-quantitative (visual scoring) or Quantitative (with digital pathology) | Absolute or Relative (truly quantitative) |
| Dynamic Range | Limited (3-4 orders of magnitude) | Wide (4-5 orders of magnitude) |
| Antibody Dependency | Required (potential batch-to-batch variability) | Not required |
| Data Output | Staining intensity, distribution pattern | Protein abundance, post-translational modifications |
| Impact of FFPE Storage Time | Significant signal loss over time [90] | Minimal impact on protein quantification [90] |
| Typical Proteins Quantified per Experiment | 1-4 | ~4,000 in cardiac tissue [91]; ~700-1,600 in cancer tissue [92] |
Impact of FFPE Storage Time on Analytical Results
A critical finding from recent investigations reveals a fundamental difference in how FFPE storage time affects IHC versus LC-MS analyses. Studies have demonstrated that while IHC signals for numerous proteins show significant, time-dependent decreases during long-term storage of FFPE specimens, LC-MS signals remain constant. This suggests that storage-associated signal loss in IHC results primarily from decreased immunoreactivity rather than actual protein degradation. This distinction has profound implications for retrospective studies, positioning LC-MS as a more reliable method for quantifying proteins in archived samples [90].
Detailed Experimental Protocols
IHC Protocol for FFPE Tissues
The following protocol provides a standardized workflow for IHC analysis of FFPE tissues, consolidating methodologies from multiple sources [28] [88] [11].
Sample Preparation: Fixation and Embedding
- Tissue Fixation: Immediately following dissection, immerse tissue samples in 10% Neutral Buffered Formalin (NBF) or 4% Paraformaldehyde (PFA). For small tissue pieces (≤5 mm thickness), fix for 18-24 hours at 4°C. For perfusion fixation, flush the vascular system with 4% PFA prior to tissue harvesting [11].
- Dehydration and Clearing: Following fixation, wash tissues in PBS and process through a graded ethanol series: 50% (1-2 hours), 75% (20-30 minutes), 85% (20-30 minutes), 95% (20-30 minutes), and 100% ethanol (20-30 minutes, two changes). Clear tissues in xylene or a less hazardous alternative (10-20 minutes, two changes) [11].
- Paraffin Infiltration and Embedding: Infiltrate cleared tissues with molten paraffin wax (50-60°C) under vacuum: 40 minutes, 1 hour, and 1 hour (three changes). Orient tissues in embedding molds, fill with fresh paraffin, and cool rapidly to form blocks [11].
Sectioning and Staining
- Sectioning: Cut paraffin blocks into 3-10 μm sections using a microtome. Float ribbons on a 40-45°C water bath, collect onto coated microscope slides, and dry overnight at 37°C [11].
- Deparaffinization and Rehydration: Deparaffinize slides through xylene (10-15 minutes, two changes) followed by rehydration through a descending ethanol series: 100% (5 minutes, two changes), 95% (5 minutes, two changes), 85% (5 minutes), 75% (5 minutes), and finally to water [28] [11].
- Antigen Retrieval: Perform Heat-Induced Epitope Retrieval (HIER) by incubating slides in 10 mM Sodium Citrate buffer (pH 6.0) at sub-boiling temperature for 10-20 minutes. Alternatively, use enzymatic retrieval with proteinase K, trypsin, or pepsin [28] [88].
- Blocking: Draw a hydrophobic barrier around the tissue section. Block endogenous peroxidases (if using peroxidase-based detection) and block nonspecific binding by incubating with 5% animal serum (from the host species of the secondary antibody) in PBS with 0.1% Triton X-100 for 30 minutes at room temperature [28] [88].
- Antibody Incubation: Apply primary antibody diluted in 1% serum/PBS and incubate for 1-2 hours at room temperature, then overnight at 4°C. Wash with PBS/0.1% Triton X-100 and apply enzyme-conjugated secondary antibody for 1-2 hours at room temperature [28].
- Detection and Counterstaining: For enzymatic detection, apply appropriate chromogenic substrate (e.g., DAB for peroxidase). Counterstain with hematoxylin, mount with appropriate mounting medium, and image with a brightfield microscope [28] [88].
IHC Data Analysis and Scoring Methods
Multiple approaches exist for interpreting IHC results, each with specific applications and limitations [89]:
Table 2: IHC Data Interpretation Methods
| Method | Description | Applications |
|---|---|---|
| Morphological Description | Qualitative description of staining patterns and intensity. | Pilot studies, non-primary method. |
| Cell Counting | Counting absolute numbers of positively stained cells. | Simple yes/no staining patterns. |
| H-Score | Semiquantitative score incorporating intensity and distribution: (0 × % negative) + (1 × % weak) + (2 × % moderate) + (3 × % strong). | Widely applicable for tissue analysis. |
| Quickscore | Product of intensity grade (0-3) and percentage of positive cells (0-4). | Rapid assessment. |
| Digital Image Analysis | Computer-aided quantification of staining intensity and area. | Objective, reproducible quantification. |
| Allred Score | Specific for estrogen receptor, combines proportion and intensity scores. | Clinical breast cancer assessment. |
LC-MS Protocol for FFPE Tissues
The following protocol describes a robust pipeline for LC-MS-based protein quantification from FFPE tissues, incorporating recent methodological advances [90] [91].
Sample Preparation and Protein Extraction
- Deparaffinization and Rehydration: Cut 2-4 sections of 10-20 μm thickness from FFPE blocks. Deparaffinize with xylene (or substitute), followed by rehydration through a graded ethanol series (100%, 95%, 70%) ending with water [90].
- Protein Extraction Using f-SEPOD: A surfactant cocktail-based procedure (f-SEPOD) provides high and reproducible recovery of target signature peptides. Extract proteins using a high-concentration surfactant cocktail under optimized conditions to reverse formalin-induced cross-links and achieve near-complete protein recovery [90].
- Protein Digestion: Reduce and alkylate extracted proteins. Digest using sequencing-grade trypsin (typically 1:50 enzyme-to-protein ratio) at 37°C for 12-16 hours. Desalt peptides using C18 solid-phase extraction columns [91].
LC-MS Analysis and Quantification
- Chromatographic Separation: Separate peptides using reverse-phase nano-liquid chromatography with acetonitrile/water gradients (typically 60-180 minutes) [90] [91].
- Mass Spectrometric Detection:
- Data-Dependent Acquisition (DDA): Suitable for discovery proteomics. The mass spectrometer automatically selects the most abundant peptides for fragmentation.
- Data-Independent Acquisition (DIA): Ideal for large-scale quantitative studies. All peptides in predetermined m/z windows are fragmented, minimizing missing values and improving reproducibility [91].
- Multiple Reaction Monitoring (MRM): Used for highly sensitive and reproducible targeted quantification of specific proteins [90].
- Data Analysis: Identify proteins by searching MS/MS spectra against appropriate protein databases. For quantification, use either label-free methods based on peptide ion intensities or isobaric labeling approaches (e.g., TMT) [91].
Critical Considerations for LC-MS of FFPE Tissues
- Calibration Strategy: Conventional spike-and-extract approaches for calibration can cause substantial negative biases. Instead, use FFPE-treated calibration standards where protein standards undergo the entire FFPE process, closely resembling the analytical behavior of target proteins in FFPE specimens [90].
- Storage Time Impact: LC-MS signals remain constant in FFPE tissues despite long-term storage, unlike IHC signals which often decrease. This makes LC-MS particularly suitable for retrospective studies using archived samples [90].
Visual Workflows
IHC Workflow for FFPE Tissues
Diagram 1: Complete IHC workflow for FFPE tissues, from sectioning through to analysis.
LC-MS Workflow for FFPE Tissues
Diagram 2: LC-MS proteomics workflow for FFPE tissues, from sample preparation to data interpretation.
The Scientist's Toolkit: Essential Research Reagents
Table 3: Essential Reagents for FFPE Tissue Protein Analysis
| Reagent Category | Specific Examples | Function | Application |
|---|---|---|---|
| Fixatives | 10% Neutral Buffered Formalin, 4% Paraformaldehyde | Preserve tissue architecture and prevent degradation | IHC, LC-MS |
| Embedding Media | Paraffin wax, OCT compound | Provide structural support for sectioning | IHC, LC-MS |
| Antigen Retrieval Reagents | Sodium Citrate buffer (pH 6.0), Tris-EDTA buffer (pH 9.0), Proteinase K | Reverse formaldehyde-induced cross-links | IHC |
| Blocking Agents | Normal serum, BSA, Non-fat dry milk | Reduce non-specific antibody binding | IHC |
| Primary Antibodies | Monoclonal or polyclonal antibodies | Bind specifically to target antigens | IHC |
| Detection Systems | HRP-conjugated secondaries, Avidin-Biotin Complex, Polymer-based systems | Amplify signal for visualization | IHC |
| Protein Extraction Buffers | Surfactant cocktails, SDS-containing buffers, Urea-based buffers | Extract proteins from FFPE matrix | LC-MS |
| Digestion Enzymes | Trypsin, Lys-C | Digest proteins into peptides for MS analysis | LC-MS |
| Chromatography Columns | C18 reverse-phase columns | Separate peptide mixtures | LC-MS |
| Mass Spectrometry Standards | Stable isotope-labeled peptides, TMT tags | Enable precise quantification | LC-MS |
Application Notes and Implementation Guidance
Method Selection Criteria
Choosing between IHC and LC-MS depends on several factors:
- Spatial Information Needs: IHC is unequivocally superior when cellular or subcellular localization information is critical.
- Multiplexing Requirements: LC-MS can quantify thousands of proteins simultaneously, while IHC typically examines 1-4 targets per section.
- Quantification Requirements: LC-MS provides truly quantitative data, while IHC is semi-quantitative without specialized imaging systems.
- Sample Age Considerations: For long-term archived samples, LC-MS may provide more reliable quantification due to its resistance to storage-related signal loss [90].
- Antibody Availability: LC-MS does not require specific antibodies, making it suitable for novel targets or when antibody quality is questionable.
Emerging Applications and Future Directions
Recent advances in both technologies are expanding their applications in FFPE tissue analysis. For IHC, digital pathology and automated image analysis are improving quantification objectivity and reproducibility [93]. For LC-MS, new methods like the f-SEPOD protocol are enhancing peptide recovery from FFPE tissues, enabling more accurate absolute quantification of target proteins [90]. These developments are particularly relevant for therapeutic antibody pharmacokinetics studies and biomarker validation in clinical samples.
The integration of both technologies represents a powerful approach - using LC-MS for unbiased protein discovery and IHC for spatial validation of promising targets within the tissue architecture. This combined approach leverages the respective strengths of each method while mitigating their individual limitations.
The reliability of immunohistochemistry (IHC) results in research and diagnostic settings critically depends on controlling pre-analytical variables. Among these, formalin fixation time and the storage conditions of formalin-fixed paraffin-embedded (FFPE) tissues represent significant factors that can profoundly impact antigen preservation and detection. Understanding and standardizing these parameters is essential for ensuring reproducible and accurate IHC data, particularly when utilizing valuable archival specimens in retrospective studies. This application note synthesizes current evidence to provide detailed protocols and evidence-based recommendations for managing fixation and storage variables in FFPE tissue research.
Quantitative Effects of Fixation and Storage
Impact of Formalin Fixation Time
Table 1: Effects of Prolonged Formalin Fixation on Biomarker Detection
| Fixation Duration | Effect on RNAscope Signal | Effect on Protein Epitopes | Recommended Action |
|---|---|---|---|
| 1-28 days | Maintained signal intensity and percent area for 16S rRNA [94]. | Variable effects; significant decrease in NeuN and Nissl body staining intensity observed after prolonged fixation [95]. | Acceptable for RNA and some protein targets. |
| >30 days | Gradual signal decline begins; irreversible covalent bonds form, fragmenting nucleic acids [94]. | Increased epitope masking due to protein cross-links [94] [95]. | Antigen retrieval optimization critical. |
| 180 days | Detectable but significantly decreased signal intensity and percent area [94]. | Not specifically quantified, but antigenicity is generally reduced [94]. | May require more sensitive detection methods. |
| 270 days | No detectable RNAscope signal [94]. | Not specifically quantified, but antigenicity is severely compromised [94]. | Tissues may be unsuitable for RNA detection. |
Impact of FFPE Block and Section Storage
Table 2: Effects of Storage Conditions on FFPE Tissues and Sections
| Storage Format & Condition | Effect on Antigens/RNA | Recommended Maximum Storage |
|---|---|---|
| FFPE Blocks (Room Temperature) | RNA detectable via RNAscope ISH after 15 years of storage [94]. Protein antigenicity varies by target; some remain stable for years. | Blocks can be stored for decades for RNA and histology. IHC success is antigen-dependent [94] [96]. |
| Unstained Sections (Room Temperature) | Rapid antigen loss; PD-L1 (SP142) positivity in breast cancer dropped to ~83% after 2 weeks and ~33% after 24 weeks [97]. Proteomics analysis (LC-MS) was unaffected over 48 weeks [98] [99]. | For IHC, use within 2 weeks. For proteomics, sections are suitable for at least 48 weeks [98] [97]. |
| Unstained Sections (4°C or -20°C) | Significantly delays antigen loss; PD-L1 positivity remained >80% for 4 weeks [97]. Cold storage slows nucleic acid degradation in FFPE sections [96]. | For sensitive IHC targets, store at low temperatures and use within 4 weeks for optimal results [97]. |
Experimental Protocols for Validation
Protocol: Validating Fixation Time for a New Antigen
To establish the maximum acceptable fixation time for a specific antigen, the following controlled experiment is recommended.
Materials:
- Tissue samples (e.g., rodent model or surgical specimens)
- 10% Neutral Buffered Formalin (NBF)
- Standard materials for processing, embedding, and IHC
Method:
- Sample Preparation: Divide a single tissue sample into multiple, thin (<1 cm thick) adjacent sections.
- Controlled Fixation: Immerse each section in a 10:1 volume of 10% NBF for varying durations (e.g., 24h, 48h, 72h, 1 week, 2 weeks, 4 weeks).
- Processing: After the allotted fixation time, transfer all tissues to 70% ethanol for a standardized period (e.g., 24-48 hours) before routine processing and paraffin embedding [94].
- Sectioning and Staining: Cut sections from all blocks simultaneously and perform IHC for the target antigen in a single run to minimize technical variation.
- Analysis: Qualitatively and quantitatively (e.g., using H-score or digital image analysis) compare staining intensity, completeness, and specificity across fixation time groups.
Protocol: Assessing Section Storage Stability
This protocol evaluates the stability of unstained sections under different storage temperatures for a new antibody.
Materials:
- FFPE block with known positive expression of the target
- Slides suitable for IHC
- Storage environments (Room Temperature, 4°C, -20°C)
Method:
- Sectioning: Cut a large number of serial sections (e.g., 4-5 µm) from the chosen FFPE block on the same day.
- Baseline Staining: Immediately stain a subset of sections (Week 0 control) to establish the reference staining pattern.
- Storage: Divide the remaining unstained sections into groups for storage at different temperatures (Room Temperature, 4°C, -20°C). Keep slides in a closed box to protect from dust and light [97].
- Longitudinal Staining: At predetermined time points (e.g., 1, 2, 4, 8, 12, and 24 weeks), retrieve slides from each storage condition and stain them concurrently with a fresh positive control section.
- Analysis: Compare the staining intensity and quality of the stored slides against the Week 0 control. Statistical analysis, such as the Intraclass Correlation Coefficient (ICC), can be used to determine the time point at which concordance becomes "poor" (ICC < 0.5) [97].
Workflow and Decision Pathways
The following diagram synthesizes the experimental data into a logical workflow for handling FFPE tissues, from fixation to staining, to minimize pre-analytical artifacts.
Optimized FFPE Tissue Handling Workflow
The Scientist's Toolkit: Research Reagent Solutions
Table 3: Essential Reagents and Kits for Managing Pre-Analytical Variables
| Item | Function | Application Note |
|---|---|---|
| 10% Neutral Buffered Formalin (NBF) | Standard fixative that preserves morphology through protein cross-linking. | A 10:1 volume ratio of fixative to tissue is recommended for penetration [94]. |
| RNAscope Assay | A specialized in situ hybridization platform for detecting RNA in FFPE tissues with high sensitivity. | Validated for detecting viral RNA in tissues stored as FFPE blocks for up to 15 years [94]. |
| Heat-Induced Epitope Retrieval (HIER) Buffers | Solutions (e.g., Citrate pH 6.0, Tris-EDTA pH 9.0) to break cross-links and unmask epitopes. | Critical for recovering antigenicity in over-fixed or archived tissues. Using a microwave is preferred over a water bath [100]. |
| SignalStain Antibody Diluent | A proprietary buffer for diluting primary antibodies to enhance specific signal and reduce background. | Superior performance compared to TBST/5% NGS for some antibodies, as per product-specific data sheets [100]. |
| Polymer-Based Detection Systems | Non-biotin detection reagents (e.g., SignalStain Boost IHC Detection Reagents) for high sensitivity. | Reduces background from endogenous biotin, especially in tissues like liver and kidney [100]. |
| Peroxidase Suppressor | Quenches endogenous peroxidase activity to minimize background in HRP-based detection. | Incubate slides in 3% H2O2 for 10 minutes prior to primary antibody application [13] [100]. |
The integrity of IHC data is fundamentally rooted in the meticulous control of pre-analytical stages. Evidence consistently demonstrates that prolonged formalin fixation and suboptimal storage of unstained sections are key drivers of antigen degradation and signal loss. By adopting the standardized protocols, validated reagents, and logical workflows outlined in this application note, researchers can significantly enhance the reliability and reproducibility of their findings from FFPE tissues, thereby unlocking the full potential of both prospective and invaluable archival tissue resources.
The advent of targeted therapies, particularly antibody-drug conjugates (ADCs) like trastuzumab deruxtecan (T-DXd), has fundamentally transformed breast cancer treatment paradigms, making accurate assessment of biomarkers like HER2 more critical than ever [101]. Similarly, the effectiveness of immunotherapies hinges on the precise quantification of PD-L1 expression. However, traditional immunohistochemistry (IHC) assays, originally designed to detect highly amplified HER2 expression, face significant challenges in the precise quantification required for "HER2-low" and "ultra-low" expression categories [101] [102]. Recent multi-institutional studies reveal substantial discordance among pathologists, particularly in distinguishing HER2 IHC 0 from 1+ cases, with one study reporting an overall percent agreement as low as 25% for IHC 0 scores [102]. This validation guide provides detailed protocols and analytical frameworks to standardize the assessment of predictive biomarkers HER2 and PD-L1 in FFPE tissues, ensuring accurate patient selection for novel targeted therapies.
Principles of Analytical Validation for Predictive IHC Assays
The College of American Pathologists (CAP) 2024 guideline update establishes harmonized principles for validating predictive IHC markers, emphasizing requirements specific to assays with distinct scoring systems like HER2 and PD-L1 [21]. These guidelines mandate that laboratories separately validate each assay-scoring system combination to ensure reproducible results across different platforms and interpreters.
Core Validation Requirements
Key validation parameters for predictive biomarkers must demonstrate:
- Accuracy and Precision: Achieving at least 90% concordance with reference standards or validated comparators is required for all predictive IHC assays, including HER2 and PD-L1 [21].
- Reproducibility: Inter-observer and inter-institutional concordance must be established, particularly challenging for HER2-low categories where traditional assays show poor agreement [102].
- Linearity and Reportable Range: Defining the dynamic range of detection is especially crucial for quantitative assays measuring low expression levels [103].
Table 1: CAP Validation Requirements for Predictive Biomarker Assays
| Validation Parameter | Requirement | Special Considerations for HER2/PD-L1 |
|---|---|---|
| Accuracy/Concordance | ≥90% agreement with reference standard [21] | Must be validated for each scoring category (0, 1+, 2+, 3+) |
| Precision | Coefficient of variation <10% for quantitative assays [103] | Must include inter-observer variability assessment |
| Assay-Scoring System Validation | Each scoring system must be separately validated per tumor site/clinical indication [21] | HER2 scoring differs by tumor site; PD-L1 uses different scoring algorithms (TPS, CPS) |
| Cytology Specimen Validation | Minimum 10 positive and 10 negative cases for alternative fixatives [21] | Required when cytology specimens are not fixed identically to validation tissues |
Advanced Methodologies for HER2 Quantification
The Challenge of HER2-low Quantification
Traditional HER2 IHC assays face significant limitations in the low expression range. The Ventana 4B5 assay, while excellent for detecting HER2 amplification, demonstrates substantial inter-rater discordance for HER2-low categories, with overall percent agreement plateaus of only 59.4% for distinguishing 0 from not-0 cases [102]. This variability has profound clinical implications as patients with HER2-low breast cancer (IHC 1+ or 2+/ISH-negative) may benefit from novel ADCs [101] [103].
High-Sensitivity HER2 Assay Protocol
Advanced quantitative methodologies enable more accurate HER2 measurement across the dynamic range:
Method Principle: Integration of IHC procedural requirements with ligand-binding assay precision to achieve attomole per square millimeter sensitivity [103].
Experimental Workflow:
Step-by-Step Protocol for FFPE Tissue Sections:
- Tissue Preparation: Section FFPE tissue blocks at 5-15μm thickness using a microtome and transfer to charged glass slides [2].
- Deparaffinization and Rehydration:
- Immerse slides in xylene (2 changes, 5 minutes each)
- Hydrate through graded ethanol series: 100%, 100%, 95%, 85%, 75%, 50% (3 minutes each)
- Rinse in distilled water followed by 1X PBS (5 minutes, 3 changes) [104]
- Heat-Induced Epitope Retrieval: Use citrate buffer (pH 6.0), EDTA buffer (pH 8.0), or Tris-EDTA buffer (pH 9.0). Boil slides in retrieval buffer and maintain at approximately 98°C for 15-20 minutes [2].
- Blocking: Incubate sections with protein block (3% BSA) for 1 hour at room temperature in a humidified chamber to prevent non-specific binding [104].
- Primary Antibody Incubation: Apply optimized dilution of HER2 primary antibody and incubate overnight at 4°C in a humidified chamber [2].
- Detection System: Utilize polymer-based detection systems for superior sensitivity and minimal background [105].
- Counterstaining and Mounting: Apply hematoxylin (chromogenic) or DAPI (fluorescent) counterstain, then mount with appropriate anti-fade mounting medium [106].
Quantitative HER2 Assessment and AI Integration
Advanced quantification approaches demonstrate high correlation between methodologies:
Table 2: Performance Metrics of HER2 Quantification Methods
| Methodology | Sensitivity Range | Correlation with Ground Truth | Clinical Utility |
|---|---|---|---|
| Quantitative IHC (qIHC) | Tunable detection across expression levels [101] | Established as ground truth | Stratifies HER2 low-expression patient groups [101] |
| AI-based Interpretation | High spatial resolution for heterogeneity [101] | Pearson correlation: 0.94 with qIHC [101] | Improves interpretation of IHC assays [101] |
| High-Sensitivity HER2 Assay | Attomole/mm² sensitivity [103] | Coefficient of variation: <10% [103] | Potential for improved T-DXd patient selection [103] |
PD-L1 Assay Validation Considerations
PD-L1 Scoring System Complexity
PD-L1 expression assessment employs multiple scoring systems based on tumor type and clinical context, including Tumor Proportion Score (TPS) and Combined Positive Score (CPS). Each assay-scoring system combination requires separate validation according to CAP guidelines [21].
Key Validation Challenges:
- Tumor cell vs. immune cell staining interpretation
- Multiple clinically relevant cut-off points
- Inter-platform reproducibility across different diagnostic assays
Multiplex Immunofluorescence Protocol for Immune Contexture
Multiplexed staining enables simultaneous evaluation of PD-L1 with other immune markers:
Procedure for Multiplexed Staining with Directly Conjugated Antibodies:
- Control Preparation: Create single-color controls for each primary antibody conjugate and nuclear counterstain-only control [104].
- Autofluorescence Reduction (Optional): Treat slides with working autofluorescence solution (4.5% H₂O₂ and 24mM NaOH in PBS) under white light illumination for 30 minutes [104].
- Multiplex Labeling: Prepare master mix containing all primary antibody conjugates diluted in blocking buffer. Incubate 1 hour at room temperature or overnight at 4°C [104].
- Nuclear Counterstaining: Apply DAPI or other fluorescent nuclear stain [106].
- Mounting: Use hard-set (e.g., ProLong Glass) or soft-set (e.g., SlowFade Glass) antifade mountant based on imaging requirements [104].
The Scientist's Toolkit: Essential Research Reagents
Table 3: Key Research Reagent Solutions for Predictive Biomarker Validation
| Reagent Category | Specific Examples | Function & Application |
|---|---|---|
| Detection Systems | Polymer-based systems (POLYVIEW PLUS) [105] | High sensitivity, low background; optimal for low-abundance targets |
| LSAB (SAVIEW PLUS) [105] | Streptavidin-biotin based; high signal amplification | |
| Chromogens | DAB (3,3'-Diaminobenzidine) [2] | Brown precipitate; standard for brightfield IHC |
| Fast Red [106] | Red precipitate; alternative for multiplexing | |
| Counterstains | Hematoxylin [106] | Blue nuclear stain; standard for chromogenic IHC |
| DAPI [106] | Blue fluorescent DNA stain; standard for fluorescence | |
| Nuclear Fast Red [106] | Red nuclear stain; alternative to hematoxylin | |
| Mounting Media | ProLong Glass [104] | Hard-set antifade; long-term archival of samples |
| SlowFade Glass [104] | Soft-set antifade; allows coverslip removal |
Experimental Design and Validation Workflow
A comprehensive validation strategy incorporates both technical and interpretative components:
The evolving landscape of cancer therapeutics, particularly for breast cancer, demands increasingly sophisticated biomarker validation approaches. Traditional HER2 IHC assays, while fit-for-purpose for detecting gene-amplified cases, demonstrate substantial limitations in the precise quantification required for HER2-low and ultra-low expression categories [102]. The integration of quantitative methodologies, including qIHC and AI-based interpretation, provides promising pathways toward more reproducible and accurate biomarker assessment [101] [103]. Adherence to updated CAP guidelines ensuring proper validation of each assay-scoring system combination remains fundamental to generating clinically reliable results [21]. As therapeutic options continue to expand, robust validation frameworks will be increasingly critical for optimizing patient selection and maximizing therapeutic benefit from targeted agents.
Conclusion
Mastering IHC for FFPE tissues requires a meticulous approach that integrates robust protocols, systematic troubleshooting, and rigorous validation. The foundational understanding of tissue processing, combined with optimized antigen retrieval and precise antibody application, forms the basis for reliable staining. Effective troubleshooting is essential for diagnosing common issues, while adherence to established validation guidelines ensures data integrity, particularly for clinical applications. As the field advances, the synergy between traditional IHC and emerging technologies like LC-MS, which offers complementary quantitative data unaffected by storage-related immunoreactivity loss, promises to unlock deeper insights from precious FFPE archives, ultimately accelerating biomarker discovery and therapeutic development.
References
- 1. IHC antigen retrieval protocol [https://www.abcam.com/en-us/technical-resources/protocols/ihc-antigen-retrieval]
- 2. Immunohistochemistry Protocols [https://www.antibodies.com/applications/immunohistochemistry/ihc-protocol]
- 3. IHC Troubleshooting Guide | Common Issues & Fixes [https://www.bosterbio.com/protocol-and-troubleshooting/ihc-troubleshooting?srsltid=AfmBOopSM0g0W41TIu29N3_3ie4Vjz3dE06cUHO0eWMewmwWTOxpXc1D]
- 4. Immunohistochemistry (IHC) Troubleshooting Guide & the ... [https://www.cellsignal.com/learn-and-support/troubleshooting/ihc-troubleshooting-guide?srsltid=AfmBOop5qpH9VIbNGphu8E3f6k3PzAZ4UbngheJtmbJ7t9lQvAIp-Xtl]
- 5. A novel automated IHC staining system for quality control ... [https://www.por-journal.com/journals/pathology-and-oncology-research/articles/10.3389/pore.2025.1611964/full]
- 6. Optimizing Immunohistochemistry Validation and ... [https://www.precisionformedicine.com/blog/optimizing-ihc-validation-regulatory-strategies]
- 7. Optimal FFPE Tissue Fixation, Processing, and Embedding [https://cellcarta.com/science-hub/optimal-ffpe-tissue-fixation-processing-and-embedding-a-comprehensive-guide/]
- 8. What are FFPE samples and how are they prepared? [https://www.lexogen.com/blog/what-are-ffpe-samples-and-how-are-they-prepared/]
- 9. Immunohistochemistry (IHC): The Complete Guide [https://www.antibodies.com/applications/immunohistochemistry]
- 10. Immunohistochemistry (IHC) [https://www.cellsignal.com/learn-and-support/overview-of-ihc?srsltid=AfmBOoo4xdLIeGUvykmUUSXGj8A0Uz-KTZte4AI4K11-2N2rXB2d12_T]
- 11. IHC-P protocols [https://www.abcam.com/en-us/technical-resources/protocols/ihc-with-samples-in-paraffin]
- 12. FFPE Tissue Preparation Steps [https://www.biochain.com/blog/ffpe-tissue-preparation-steps/]
- 13. IHC Troubleshooting Guide [https://www.thermofisher.com/us/en/home/life-science/protein-biology/protein-biology-learning-center/protein-biology-resource-library/pierce-protein-methods/ihc-troubleshooting-guide.html]
- 14. Immunohistochemistry (IHC) [https://www.cellsignal.com/learn-and-support/overview-of-ihc?srsltid=AfmBOopjcwD6sre8YGxB7KW3ic7tVGTsNUrS9IAE5K5_n_7p6271QDC6]
- 15. 6 Essential IHC Controls for Reliable Staining Results [https://www.bosterbio.com/blog/post/6-ihc-controls-you-should-know?srsltid=AfmBOoo5sqBYmrDYAgZacG1B7dlhK3kLjUm8h3tywhbR7OkFAruptGc9]
- 16. Reagents for Reliable Immunohistochemistry (IHC) Results [https://www.cellsignal.com/applications/immunohistochemistry/solutions-for-consistent-ihc-results?srsltid=AfmBOooH_rAYutPUpLW0W_NocAUYit47ZE1y6aAy9yiYPkAusHr0yXT_]
- 17. IHC FFPE Tissue High pH Antigen Retrieval—Direct Method [https://www.thermofisher.com/us/en/home/references/protocols/cell-and-tissue-analysis/protocols/ihc-ffpe-tissue-high-ph-antigen-retrieval-direct-method.html]
- 18. Resources | Attardi Laboratory - Stanford Medicine [https://med.stanford.edu/attardilab/perp-ihc-protocol.html]
- 19. IHC and IF workflow essentials [https://bionordika.no/products/reagents-and-kits/ihc-and-if-workflow-essentials]
- 20. Impact of delayed and prolonged fixation on the evaluation ... [https://pmc.ncbi.nlm.nih.gov/articles/PMC6647403/]
- 21. Principles of Analytic Validation of Immunohistochemical ... [https://www.cap.org/protocols-and-guidelines/cap-guidelines/current-cap-guidelines/principles-of-analytic-validation-of-immunohistochemical-assays]
- 22. The impact of impaired tissue fixation in resected non-small ... [https://www.sciencedirect.com/science/article/pii/S0169500223000661]
- 23. Immunohistochemistry (IHC) [https://www.cellsignal.com/learn-and-support/overview-of-ihc?srsltid=AfmBOor_hhEx9ocaOgM4eGIfO5b6XRoRqLaU4yE1wERV07m1CSfXfywj]
- 24. Accelerated instability testing reveals quantitative mass ... [https://www.nature.com/articles/s41374-019-0366-y]
- 25. Fluorescent IHC Protocol: Paraffin-embedded Tissue ... [https://www.rndsystems.com/resources/protocols/protocol-preparation-and-fluorescent-ihc-staining-paraffin-embedded-tissue]
- 26. Immunohistochemical Staining of Formalin-Fixed Paraffin- ... [https://www.thermofisher.com/us/en/home/references/protocols/cell-and-tissue-analysis/protocols/ihc-staining-formalin-fixed-paraffin-embedded-tissues.html]
- 27. Comparative evaluation of a novel adhesive- Histoweld™ ... [https://pubmed.ncbi.nlm.nih.gov/40485404/]
- 28. FFPE Immunofluorescence Protocol | IHC Staining of ... [https://www.bio-techne.com/resources/protocols-troubleshooting/fluorescent-ihc-staining-of-ffpe-tissue]
- 29. IHC: Staining Protocol - Slide Mounted [https://www.sysy.com/protocols/protocol-ihc-slide]
- 30. Deparaffinization & Rehydration of FFPE Tissue Samples [https://superiorbiodx.com/blog/deparaffinization-protocol/]
- 31. IHC Epitope Retrieval (HIER vs. PIER) [https://www.novusbio.com/epitope-retrieval?srsltid=AfmBOorSurDrWMs1jA6y4vPy3J3VZxRCdO7kURdYLqktkctF8MOcjLtR]
- 32. Antigen Retrieval in IHC: Why It Matters and How to Get ... [https://www.atlasantibodies.com/knowledge-hub/blog/antigen-retrieval-in-ihc-why-it-matters-and-how-to-get-it-right/]
- 33. Immunohistochemistry (IHC) [https://www.cellsignal.com/learn-and-support/overview-of-ihc?srsltid=AfmBOor-UguQFqpIf0VJ6kNNyIufuomQGTUuCGmKA1dTMf1WHFvZ96y4]
- 34. Comparison of Antigen Retrieval Methods for ... [https://pmc.ncbi.nlm.nih.gov/articles/PMC11417793/]
- 35. Spatial profiling of chromatin accessibility in formalin-fixed ... [https://www.nature.com/articles/s41467-025-60882-3]
- 36. Tips and Techniques for Troubleshooting ... [https://www.sigmaaldrich.com/US/en/technical-documents/protocol/protein-biology/immunohistochemistry/antibody-immunohistochemistry-expert-tips-and-techniques?srsltid=AfmBOooGzkulzR4sOzn55YdHxMFwqXzlxn6UHIuitu_z4rWGBdmti5kq]
- 37. Chromogenic Immunohistochemistry (IHC) Paraffin Protocol [https://www.novusbio.com/support/support-by-application/immunohistochemistry-paraffin/protocol.html?srsltid=AfmBOorwwK1W19PLIlfq9-xgmAs3pauHiSRkFlw--OOmiEfioaLDZqcA]
- 38. Immunofluorescent IHC Staining of Formalin-Fixed Paraffin ... [https://www.novusbio.com/support-by-application/fluorescent-ihc-staining-of-ffpe-tissue]
- 39. Introduction To Immunohistochemistry [https://www.southernbiotech.com/introduction-immunohistochemistry/]
- 40. Optimization, Design and Avoiding Pitfalls in Manual ... [https://pmc.ncbi.nlm.nih.gov/articles/PMC6786767/]
- 41. Immunohistochemical detection of porcine reproductive ... [https://www.protocols.io/view/immunohistochemical-detection-of-porcine-reproduct-g8e9bzth7.html]
- 42. BestProtocols: IHC FFPE Tissue High pH Antigen Retrieval ... [https://www.thermofisher.com/us/en/home/references/protocols/cell-and-tissue-analysis/protocols/ihc-ffpe-tissue-high-ph-antigen-retrieval-indirect-method.html]
- 43. Intro to Immunohistochemistry (IHC) Staining: Steps & Best ... [https://www.leicabiosystems.com/us/knowledge-pathway/immunohistochemistry-an-overview-steps-to-better-ihc-staining/]
- 44. Detection and amplification systems [https://www.abcam.com/en-us/technical-resources/guides/ihc-guide/detection-and-amplification-systems]
- 45. Multiple immunofluorescence labelling of formalin-fixed ... [https://pmc.ncbi.nlm.nih.gov/articles/PMC2288605/]
- 46. Immunohistochemistry-IHC | Thermo Fisher Scientific - US [https://www.thermofisher.com/us/en/home/life-science/cell-analysis/cellular-imaging/ihc.html/1000]
- 47. Synaptic Systems standard protocol for chromogenic IHC-P / FFPE [https://sysy.com/protocols/protocol-ihc-paraffin-chromogenic]
- 48. Andy's Algorithms: new automated digital image analysis ... [https://www.nature.com/articles/s41598-017-15885-6]
- 49. Protocol for the Preparation and Chromogenic IHC Staining of Paraffin-embedded Tissue Sections [https://www.rndsystems.com/resources/protocols/protocol-preparation-and-chromogenic-ihc-staining-paraffin-embedded-tissue]
- 50. Chromogenic Immunohistochemistry IHC Staining of Frozen Tissue Protocol | Bio-Techne [https://www.bio-techne.com/resources/protocols-troubleshooting/chromogenic-ihc-staining-of-frozen-tissue-protocol]
- 51. Immunohistochemistry (IHC) Troubleshooting Guide & the ... [https://www.cellsignal.com/learn-and-support/troubleshooting/ihc-troubleshooting-guide?srsltid=AfmBOop8IEBzuinQj3duuGHI2q8DA89ZvcvGab6tq8zkyOY3V9l4EyLO]
- 52. Immunofluorescence Method for IHC Detection [https://www.thermofisher.com/us/en/home/life-science/protein-biology/protein-biology-learning-center/protein-biology-resource-library/pierce-protein-methods/immunofluorescence-method-ihc-detection.html]
- 53. Fluorescent-IHC-Staining-of-FFPE-Tissue [https://www.novusbio.com/fluorescent-ihc-staining-of-ffpe-tissue?srsltid=AfmBOooinvXYXMTWO0fvj_wzCxdfkdS2RcTkTCImiXK6Vs6VPHvVAa-a]
- 54. Four-color Fluorescence Immunohistochemistry of T-cell ... [https://pmc.ncbi.nlm.nih.gov/articles/PMC5613782/]
- 55. Basics of Immunohistochemistry (IHC) | PDF [https://www.slideshare.net/slideshow/basics-of-immunohistochemistryihc/61066350]
- 56. Ultimate IHC Troubleshooting Guide: Fix Weak Staining & ... [https://www.atlasantibodies.com/knowledge-hub/blog/the-ultimate-ihc-troubleshooting-guide-from-weak-staining-to-high-background/]
- 57. Immunohistochemistry (IHC) Troubleshooting Guide & the ... [https://www.cellsignal.com/learn-and-support/troubleshooting/ihc-troubleshooting-guide?srsltid=AfmBOoqM9U1Yan4f_d9yj7tcto6BhIEA7YuKJ1Nf0eqX9-MeaVRPJYjI]
- 58. IHC Troubleshooting Guide | Common Issues & Fixes [https://www.bosterbio.com/protocol-and-troubleshooting/ihc-troubleshooting?srsltid=AfmBOoqu-SQolut9605wlodq8VO1LjIMUO6mUe0zyXlj6EbHAj_MALLa]
- 59. Overview of Immunohistochemistry (IHC) [https://www.thermofisher.com/us/en/home/life-science/protein-biology/protein-biology-learning-center/protein-biology-resource-library/pierce-protein-methods/overview-immunohistochemistry.html]
- 60. Systematic comparison of quantity and quality of RNA ... [https://translational-medicine.biomedcentral.com/articles/10.1186/s12967-024-05890-5]
- 61. Immunohistochemistry (IHC) Troubleshooting Guide & the ... [https://www.cellsignal.com/learn-and-support/troubleshooting/ihc-troubleshooting-guide?srsltid=AfmBOoqgrGTEbsafVGRyTUpeX3RXJof9MmO4mE7twmwpTn27L2iB030Z]
- 62. IHC Troubleshooting Guide | Common Issues & Fixes [https://www.bosterbio.com/protocol-and-troubleshooting/ihc-troubleshooting?srsltid=AfmBOooVInofz0auRKSSs77NUgSmHGW-5AAWalGtuHB5HbRON0xBuC12]
- 63. Immunohistochemistry (IHC) [https://www.cellsignal.com/learn-and-support/overview-of-ihc?srsltid=AfmBOooesxV50aFb8S-yzUwx-qQTNx0aFzDHocewPhMjpCLFYNeIRgRX]
- 64. IHC Troubleshooting [https://www.origene.com/research-areas/ihc/ihc-troubleshooting]
- 65. Immunohistochemistry (IHC) Troubleshooting Guide & the ... [https://www.cellsignal.com/learn-and-support/troubleshooting/ihc-troubleshooting-guide?srsltid=AfmBOor728ZgF1Y_QXKR_9pragQNSTnz6BE1vn5XPDPOBB6cjG4HQpKY]
- 66. Antigen Retrieval - an overview [https://www.sciencedirect.com/topics/medicine-and-dentistry/antigen-retrieval]
- 67. 8-Plex Antibody Panels for Spatial Biology | SignalStar ... [https://blog.cellsignal.com/signalstar-multiplex-ihc-speed-your-spatial-biology-research]
- 68. How To Prevent Tissue And Reagent Loss On Your Slides [https://vectorlabs.com/blog/how-to-prevent-tissue-and-reagent-loss-on-your-slides/?srsltid=AfmBOooR-odRDpf8qz6G0kW4Nv2iOfWcRfMQf2Fm52Icf6k7ycPGWOFZ]
- 69. Adaptable Immunofluorescence Protocol for Muscle Fiber ... [https://pmc.ncbi.nlm.nih.gov/articles/PMC12582162/]
- 70. Assessment of staining and interpretation quality in Taiwan [https://link.springer.com/article/10.1007/s00428-025-04192-5]
- 71. Novel immunohistochemical assay utilizing the INSM1 (SP493 ... [https://pmc.ncbi.nlm.nih.gov/articles/PMC12532420/]
- 72. Semi-quantitative Determination of Protein Expression ... [https://en.bio-protocol.org/en/bpdetail?id=3465&type=0]
- 73. Monitoring Immunohistochemical Staining Variations Using ... [https://www.sciencedirect.com/science/article/pii/S0023683725000157]
- 74. Immunohistochemistry-IHC | Thermo Fisher Scientific - US [https://www.thermofisher.com/us/en/home/life-science/cell-analysis/cellular-imaging/ihc.reg.my.html]
- 75. Fluorescence immunohistochemistry for quantitative ... [https://www.protocols.io/view/fluorescence-immunohistochemistry-for-quantitative-dxs57ng6.html]
- 76. How To Prevent Tissue And Reagent Loss On Your Slides [https://vectorlabs.com/blog/how-to-prevent-tissue-and-reagent-loss-on-your-slides/?srsltid=AfmBOor1ff5ZW3y2yRrElLgs3TNcYTmS6cB_mxH9_YlaHXBcrt7a4Bse]
- 77. IHC Troubleshooting Guide | Thermo Fisher Scientific - SA [https://www.thermofisher.com/sa/en/home/life-science/protein-biology/protein-biology-learning-center/protein-biology-resource-library/pierce-protein-methods/ihc-troubleshooting-guide.html]
- 78. Optical super-resolution histology of formalin-fixed paraffin- ... [https://www.nature.com/articles/s41467-025-64626-1]
- 79. Spatial proteomics of single cells and organelles on tissue ... [https://www.nature.com/articles/s41467-024-53683-7]
- 80. Quantitative immunohistochemistry (IHC) analysis of ... [https://pmc.ncbi.nlm.nih.gov/articles/PMC8339853/]
- 81. A fully automated quantitative analysis method based on ... [https://www.sciencedirect.com/science/article/pii/S2950261625000342]
- 82. Histopathological Considerations for IHC-based Studies [https://waxitinc.com/histopathological-considerations-for-ihc-based-studies/]
- 83. CAP Updates Their 'Principles of Analytic Validation ... [https://www.bioanalysis-zone.com/cap-updates-their-guidelines-for-principles-of-analytic-validation-of-immunohistochemical-assays/]
- 84. Chromogenic Immunohistochemistry (IHC) Paraffin Protocol [https://www.novusbio.com/support/support-by-application/immunohistochemistry-paraffin/protocol.html?srsltid=AfmBOorp2pWQdre3Q-wV-m0FWS3CErAd6Y5s-2iTaAEFgQGyJhWBfwJm]
- 85. Controls in IHC [https://www.abcam.com/en-us/technical-resources/guides/ihc-guide/controls-in-ihc]
- 86. 6 Essential IHC Controls for Reliable Staining Results [https://www.bosterbio.com/blog/post/6-ihc-controls-you-should-know?srsltid=AfmBOorf-rWrX7zlGsgB4-3fGNVSErnSVdGu1REcrWyn-4gZHpbGPr9T]
- 87. Reagents for Reliable Immunohistochemistry (IHC) Results [https://www.cellsignal.com/applications/immunohistochemistry/solutions-for-consistent-ihc-results?srsltid=AfmBOopgO4_9DesjGNp-z_LuqsjXtudGOFcuTNVUCLcd3y9lzIkmxpd7]
- 88. Immunohistochemistry (IHC) Workflow [https://www.rockland.com/resources/immunohistochemistry-workflow/?srsltid=AfmBOops-vyk6CBNHUD4QGl3hWKYG9LZUjrCNU6Wsz5xXO4bKckeJBsf]
- 89. Different approaches for interpretation and reporting of ... [https://diagnosticpathology.biomedcentral.com/articles/10.1186/s13000-014-0221-9]
- 90. Highly Accurate and Robust Absolute Quantification of ... [https://pmc.ncbi.nlm.nih.gov/articles/PMC10581745/]
- 91. Quantitative proteomics of formalin-fixed, paraffin ... [https://www.nature.com/articles/s44161-025-00721-2]
- 92. Proteomic comparison between different tissue ... [https://www.nature.com/articles/s41598-021-87003-6]
- 93. Quantitative comparison of immunohistochemical staining ... [https://pmc.ncbi.nlm.nih.gov/articles/PMC3379953/]
- 94. Effect of formalin-fixation and paraffin-embedded tissue ... [https://pmc.ncbi.nlm.nih.gov/articles/PMC11185121/]
- 95. The effect of prolonged formalin fixation on the expression ... [https://www.sciencedirect.com/science/article/abs/pii/S0065128122000381]
- 96. Impact of storage conditions on the quality of nucleic acids in ... [https://journals.plos.org/plosone/article?id=10.1371/journal.pone.0203608]
- 97. Effect of storage time of paraffin sections on the expression of ... [https://diagnosticpathology.biomedcentral.com/articles/10.1186/s13000-023-01423-8]
- 98. The effect of storage time and temperature on ... [https://pmc.ncbi.nlm.nih.gov/articles/PMC11796064/]
- 99. The effect of storage time and temperature on ... [https://pubmed.ncbi.nlm.nih.gov/39910438/]
- 100. Immunohistochemistry (IHC) Troubleshooting Guide & the ... [https://www.cellsignal.com/learn-and-support/troubleshooting/ihc-troubleshooting-guide?srsltid=AfmBOopdpQJi35fGd0QH5MfJS1p5U5v2mG1sWA-uousa5BM4fLr0wPn8]
- 101. Quantification of HER2-low and ultra-low expression in ... [https://www.sciencedirect.com/science/article/pii/S2153353925000999]
- 102. Multi-institutional Assessment of Pathologist scoring HER2 ... [https://pmc.ncbi.nlm.nih.gov/articles/PMC10278086/]
- 103. Validation and Prospective Testing of a High Sensitivity ... [https://pubmed.ncbi.nlm.nih.gov/40882816/]
- 104. Multiplexed IHC Staining with Primary Antibodies ... [https://www.thermofisher.com/us/en/home/references/protocols/cell-and-tissue-analysis/protocols/multiplex-ihc-primary-antibodies.html]
- 105. What are the different detection methods for IHC? [https://www.enzo.com/note/what-are-the-different-detection-methods-for-ihc/]
- 106. Counterstains in Immunohistochemistry: Principles, ... [https://www.bosterbio.com/blog/post/counterstains-in-immunohistochemistry-principles-options-and-troubleshooting?srsltid=AfmBOoram48DCi1SMwUjauFgVK_gvstY66b7gyrYezdgMVqRwpea5G7U]