Mastering IHC Controls: A Complete Guide to Validating Antibody Specificity for Reproducible Research
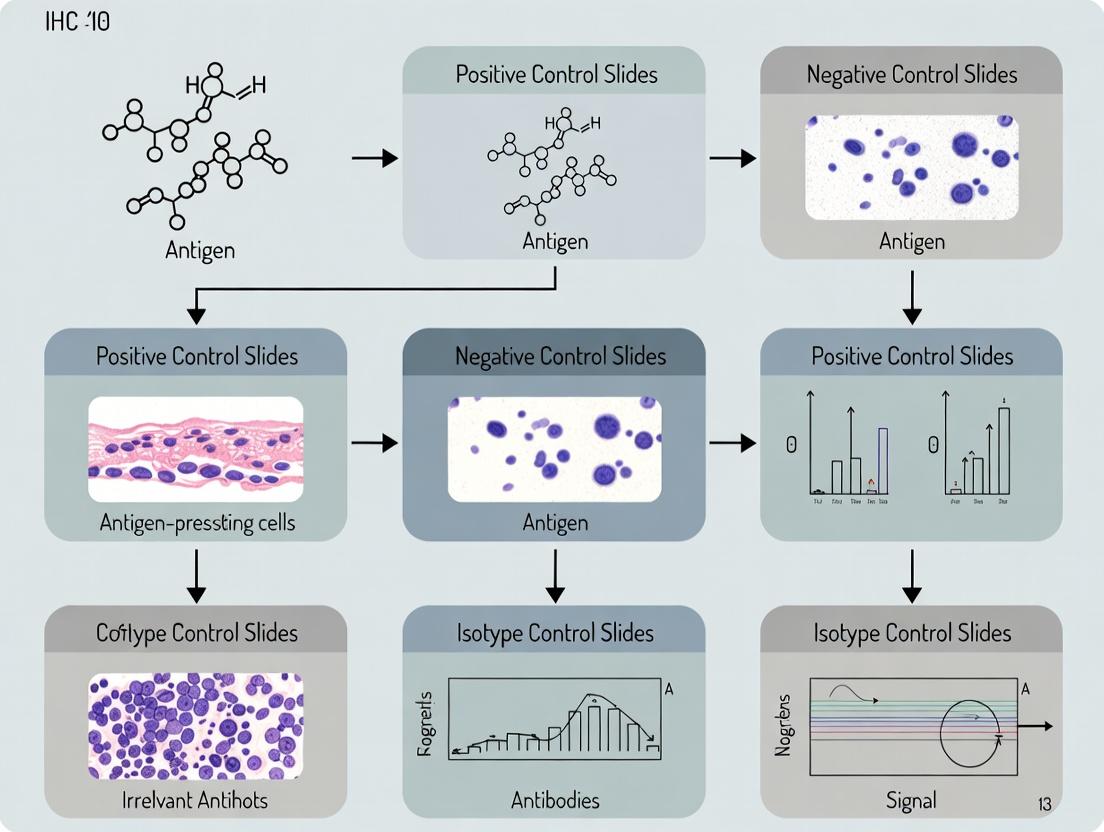
This comprehensive guide details the essential framework of immunohistochemistry (IHC) controls for antibody specificity validation, critical for researchers and drug development professionals.
Mastering IHC Controls: A Complete Guide to Validating Antibody Specificity for Reproducible Research
Abstract
This comprehensive guide details the essential framework of immunohistochemistry (IHC) controls for antibody specificity validation, critical for researchers and drug development professionals. It progresses from foundational principles and common pitfalls to advanced methodologies for positive, negative, and isotype controls. The article provides a systematic troubleshooting approach to optimize protocols and interpret results accurately. Finally, it establishes a robust validation strategy comparing techniques like Western blot and knockout validation, culminating in a practical roadmap for implementing rigorous controls to ensure data integrity, reproducibility, and translational confidence in biomedical research.
The Why and What: Core Principles of IHC Controls for Reliable Staining
Defining Antibody Specificity, Sensitivity, and Reproducibility in IHC
Technical Support Center
Troubleshooting Guides & FAQs
FAQ 1: How can I systematically determine if high background staining is due to antibody specificity or assay conditions? Answer: High background is often an assay sensitivity issue, but cross-reactivity can mimic it. Follow this diagnostic workflow:
- Run a No-Primary Antibody Control. High background indicates issues with detection system, endogenous enzyme activity, or non-specific protein binding.
- Run an Isotype Control. If background is high here but not in the No-Primary control, it suggests non-specific Fc receptor or protein binding by the antibody's constant region.
- Run a Knockout/Knockdown Validation Control. If background staining persists in a genetically negative tissue sample, it confirms antibody cross-reactivity (lack of specificity). If the background is clean in the knockout but high in the wild-type, re-optimize assay conditions (e.g., increase blocking time, optimize antibody dilution).
FAQ 2: My antibody works perfectly in Western Blot but shows unexpected localization in IHC. Is the antibody non-specific? Answer: Not necessarily. This often highlights the context-dependency of antibody specificity. In Western Blots, denatured proteins expose linear epitopes. In IHC, the antibody binds to native, conformationally dependent epitopes that may be masked or altered by fixation. Furthermore, post-translational modifications present in tissue (phosphorylation, glycosylation) can affect binding. Always validate IHC antibodies using IHC-appropriate positive and negative tissue controls, not just Western data.
FAQ 3: What is the most critical control for proving antibody reproducibility across lots and labs? Answer: The use of a standardized, well-characterized Reference Tissue Microarray (TMA) or a set of control tissue slides. Reproducibility is quantifiably demonstrated when staining patterns (intensity, distribution) on these identical reference samples remain consistent across experiments, users, antibody lots, and laboratories. Quantitative image analysis (QIA) of staining in the reference TMA is the gold standard for assessing reproducibility.
FAQ 4: How do I differentiate true negative staining from a failed experiment due to low sensitivity? Answer: A comprehensive set of controls is required. See the table below for the control hierarchy.
Table 1: Control Scheme for Interpreting IHC Results
| Control Type | Purpose | Interpretation of Negative Result in Test Sample |
|---|---|---|
| Assay Sensitivity Control | Known positive tissue for the target. | If POSITIVE control is also negative, the experiment failed (sensitivity issue). Optimize protocol. |
| Antibody Specificity Control | Genetic knockout tissue, siRNA knockdown, or tissue known to lack the target. | If NEGATIVE control is clean but POSITIVE control stained correctly, the test sample is a true negative. |
| Detection System Control | No-Primary Antibody control. | Rules out non-specific signal from detection reagents or endogenous enzymes. |
| Tissue & Fixation Control | Internal positive cells (e.g., stromal cells adjacent to tumor). | Confirms tissue antigenicity is preserved and assay conditions are valid. |
Experimental Protocols
Protocol 1: Knockout/Knockdown Validation for Antibody Specificity
- Objective: To confirm antibody binding is specific to the intended target.
- Materials: Wild-type (WT) and genetically engineered knockout (KO) tissue samples (e.g., from mouse models, CRISPR-edited cell pellets, or siRNA-treated cells).
- Method:
- Process WT and KO samples identically (fixation, embedding, sectioning).
- Perform IHC staining on serial sections of WT and KO samples simultaneously using the same antibody batch and reagent lots.
- Use identical image acquisition settings.
- Interpretation: Specific antibody will show staining in WT and absent staining in KO. Persistent staining in KO indicates non-specific cross-reactivity.
Protocol 2: Antibody Titration for Optimal Sensitivity and Specificity
- Objective: To establish the optimal antibody dilution that maximizes signal-to-noise ratio.
- Method:
- Prepare a checkerboard titration. Test a range of primary antibody dilutions (e.g., 1:50, 1:100, 1:200, 1:500, 1:1000) on a known positive tissue section.
- For each dilution, also test a range of retrieval conditions (e.g., no retrieval, low-pH retrieval, high-pH retrieval) if applicable.
- Include a no-primary control for each retrieval condition.
- Score each condition for specific signal intensity (0-3+) and background staining (0-3+).
- Interpretation: The optimal dilution is the highest dilution (lowest antibody concentration) that yields a strong specific signal (e.g., 3+) with minimal background (0-1+). This balances sensitivity and specificity.
Visualizations
Title: Diagnostic Workflow for High IHC Background
Title: Components of Antibody Binding in IHC
The Scientist's Toolkit: Key Research Reagent Solutions
| Item | Function in IHC Validation |
|---|---|
| Validated Positive Control Tissues | Provides a benchmark for expected staining pattern and intensity, essential for establishing sensitivity and reproducibility. |
| Genetically Validated Negative Tissues (KO/Knockdown) | The gold standard control for definitively proving antibody specificity by showing absence of staining when the target is absent. |
| Tissue Microarray (TMA) | Contains dozens of control tissues on one slide, enabling high-throughput, standardized testing of antibody performance across many tissues simultaneously. |
| Recombinant Target Protein | Can be used in peptide blocking experiments or on western blots to confirm the antibody binds the correct molecule. |
| Antibody Diluent with Carrier Protein | Stabilizes the antibody solution, reduces non-specific sticking to tube surfaces, and can help minimize background staining. |
| Polymer-based Detection System | Offers high sensitivity with minimal endogenous biotin interference, improving signal-to-noise ratio compared to traditional ABC methods. |
| Automated Staining Platform | Dramatically improves inter-experiment and inter-lab reproducibility by standardizing all incubation and wash times. |
| Quantitative Image Analysis Software | Enables objective, numerical scoring of staining intensity and percentage, replacing subjective visual scoring for robust reproducibility data. |
Technical Support Center: IHC Antibody Validation & Troubleshooting
FAQs & Troubleshooting Guides
Q1: My IHC staining shows high background across the entire tissue section. What are the primary causes and solutions? A: High background, or non-specific staining, is often due to inadequate blocking or antibody concentration issues.
- Troubleshooting Steps:
- Increase Blocking: Extend blocking time with normal serum (from the species of your secondary antibody) or use 2-5% BSA for 1 hour at room temperature.
- Optimize Antibody Dilution: Perform a checkerboard titration. High antibody concentration is a common cause.
- Check Secondary Antibody: Ensure your secondary antibody is not cross-reacting with endogenous immunoglobulins in the tissue. Use a secondary antibody pre-adsorbed against the species of your tissue sample.
- Wash Stringency: Increase the number and duration of washes with PBS-T (0.1% Tween-20).
- Endogenous Enzyme Quenching: For HRP systems, ensure fresh 3% H₂O₂ treatment (10-15 minutes) to quench endogenous peroxidase activity.
Q2: My positive control tissue stains correctly, but my target tissue shows no signal. What does this indicate? A: This is a critical scenario emphasizing the need for multiple controls.
- Interpretation & Actions:
- Validate Antibody Specificity: The positive control working confirms the detection protocol is functional. The lack of signal in the test tissue may be a true negative (target antigen not expressed) OR indicate a problem with the test tissue itself.
- Run Additional Controls:
- Tissue Quality Control: Perform a mandatory H&E stain on a serial section to assess tissue morphology and fixation quality.
- Antigen Integrity Control: Stain a serial section with an antibody against a ubiquitously expressed protein (e.g., Beta-actin, GAPDH). If this also fails, antigen retrieval may be insufficient or the tissue may be over-fixed.
- Use a Genetic Control: If available, include a known knockout tissue sample as a negative control.
Q3: I see unexpected nuclear staining with my supposedly membrane-targeted antibody. How should I proceed? A: This is a strong indicator of off-target binding or antibody cross-reactivity.
- Validation Protocol:
- Immediate Action: Halt all experiments using this antibody for critical data generation.
- Run a Knockout/Knockdown Validation Experiment: This is the gold standard.
- Protocol: Transfert cells with siRNA targeting your protein of interest. Include a non-targeting siRNA control. 48-72 hours post-transfection, harvest cells, prepare pellets for IHC or perform Western blot (for validation of knockdown), and then stain with the antibody.
- Expected Result: A specific antibody will show loss of signal in the knockdown sample compared to the control. Persistent nuclear staining in the knockdown sample confirms non-specificity.
- Alternative: Pre-absorb the antibody with the immunizing peptide (if available). The specific signal should be abolished.
Q4: How do I systematically validate a new antibody for IHC in my specific tissue? A: Follow a multi-control tiered approach.
| Control Tier | Control Type | Purpose | Acceptance Criterion |
|---|---|---|---|
| Tier 1: Protocol Controls | Tissue without primary antibody | Detects secondary antibody/ detection system artifacts. | No staining. |
| Endogenous enzyme/quench control | Confirms quenching of endogenous peroxidase/alkaline phosphatase. | No background from endogenous enzymes. | |
| Tier 2: Biological Controls | Known positive tissue | Confirms antibody and protocol work under optimal conditions. | Strong, specific staining in expected pattern. |
| Known negative tissue (or knockout) | Confirms antibody specificity by showing absence of staining. | No specific staining. | |
| Tier 3: Experimental Controls | Isotype control | Matches the primary antibody host species and isotype. Estimates non-specific Fc binding. | Minimal to no staining. |
| Absorption control (peptide blocking) | Competes away specific epitope binding. | Significant reduction or abolition of specific signal. |
Q5: My staining pattern is inconsistent between replicates. What are the most likely variables to standardize? A: Inconsistency points to protocol or reagent variability.
- Key Variables to Lock Down:
- Fixation Time: Standardize time from tissue harvest to fixation and exact fixation duration.
- Antigen Retrieval: Precisely document retrieval method (heat-induced, enzymatic), pH of buffer, and retrieval time. Use a calibrated water bath or pressure cooker.
- Antibody Incubation: Use consistent incubation times and temperatures. Ensure slides are kept in a humidified chamber.
- Detection System: Use the same lot of detection kit for an entire study. Develop for the exact same duration under microscopic monitoring.
- Sample Blinding: Implement blinding during staining and analysis to eliminate observer bias.
Visualization of Key Concepts
Diagram 1: IHC Control Failure Decision Tree (89 chars)
Diagram 2: Standard IHC Workflow (36 chars)
The Scientist's Toolkit: Key Research Reagent Solutions
| Reagent / Material | Function in IHC Validation |
|---|---|
| Validated Positive Control Tissue | Provides a biological benchmark for antibody performance and protocol optimization. Essential for confirming the assay works. |
| Knockout/Knockdown Tissue or Cell Pellet | The gold-standard negative control for confirming antibody specificity by demonstrating absence of staining when the target is absent. |
| Isotype Control Antibody | A non-specific immunoglobulin matching the host species and isotype of the primary antibody. Controls for non-specific Fc receptor binding. |
| Blocking Peptide | The immunizing peptide sequence. Used in pre-absorption experiments to competitively inhibit specific binding, confirming epitope specificity. |
| Universal Negative Tissue | Tissue known to lack expression of the target (e.g., mouse liver for many human-specific proteins). Serves as an initial specificity check. |
| Antigen Retrieval Buffer (pH 6 & pH 9) | Two standard buffers to reverse formaldehyde cross-links. Testing both is critical for optimizing signal from fixed tissues. |
| Polymer-based Detection System | Amplifies signal and reduces background compared to traditional avidin-biotin systems (which can have endogenous biotin). |
| Serum from Secondary Host | Used for blocking to prevent secondary antibody cross-reactivity with endogenous immunoglobulins in the tissue sample. |
Troubleshooting Guides & FAQs
Q1: My positive control tissue shows weak or absent staining, but my experimental slide is positive. What is wrong? A: This indicates a problem with the IHC protocol itself, not the primary antibody's specificity. The likely culprits are reagent degradation or procedural errors.
- Troubleshooting Steps:
- Check reagent expiration dates, especially the hydrogen peroxide in the quenching solution and the chromogen.
- Verify incubation times and temperatures for deparaffinization, antigen retrieval, and primary/secondary antibody steps.
- Confirm the functionality of detection system components (e.g., enzyme conjugate, chromogen) by testing with a different validated antibody.
- Ensure the positive control tissue is appropriate and known to express the target antigen abundantly.
Q2: My negative control (e.g., IgG) shows nonspecific staining in areas where my experimental slide is also positive. How do I interpret this? A: Nonspecific staining in the negative control invalidates the experimental result. It suggests background from non-antibody sources.
- Troubleshooting Steps:
- Increase blocking time or change blocking agents (e.g., use 5% normal serum from the secondary antibody host, or add casein).
- Optimize primary antibody dilution. High concentrations increase nonspecific binding. Perform a titration series.
- Check for endogenous enzyme activity. Ensure peroxidase/alkaline phosphatase blocking steps were performed correctly and for sufficient duration.
- Consider high antigenicity. For tissues with endogenous immunoglobulins (e.g., spleen, lymph node), use a different negative control format like the knockout/no primary antibody control.
Q3: My tissue knockout control (genetically negative tissue) shows staining. What does this mean? A: Staining in a verified knockout sample is a clear indicator of antibody nonspecificity or cross-reactivity.
- Troubleshooting Steps:
- Verify the knockout control's validity. Confirm via PCR or Western blot that the tissue truly lacks the target protein.
- Re-evaluate antibody selection. Review the immunogen sequence for homology with other proteins. The antibody may require validation in a knockout context before use.
- Increase stringency of washing (e.g., increase salt concentration in wash buffer) or modify antigen retrieval conditions (pH, time) to reduce off-target binding.
Q4: My experimental stain is clean, but my isotype control shows patchy, nonspecific staining in specific cell types. How should I proceed? A: This indicates Fc receptor-mediated or charged interaction binding in certain cells, not target-specific staining.
- Troubleshooting Steps:
- Use an Fc receptor block prior to primary antibody incubation, especially for immune tissues.
- Include a protein block (e.g., 1-5% BSA) in the antibody diluent.
- Switch to a monoclonal antibody with a different isotype if available, as some isotypes bind more readily to Fc receptors.
Table 1: Expected Outcomes for Core IHC Controls
| Control Type | Purpose | Expected Result | Interpretation of Deviation |
|---|---|---|---|
| Positive Tissue Control | Validates protocol integrity | Strong, specific staining in known positive cells | Protocol failure if weak/absent. |
| Negative Reagent Control (No Primary Ab) | Detects system background | No staining | High background invalidates experiment. |
| Isotype Control | Assesses nonspecific Fc binding | Staining pattern distinct from experimental | Suggests need for better blocking. |
| Knockout/Negative Tissue Control | Validates antibody specificity | No staining | Any staining suggests antibody nonspecificity. |
| Absorption Control (Ab + immunogen) | Confirms epitope specificity | Significant reduction in staining | Confirms antibody is binding intended target. |
Table 2: Titration Series Results for Anti-p53 Antibody (Clone DO-7)
| Antibody Dilution | Staining Intensity (Positive Control) | Background (Negative Tissue Control) | Optimal Score* |
|---|---|---|---|
| 1:50 | 4+ (Very Strong) | 2+ (High) | Unacceptable |
| 1:200 | 3+ (Strong) | 1+ (Low) | Optimal |
| 1:800 | 2+ (Moderate) | 0 (None) | Acceptable |
| 1:3200 | 1+ (Weak) | 0 (None) | Suboptimal |
*Optimal Score = High Signal-to-Noise Ratio.
Experimental Protocols
Protocol 1: Standard IHC with Comprehensive Controls Title: Validated IHC Protocol for Antibody Specificity Testing. Key Steps:
- Sectioning: Cut 4-5 μm sections from paraffin-embedded blocks of (a) experimental tissue, (b) known positive control tissue, (c) known negative/knockout control tissue. Mount on charged slides.
- Deparaffinization & Rehydration: Xylene (2 x 10 min), 100% Ethanol (2 x 5 min), 95% Ethanol (5 min), 70% Ethanol (5 min), dH₂O (5 min).
- Antigen Retrieval: Place slides in pre-heated citrate buffer (pH 6.0) or EDTA buffer (pH 9.0) in a decloaking chamber or water bath (95-100°C, 20-30 min). Cool for 30 min at room temperature (RT).
- Peroxidase Blocking: Incubate with 3% H₂O₂ in methanol for 10 min at RT. Rinse with PBS.
- Protein Blocking: Apply 2.5-5% normal serum (from species of secondary antibody) or protein-free block for 30 min at RT.
- Primary Antibody Incubation: Apply optimized dilution of specific primary antibody to experimental and positive control slides. Apply isotype control antibody at same concentration to a serial section of experimental tissue. Apply antibody diluent only to the negative reagent control slide. Incubate for 1 hr at RT or overnight at 4°C.
- Secondary Antibody: Apply labeled polymer-horseradish peroxidase (HRP) conjugate for 30 min at RT. Rinse with PBS.
- Detection: Apply DAB chromogen substrate for 3-10 min. Monitor development microscopically.
- Counterstaining & Mounting: Counterstain with Hematoxylin for 30-60 sec, dehydrate, clear, and mount with permanent mounting medium.
Protocol 2: Peptide Absorption (Neutralization) Control Title: Antibody Neutralization Assay for Specificity Confirmation. Key Steps:
- Prepare Peptide-Antibody Mixture: Incubate the primary antibody at its working dilution with a 5-10 fold molar excess of the immunizing peptide (or a known control peptide) for 2 hours at RT on a rotator.
- Parallel Setup: Prepare a control mixture where the antibody is incubated with PBS or an irrelevant peptide.
- IHC Staining: Perform the standard IHC protocol (Protocol 1, steps 1-5), then apply the pre-adsorbed antibody mixture to one experimental slide and the control antibody mixture to a serial section.
- Analysis: Compare staining. A significant reduction (≥70%) in signal in the pre-adsorbed slide confirms epitope specificity.
Visualization: Experimental Workflow & Logic
Diagram 1: IHC Control Experiment Workflow
Diagram 2: IHC Antibody Specificity Validation Logic
The Scientist's Toolkit: Research Reagent Solutions
Table 3: Essential Materials for IHC Control Experiments
| Item | Function | Critical for Control Type |
|---|---|---|
| Validated Positive Control Tissue | Tissue microarray or block with known high expression of target. Provides a benchmark for protocol success. | Positive Tissue Control |
| Knockout Tissue (Genetically Modified) | Tissue from an organism where the target gene is deleted or inactivated. The gold standard for specificity testing. | Knockout/Negative Tissue Control |
| Isotype Control Immunoglobulin | An antibody of the same class/isotype but irrelevant specificity. Identifies nonspecific Fc-mediated binding. | Isotype Control |
| Immunizing Peptide | The peptide sequence used to generate the primary antibody. Used to pre-adsorb and neutralize the antibody. | Absorption Control |
| Protein-Free Blocking Buffer | Blocking agent without immunoglobulins (e.g., casein, BSA). Reduces nonspecific background without interfering with isotype controls. | All controls, especially Isotype. |
| Charged Microscope Slides | Promote strong tissue adhesion throughout rigorous antigen retrieval and washing steps, preventing tissue loss. | All controls. |
| Validated Detection Kit | A polymer-based HRP/DAB or AP/Red system with low background. Ensures sensitivity and minimizes system noise. | All controls. |
| Automated Stainer or Humidity Chamber | Provides consistent incubation conditions, reducing variability between control and experimental slides. | All controls. |
Troubleshooting Guides & FAQs
FAQ: Understanding Control Tiers
Q: What defines an "Essential" versus a "Recommended" control in IHC? A: Essential controls are non-negotiable experiments required to validate that a signal is specific to the target antigen-antibody interaction. Recommended controls provide additional layers of validation, enhancing reproducibility and interpretability, especially in complex or novel systems.
Q: My positive control tissue shows no staining. What should I check first? A: This indicates a potential failure in the entire IHC protocol. Follow this checklist:
- Reagent Integrity: Check expiration dates of primary antibody, detection kit, and chromogen.
- Protocol Execution: Verify all incubation times, temperatures, and washing steps.
- Equipment: Confirm that the antigen retrieval system (e.g., pressure cooker, water bath) reached and maintained the correct temperature and time.
- Sample Quality: Ensure the control tissue was properly fixed and processed.
Q: My negative control shows weak, non-specific staining. How can I troubleshoot? A: Non-specific staining in the negative control (e.g., no-primary or isotype) invalidates the experiment. Key causes and solutions:
| Observed Issue | Potential Cause | Troubleshooting Action |
|---|---|---|
| Diffuse background | Inadequate blocking | Increase blocking time; use serum from the species of the secondary antibody; consider adding a protein block. |
| Particulate staining | Endogenous enzyme activity (e.g., peroxidase, phosphatase) | Use appropriate quenching steps (3% H₂O₂ for peroxidase, levamisole for alkaline phosphatase). |
| Edge staining | Edge artifact or over-fixation | Ensure uniform fixation; avoid letting sections dry out; optimize antigen retrieval time. |
FAQ: Antibody & Specificity Validation
Q: How do I validate a new antibody for IHC on an unverified tissue? A: A tiered validation strategy is required. Genetic or biochemical validation (e.g., siRNA/CRISPR knockout, Western blot) is strongly recommended to confirm specificity.
Q: What does it mean if my knockout/knockdown tissue control still shows staining? A: Residual staining strongly suggests antibody non-specificity. You must:
- Confirm the knockout efficiency via an orthogonal method (e.g., qPCR, Western).
- Re-optimize antibody dilution and retrieval conditions using the knockout tissue.
- Consider an alternative antibody targeting a different epitope.
Experimental Protocols
Protocol 1: Essential Control - Isotype Control for Monoclonal Antibodies
Purpose: To control for non-specific binding mediated by the Fc region or other protein-protein interactions of the immunoglobulin. Materials: See "Research Reagent Solutions" below. Method:
- On a consecutive tissue section, replace the primary antibody with a non-immune immunoglobulin from the same host species, subclass, and concentration.
- Keep all other steps (blocking, detection, visualization) identical to the test section.
- Compare staining between the test and isotype control sections. Specific signal must be absent in the isotype control.
Protocol 2: Recommended Control - Adsorption (Neutralization) Control
Purpose: To demonstrate that staining is abolished by pre-incubation of the antibody with its target antigen. Method:
- Prepare Adsorbed Antibody: Incubate the primary antibody at its working dilution with a 5-10 fold molar excess of the immunizing peptide or recombinant protein for 2 hours at room temperature.
- Centrifuge: Spin at 12,000 x g for 10 minutes to pellet immune complexes.
- Apply Supernatant: Carefully apply the supernatant to the tissue section as the primary antibody.
- Interpretation: Specific staining should be significantly reduced or eliminated compared to the standard protocol. Persistent staining indicates non-specific binding.
Data Presentation
Table 1: Tiered Control Strategy for IHC Antibody Validation
| Control Tier | Control Type | Purpose | Experimental Outcome for Validation |
|---|---|---|---|
| Essential | Positive Tissue | Verifies protocol functionality | Robust, expected staining pattern in known antigen-expressing cells. |
| Essential | Negative Tissue (Biological) | Confirms specificity in a known negative context | Absence of staining (e.g., in KO tissue or antigen-negative organ). |
| Essential | No-Primary/Isotype | Detects non-specific binding from detection system or Ig | No staining. |
| Recommended | Knockout/Knockdown | Genetic confirmation of antibody specificity | Elimination or drastic reduction of staining signal. |
| Recommended | Adsorption (Neutralization) | Epitope-specific confirmation of antibody binding | Significant reduction of staining signal. |
| Recommended | Orthogonal Method | Confirms result via non-IHC technique (e.g., IF, RNAscope) | Concordance of staining pattern and cell type localization. |
Table 2: Common IHC Artifacts & Diagnostic Controls
| Artifact | Appearance | Control to Diagnose | Solution |
|---|---|---|---|
| Edge Artifact | Strong staining at tissue edges | No-primary control | Ensure sections never dry; optimize blocking. |
| Nuclear Staining | Non-specific nuclear localization | Isotype/KO control | Optimize retrieval; check antibody specificity (may recognize nuclear proteins). |
| High Background | Diffuse staining across tissue | No-primary/Isotype control | Increase blocking; optimize antibody titer; increase wash stringency. |
Visualizations
Tiered IHC Validation Workflow
Specific vs. Non-Specific Antibody Binding
The Scientist's Toolkit: Research Reagent Solutions
| Reagent | Function & Importance in Control Experiments |
|---|---|
| Validated Positive Control Tissue | Tissue microarray or cell pellet with known, documented expression of the target. Essential for protocol verification. |
| Knockout/Knockdown Tissue or Cell Line | Genetically modified sample lacking the target antigen. The gold-standard negative control for antibody specificity. |
| Immunizing Peptide/Recombinant Protein | The exact antigen used to generate the antibody. Required for performing the adsorption (neutralization) control. |
| Matched Isotype Control | An immunoglobulin of the same species, isotype, and conjugation as the primary antibody, but with irrelevant specificity. Controls for Fc-mediated binding. |
| Antigen Retrieval Buffer (pH 6 & pH 9) | Solutions to unmask epitopes altered by formalin fixation. Optimization of pH and method is critical for antibody performance. |
| Specific Blocking Sera | Normal serum from the species in which the secondary antibody was raised. Reduces non-specific binding of the secondary antibody. |
| Endogenous Enzyme Block | e.g., 3% H₂O₂ for peroxidase, levamisole for alkaline phosphatase. Eliminates false-positive signal from tissue enzymes. |
| Chromogen with Contrasting Color | e.g., DAB (brown) and Vector Blue (blue). Allows for multiplexing or for clearly distinguishing a marker from a counterstain. |
Technical Support Center: Troubleshooting & FAQs
FAQ 1: Inconsistent IHC Staining Between Tissue Types Q: My antibody works perfectly in human tonsil but shows no signal in human colon cancer tissue. Is the antibody specific? A: This is a common challenge. The issue may not be antibody specificity but antigen accessibility or expression level.
- Troubleshooting Guide:
- Check Antigen Retrieval: Colon tissue may require more stringent retrieval. Try multiple retrieval methods (e.g., citrate pH 6.0, Tris-EDTA pH 9.0) and times.
- Confirm Expression: Consult public protein atlas databases (e.g., Human Protein Atlas) for expected expression in your specific colon cancer subtype.
- Use a Complementary Technique: Validate using Western Blot (WB) on lysates from the same colon tissue type to confirm the target protein's presence and the antibody's reactivity.
- Employ Orthogonal Validation: Use an antibody targeting a different epitope on the same protein or perform RNAscope to confirm mRNA expression.
FAQ 2: Multiple Bands in Western Blot Q: My antibody detects the expected band at 50 kDa but also shows non-specific bands at higher molecular weights. How can I confirm specificity? A: Multiple bands often indicate cross-reactivity or post-translational modifications.
- Troubleshooting Guide:
- Optimize Blocking and Antibody Dilution: Increase blocking time (use 5% BSA or casein) and titrate the primary antibody to minimize off-target binding.
- Knockdown/Knockout (KO) Control: The gold standard. Run parallel WB on cell lysates where the target gene has been genetically silenced (siRNA) or knocked out (CRISPR-Cas9). Specific bands will disappear in the KO sample.
- Peptide Competition: Pre-incubate the antibody with its immunizing peptide (10-20x molar excess). The true signal should be abolished.
FAQ 3: High Background in ICC/IF Q: My immunofluorescence images have high background, obscuring the specific signal. How can I improve the signal-to-noise ratio? A: High background is typically due to non-specific antibody binding or insufficient washing.
- Troubleshooting Guide:
- Titrate Antibodies: Both primary and secondary antibodies may be over-concentrated.
- Include Critical Controls:
- No-Primary Control: Omit the primary antibody. Remaining fluorescence indicates non-specific secondary antibody binding.
- Isotype Control: Use an irrelevant IgG from the same host species as the primary antibody at the same concentration.
- Increase Stringency of Wash Buffers: Add a mild detergent (e.g., 0.1% Triton X-100) to PBS for washes or increase salt concentration (e.g., 0.5 M NaCl).
Comparative Overview of Validation Guidelines
Table 1: Key Validation Criteria Across Techniques
| Technique | Recommended Positive Control | Recommended Negative Control | Key Validation Method | Common Pitfall |
|---|---|---|---|---|
| IHC | Tissue known to express the target (e.g., normal tonsil for many markers). | Tissue known to lack the target; isotype control. | Genetic (KO) validation on consecutive tissue sections; comparison with orthogonal methods (RNAscope). | Over-reliance on single tissue type; improper antigen retrieval. |
| WB | Cell line or tissue lysate with confirmed expression. | Knockout/Knockdown cell lysate. | Use of KO/Knockdown lysates; peptide competition. | Inadequate lysis buffer; ignoring post-translational modifications. |
| ICC/IF | Cell line with known expression pattern. | Isotype control; no-primary control; KO cells. | Colocalization with a fluorescent protein tag; genetic (KO) validation. | Autofluorescence; antibody penetration issues; fixation artifacts. |
Experimental Protocols
Protocol 1: CRISPR-Cas9 Knockout for Antibody Validation (WB/IHC)
- Design and transfect gRNAs targeting your gene of interest into a relevant cell line.
- Single-cell clone and expand potential KO clones.
- Validate knockout by genomic sequencing and RT-qPCR.
- For WB: Prepare lysates from wild-type (WT) and KO clones. Run SDS-PAGE and probe with your antibody. A true specific band will be absent in the KO lane.
- For IHC: Generate formalin-fixed, paraffin-embedded (FFPE) cell pellets from WT and KO clones. Section and stain. Specific staining should be absent in the KO pellet.
Protocol 2: Orthogonal IHC Validation Using RNAscope
- Perform standard IHC on an FFPE tissue section with your antibody.
- On a consecutive serial section, perform RNAscope using a probe set for the target mRNA.
- Compare the spatial patterns. High correlation between protein (IHC) and mRNA (RNAscope) signals strongly supports antibody specificity.
Diagrams
Title: Antibody Validation Troubleshooting Decision Tree
Title: Peptide Competition Assay Workflow
The Scientist's Toolkit: Key Research Reagent Solutions
Table 2: Essential Materials for Antibody Validation
| Reagent/Material | Function in Validation |
|---|---|
| CRISPR-Cas9 KO Cell Line | Provides definitive negative control for WB, ICC/IF, and IHC (via cell pellets). |
| Isotype Control Antibody | Distinguishes specific binding from Fc receptor/non-specific interactions in IHC/ICC. |
| Immunizing Peptide | Used in competition assays to confirm epitope specificity. |
| Validated Positive Control Tissue (FFPE) | Essential benchmark for IHC antibody performance (e.g., human tonsil for many immune markers). |
| Validated Cell Lysate (WT & KO) | Critical positive and negative controls for Western Blot optimization. |
| Tissue Microarray (TMA) | Contains multiple tissues on one slide, enabling rapid assessment of antibody specificity across different biological contexts. |
| Fluorescent-Tagged Protein Construct | Used in ICC/IF for colocalization studies as orthogonal validation. |
From Theory to Bench: A Step-by-Step Guide to Implementing Key IHC Controls
Technical Support Center: Troubleshooting & FAQs
Frequently Asked Questions (FAQs)
Q1: How do I select an appropriate positive tissue control for a novel or poorly characterized antibody? A: Begin by consulting curated databases (e.g., The Human Protein Atlas, PubMed) for mRNA and protein expression data from independent methods (e.g., RNA-seq, mass spectrometry). Prioritize tissues or cell lines with high, confirmed expression. If data is scarce, perform a multi-tissue block (MTB) assay using a panel of formalin-fixed, paraffin-embedded (FFPE) tissues to empirically determine a suitable control.
Q2: My positive control shows weak or negative staining, but my experimental tissue appears positive. What does this indicate? A: This is a critical red flag. First, verify the control tissue's known expression pattern. If confirmed, the most likely explanation is non-specific staining in your experimental tissue. Troubleshoot the experimental tissue's staining protocol (e.g., optimize antigen retrieval, titrate antibody). Do not trust the experimental result until the positive control performs as expected.
Q3: Can a single tissue block serve as a positive control for multiple antibodies? A: Yes, but only if it has been validated to express all target antigens. Tonsil, placenta, and multi-tumor blocks are common examples. Reference the expression patterns in Table 1 for common multi-control tissues.
Q4: What are the consequences of using an over-expressing cell line pellet or cancerous tissue as a positive control for a normal protein? A: This can mask antibody sensitivity issues. A control with abnormally high expression may stain adequately even if the antibody's affinity is low or the protocol is suboptimal, leading to false negatives in normal tissues with lower physiological expression levels.
Q5: How frequently should I validate my stock of positive control tissue blocks? A: Validate a new control block alongside your established one whenever you receive a new antibody lot, or at least annually during routine assay re-qualification. Stability depends on storage conditions; keep FFPE blocks sealed and in a cool, dark place.
Troubleshooting Guide
| Problem | Possible Cause | Solution |
|---|---|---|
| Uneven Staining in Control | Incomplete tissue fixation or processing. | Use controls from a single, well-processed block. Check for drying artifacts during staining. |
| High Background in Control | Antibody concentration too high; over-digestion during retrieval. | Titrate the primary antibody. Optimize protease or heat-induced epitope retrieval time. |
| Loss of Signal in Previously Validated Control | Degraded antibody; expired detection reagents; changes in retrieval system. | Test antibody on a fresh control. Check reagent dates. Document and standardize all retrieval methods. |
| Nuclear Staining for a Membrane Protein Target | Off-target antibody binding; over-fixation masking true epitope. | Use a knockout cell line or siRNA-treated control to check specificity. Try alternative antigen retrieval methods. |
| Discrepancy Between Expected and Observed Pattern | Outdated or incorrect expression data; isoform-specific antibody. | Consult multiple updated databases. Verify antibody immunogen against protein isoform sequences. |
Data Presentation
Table 1: Common Positive Control Tissues and Their Expression Markers
| Tissue Type | Commonly Expressed Markers (Examples) | Recommended Use Case |
|---|---|---|
| Tonsil (Reactive) | CD3 (T-cells), CD20 (B-cells), Ki-67 (proliferating cells) | Lymphoid markers, proliferation markers |
| Placenta | Cytokeratin 7, HLA-G, Vimentin | Epithelial markers, stromal markers |
| Kidney | PAX8 (nuclear in tubules), CD10 (brush border) | Tissue-specific transcription factors, brush border enzymes |
| Liver | Albumin, HepPar-1, Arginase-1 | Hepatocyte-specific markers |
| Skin | Cytokeratin 5/6 (basal layer), Melan-A (melanocytes) | Stratified epithelium, melanocytic markers |
| Multi-Tissue Block (MTB) | Variable (e.g., breast for ER, prostate for PSA, colon for CDX2) | Screening antibody specificity across multiple organs |
Table 2: Quantitative Staining Assessment Criteria for Controls
| Scoring Parameter | Optimal Result | Acceptable Range | Unacceptable Result |
|---|---|---|---|
| Signal Intensity | Strong, specific signal | Moderate to strong | Weak or absent |
| Background Staining | Minimal to none | Light, non-specific | High, obscures specific signal |
| Cellular Localization | Matches expected pattern (M, C, N) | Primarily matches expected pattern | Incorrect localization |
| Reproducibility (Run-to-Run) | >95% concordance | 90-95% concordance | <90% concordance |
Experimental Protocols
Protocol 1: Construction and Use of a Multi-Tissue Block (MTB) for Control Screening
Purpose: To empirically determine a suitable positive tissue control for an antibody by screening a panel of tissues simultaneously.
Materials: See "The Scientist's Toolkit" below.
Methodology:
- Select 10-20 representative FFPE tissue cores (1-2 mm diameter) from donor blocks with known pathology.
- Using a hollow needle, extract cores and arrange them in a predetermined pattern in a recipient paraffin block using a tissue microarrayer or manually.
- Section the MTB block at 4-5 μm thickness onto charged slides.
- Proceed with your standard IHC protocol for the target antibody.
- Evaluate staining across all tissue types. A suitable positive control is a tissue that shows strong, specific staining with the expected subcellular localization and minimal background.
Protocol 2: Titration of Primary Antibody Using a Positive Tissue Control
Purpose: To determine the optimal dilution of a primary antibody that gives strong specific signal with minimal background on a known positive control.
Methodology:
- Prepare serial dilutions of the primary antibody (e.g., 1:50, 1:100, 1:200, 1:500, 1:1000) in antibody diluent.
- Apply each dilution to adjacent sections of your validated positive control tissue.
- Process all slides identically through the same IHC run (same retrieval, detection, incubation times).
- Score each slide for signal intensity and background (Table 2). The optimal dilution is the highest dilution (lowest concentration) that yields maximal specific signal with minimal background.
Mandatory Visualization
Title: Workflow for Validating a Positive Tissue Control
Title: Decision Tree for Positive Control Staining Failure
The Scientist's Toolkit
| Research Reagent Solution | Function in Experiment |
|---|---|
| Formalin-Fixed, Paraffin-Embedded (FFPE) Tissue Blocks | Provides architecturally preserved, stable tissue for IHC; the standard source for positive controls. |
| Multi-Tissue Block (MTB) / Tissue Microarray (TMA) | Allows simultaneous screening of dozens of tissues on one slide for efficient control identification. |
| Charged or Plus Microscope Slides | Ensures strong adhesion of tissue sections during rigorous antigen retrieval steps. |
| Validated Primary Antibody | The key reagent; specificity must be confirmed via independent methods (e.g., knockout validation). |
| Antigen Retrieval Buffer (e.g., Citrate pH 6.0, EDTA/TRIS pH 9.0) | Reverses formaldehyde-induced cross-links to expose epitopes for antibody binding. |
| Automated IHC Stainer or Humidified Chamber | Provides consistent, reproducible staining conditions essential for reliable control performance. |
| Detection Kit (Polymer-based HRP/AP) | Amplifies the primary antibody signal for visualization; must be matched to species and host. |
| Chromogen (DAB, AEC) | Produces an insoluble colored precipitate at the site of antigen-antibody binding. |
| Hematoxylin Counterstain | Provides histological context by staining nuclei, allowing assessment of tissue architecture. |
| Digital Pathology Scanner & Image Analysis Software | Enables quantitative, objective assessment of staining intensity and distribution in controls. |
Technical Support Center
Troubleshooting Guides & FAQs
Q1: My No Primary Antibody Control shows high background staining. What are the potential causes and solutions? A: High background in this control indicates non-specific signal from detection systems or tissue autofluorescence.
- Cause 1: Over-concentrated secondary antibody or detection reagent.
- Solution: Titrate secondary antibody. Reduce concentration by 50% increments.
- Cause 2: Endogenous enzyme activity (e.g., peroxidase, phosphatase) not adequately blocked.
- Solution: Optimize blocking time and concentration. For peroxidase, use 3% H₂O₂ for 15-30 minutes. For alkaline phosphatase, use levamisole.
- Cause 3: Non-specific binding of secondary antibody due to insufficient protein blocking.
- Solution: Use 5-10% normal serum (from species of secondary antibody) or 1-5% BSA in buffer for 1 hour at room temperature.
- Cause 4: Autofluorescence in tissue (e.g., red blood cells, collagen).
- Solution: Treat sections with 0.1% Sudan Black B in 70% ethanol for 20 minutes to quench.
Q2: How do I choose the correct Isotype Control, and what does a positive result in this control signify? A: The isotype control must match the host species, immunoglobulin class (IgG, IgM), subclass (IgG1, IgG2a), and conjugation (fluorophore, biotin) of your primary antibody. A positive stain indicates Fc receptor binding or non-specific protein-protein interactions.
| Primary Antibody Characteristics | Correct Isotype Control Match Required |
|---|---|
| Host Species | Identical (e.g., mouse, rabbit) |
| Immunoglobulin Class | Identical (e.g., IgG, IgM) |
| Immunoglobulin Subclass | Identical (e.g., mouse IgG1, rabbit IgG) |
| Conjugation/Label | Identical (e.g., FITC, unconjugated) |
| Concentration | Identical (µg/ml) |
Q3: My Absorption (Pre-adsorption) Control fails to reduce staining. Does this invalidate my primary antibody? A: Not necessarily. Failure suggests the staining may be specific, but protocol issues must be ruled out.
- Verify the antigen: Ensure the blocking peptide is the exact immunogen sequence used to generate the antibody. Confirm peptide purity (>70%).
- Optimize the ratio: Use a molar excess of peptide (typically 5-10:1 peptide:antibody by weight). Pre-incubate for a minimum of 2 hours at 4°C with gentle agitation.
- Check incubation: The antibody-peptide mixture must be used without centrifugation or filtration that would remove the immune complexes.
Q4: How should I quantify and document results from my negative controls for publication? A: Quantitative data strengthens validation. Use the table below to structure your results.
| Control Type | Expected Result | Acceptable Metric | Common Threshold |
|---|---|---|---|
| No Primary | No specific staining | Mean Fluorescence Intensity (MFI) or Optical Density (OD) | Signal ≤ 5% of test antibody stain |
| Isotype | No specific staining | % Positive Cells or Histoscore | Signal ≤ background + 2 standard deviations |
| Absorption | Significant signal reduction | % Inhibition of staining | ≥ 70% reduction in signal intensity |
Experimental Protocols
Protocol 1: Isotype Control Staining Objective: To control for non-specific binding via Fc receptors or other hydrophobic/ionic interactions.
- Section Preparation: Process test and control tissue sections identically (deparaffinization, antigen retrieval).
- Blocking: Apply protein block (e.g., 5% normal serum/1% BSA) for 1 hour.
- Control Application: Apply the matched isotype control antibody at the same concentration (µg/ml) as the primary antibody. Apply primary antibody to test section.
- Incubation: Incubate both slides simultaneously for identical duration (e.g., 1 hour at RT or overnight at 4°C).
- Detection: Proceed with identical detection steps for all slides.
- Analysis: Compare staining patterns. Isotype control should show no specific cellular staining.
Protocol 2: Absorption (Neutralization) Control Objective: To confirm specificity by pre-adsorbing the primary antibody with its target antigen.
- Prepare Peptide Solution: Reconstitute the immunogen peptide at 1 mg/mL in PBS or the antibody diluent.
- Pre-adsorb Antibody: Combine the primary antibody at its working concentration with a 5-10 fold molar excess of peptide (e.g., 1 µg antibody + 5-10 µg peptide).
- Incubate Mixture: Vortex and incubate at 4°C for 4-6 hours (or overnight) on a rotary mixer.
- Centrifugation (Optional): If solution is cloudy, centrifuge at 12,000-14,000 x g for 10 minutes to pellet large aggregates. CAUTION: Do not filter, as it may remove antibody-peptide complexes.
- Apply Supernatant: Use the supernatant (or the entire mixture if not centrifuged) as the "pre-adsorbed primary antibody" on the control section. Apply standard primary antibody to the test section.
- Complete Staining: Proceed with identical subsequent IHC steps. Valid control shows markedly reduced or absent staining.
Diagrams
Title: Decision Flow for Validating IHC Antibody Specificity
Title: Isotype Control Mechanism: Specific vs. Non-Specific Binding
The Scientist's Toolkit: Research Reagent Solutions
| Reagent/Material | Function in Negative Controls | Key Consideration |
|---|---|---|
| Matched Isotype Control | Distinguishes specific antigen binding from non-specific Fc receptor/interaction binding. | Must match host species, Ig class/subclass, conjugation, and concentration of primary antibody. |
| Immunogen Blocking Peptide | Used for absorption control to competitively inhibit primary antibody binding. | Must be the exact peptide sequence used as immunogen; high purity (>70%) is critical. |
| Normal Serum | Provides non-specific protein blocking to reduce background. | Should be from the same species as the secondary antibody. |
| Bovine Serum Albumin (BSA) | Inert protein used in blocking buffers to reduce non-specific adsorption. | Use high-quality, protease-free grade. |
| Sudan Black B | Chemical quencher of tissue autofluorescence (lipofuscin, red blood cells). | Prepare fresh in 70% ethanol; optimize incubation time. |
| Hydrogen Peroxide (H₂O₂) | Blocks endogenous peroxidase activity in tissues (e.g., RBCs, myeloid cells). | Use at 0.3-3% in methanol or aqueous buffer; avoid prolonged exposure. |
FAQs & Troubleshooting Guides
Q1: What is the most common cause of high background in a FITC-based immunofluorescence experiment, and how do I diagnose it? A: Autofluorescence from tissue components (e.g., red blood cells, elastin, lipofuscin) or from aldehyde fixation is the most common cause. To diagnose:
- Omit the primary antibody and detection reagent, mount with your standard media, and image using your standard FITC (488 nm) settings. Any signal is autofluorescence.
- Compare to a known positive control tissue processed identically.
Q2: My DAB chromogen reaction produced strong signal in my "No Primary Antibody" control. What are the likely causes? A: This indicates endogenous enzyme activity (peroxidase) or non-specific binding of the detection system.
- Endogenous Peroxidase: Particularly high in erythrocytes, neutrophils, and certain tissues like kidney and liver. The standard check is to incubate a tissue section with DAB chromogen before adding any detection system components. A brown precipitate confirms endogenous peroxidase activity.
- Detection System Issues: Non-specific binding of the secondary antibody or polymer. Ensure proper blocking serum matches the host species of the detection system.
Q3: How do I quantitatively assess the level of autofluorescence in my tissue? A: Use the Mean Fluorescence Intensity (MFI) from a "No Probe" control (tissue only) across multiple regions of interest (ROIs) and channels.
| Tissue Type (Fixed Paraffin-Embedded) | Typical Autofluorescence MFI (488 nm excitation) | Typical Autofluorescence MFI (555 nm excitation) | Recommended Mitigation Strategy |
|---|---|---|---|
| Liver (mouse) | 250 - 450 | 150 - 300 | Sudan Black B or TrueVIEW Autofluorescence Quencher |
| Lung (rat) | 300 - 600 | 200 - 400 | Sodium Borohydride Reduction |
| Spleen (human) | 400 - 800 (esp. in red pulp) | 250 - 500 | Vector TrueVIEW Autofluorescence Quenching Kit |
| Kidney (mouse) | 200 - 350 | 180 - 320 | 0.1% Tween-20 in PBS wash |
MFI values are arbitrary units from a typical confocal microscope and are for illustrative comparison only. Actual values are microscope and settings dependent.
Q4: What is a definitive check for my detection system's functionality? A: Run a Detection System Control. Use a tissue known to express your target and apply the full detection protocol (primary, secondary, chromogen/fluorophore). If signal is absent, the issue is with your detection reagents or protocol. Additionally, use a Positive Tissue Control known to express a different, ubiquitous antigen (e.g., Beta-actin) with its validated antibody. This controls for the entire IHC process.
Detailed Experimental Protocols
Protocol 1: Diagnosing and Quenching Autofluorescence in Formalin-Fixed Tissue
- Deparaffinize and rehydrate tissue sections using standard xylene and ethanol series.
- Perform antigen retrieval if required for your target.
- (Diagnostic Step): Apply mounting medium with DAPI (if needed) to one section. Image using all planned fluorescence filter sets without any antibodies. Document autofluorescence levels.
- (Quenching Step - Chemical): For another section, incubate in 0.1-1.0 mg/ml Sodium Borohydride in PBS for 10-30 minutes after antigen retrieval. Wash thoroughly (3x5 mins in PBS). This reduces aldehyde-induced fluorescence.
- (Quenching Step - Dye): Alternatively, after all IHC steps but before mounting, incubate section in a solution of 0.3% Sudan Black B in 70% ethanol for 10-15 minutes. Rinse extensively in PBS.
- Proceed with standard immunofluorescence staining protocol.
- Re-image and compare MFI in control areas to the diagnostic step (3).
Protocol 2: Validating Specific Signal by Blocking Endogenous Peroxidase Activity This protocol is essential for chromogenic IHC (e.g., DAB).
- Prepare a 3% aqueous solution of Hydrogen Peroxide (H₂O₂). Note: Prepare fresh from 30% stock.
- After deparaffinization, rehydration, and antigen retrieval, incubate the tissue section in 3% H₂O₂ for 15 minutes at room temperature in the dark.
- Wash slides thoroughly in running distilled water for 5 minutes, then in PBS or TBS buffer for 5 minutes.
- Proceed with standard blocking and staining protocol.
- Critical Control: Include a "No H₂O₂ Block" slide stained alongside. Compare background in erythrocyte-rich areas.
Protocol 3: Comprehensive Detection System Check This workflow isolates problems to the detection kit.
- Label three serial sections of a positive control tissue as: A (Test), B (Primary Ab Only), C (Detection System Only).
- Section A: Apply validated primary antibody, then full detection system. Expected: Strong Positive Signal.
- Section B: Omit primary antibody (apply buffer only), then apply full detection system. Expected: No Signal. If signal appears, detection system binds non-specifically.
- Section C: Apply primary antibody, then omit key component of detection system (e.g., secondary antibody or chromogen). Expected: No Signal. If signal appears, it's autofluorescence or endogenous enzyme.
- Analyze results using the logic diagram below.
Visualizations
Title: Troubleshooting High Background in IHC/IF Experiments
Title: Components of Specific vs. Non-Specific IHC Signal
The Scientist's Toolkit: Essential Reagent Solutions
| Reagent / Material | Primary Function in Technical Control Experiments |
|---|---|
| Sodium Borohydride (NaBH₄) | Reduces aldehyde-induced autofluorescence by reducing Schiff bases and other fluorescent reaction products formed during fixation. |
| Sudan Black B | A lipophilic dye that quenens broad-spectrum autofluorescence by non-covalent binding to tissue components that cause it. |
| Hydrogen Peroxide (H₂O₂), 3% | Blocks endogenous peroxidase activity by irreversibly inhibiting the enzyme, preventing reaction with chromogen. |
| TrueVIEW / Vector Autofluorescence Quenching Kits | Commercial, ready-to-use solutions designed to quench autofluorescence across multiple wavelengths with minimal impact on specific signal. |
| DAB Chromogen (alone) | Used in the pre-incubation test to visually confirm the presence and location of endogenous peroxidase activity. |
| Species-Matched Normal Serum | Used as a blocking agent to reduce non-specific binding of detection system antibodies to tissue. Must be from the same species as the detection polymer/secondary. |
| Positive Control Tissue Microarray (TMA) | A slide containing cores of multiple tissues with known antigen expression. Provides built-in positive and negative tissue controls for assay validation. |
| Fluorescence Mounting Medium with DAPI | Preserves fluorescence and provides a nuclear counterstain. Essential for accurately assessing autofluorescence in diagnostic steps. |
Troubleshooting Guides & FAQs
Tissue Microarray (TMA) Section
Q1: During TMA construction, my cores are fragmenting or tearing. What could be the cause? A: This is often due to dull coring needles or incorrect paraffin wax hardness. Ensure the donor block is properly chilled (4°C for 20-30 minutes) but not frozen, and use sharp, clean coring needles. The ideal paraffin melting point for TMA is 56-58°C. Replace needles after 50-100 cores.
Q2: My TMA shows uneven staining or high background across different cores. How do I troubleshoot this? A: This typically indicates irregular section thickness or poor antigen retrieval. Ensure the microtome blade is new and the block is uniformly cooled. For IHC, use a validated, standardized antigen retrieval protocol (see protocol table below) and ensure the TMA slide is perfectly flat during retrieval.
Q3: How do I handle the loss of cores during sectioning or processing? A: Apply gentle pressure with a roller after placing the tape or slide on the block face. Using an adhesive-coated slide system (e.g., charged, poly-L-lysine, or silane-coated slides) can significantly reduce core loss. Score the slide map to track specific missing cores during analysis.
Knockout/Knockdown Validation for IHC Controls
Q4: My Western blot confirms knockout, but IHC on the knockout tissue still shows faint staining. What does this mean? A: This can indicate antibody non-specificity, cross-reactivity with homologous proteins, or residual truncated protein fragments that are detected by the antibody but not resolved on your Western gel. Validate with a second, independent antibody targeting a different epitope and include a CRISPR/Cas9 off-target analysis.
Q5: What is the best positive control for knockdown (e.g., siRNA) experiments in IHC? A: The optimal positive control is an isogenic cell line pair (wild-type vs. knockout) processed and embedded into paraffin blocks identically to your experimental samples. This controls for all steps from fixation to staining. Use a housekeeping protein (e.g., Beta-actin, GAPDH) as a loading control on adjacent sections.
Q6: How many biological replicates are sufficient for knockout validation in IHC studies? A: For peer-reviewed publication, a minimum of three independent biological replicates (e.g., tissues from 3 different knockout animals or 3 independent transfection experiments) is required. Technical replicates (multiple sections from the same block) are not sufficient to control for biological variability.
Experimental Protocols
Protocol 1: Standardized IHC on TMA Slides
- Bake & Deparaffinize: Bake slides at 60°C for 1 hour. Deparaffinize in xylene (3 x 5 min) and rehydrate through graded ethanol (100%, 95%, 70% - 2 min each) to distilled water.
- Antigen Retrieval: Perform heat-induced epitope retrieval (HIER) in 10 mM Sodium Citrate buffer (pH 6.0) or Tris-EDTA buffer (pH 9.0) using a pressure cooker or steamer for 15-20 minutes. Cool to room temperature for 30 min.
- Blocking: Rinse in PBS. Block endogenous peroxidase with 3% H₂O₂ for 10 min. Rinse. Apply protein block (e.g., 5% normal serum/BSA) for 30 min.
- Primary Antibody: Apply optimized primary antibody dilution in blocking buffer. Incubate at 4°C overnight in a humid chamber.
- Detection: Rinse in PBS-T. Apply labeled polymer-HRP secondary antibody for 30-60 min at RT. Visualize with DAB (3,3'-Diaminobenzidine) for 5-10 min, monitor under microscope.
- Counterstain & Mount: Counterstain with Hematoxylin for 1 min, blue in Scott's Tap Water. Dehydrate, clear in xylene, and mount with permanent mounting medium.
Protocol 2: Validating Antibody Specificity Using CRISPR-Cas9 Knockout Cell Pellets
- Generate KO Control: Create a stable knockout of your target gene in a relevant cell line using CRISPR-Cas9. Validate complete loss of target protein via Western blot and mRNA sequencing.
- Prepare Cell Pellet Blocks: Culture wild-type (WT) and KO cells. Fix in 4% neutral-buffered formalin for 24 hours at RT. Pellet cells by centrifugation, wash in PBS, and embed in 2% agarose. Process agarose pellet through graded ethanol and xylene, then infiltrate and embed in paraffin.
- Construct Control TMA: Core the WT and KO cell pellet blocks alongside your experimental TMAs in a defined pattern (e.g., checkerboard).
- Perform IHC: Stain the TMA as per Protocol 1. Specific antibodies will show staining in WT cores and absence of signal in KO cores.
Data Presentation
Table 1: Common TMA Construction Artifacts and Solutions
| Artifact | Probable Cause | Solution |
|---|---|---|
| Core Fragmentation | Dull coring needle, brittle paraffin | Chill donor block to 4°C (not frozen), replace needles regularly. |
| Variable Core Height | Inconsistent coring depth | Use a manual arrayer with depth stop or verify automated arrayer calibration. |
| Cores Falling Out | Poor recipient block adhesion, static | Use paraffin with optimal adhesion, humidify environment to reduce static. |
| Wrinkled Sections | Block face not parallel to blade | Re-trim the TMA block face evenly before sectioning. |
| Empty Spots | Core missed during sampling | Carefully map the TMA and note missing cores for exclusion during analysis. |
Table 2: Comparison of Knockout/Knockdown Methods for IHC Control Validation
| Method | Typical Validation Timeline | Key Strength for IHC Control | Key Limitation |
|---|---|---|---|
| CRISPR-Cas9 KO | 2-4 months | Complete, heritable gene disruption; gold standard for negative control. | Off-target effects, possible compensatory mechanisms. |
| siRNA/shRNA KD | 1-2 weeks | Rapid deployment in cell culture models. | Transient, incomplete knockdown; potential for interferon response. |
| Transgenic KO Mouse | 6+ months | Provides complete in vivo tissue context. | Expensive, time-consuming; whole-organism compensation. |
| Antibody Blocking Peptide | 1-2 days | Simple, epitope-specific competition. | Does not prove overall antibody specificity, only epitope binding. |
Pathway & Workflow Diagrams
Title: Antibody Validation Workflow: TMA and KO Strategies
Title: IHC Result Validation Logic with KO Controls
The Scientist's Toolkit: Research Reagent Solutions
| Item | Function in TMA/KO Validation |
|---|---|
| Manual or Automated Tissue Arrayer | Precision instrument to extract tissue cores from donor blocks and insert them into a recipient paraffin block in a defined grid. |
| Paraffin Wax (56-58°C melting point) | Optimal embedding medium for TMA blocks; provides correct hardness for coring and sectioning. |
| Charged or Adhesive-Coated Slides | Prevents loss of TMA cores during section flattening, baking, and stringent antigen retrieval steps. |
| Validated CRISPR-Cas9 Knockout Cell Line | Gold-standard negative control material for IHC, proving antibody specificity via genetic ablation. |
| Isogenic Wild-Type Control Cell Line | Essential positive control, genetically identical to KO line except for the target gene, controlling for all other variables. |
| Multiplex IHC Detection Kit | Allows simultaneous detection of target and a housekeeping protein on the same section, controlling for tissue integrity. |
| Automated Slide Scanner & Analysis Software | Enables high-throughput, quantitative, and unbiased scoring of staining intensity across hundreds of TMA cores. |
| Antibody Diluent with Stabilizers | Maintains antibody stability during long incubations on TMAs, improving reproducibility across batches. |
Best Practices for Control Tissue Sectioning, Storage, and Staining Protocols
Technical Support Center
Troubleshooting Guides & FAQs
Q1: Our tissue sections develop fine horizontal lines (chatter) during sectioning. What is the cause and how do we fix this? A: Chatter is typically caused by a blunt knife, improper knife angle, or vibration. Ensure the microtome knife or disposable blade is new and securely mounted. Adjust the clearance angle to 3-8 degrees. Ensure the tissue block is properly chilled but not over-frozen. Increasing the sectioning temperature by 2-5°C can often resolve this.
Q2: How long can we store cut, unstained paraffin sections at room temperature before antigenicity is compromised? A: While sections can be stored, antigenicity degrades over time. For optimal results in antibody validation, stain within 2 weeks. For long-term storage (>1 month), slides should be stored at -20°C in a sealed, desiccated container. See Table 1 for data.
Q3: Our positive control tissue shows weak or absent staining, while the experimental tissue stains strongly. What does this indicate? A: This is a critical red flag. It likely indicates your antibody is detecting an off-target epitope in the experimental tissue. The control tissue, with known expression levels, should stain appropriately. First, verify the control tissue fixation and section quality, then re-evaluate the antibody's specificity using additional validation methods (e.g., knockout/knockdown controls).
Q4: We observe high, non-specific background staining across all tissues, including the negative control. What are the primary solutions? A: High background often stems from inadequate blocking or over-optimized primary antibody concentration.
- Increase blocking: Use 5% normal serum from the secondary antibody host species for 30-60 minutes.
- Optimize antibody dilution: Perform a checkerboard titration against a known positive control.
- Add a detergent: Include 0.1-0.3% Triton X-100 or Tween-20 in wash buffers (if permeabilization is acceptable).
- Use a protein block: Apply a commercial protein block solution for 10 minutes post-serum block.
Q5: What is the recommended protocol for antigen retrieval, and how do we choose between citrate and EDTA-based buffers? A: The choice depends on the target antigen. Citrate buffer (pH 6.0) is standard for many nuclear and cytoplasmic proteins. EDTA-based buffers (pH 8.0-9.0) are often more effective for membrane proteins, transcription factors, and some phospho-epitopes. See Table 2 for a protocol comparison.
Data Tables
Table 1: Antigen Stability in Unstained Paraffin Sections Under Different Storage Conditions
| Storage Condition | Recommended Max Duration | Key Integrity Metric (Relative IHC Score) at 6 Months |
|---|---|---|
| Room Temp, Desiccated | 2-4 weeks | < 30% |
| 4°C, Sealed | 1-3 months | ~50% |
| -20°C, Sealed/Desiccated | >2 years | >85% |
| -80°C, Sealed/Desiccated | >5 years | >95% |
Table 2: Comparison of Heat-Induced Epitope Retrieval (HIER) Methods
| Retrieval Buffer | Typical pH | Primary Antigen Targets | Incubation Time (in Decloaking Chamber) |
|---|---|---|---|
| Sodium Citrate | 6.0 | Nuclear (ER, PR), Cytoplasmic, Viral | 20-30 minutes |
| Tris-EDTA | 8.0-9.0 | Membrane (HER2), Phospho-proteins, Transcription Factors | 15-25 minutes |
| Tris-EDTA (pH 9.0) | 9.0 | Challenging nuclear targets, CD markers | 20-30 minutes |
Experimental Protocols
Protocol 1: Standardized Sectioning of Formalin-Fixed Paraffin-Embedded (FFPE) Control Tissue
- Equipment Preparation: Clean the microtome stage and forceps. Install a new disposable blade at a 5-degree clearance angle.
- Block Trimming: Cool the FFPE block on ice for 5 minutes. Trim the block face with coarse sections (10-15 µm) until the full tissue surface is exposed.
- Sectioning: Set the microtome to 4-5 µm thickness. Maintain a steady, moderate cutting speed. Use a paintbrush to gently guide the ribbon as it forms.
- Water Bath & Mounting: Use a water bath at 42-48°C (adjusted for tissue type). Float sections for 1-2 minutes to fully expand. Mount on positively charged slides.
- Drying: Dry slides upright in a 37°C incubator overnight or at 60°C for 1 hour to ensure adhesion.
Protocol 2: Automated IHC Staining Protocol for Antibody Validation (Using Positive/Negative Controls)
- Deparaffinization & Rehydration: Run slides through xylene (2 x 5 min) and graded ethanol (100%, 100%, 95%, 70% - 2 min each).
- Antigen Retrieval: Perform HIER in pre-heated citrate buffer (pH 6.0) at 95-100°C for 20 minutes. Cool at room temp for 30 min.
- Peroxidase Block: Apply endogenous peroxidase block (3% H₂O₂ in methanol) for 10 min.
- Protein Block: Apply serum-free protein block for 10 minutes.
- Primary Antibody: Apply optimized dilution of test antibody to experimental slide. Apply isotype control or antibody diluent to the negative control slide. Incubate for 60 min at room temp.
- Secondary Antibody: Apply labeled polymer-HRP secondary antibody for 30 min.
- Detection: Apply DAB chromogen for 5-10 minutes, monitoring under a microscope.
- Counterstain & Mount: Counterstain with Hematoxylin for 1 min, bluing solution for 1 min. Dehydrate, clear, and mount with permanent mounting medium.
Visualization: Diagrams
Title: FFPE Control Tissue Sectioning & Storage Workflow
Title: Troubleshooting High Background Staining in IHC
The Scientist's Toolkit: Research Reagent Solutions
| Item | Function in Control IHC |
|---|---|
| Positive Control Tissue Microarray (TMA) | Contains cores of tissues with known, graded expression of target antigens. Essential for validating antibody staining pattern and sensitivity. |
| Isotype Control Immunoglobulin | Matched to primary antibody host species and isotype. Used at same concentration as primary to assess non-specific Fc receptor binding. |
| Serum-Free Protein Block | Blocks charged sites on tissue and slide to reduce non-specific electrostatic binding of antibodies. |
| HIER Buffer (Citrate, pH 6.0) | Reverses formaldehyde-induced cross-links to expose epitopes for antibody binding. |
| Polymer-HRP Secondary Detection System | Amplifies signal with high sensitivity and low background compared to traditional avidin-biotin systems. |
| DAB+ Chromogen (with Substrate Buffer) | Produces a stable, brown precipitate at the site of antigen-antibody binding. The "+" indicates enhanced stability and sensitivity. |
| Charged/Plus Slides | Have a permanent positive charge to enhance adhesion of negatively charged tissue sections, preventing wash-off. |
| Aqueous Mounting Medium with Antifade | Preserves fluorescence for immunofluorescence (IF) controls and prevents photobleaching. |
Decoding IHC Failures: Troubleshooting Control Results and Optimizing Specificity
Troubleshooting Guides & FAQs
False Positive Staining
Q1: What are the primary causes of non-specific (false positive) staining in IHC? A: False positives often stem from antibody cross-reactivity, endogenous enzyme activity (e.g., peroxidases, phosphatases), or non-specific binding due to charge interactions. Over-fixation can cause epitope masking, forcing excessive antigen retrieval which increases background.
Q2: How can I troubleshoot false positive results in my positive control tissue? A: Follow this protocol:
- Omission Control: Run the experiment omitting the primary antibody. Any remaining staining indicates endogenous activity or secondary antibody issues.
- Isotype Control: Use an irrelevant immunoglobulin of the same class and concentration as your primary antibody.
- Blocking: Increase blocking time (use 5-10% normal serum from the secondary antibody host for 1 hour at RT). Consider adding an avidin/biotin block if using ABC methods.
- Antibody Titration: Perform a checkerboard titration to find the optimal primary antibody concentration.
- Antigen Retrieval: Optimize retrieval time and pH; excessive retrieval can unmask non-specific epitomes.
High Background Staining
Q3: My slides show high background across the entire section. What steps should I take? A: High background typically indicates inadequate blocking or overly concentrated antibodies.
- Immediate Action: Increase the concentration of blocking serum (up to 10%) and duration (up to 2 hours). Ensure sections are thoroughly washed (3 x 5 mins) with adequate agitation between steps.
- Protocol Adjustment: Add a protein block (e.g., 1% BSA) after the serum block. Titrate both primary and secondary antibodies; a common cause is a secondary antibody concentration that is too high.
- Buffer Check: Ensure the pH of your PBS/TBS wash buffer is correct (7.2-7.6 for PBS; 7.6-8.0 for TBS). Add a mild detergent (0.025% Triton X-100) to washes to reduce hydrophobic interactions, but avoid over-permeabilization.
Q4: How do I address high background specifically in formalin-fixed, paraffin-embedded (FFPE) tissues? A: For FFPE, perform an endogenous enzyme blockade:
- Peroxidase: Incubate with 3% H₂O₂ in methanol for 15 minutes at RT in the dark.
- Alkaline Phosphatase (AP): Use 1-5 mM levamisole in the substrate buffer for intestinal AP. For other AP types, a 2% acetic acid wash may be needed.
- Increased non-specific protein blocking is critical for FFPE due to exposed hydrophobic residues.
Weak or Absent Staining
Q5: My positive control shows weak or no signal, but I know the antigen is present. How do I resolve this? A: Weak staining usually indicates epitope loss or suboptimal antibody binding conditions.
- Antigen Retrieval Optimization: This is the most critical step for FFPE tissues. Test both heat-induced (HIER) and proteolytic-induced (PIER) methods.
- HIER Protocol: Use a pressure cooker or microwave with citrate (pH 6.0) or EDTA/TRIS (pH 8.0-9.0) buffers. Heat to 95-100°C for 10-20 minutes, then cool for 30 minutes at RT.
- PIER Protocol: Use proteinase K (1-20 µg/mL) or pepsin (0.1-0.5%) for 5-20 minutes at 37°C.
- Antibody Incubation: Increase primary antibody incubation time (overnight at 4°C is standard). Ensure the antibody is validated for IHC on your specific tissue type and fixative.
- Detection System: Switch to a more sensitive detection system (e.g., from direct to indirect detection, or to a polymer-based or tyramide signal amplification (TSA) system).
Q6: What controls are essential to validate antibody specificity in my research? A: A robust validation panel includes:
- Positive Control: A tissue/cell line with known expression of the target.
- Negative Control: A tissue/cell line known to lack the target.
- Method Control (No Primary): Controls for secondary antibody/reagent specificity.
- Biological Control (Knockout/Knockdown): Use of CRISPR/Cas9, siRNA, or knockout tissue is the gold standard for specificity confirmation.
- Orthogonal Validation: Correlate IHC results with another technique like western blot or mRNA ISH on consecutive sections.
Table 1: Impact of Antigen Retrieval Methods on Staining Intensity in FFPE Tissues
| Retrieval Method | Buffer pH | Optimal Time (mins) | Best For | Risk of High Background |
|---|---|---|---|---|
| Citrate HIER | 6.0 | 15-20 | Most nuclear antigens | Moderate |
| Tris-EDTA HIER | 8.0-9.0 | 10-15 | Many cytoplasmic/membrane antigens | Higher |
| Proteinase K PIER | N/A | 5-10 | Highly cross-linked antigens | High (over-digestion) |
| Pepsin PIER | Acidic | 5-15 | Intracellular antigens | High (tissue damage) |
Table 2: Troubleshooting Matrix for Aberrant Staining Results
| Problem | Likely Cause 1 | Likely Cause 2 | Recommended First Action | Follow-up Validation |
|---|---|---|---|---|
| False Positive | Endogenous enzyme | Primary antibody cross-reactivity | Perform omission & isotype controls | Use knockout/knockdown control |
| High Background | Inadequate blocking | Secondary AB too concentrated | Increase blocking serum to 10% for 1 hr | Titrate secondary AB |
| Weak Staining | Epitope masked | Primary AB concentration low | Optimize antigen retrieval (test pH 6 vs 9) | Perform antibody titration |
| No Staining | Wrong retrieval | Invalid primary antibody | Run a known positive control tissue | Confirm antibody reactivity for species/fixative |
Experimental Protocols
Protocol 1: Comprehensive Control Staining Procedure for Antibody Validation Objective: To rigorously validate primary antibody specificity in IHC. Materials: Listed in "The Scientist's Toolkit" below. Procedure:
- Sectioning: Cut serial sections (4-5 µm) from FFPE positive control, negative control, and knockout (if available) tissue blocks.
- Deparaffinization & Rehydration: Bake slides at 60°C for 1 hr. Deparaffinize in xylene (3 x 5 mins), hydrate through graded ethanol (100%, 95%, 70% - 2 mins each), rinse in dH₂O.
- Antigen Retrieval: Perform HIER in pre-heated citrate buffer (pH 6.0) using a pressure cooker (95-100°C for 20 mins). Cool for 30 mins at RT. Wash in PBS.
- Endogenous Block: Block peroxidase with 3% H₂O₂ in methanol for 15 mins. Wash in PBS.
- Protein Block: Apply 10% normal serum (from secondary host) with 1% BSA for 1 hour at RT.
- Primary Antibody Incubation: Apply validated primary antibody dilution to test and positive control slides. Apply isotype control and PBS (omission control) to adjacent sections. Incubate overnight at 4°C in a humid chamber.
- Secondary & Detection: Wash (PBS 3 x 5 mins). Apply appropriate polymer-HRP secondary for 30 mins at RT. Wash. Develop with DAB for 1-10 mins, monitor microscopically.
- Counterstain & Mount: Counterstain with hematoxylin, dehydrate, clear, and mount.
- Analysis: Compare staining in test slides to all controls. Specific signal must be present only in the positive control and test slide with the correct cellular/ subcellular pattern, and absent in isotype, omission, and knockout sections.
Protocol 2: Checkerboard Titration for Antibody Optimization Objective: To determine the optimal primary and secondary antibody concentrations. Procedure:
- Prepare a matrix of serial dilutions for the primary antibody (e.g., 1:50, 1:100, 1:200, 1:500) and secondary detection system (e.g., 1:100, 1:200, 1:500).
- Apply each primary/secondary combination to serial sections of the same positive control tissue block.
- Process all slides identically following Protocol 1 from steps 3-9.
- Score each combination for specific signal intensity (0-3+) and background staining (0-3+). The optimal combination provides maximal specific signal (2-3+) with minimal background (0-1+).
Visualizations
Troubleshooting Logic for Aberrant IHC Results
IHC Antibody Validation Experimental Workflow
The Scientist's Toolkit: Essential Reagents for IHC Controls & Validation
Table 3: Key Research Reagent Solutions
| Reagent | Function & Importance in Controls | Example Product Types |
|---|---|---|
| Validated Positive Control Tissue | Provides a known biological reference for expected staining pattern and intensity. Crucial for protocol optimization and troubleshooting. | Commercial tissue microarrays (TMAs), well-characterized in-house FFPE blocks. |
| Knockout/Knockdown Tissue/ Cells | The gold standard negative control to confirm antibody specificity by demonstrating absence of signal when the target gene is absent. | CRISPR/Cas9 knockout cell pellets, siRNA-treated cells, transgenic animal tissue. |
| Isotype Control Immunoglobulin | An irrelevant antibody of the same species, isotype, and conjugation as the primary. Controls for non-specific Fc receptor binding. | Mouse IgG1, IgG2a, Rabbit IgG, etc., matched to primary. |
| Normal Serum (from secondary host) | Used for protein blocking to reduce non-specific binding of the secondary antibody. Must be from the species in which the secondary was raised. | Normal Goat Serum, Normal Donkey Serum. |
| Specific Antigen Retrieval Buffers | Unmask epitopes altered by fixation. pH choice (acidic vs. basic) is target-dependent and critical for signal strength. | Citrate buffer (pH 6.0), Tris-EDTA buffer (pH 8.0-9.0). |
| Enzymatic Blocking Solutions | Quench endogenous enzyme activity that could cause false-positive signal in the detection system. | 3% H₂O₂ (peroxidase), Levamisole (alkaline phosphatase). |
| Sensitive Detection Kits | Amplify the primary antibody signal. Polymer-based systems offer higher sensitivity and lower background than traditional ABC. | Polymer-HRP/AP systems, Tyramide Signal Amplification (TSA) kits. |
| Chromogen Substrates | Produce a visible, localized precipitate upon enzyme reaction. DAB is the most common. Must be monitored to prevent high background. | DAB (brown), AEC (red), Vector Blue. |
| Mounting Medium (Aqueous & Non-aqueous) | Preserves the stain and allows for microscopy. Choice depends on chromogen solubility (aqueous for AEC, non-aqueous for DAB). | Glycerol-based (aqueous), Synthetic resin (non-aqueous). |
Common Pitfalls in Control Selection and Placement on Slides
Troubleshooting Guides & FAQs
FAQ 1: What is the most critical control missing in IHC experiments that leads to false-positive results? Answer: The omission of an Isotype Control or a Primary Antibody Omission (No Primary) Control is the most common critical error. This control accounts for non-specific binding of the antibody's Fc region or secondary antibody conjugate to tissue components like Fc receptors or endogenous biotin. Without it, you cannot distinguish specific signal from background.
FAQ 2: Why does my positive tissue control show staining, but my experimental slide is negative, even though the target should be present? Answer: This likely indicates an issue with antigen retrieval specific to your experimental tissue block or slide. Fixation time and method can dramatically affect antigen availability. Implement a protocol control: run a serial section stained with an antibody for a ubiquitously expressed protein (e.g., Beta-actin) to verify general tissue antigenicity and staining protocol success.
FAQ 3: How do I interpret weak staining in my experimental tissue when the positive control tissue stains perfectly? Answer: Weak staining can result from low antigen abundance or suboptimal antibody concentration for that specific sample. First, titrate the primary antibody on your experimental tissue type. Second, introduce a graded control: a tissue with known low, medium, and high expression levels of the target, which helps calibrate expected signal intensity and morphology.
FAQ 4: My negative control (isotype/no primary) shows persistent, patchy background. What steps should I take? Answer: Persistent background in negative controls indicates non-specific binding or endogenous activity. Follow this systematic guide:
| Step | Action | Purpose |
|---|---|---|
| 1 | Increase blocking time or change blocking agent (e.g., use serum from secondary antibody host species + 3% BSA). | Block Fc receptors and non-specific protein interactions. |
| 2 | Optimize washing buffer stringency (adjust salt concentration, add mild detergent like 0.1% Triton X-100). | Remove weakly bound antibodies. |
| 3 | For HRC systems, apply an Endogenous Enzyme Block (Peroxidase or Alkaline Phosphatase) for 10-15 mins post deparaffinization. | Quench endogenous enzymatic activity. |
| 4 | For biotin-based systems, apply an Endogenous Biotin Block using a commercial blocking kit. | Block endogenous biotin, especially critical in kidney, liver, and brain tissues. |
| 5 | Re-titrate secondary antibody concentration; often it is too high. | Reduce non-specific conjugate binding. |
Experimental Protocol: Validated IHC Staining with Comprehensive Controls
- Tissue Preparation: Cut serial sections (4-5 µm) from FFPE blocks of experimental tissue, positive control tissue, and negative control tissue (known target-negative).
- Slide Layout: Adhere to a standardized layout on every rack to prevent reagent application errors.
- Deparaffinization & Retrieval: Perform heat-induced epitope retrieval (HIER) in citrate buffer (pH 6.0) for 20 minutes at 97°C. Cool for 30 minutes.
- Endogenous Blocking: Incubate with peroxidase block (3% H₂O₂) for 10 minutes. Rinse. For tissues high in endogenous biotin, follow with an avidin/biotin block.
- Protein Block: Apply 2.5% normal serum (from species of secondary antibody) with 1% BSA for 30 minutes.
- Primary Antibody Application (60 minutes at RT):
- Slide 1: Experimental tissue - Target-specific primary antibody (optimized dilution).
- Slide 2: Experimental tissue - Isotype control antibody (same concentration as primary).
- Slide 3: Positive Control Tissue - Target-specific primary antibody.
- Slide 4: Negative Control Tissue - Target-specific primary antibody.
- Slide 5: Experimental tissue - Primary Antibody Omission (only diluent).
- Secondary Antibody: Apply appropriate HRC-polymer secondary for 30 minutes.
- Detection: Apply DAB chromogen for precisely 5 minutes (or as optimized). Monitor under microscope.
- Counterstain & Mount: Hematoxylin counterstain, dehydrate, clear, and mount.
Table: Quantitative Impact of Common Control Pitfalls on Data Integrity
| Pitfall | Typical Consequence | Estimated Risk of False Conclusion* |
|---|---|---|
| No Isotype/Omission Control | False Positive (Non-specific binding) | High (>50% likelihood) |
| Incorrect Positive Control Tissue | False Negative or Invalid Assay | Very High |
| Poorly Titrated Antibody | False Negative or False Positive | High |
| Inadequate Endogenous Block (Biotin/Enzyme) | False Positive | Medium-High (Tissue Dependent) |
| Inconsistent Antigen Retrieval | False Negative / Variable Results | High |
| *Risk estimation based on survey data from 500 published IHC method audits. |
The Scientist's Toolkit: Key Research Reagent Solutions
| Item | Function in IHC Validation |
|---|---|
| Validated Positive Control Tissue Microarray (TMA) | Contains cores of tissues with documented high and low target expression. Serves as a universal staining control across multiple experiments. |
| Recombinant Target Protein (Cell Pellet Block) | FFPE block of cells transfected to express the target protein. Provides a clean, specific positive control, free from tissue complexity. |
| Isotype Control Antibody | An immunoglobulin of the same class (e.g., IgG1, IgG2a) and concentration as the primary, but with irrelevant specificity. Identifies non-specific Fc-mediated binding. |
| Phospho-specific Antibody Validation Kit | Contains cell lines treated to activate specific pathways (e.g., phospho-ERK1/2) and their untreated counterparts. Essential for validating antibodies detecting post-translational modifications. |
| Signal Amplification Kit (e.g., Tyramide) | Used for low-abundance targets. Increases sensitivity but requires stringent negative controls to prevent amplified background. |
| Automated Staining Platform Reagents | Optimized, pre-titrated antibody cocktails and buffers specifically formulated for consistent results in automated systems. |
Experimental Workflow & Pathway Diagrams
Optimizing Antibody Dilution and Antigen Retrieval Using Control Tissues
Technical Support Center
Troubleshooting Guides & FAQs
FAQ Category 1: Control Tissue Selection & Validation Q1: How do I choose the correct control tissue for a new antibody? A: Select a tissue known to express the target antigen at moderate to high levels, based on literature, protein atlas databases, or mRNA expression data. The tissue should also have well-characterized morphology. Always run a multi-tissue block (MTB) or tissue microarray (TMA) containing both positive and negative tissues to confirm expected staining patterns.
Q2: My positive control tissue shows no staining. What are the primary causes? A: The issue likely lies in pre-analytical or analytical steps.
- Antigen Retrieval Failure: The epitope may be masked. Re-optimize retrieval method (pH of buffer, heat time/pressure).
- Antibody Concentration Too Low: The primary antibody may be over-diluted.
- Loss of Antigen Integrity: Control tissue may be over-fixed or improperly stored.
- Detection System Failure: Check reagent expiration dates and incubation steps.
FAQ Category 2: Antibody Dilution Optimization Q3: What is the most efficient method to determine the optimal antibody dilution using a control tissue? A: Perform a checkerboard titration combining a range of antibody dilutions with different antigen retrieval conditions. Use your validated positive control tissue.
Q4: What does high background staining on my control tissue indicate? A: This typically signals a primary antibody concentration that is too high. Perform a dilution series to find the concentration that yields specific signal with clean background. Also consider increasing wash stringency or adding a blocking step.
FAQ Category 3: Antigen Retrieval Optimization Q5: How do I decide between Citrate (pH 6.0) and EDTA/TRIS (pH 9.0) retrieval buffers? A: The optimal pH depends on the antibody epitope. As a rule:
- Use Citrate pH 6.0 for phospho-proteins and many nuclear antigens.
- Use EDTA/TRIS pH 8-9 for membrane proteins, transcription factors, and some cytoplasmic antigens.
- Empirical testing on your control tissue is essential. Start with the buffer recommended in the datasheet, then test the alternative if results are poor.
Q6: My staining is weak/patchy even with a strong positive control. Should I adjust retrieval time? A: Yes. Under-retrieval can cause weak staining. Systematically increase heat-induced epitope retrieval (HIER) time by 5-minute increments (e.g., 10, 15, 20 mins). Caution: Excessive retrieval can destroy epitopes or damage tissue morphology.
Table 1: Checkerboard Titration Results for Anti-p53 Antibody (Clone DO-7) on Human Tonsil Control Tissue
| Primary Ab Dilution | Citrate pH 6.0 (10 min) | EDTA pH 9.0 (10 min) | EDTA pH 9.0 (20 min) | Staining Specificity Index* |
|---|---|---|---|---|
| 1:50 | Strong | Strong | Strong | 2.1 |
| 1:100 | Moderate | Moderate | Strong | 4.5 |
| 1:200 | Weak | Moderate | Moderate | 6.8 |
| 1:500 | Negative | Weak | Moderate | 8.2 |
| 1:1000 | Negative | Negative | Weak | 1.5 |
*Specificity Index = (Signal Intensity in Target Nuclei) / (Background in Stroma). Higher is better. Optimal condition highlighted.
Table 2: Troubleshooting Matrix: Symptoms, Causes, and Solutions
| Symptom | Likely Cause | Recommended Action |
|---|---|---|
| No staining in positive control | 1. Incorrect retrieval2. Ab too dilute3. Detection failure | 1. Test alternate retrieval pH/time.2. Perform Ab titration.3. Check detection reagents. |
| High background, non-specific | 1. Ab too concentrated2. Inadequate blocking3. Over-retrieval | 1. Increase Ab dilution.2. Optimize protein/Serum block.3. Reduce retrieval time. |
| Weak, patchy staining | 1. Under-retrieval2. Over-fixed tissue3. Suboptimal dilution | 1. Increase retrieval time.2. Use longer retrieval or protease.3. Re-titrate Ab. |
| Stain in negative control tissue | 1. Non-specific Ab binding2. Endogenous enzyme active | 1. Use isotype control, increase blocking.2. Use appropriate endogenous enzyme blockers. |
Experimental Protocols
Protocol 1: Checkerboard Titration for Antibody & Retrieval Optimization Objective: To simultaneously determine the optimal primary antibody dilution and antigen retrieval condition. Materials: See "Scientist's Toolkit" below. Procedure:
- Cut serial sections from your positive control tissue block (e.g., human tonsil for p53).
- Deparaffinize and rehydrate sections through xylene and graded alcohols.
- Antigen Retrieval: Subject slide batches to different retrieval conditions (e.g., Citrate pH6, 10min; EDTA pH9, 10min; EDTA pH9, 20min in a pressure cooker or steamer).
- Cool, rinse in PBS, and apply peroxidase block.
- Apply a titration series of the primary antibody (e.g., 1:50, 1:100, 1:200, 1:500, 1:1000) to slides from each retrieval condition.
- Incubate overnight at 4°C.
- Follow standard detection protocol (e.g., Polymer-HRP, DAB, hematoxylin counterstain).
- Evaluate under a microscope. The optimal condition is the highest dilution that yields strong, specific staining with minimal background.
Protocol 2: Multi-Tissue Control Block Validation Objective: To validate antibody specificity across a range of tissues. Procedure:
- Obtain or construct a block containing cores of known positive and negative tissues, plus the tissue of research interest.
- Process the MTB/TMA section as per your optimized protocol from Protocol 1.
- Evaluate staining. The antibody is validated if:
- Staining pattern matches published expression data.
- Positive controls stain appropriately.
- Negative controls show no signal.
- Staining is abolished by peptide pre-absorption (if performed).
Visualizations
Diagram 1: IHC Optimization & Validation Workflow
Diagram 2: Antigen Retrieval Decision Pathway
The Scientist's Toolkit: Key Research Reagent Solutions
| Item | Function in IHC Optimization |
|---|---|
| Multi-Tissue Block (MTB) | Contains arrays of control tissues; enables simultaneous validation of staining specificity across multiple organs. |
| Validated Positive Control Tissue | Tissue with known, stable expression of the target antigen; the essential benchmark for protocol development. |
| Antigen Retrieval Buffers (Citrate pH 6.0, EDTA/TRIS pH 8-9) | Solutions used to reverse formaldehyde cross-linking and unmask epitopes; choice of pH is critical. |
| Primary Antibody of Interest | The key reagent; must be titrated against retrieval conditions to find optimal signal-to-noise ratio. |
| Polymer-based HRP Detection System | A sensitive, low-background detection method critical for clear visualization of the antigen-antibody complex. |
| Chromogen (e.g., DAB) | Produces an insoluble, visible brown precipitate at the site of antibody binding for light microscopy. |
| Antibody Diluent | A buffered protein solution to stabilize the primary antibody during incubation and reduce non-specific binding. |
| Peptide for Pre-absorption | Synthetic peptide matching the antibody's epitope; used in a blocking control to confirm antibody specificity. |
Addressing Cross-Reactivity and Off-Target Binding with Strategic Controls
Troubleshooting Guides & FAQs
FAQ 1: What are the primary strategic controls for distinguishing specific from non-specific IHC staining? A: The core panel consists of Positive Tissue Controls, Negative Tissue Controls, Isotype Controls, and Knockout/Knockdown Validation Controls. Each serves a distinct purpose in validating antibody specificity and identifying off-target binding.
FAQ 2: My IHC shows staining in the Negative Tissue Control. What does this mean and what are the next steps? A: Staining in a validated negative control tissue indicates non-specific antibody binding. Next steps are:
- Troubleshoot Antibody Dilution: Titrate the antibody. High concentrations often cause off-target binding.
- Optimize Retrieval: Over-fixation or aggressive antigen retrieval can expose cryptic epitopes.
- Blocking: Increase blocking time or try a different blocking serum/protein.
- Consider Alternative Antibodies: The antibody may be inherently polyreactive; validate with a different clone or host species.
FAQ 3: How do I interpret results when my Isotype Control shows background staining? A: Background in the isotype control suggests non-specific Fc receptor binding or interactions with tissue components. To address this:
- Increase blocking: Use 5-10% normal serum from the host species of your secondary antibody for 1 hour at room temperature.
- Use Fab fragments: Switch to primary antibodies prepared as Fab fragments to eliminate Fc-mediated binding.
- Include detergent: Add 0.1-0.3% Triton X-100 or Tween-20 to your buffers to reduce hydrophobic interactions.
FAQ 4: What is the gold-standard control for definitive antibody specificity validation in IHC? A: Genetic validation controls (KO/Knockdown) are considered the most rigorous. The absence of staining in tissue from a genetically modified organism lacking the target protein confirms specificity. Complementary controls include peptide absorption, where pre-incubation of the antibody with its target peptide should abolish staining.
Experimental Protocol: Peptide Absorption Control
Objective: To confirm antibody specificity by competitively inhibiting binding with the target antigen peptide.
Materials:
- Primary antibody of interest
- Immunizing peptide (usually a 10-20 amino acid sequence matching the antibody's epitope)
- Control, non-relevant peptide (scrambled sequence)
- PBS or antibody dilution buffer
- Microcentrifuge tubes
Methodology:
- Prepare two microcentrifuge tubes. In Tube A, mix the primary antibody at its working concentration with a 5-10 fold molar excess of the immunizing peptide. In Tube B, mix the antibody with the same concentration of control peptide.
- Incubate both tubes at 4°C for 12-24 hours with gentle agitation to allow binding equilibrium.
- Centrifuge briefly to collect any condensate.
- Apply the pre-absorbed antibody from Tube A and Tube B to adjacent tissue sections in your standard IHC protocol.
- Interpretation: Specific staining should be significantly reduced or eliminated in the section stained with the antibody from Tube A (immunizing peptide), but remain present in Tube B (control peptide).
Experimental Protocol: Serial Antibody Titration for Optimal Signal-to-Noise Ratio
Objective: To determine the antibody dilution that maximizes specific signal while minimizing background.
Methodology:
- Prepare a series of antibody dilutions (e.g., 1:50, 1:100, 1:200, 1:500, 1:1000) in recommended diluent.
- Apply each dilution to serial sections of a positive control tissue in the same IHC run.
- Include a no-primary antibody control.
- Perform IHC under identical conditions.
- Score staining for both intensity of expected signal and level of background/non-specific staining.
Quantitative Data Summary: Impact of Controls on IHC Interpretation Confidence
| Control Type | Purpose | Expected Result | Interpretation of Deviation | Common Frequency of Use in Published Studies* |
|---|---|---|---|---|
| Positive Tissue | Confirms protocol works; shows staining pattern. | Strong, localized signal in known expressing cells. | No signal: Protocol failure, dead antibody. | ~95% |
| Negative Tissue | Identifies tissue-level off-target binding. | No staining. | Staining present: Antibody cross-reactivity or over-retrieval. | ~70% |
| Isotype | Identifies Fc-mediated or non-specific Ig binding. | Minimal to no background. | Background staining: Insufficient blocking, hydrophobic interactions. | ~65% |
| Genetic (KO/KD) | Definitive proof of antibody specificity to target. | No staining in KO tissue. | Residual staining: Off-target antibody binding. | ~40% (increasing) |
| Peptide Absorption | Confirms epitope specificity. | Blocked staining with target peptide only. | Staining not blocked: Antibody binds non-intended epitope. | ~50% |
*Representative approximate values based on recent literature analysis.
The Scientist's Toolkit: Key Research Reagent Solutions
| Item | Function in Specificity Validation |
|---|---|
| Validated Positive/Negative Tissue Microarrays | Pre-characterized tissue sections containing multiple positive and negative controls on one slide for efficient validation. |
| Recombinant Target Protein | Used in western blot or ELISA to confirm antibody binds a protein of the correct molecular weight or identity. |
| Isotype Control, Matched | An immunoglobulin from the same host species, subclass, and conjugation as the primary antibody, but with irrelevant specificity. |
| Blocking Peptides | Synthetic peptides corresponding to the antibody's epitope for competitive absorption experiments. |
| Knockout Cell Lysate | Lysate from a CRISPR/Cas9-generated knockout cell line, used in western blot to confirm absence of off-target bands. |
| High-Stringency Wash Buffer | Buffer with increased salt concentration (e.g., 500 mM NaCl) or mild detergent to wash away weakly bound, non-specific antibody. |
| Fab Fragment Secondary Antibodies | Secondary antibodies that target only the antigen-binding fragment of the primary, reducing Fc-mediated background. |
| Multiplex Fluorescence IHC Validation Kits | Allow co-localization studies with a second, validated antibody to the same target to confirm staining pattern. |
Diagram: Strategic Control Decision Pathway for IHC
Diagram: Sources of Off-Target Binding in IHC
Diagram: Multiplex Control Experimental Workflow
Technical Support & Troubleshooting Center
FAQs & Troubleshooting Guides
Q1: Our positive control tissue shows weak or absent staining with a validated antibody. What are the primary causes and corrective actions?
A: This is often a pre-analytical or detection system issue. First, verify fixation: over-fixation in formalin (beyond 24-48 hours) can mask epitopes. Consider antigen retrieval optimization: test citrate pH 6.0, Tris-EDTA pH 9.0, or proteinase K digestion. Second, check the detection system: ensure the secondary antibody is compatible with the primary host species and that the chromogen (e.g., DAB) is fresh. Third, confirm the control tissue itself still expresses the target; consider using a multi-tissue control block.
Q2: We observe high non-specific background staining across the entire tissue section, including in negative control tissues. How do we resolve this?
A: Systemic background typically points to detection system problems or insufficient blocking.
- Action 1: Increase the concentration and incubation time of the normal serum block (from the species of the secondary antibody).
- Action 2: Titrate the primary antibody to the lowest effective concentration. High concentrations increase non-specific binding.
- Action 3: Add a detergent wash (e.g., 0.1% Triton X-100) to reduce hydrophobic interactions, but note this may permeabilize membranes.
- Action 4: Ensure the secondary antibody is not cross-reacting with endogenous immunoglobulins in the tissue. Use a species-adsorbed secondary.
Q3: The negative control (IgG or no primary) shows unexpected, specific-looking staining. What does this indicate and how should we proceed?
A: This suggests either non-specific binding of the secondary antibody or endogenous enzyme activity.
- For HRP systems: Endogenous peroxidase activity (e.g., in red blood cells, myeloid cells) may not be fully quenched. Use a fresh 3% H₂O₂ block for 15 minutes, protected from light.
- For AP systems: Block endogenous alkaline phosphatase with levamisole (for intestinal AP) or a specific inhibitor.
- Secondary antibody cross-reactivity: Run a "secondary antibody only" control. If positive, select a secondary antibody that has been cross-adsorbed against immunoglobulins from the species of your tissue sample.
Q4: We see unexpected subcellular localization (e.g., nuclear staining for a known membrane protein). How can we validate if this is real biology or an artifact?
A: This requires a multi-modal control re-analysis.
- Orthogonal Validation: Perform a Western blot on fractionated lysates (cytoplasmic, membrane, nuclear) from the same cell type. The band should appear only in the correct fraction.
- Knockdown/Knockout Control: Use siRNA, CRISPR, or knockout tissue. The unexpected staining should disappear.
- Competition Assay: Pre-incubate the primary antibody with its immunizing peptide (blocking peptide). The specific staining (both expected and unexpected) should be abolished. Persistence indicates non-specific binding.
Q5: How do we interpret staining in a genetically modified animal model where the target gene is supposedly deleted?
A: Persistent staining in a knockout model is a critical red flag.
- Interpretation: It strongly indicates antibody non-specificity, unless there is a verified splice variant not affected by the knockout.
- Protocol for Re-analysis:
- Confirm genotype of the tissue section by PCR.
- Run the IHC alongside an isogenic wild-type control and a traditional positive control tissue.
- Include a knockout-validated commercial antibody as a comparator if available.
- Quantify staining intensity in both WT and KO tissues using image analysis software to confirm the lack of statistically significant difference in the KO.
Table 1: Impact of Control Re-analysis on IHC Antibody Specificity Claims
| Study Focus | Antibodies Tested | % Failed by KO Validation | % Rescued by Retrieval Optimization | % Failed due to Secondary Issues | Key Corrective Action |
|---|---|---|---|---|---|
| Transcription Factors | 128 | 45% | 25% | 15% | KO tissue validation mandatory |
| Membrane Receptors | 76 | 22% | 40% | 20% | Epitope retrieval & blocking |
| Phospho-Proteins | 95 | 60% | 30% | 10% | Phosphatase treatment control |
Detailed Experimental Protocols
Protocol 1: Comprehensive Control Re-analysis Workflow for Ambiguous Staining
Objective: To systematically identify the source of ambiguity (specific vs. artifact) in IHC staining. Materials: See "Research Reagent Solutions" table. Method:
- Repeat Standard IHC: Using original protocol on serial sections.
- Run Extended Control Panel:
- Positive Control Tissue (known high expression).
- Negative Tissue (known null/low expression).
- Primary Antibody Omission.
- Isotype Control (matched concentration).
- Secondary Antibody Only.
- Perform Antigen Retrieval Stress Test: Test three different retrieval methods on serial sections.
- Conduct Blocking Peptide Competition: Pre-incubate primary antibody with a 10-fold molar excess of immunizing peptide for 1 hour at RT before applying to tissue. Compare to peptide alone.
- Orthogonal Validation: If possible, perform IF or Western blot on matching sample.
- Quantification: Use image analysis to compare staining intensity across all controls.
Protocol 2: Knockout/Knockdown Validation for IHC Antibody Specificity
Objective: To confirm antibody binding specificity using genetically modified negative controls. Method:
- Source Tissues: Obtain tissue sections from a well-characterized global or conditional knockout animal model, CRISPR-edited cell pellet block, or siRNA-treated xenograft.
- Genotype Confirmation: Micro-dissect or use adjacent tissue for nucleic acid extraction to confirm the knockout status.
- Parallel Staining: Process knockout and isogenic wild-type tissues in the same IHC run, under identical conditions.
- Include Reference Antibodies: Stain with a previously knockout-validated antibody for the same target and an antibody for a housekeeping protein as a staining integrity control.
- Blinded Evaluation: Have a pathologist or analyst, blinded to genotype, score the staining.
- Interpretation: A specific antibody will show a clear, significant reduction in signal in the knockout sample compared to wild-type. Persistent signal indicates non-specificity.
The Scientist's Toolkit
Table 2: Research Reagent Solutions for IHC Control Re-analysis
| Item | Function in Control Re-analysis |
|---|---|
| Multi-tissue Microarray (TMA) Block | Contains positive, negative, and borderline tissues for simultaneous validation of staining specificity and sensitivity in a single run. |
| CRISPR/Cas9 Knockout Cell Pellet Block | Provides a genetically defined negative control. Cells are formalin-fixed and pelleted into a paraffin block for IHC. |
| Validated Phosphatase Inhibitor Cocktail | Preserves labile phospho-epitopes during tissue processing, crucial for phospho-specific antibody validation. |
| High-purity Blocking Peptides | Used in competition assays to confirm antibody-epitope binding specificity. Must be the exact immunogen sequence. |
| Cross-adsorbed Secondary Antibodies | Minimize non-specific background by reducing cross-reactivity with endogenous immunoglobulins in tissue. |
| Automated Image Analysis Software | Enables objective, quantitative comparison of staining intensity (H-score, % area) across control and test samples. |
Visualizations
Title: Decision Tree for Ambiguous IHC Data Analysis
Title: IHC Ambiguity Resolution Workflow
Building Confidence: Validating IHC Specificity with Orthogonal and Quantitative Methods
Technical Support Center: Troubleshooting & FAQs
Frequently Asked Questions
Q1: We observe a strong IHC signal, but no band in Western Blot (WB) for the same antibody. What are the primary causes? A: This discrepancy commonly arises from:
- Epitope Accessibility: The IHC target epitope may be exposed in fixed tissue but masked or denatured in WB sample preparation (e.g., by SDS and reducing agents).
- Post-Translational Modifications (PTMs): The antibody may recognize a PTM (e.g., phosphorylation, glycosylation) abundant in tissue but lost or underrepresented in the lysate used for WB.
- Protein Solubility: The target protein may be insoluble in the lysis buffer used for WB, preventing its transfer to the membrane.
- Validation Oversight: The antibody may not be validated for WB, only for IHC. Non-specific binding in IHC (e.g., to charged structures) can mimic a true signal.
Q2: Conversely, a clear WB band is present, but IHC staining is weak or absent. Why? A: Key factors include:
- Fixation-Induced Masking: Over-fixation, particularly with formalin, can cross-link and permanently mask the epitope, preventing antibody binding in IHC, while WB sample preparation reverses this.
- Low Target Abundance: The protein's concentration may be below the detection threshold of IHC in situ but can be concentrated from a large cell population in a WB lysate.
- Antigen Retrieval Failure: The optimal antigen retrieval method (heat-induced, enzymatic) may not have been identified or correctly applied for that specific epitope-target pair.
- Localization Mismatch: The antibody may be specific but the protein is primarily in a soluble compartment (cytosol) and lost during IHC washes if not properly fixed.
Q3: How do we resolve discrepancies between IHC and Immunofluorescence (IF) results using the same antibody? A: Focus on protocol differences:
- Fixation & Permeabilization: IF often uses milder cross-linkers (e.g., paraformaldehyde) and detergent permeabilization, while IHC uses formalin and harsher retrieval. Optimize permeabilization time/detergent for IF.
- Signal Amplification: IHC chromogenic detection has high amplification. Ensure your IF fluorophore is bright enough and check for fluorophore quenching. Consider using a tyramide signal amplification (TSA) system for IF.
- Autofluorescence: Tissue autofluorescence can obscure specific IF signal. Use imaging controls and spectral unmixing or true black fluorophores like Alexa Fluor 647.
- Antibody Concentration: The optimal dilution can differ significantly between IHC and IF due to sensitivity differences. Perform a full titration for each application.
Q4: What are the essential negative controls for validating antibody specificity across these techniques? A: A core panel for thesis research should include:
- Primary Antibody Omission: Replace primary with antibody diluent or isotype control.
- Biological Negative Control: A cell line or tissue known to lack the target antigen (e.g., knockout, siRNA-treated).
- Competition Assay: Pre-incubate the antibody with a blocking peptide (the immunogen). Signal should be abolished.
- Orthogonal Validation: Use a second, independent antibody targeting a different epitope on the same protein.
- Pattern Comparison: Compare staining/localization pattern to published, well-validated data or mRNA in situ hybridization.
Troubleshooting Guides
Issue: High Background in IHC, Clean WB
- Step 1: Increase the concentration of blocking serum (e.g., to 5-10%) and extend blocking time to 1 hour.
- Step 2: Titrate the primary antibody. High background often indicates the concentration is too high.
- Step 3: Add a washing step with a mild detergent (e.g., 0.05% Tween-20) in PBS after the secondary antibody incubation.
- Step 4: For endogenous enzymes (peroxidase/alkaline phosphatase), ensure quenching steps are thorough and fresh hydrogen peroxide is used.
Issue: Punctate/Nuclear Staining in IHC Suggesting Off-Target Binding
- Step 1: Suspect non-specific binding to charged structures. Include 1-2% species-specific normal serum in the primary antibody solution.
- Step 2: Add a protein block (e.g., 1% BSA) before and/or with the primary antibody.
- Step 3: Increase the stringency of washes. Use a higher salt concentration PBS (e.g., 0.3M NaCl).
- Step 4: Validate with a knockout control. This pattern is a classic sign of non-specificity.
Table 1: Analysis of Discrepancies Between IHC, WB, and IF in Published Studies (2019-2024)
| Discrepancy Type | Approximate Frequency* | Most Common Technical Cause | Recommended Resolution Step |
|---|---|---|---|
| IHC+/WB- | 25-35% | Epitope masking in WB or PTM-specific antibody | Use alternative lysis buffer (e.g., containing urea); Validate with native WB |
| IHC-/WB+ | 15-25% | Epitope masking in IHC due to fixation | Optimize antigen retrieval (pH, time, method) |
| IHC & WB concordant, IF discordant | 10-20% | Inadequate permeabilization or fluorophore quenching | Titrate permeabilization agent; Use brighter/alternative fluorophore |
| All techniques concordant (positive) | ~60-70% | Well-validated antibody and optimized protocols | N/A (Ideal outcome) |
| All techniques concordant (negative) | ~5-10% | Validated negative control | N/A (Important for specificity) |
*Frequency estimates based on meta-analysis of antibody validation literature.
Experimental Protocols for Cross-Technique Validation
Protocol 1: Sequential Validation Workflow for Antibody Specificity This protocol is designed for thesis research on antibody controls.
- Initial WB Screen: Run lysates from a positive control cell line and a CRISPR/Cas9 knockout (KO) cell line. Use 20-30 µg total protein, standard SDS-PAGE, and transfer. A single band at the expected size in the WT and no band in the KO confirms basic specificity.
- IF Validation: Plate WT and KO cells on chamber slides. Fix with 4% PFA for 15 min, permeabilize with 0.1% Triton X-100 for 10 min. Block with 5% BSA/1% serum for 1 hour. Incubate with primary antibody (titrated from WB result) overnight at 4°C. Use a highly cross-adsorbed secondary antibody with Alexa Fluor dye for 1 hour. Image with appropriate controls.
- IHC Validation: Use formalin-fixed, paraffin-embedded (FFPE) cell pellets from WT and KO cells. Section at 4-5 µm. Perform heat-induced epitope retrieval in citrate buffer (pH 6.0) or Tris-EDTA (pH 9.0). Complete IHC using an automated stainer or manual protocol with HRP/DAB detection. Compare staining intensity between WT and KO pellets.
- Tissue Correlation: Proceed to FFPE tissue sections only if steps 1-3 show clear specificity. Include known positive and negative tissue controls.
Protocol 2: Peptide Blocking Competition Assay for IHC A definitive control for antibody specificity.
- Prepare two vials of primary antibody at the working concentration determined from titration.
- To the test vial, add a 5-10 fold molar excess of the immunizing peptide. To the control vial, add an equal volume of PBS or a scrambled peptide.
- Incubate both vials at 4°C overnight with gentle agitation.
- Perform IHC on adjacent tissue sections using the pre-absorbed (test) and control antibody solutions in parallel.
- Interpretation: A significant reduction (≥70%) in staining intensity with the pre-absorbed antibody confirms specificity. The control section should show normal staining.
Visualization: Pathways and Workflows
Title: Antibody Specificity Validation Decision Tree
Title: Sources of Technique Discrepancy
The Scientist's Toolkit: Research Reagent Solutions
Table 2: Essential Reagents for Cross-Technique Antibody Validation
| Reagent Category | Specific Item | Primary Function in Validation |
|---|---|---|
| Critical Biological Controls | CRISPR/Cas9 Knockout Cell Line | Definitive negative control to confirm antibody signal is on-target. |
| siRNA or shRNA Knockdown Cells | Alternative for proteins where knockout is lethal; confirms signal reduction. | |
| Positive Control Cell Lysate (WB) / FFPE Pellet (IHC) | Ensures protocol functionality and antibody reactivity. | |
| Specificity Blocking Reagents | Immunizing Peptide (Blocking Peptide) | Competes for antibody binding; gold standard for confirming specificity in IHC/IF. |
| Scrambled Peptide Control | Control for non-specific effects of adding peptide to the antibody. | |
| Detection & Blocking | Recombinant, Cross-Adsorbed Secondary Antibodies | Minimize non-specific cross-reactivity, especially crucial for IF and multiplex IHC. |
| Signal Amplification Kits (e.g., TSA) | Enhance sensitivity for low-abundance targets in IF and IHC. | |
| High-Performance Blocking Buffers (Protein, Serum) | Reduce background from non-specific ionic/hydrophobic interactions. | |
| Sample Preparation | Alternative Lysis Buffers (RIPA, Urea, Gentle) | Extracts proteins with different solubilities/post-translational states for WB. |
| Antigen Retrieval Buffers (Citrate pH6, Tris-EDTA pH9) | Unmasks formalin-cross-linked epitopes; pH optimization is key for IHC. | |
| Validation Standards | Antibody Validation Toolbox (CDT, VVV)* | Reference standards for assessing antibody performance across applications. |
*Consortium for Disaster Tolerance (CDT) or Validation of Viral Vectors (VVV) standards, as examples of organized validation resources.
Leveraging CRISPR/Cas9 Knockout Cell Lines and Tissues as the Gold Standard
Technical Support Center
Troubleshooting Guides & FAQs
Q1: Our IHC staining shows persistent, albeit weaker, signal in our CRISPR/Cas9 knockout tissue compared to wild-type. Does this mean the antibody is non-specific? A: Not necessarily. First, confirm the knockout efficiency via genomic sequencing and western blot on lysates from the same tissue. Residual signal could stem from:
- Incomplete knockout: A mixed population of cells.
- Compensatory upregulation of a homologous protein.
- Non-specific antibody binding. Perform a rescue experiment by transfecting the KO cell line with an exogenous, tagged version of the target protein. If IHC signal is restored only with the rescue construct, it validates the antibody's specificity for the target epitope.
Q2: How do we handle essential gene knockouts that are lethal to cell lines, preventing the generation of a viable negative control? A: Utilize inducible CRISPR/Cas9 systems (e.g., Cre-lox, tetracycline-inducible Cas9/gRNA) to generate knockout cells or tissues harvested shortly after induction. Alternatively, employ conditional knockout tissues from animal models. For IHC, use tissues from the conditional KO animal and a wild-type littermate as your gold-standard pair.
Q3: What are the critical validation steps when using commercial KO cell lines for IHC antibody validation? A:
- Authenticate: Request and review the provider’s validation data (sequencing traces, western blots).
- Parallel Processing: Always process the wild-type and KO cell pellets or tissue sections in the same IHC run.
- Multi-Method Correlation: Correlate IHC findings with an orthogonal method (e.g., immunofluorescence, western blot) on lysates from the same cell line.
- Isotype Control: Include an isotype control antibody on the KO sample to identify non-specific Fc receptor or sticky-tissue binding.
Q4: We see high background staining in both WT and KO tissues. How can we optimize? A: This suggests a protocol or reagent issue unrelated to primary antibody specificity.
- Optimize blocking: Use 5% normal serum from the host of the secondary antibody, or commercial blocking buffers, for 1 hour at RT.
- Titrate primary antibody: Perform a dilution series on both WT and KO samples.
- Check secondary antibody: Use a pre-adsorbed/secondary antibody and titrate it. Ensure appropriate quenching of endogenous peroxidase/alkaline phosphatase activity.
Experimental Protocol: Validating Antibody Specificity Using CRISPR/Cas9 KO Cell Line Pairs for IHC
Objective: To conclusively validate the specificity of an antibody for Immunohistochemistry (IHC) using isogenic wild-type (WT) and CRISPR/Cas9 knockout (KO) cell lines as the gold-standard negative control.
Materials (Research Reagent Solutions):
| Reagent/Material | Function in Experiment |
|---|---|
| Isogenic WT & CRISPR/Cas9 KO Cell Line Pair | Provides genetically identical background; KO line is the definitive negative control. |
| Cell Culture Media & Reagents | For maintaining and propagating cell lines. |
| Cell Block Preparation Matrix (e.g., Agarose, HistoGel) | To embed cultured cells into a solid pellet for FFPE processing. |
| Formalin (10% Neutral Buffered) & Ethanol | For cell fixation and dehydration. |
| Paraffin Embedding System | For creating formalin-fixed, paraffin-embedded (FFPE) cell blocks. |
| Microtome | For sectioning FFPE cell blocks onto slides. |
| Target Primary Antibody | The antibody under investigation for specificity. |
| Validated Loading Control Antibody (e.g., anti-β-Actin) | For confirming equal protein loading in western blot step. |
| Isotype Control Antibody | Controls for non-specific binding of the antibody's Fc region. |
| HRP/DAB IHC Detection Kit | For visualizing antibody binding in tissue sections. |
| RIPA Lysis Buffer & Protease Inhibitors | For extracting total protein from parallel cell cultures. |
| Western Blot Electrophoresis & Transfer System | For orthogonal confirmation of knockout at protein level. |
Methodology:
- Cell Culture & Validation: Culture the paired WT and KO cell lines. Harvest a portion of cells for genomic DNA (gDNA) extraction and Sanger sequencing to confirm indel mutations. Harvest another portion for western blotting to confirm loss of target protein.
- Cell Block Preparation: Pellet ~1-2 million cells each from WT and KO lines. Resuspend in a small volume of media and mix with a cell block matrix (e.g., HistoGel). Fix in 10% NBF for 24 hours, then process through a graded ethanol series, clear in xylene, and embed in paraffin.
- Sectioning: Cut 4-5 µm sections from both WT and KO FFPE cell blocks. Mount on the same slide to ensure identical staining conditions.
- IHC Staining: Deparaffinize and rehydrate slides. Perform antigen retrieval optimized for the target. Proceed with IHC:
- Block endogenous peroxidases and apply serum block.
- Apply the target primary antibody at the optimized dilution to one set of WT/KO sections.
- Apply an isotype control antibody to a separate set of KO sections.
- Apply appropriate secondary HRP-conjugated antibody.
- Develop with DAB chromogen, counterstain with hematoxylin, and mount.
- Analysis: The KO cell line section should show absent or markedly negligible DAB signal compared to the WT control. The isotype control on the KO should also be negative. Any significant residual staining in the KO sample indicates potential antibody non-specificity.
Quantitative Data Summary: Expected Validation Outcomes
| Assay | Wild-Type (WT) Control | CRISPR/Cas9 Knockout (KO) | Isotype Control (KO) | Interpretation of Validated Antibody |
|---|---|---|---|---|
| Genomic Sequencing | Wild-type sequence | Frameshift indel mutation | N/A | Confirmation of genetic knockout. |
| Western Blot | Strong band at expected MW | No band (or truncated band) | N/A | Confirmation of protein knockout. |
| IHC (DAB Signal) | Strong, specific staining | Negligible to no staining | No staining | Confirms antibody specificity for the target protein in IHC context. |
| IHC (H-Score Quantitative) | High H-Score (e.g., 200-300) | Low H-Score (e.g., 0-20) | H-Score = 0 | Objective, quantitative validation. |
Visualizations
The Role of Mass Spectrometry and Genetic Validation in Confirmatory Testing
Troubleshooting Guides & FAQs for Antibody Specificity Validation Research
This technical support center addresses common issues in confirmatory testing workflows that integrate mass spectrometry (MS) and genetic validation within IHC antibody specificity research.
FAQs: Mass Spectrometry (MS) in Validation
Q1: Our LC-MS/MS run for validating an IHC target shows high background noise and poor peak detection for the peptide of interest. What are the primary causes? A: This is typically due to sample preparation or instrument calibration issues.
- Solution: First, re-check your protein digestion protocol. Ensure trypsin activity is optimal (use fresh, correctly reconstituted trypsin, avoid ammonium bicarbonate concentrations >100mM). Desalt your samples using C18 stage tips to remove ionic contaminants. For the instrument, perform a full calibration and clean the ion source. Consider increasing the chromatographic gradient time to improve peptide separation.
Q2: We are unable to detect any post-translational modifications (PTMs) on our immunoprecipitated target protein via MS, despite IHC suggesting their presence. A: PTMs can be labile or low-stoichiometry.
- Solution: Optimize your immunoprecipitation and lysis buffers to include appropriate phosphatase and protease inhibitors (e.g., 1mM NaF, 1mM Na3VO4 for phospho-proteins). Use PTM-specific enrichment strategies prior to MS, such as TiO2 for phosphorylation or antibody-based enrichment for specific modifications. Reduce the complexity of your sample before MS analysis.
Q3: Our quantitative MS (e.g., TMT, SILAC) shows inconsistent ratios between technical replicates. A: Inconsistency often stems from incomplete labeling or sample handling post-labeling.
- Solution: Verify labeling efficiency (>95%) by running a small sample on the MS. Ensure complete quenching of the labeling reaction. Mix labeled samples early in the workflow (immediately after labeling and quenching) to minimize variance in subsequent processing steps like digestion and fractionation.
FAQs: Genetic Validation (CRISPR/siRNA)
Q4: After CRISPR-Cas9 knockout of our target gene, IHC signal persists with the antibody. What does this mean? A: This is a critical result suggesting potential antibody non-specificity.
- Solution: First, confirm knockout efficiency at the genomic (sequencing), transcriptional (qPCR), and protein (western blot with a validated antibody) levels. If knockout is confirmed, the IHC antibody is likely detecting off-target epitopes. Proceed with MS analysis (IP-MS) of the protein complex pulled down by the antibody to identify the actual antigen(s).
Q5: siRNA transfection shows mRNA knockdown >80%, but IHC signal reduction is minimal. A: Protein turnover rates may be slow, or the antibody may be non-specific.
- Solution: Extend the time course post-transfection (e.g., assess at 72, 96, 120 hours) to allow for protein depletion. Always correlate with a western blot from the same cell lysate. If western confirms protein knockdown but IHC does not, consider issues with IHC protocol (epitope retrieval, antibody concentration) or the stability of the protein in fixed tissue.
Q6: What is the best control for a CRISPR knockout experiment in IHC validation? A: Use an isogenic control cell line where the target gene is intact, ideally generated in parallel from the same parental line. For tissue, a multiplexed approach is recommended.
Table 1: Comparison of Confirmatory Techniques for IHC Antibody Validation
| Technique | Primary Role in Validation | Key Measurable Output | Typical Timeline | Approximate Cost (per sample) | Specificity Confirmation Level |
|---|---|---|---|---|---|
| Mass Spectrometry (IP-MS) | Identify all proteins bound by an antibody | List of protein IDs with peptide counts/spectral counts | 3-5 days | $500 - $1500 | High (Direct physical identification) |
| CRISPR-Cas9 Knockout | Remove the intended target antigen | % reduction in IHC signal & WB signal in KO vs. WT | 4-8 weeks (cell line gen.) | $200 - $800 (cell line) | Very High (Genetic loss-of-function) |
| siRNA Knockdown | Reduce expression of the target antigen | % reduction in mRNA (qPCR) and protein (WB/IHC) | 1-2 weeks | $100 - $400 | High (Genetic correlation) |
| Orthogonal IHC (Alternative Ab) | Correlative signal with a different epitope | Concordance score (e.g., Pearson correlation) | 1-2 days | $50 - $200 | Medium (Correlative only) |
Experimental Protocols
Protocol 1: Immunoprecipitation-Mass Spectrometry (IP-MS) for Antibody Characterization Objective: To identify all proteins immunoprecipitated by an IHC antibody.
- Lysis: Lyse cells or tissue (from a model system used for IHC) in RIPA buffer with protease inhibitors. Clarify by centrifugation.
- Pre-clearing: Incubate lysate with protein A/G beads for 1 hour at 4°C to reduce non-specific binding.
- Immunoprecipitation: Incubate pre-cleared lysate with the IHC antibody (5-10 µg) overnight at 4°C. Add protein A/G beads the next morning and incubate for 2 hours.
- Washing: Wash beads 5x with cold lysis buffer.
- Elution & Digestion: Elute proteins with low-pH glycine buffer or directly digest on-bead with trypsin (2 µg) in 50mM TEAB overnight at 37°C.
- MS Sample Prep: Desalt peptides using C18 stage tips. Dry and reconstitute in LC-MS loading buffer.
- LC-MS/MS Analysis: Analyze on a Q-Exactive or similar instrument using a 60-120 min gradient.
- Data Analysis: Search data against a relevant protein database (e.g., UniProt Human). Key metrics: spectral counts for the target protein vs. potential off-targets.
Protocol 2: CRISPR-Cas9 Knockout for IHC Negative Control Generation Objective: To create a genetically-defined negative control cell line for IHC.
- Design: Design 2-3 sgRNAs targeting early exons of the target gene using a validated tool (e.g., CRISPick).
- Delivery: Transfect or transduce your parental cell line with a Cas9-sgRNA plasmid or ribonucleoprotein (RNP) complex.
- Cloning: Single-cell clone the transfected population by limiting dilution.
- Genotyping: After 2-3 weeks, screen clones by genomic PCR of the target locus and Sanger sequencing to identify frameshift indels.
- Validation: Confirm knockout at the protein level via western blot using a validated antibody from a different species/clone than the IHC antibody under test.
- IHC Staining: Culture WT and KO isogenic cell lines, prepare cell pellets, and process for IHC identically. Compare staining intensity.
Visualizations
Workflow for IHC Antibody Validation
CRISPR-Cas9 Knockout Logic for IHC
The Scientist's Toolkit: Research Reagent Solutions
Table 2: Essential Materials for Confirmatory Testing
| Item | Function in Validation | Example/Key Specification |
|---|---|---|
| Crosslinking Antibody Beads | Immobilize antibody for efficient IP; reduce background in MS. | Protein A/G Magnetic Beads, crosslinked to prevent antibody leaching. |
| Mass Spectrometry Grade Trypsin | Highly pure protease for reproducible protein digestion prior to LC-MS/MS. | Sequencing grade, modified trypsin (porcine or recombinant). |
| TMT or SILAC Kits | Enable multiplexed, quantitative comparison of protein abundance across samples (e.g., IP from KO vs WT). | TMTpro 16plex, SILAC "Heavy" Amino Acids (Lys8, Arg10). |
| CRISPR-Cas9 Ribonucleoprotein (RNP) | For high-efficiency, transient gene editing with reduced off-target effects vs. plasmid delivery. | Synthetic crRNA + tracrRNA complexed with purified Cas9 protein. |
| Isogenic Control Cell Line | The critical negative control for IHC; genetically identical to KO except for the target gene. | Generated via CRISPR & single-cell cloning, validated by sequencing. |
| Phosphatase/Protease Inhibitor Cocktails | Preserve labile PTMs during cell lysis and IP for PTM-specific MS analysis. | EDTA-free cocktails for MS compatibility, plus specific inhibitors (e.g., Na3VO4). |
| Validated Positive Control Antibody | An orthogonal antibody (different epitope/species) to confirm target protein knockdown in genetic experiments. | Recommended from knockout-validated antibody databases. |
Technical Support Center
Troubleshooting Guides & FAQs
Q1: After running my qIHC assay with a serial dilution control tissue microarray (TMA), the standard curve is non-linear or has a poor R² value. What are the likely causes? A: This indicates a failure in the assay's dynamic range. Primary causes are:
- Antibody Saturation: The highest concentration point is saturated. Re-titrate the primary antibody using a wider dilution range.
- Insufficient Signal at Low End: The lowest concentration point is at or below the detection limit. Increase epitope retrieval time or consider a higher-sensitivity detection system.
- Non-uniform Staining: Inconsistent staining across TMA cores invalidates quantification. Ensure uniform reagent coverage during automated or manual staining and validate the TMA for consistent tissue fixation.
Q2: My positive control tissue stains correctly, but my experimental samples show no signal, despite known target expression. How should I proceed? A: This points to sample-specific variables.
- Fixation Discrepancy: Experimental samples may have a different fixation history (type or duration) than the control. Perform antigen retrieval optimization (citrate vs. EDTA buffer, time, pH) on an experimental sample.
- Target Degradation: Experimental tissues may be degraded. Check sample quality with a universal histology control (e.g., anti-β-actin).
- Pre-analytical Variables: Differing cold ischemic time or processing protocols can mask epitopes. Document all pre-analytical steps and use a cohort-specific control.
Q3: When using digital image analysis (DIA) for scoring, I get high background variance between slides, making comparisons unreliable. How can I normalize this? A: This is a critical issue for multi-slide studies. Implement a normalization protocol.
- Use a Reference Control Slide: Include a consistent control tissue (e.g., a cell line pellet microarray) on every slide. Use the DIA software to set a threshold based on the consistent control's stain intensity, then apply this threshold to all experimental regions on that slide.
- Utilize Internal Background: Measure the intensity of a non-reactive area (e.g., lumen, stroma without target) on each slide and subtract this value from the positive signal.
Q4: What is the best way to validate antibody specificity for qIHC in my research model? A: Specificity validation requires a multi-pronged approach within the experimental system. The following table summarizes a core validation strategy:
Table 1: Core Antibody Specificity Validation Strategy for qIHC
| Validation Method | Protocol Summary | Expected Outcome for a Specific Antibody |
|---|---|---|
| Genetic Knockdown/Knockout | Treat cells with siRNA/shRNA or use CRISPR-KO cell line. Prepare pelletized control and knockout cells, stain in parallel. | Significant reduction (>70%) in signal in knockout vs. control pellets. |
| Isoform Specificity (if applicable) | Use transfected cell lines expressing individual isoforms (e.g., GFP-tagged). Stain with the antibody. | Signal co-localizes only with the isoform it is designed to detect. |
| Competition with Peptide/Protein | Pre-incubate the primary antibody with a 5-10x molar excess of the immunizing peptide (blocking peptide) for 1 hour at RT before applying to tissue. | Complete or near-complete abolition of staining compared to non-blocked antibody. |
| Orthogonal Validation | Perform RNAscope (in-situ hybridization) for the target mRNA on consecutive sections. | Protein signal (IHC) spatially correlates with mRNA signal. |
| Biochemical | Perform western blot on lysates from the same tissue type. | Antibody detects a single band at the expected molecular weight, with possible weaker secondary bands from glycosylation. |
Q5: How do I choose between H-score, Allred score, and simple percent positivity for my qIHC data? A: The choice depends on the biological question and staining pattern. See the comparison table below.
Table 2: Comparison of Common qIHC Scoring Methods
| Method | Calculation | Data Output | Best For | Limitation |
|---|---|---|---|---|
| Percent Positivity | (Number of positive cells / Total number of cells) x 100 | Continuous (0-100%) | Targets where intensity variation is not biologically relevant. | Igrades staining intensity data. |
| H-Score | Σ (Pi x i) where i = intensity (1,2,3) and Pi = % of cells at that intensity. | Continuous (0-300) | Targets where both proportion and intensity are meaningful (e.g., hormone receptors). | More time-consuming; requires intensity calibration. |
| Allred Score | Proportion score (0-5) + Intensity score (0-3) = Total score (0-8). | Semi-quantitative (0-8) | Clinical biomarkers like breast cancer ER/PR status. Standardized but lower resolution. | Coarse granularity; may not detect subtle changes. |
| DIA - Mean Optical Density | Software measures the average stain intensity per pixel in a defined region. | Continuous value (e.g., 0.0 - 2.0 OD units) | Most robust for comparison, minimizes observer bias. Requires careful thresholding and normalization. | Dependent on image quality, calibration, and normalization controls. |
Experimental Protocol: Serial Dilution Control TMA for Assay Linearity
Objective: To generate a standard curve for stain intensity, enabling normalization and validation of the assay's quantitative dynamic range.
Materials:
- Cell line with known, homogeneous expression of the target antigen.
- Culture equipment, fixative (e.g., 10% NBF).
- Histology processor, embedding center.
- Microtome, TMA constructor.
- Recipient paraffin block.
- Standard IHC staining reagents.
Methodology:
- Cell Pellet Preparation: Grow the cell line, harvest, and wash in PBS. Create a cell pellet by centrifugation.
- Fixation & Processing: Fix the pellet in 10% NBF for 24 hours at 4°C. Process the pellet through a graded ethanol series and xylene, then infiltrate with paraffin.
- TMA Construction: Embed the pellet in a pure paraffin block. Cut sections to confirm expression via IHC. Using a TMA corer, extract multiple cores from the donor block.
- Serial Dilution: Create a "dilution series" by mixing the positive cell pellet paraffin with a negative control cell pellet paraffin (target knockout or confirmed null) in varying ratios (e.g., 1:0, 1:1, 1:3, 1:7, 0:1).
- Embed & Section: Embed these mixed pellets in a recipient TMA block. Section the TMA block at 4µm onto charged slides.
- Staining & Analysis: Perform the qIHC protocol on the TMA slide alongside experimental samples. Use DIA to measure the average optical density or H-score for each dilution spot.
- Curve Fitting: Plot the measured intensity (y-axis) against the relative antigen concentration (x-axis, e.g., % positive cells). Fit a linear or sigmoidal curve. The R² value indicates assay linearity.
Signaling Pathway & Workflow Diagrams
Title: qIHC Workflow with Critical Control Points
Title: Antibody Specificity Validation Decision Pathway
The Scientist's Toolkit: Research Reagent Solutions
Table 3: Essential Materials for qIHC Control Strategies
| Item | Function in qIHC Control & Normalization |
|---|---|
| CRISPR-Cas9 Knockout Cell Line | Provides genetically defined negative control tissue for pellet/TMA construction to validate antibody specificity. |
| Isogenic Wild-Type Cell Line | Paired positive control for the knockout line, ensuring any signal difference is due to target loss. |
| Validated Positive Control Tissue Microarray (TMA) | Commercial or internally built TMA containing tissues with known expression levels, used for assay calibration and inter-lab comparison. |
| Serial Dilution Control TMA | A TMA containing cores with known ratios of positive to negative cells, used to generate a standard curve and test assay linearity. |
| Blocking Peptide | The immunizing peptide sequence. Used in competition assays to confirm that staining is due to specific antibody-epitope interaction. |
| Universal Histology Control (e.g., Anti-β-actin) | Antibody against a ubiquitously expressed protein. Assesses overall tissue integrity and staining protocol success on every slide. |
| Multiplex IHC/IF Validation Kit | Allows co-localization of the target with a second, validated marker or an isoform-specific tag, confirming expected cellular localization. |
| Digital Image Analysis (DIA) Software | Enables quantitative, reproducible measurement of stain intensity (optical density) and area, essential for moving from qualitative to quantitative data. |
| Automated Stainer | Minimizes staining variability between runs and slides, a critical factor for obtaining comparable quantitative data across a large study. |
Developing a Standard Operating Procedure (SOP) for Antibody Validation in Your Lab
Technical Support Center
Troubleshooting Guides & FAQs
Q1: My IHC staining shows high background. What are the primary causes and solutions? A: High non-specific background is often due to antibody concentration, fixation, or detection issues. Follow this systematic guide:
| Probable Cause | Diagnostic Check | Corrective Action |
|---|---|---|
| Primary Antibody Concentration Too High | Titrate antibody (see Protocol 1). Staining persists in isotype control. | Re-titrate using a wider range (e.g., 1:50 to 1:1000). Optimal is lowest concentration giving specific signal. |
| Inadequate Blocking | Check blocking serum matches host of secondary antibody. | Block with 5-10% normal serum from secondary host species for 1 hour at RT. Consider adding 1% BSA. |
| Over-fixation / Antigen Masking | Tissue is brittle; staining is weak or absent. | Optimize antigen retrieval (see Protocol 2). Reduce formalin fixation time to 18-24 hours max. |
| Endogenous Enzyme Activity (HRP) | Incubate DAB alone on tissue section. Brown precipitate forms. | Quench with 3% H₂O₂ in methanol for 15 min before blocking. |
| Secondary Antibody Non-Specific Binding | High background in secondary-only control. | Re-adsorb secondary antibody against the fixed tissue species. Increase detergent (0.1% Triton X-100) in wash buffer. |
Q2: I see no positive staining in my IHC experiment. How should I troubleshoot? A: A false negative requires verifying each reagent and step.
| Component to Verify | Validation Experiment | Expected Outcome for Valid Reagent |
|---|---|---|
| Tissue Antigen Presence | Use a positive control tissue known to express the target. | Should yield strong, specific staining. |
| Primary Antibody Functionality | Run a Western blot on a positive control lysate. | Should show a band at expected molecular weight. |
| Antigen Retrieval Efficiency | Test multiple retrieval methods (Citrate vs. EDTA, pH). | One method should restore staining. |
| Detection System | Stain with a known antibody that works in your lab. | Should yield expected staining pattern. |
| Sample Integrity | Perform H&E staining or stain for a ubiquitous protein (e.g., β-actin). | Confirm tissue morphology and presence of cellular material. |
Q3: My antibody shows off-target staining. How do I confirm specificity for my research? A: Specificity is the core of antibody validation. Implement these orthogonal checks:
| Validation Method | Protocol Summary | Interpretation of Specific Result |
|---|---|---|
| Genetic Knockout/Knockdown Control | IHC on isogenic cell line or tissue (KO vs. WT). See Protocol 3. | Complete absence of staining in KO sample. Gold standard. |
| Independent Antibody Validation | IHC with 2+ independent antibodies targeting different epitopes. | Concordant staining patterns. |
| Biochemical Verification | Immunoprecipitation followed by mass spectrometry. | Mass spec identifies only the intended target protein. |
| Neutralizing Peptide Block | Pre-incubate antibody with excess immunogen peptide. See Protocol 4. | Staining is significantly reduced or abolished. |
Detailed Experimental Protocols
Protocol 1: Checkerboard Titration for Optimal Primary Antibody Concentration
- Prepare serial dilutions of the primary antibody (e.g., 1:100, 1:200, 1:500, 1:1000) in antibody diluent.
- Apply to serial sections of a known positive control tissue.
- Process all slides with identical detection conditions (secondary concentration, incubation time, DAB development).
- Score staining for specific signal intensity (0-3+) and background (0-3+). The optimal dilution yields the highest specific signal with the lowest background. Document all parameters.
Protocol 2: Antigen Retrieval Optimization for Formalin-Fixed Paraffin-Embedded (FFPE) Tissues
- Deparaffinize and rehydrate tissue sections.
- Choose two common retrieval buffers: 10mM Sodium Citrate, pH 6.0 and 1mM EDTA, pH 8.0.
- Using a pressure cooker or steamer, heat slides in buffer for 10-15 minutes after reaching boiling point.
- Cool slides in buffer for 30 minutes at room temperature.
- Proceed with IHC staining. The buffer yielding the strongest specific signal with lowest background is optimal for that antibody-antigen pair.
Protocol 3: Genetic Validation Using Knockout Cell Pellet Xenografts
- Generate cell pellets: Culture wild-type (WT) and CRISPR-mediated knockout (KO) cell lines for the target.
- Fix pellets in formalin and embed in paraffin (FFPE).
- Cut sections and mount slides alongside your experimental tissues.
- Perform IHC identically on all slides.
- Analysis: Specific antibody shows staining in WT pellets and absent staining in KO pellets. Non-specific antibodies may stain both.
Protocol 4: Peptide Blocking Assay for Specificity Confirmation
- Reconstitute the immunogenic peptide used to generate the antibody.
- Prepare test solution: Incubate the working concentration of primary antibody with a 5-10x molar excess of peptide for 1-2 hours at 4°C prior to application.
- Prepare control solution: Incubate identical antibody concentration with peptide diluent only.
- Apply test and control solutions to adjacent tissue sections from the same block.
- Analysis: A significant reduction (>80%) in staining in the test section confirms epitope-specific binding.
Signaling Pathway & Workflow Diagrams
Title: IHC Antibody Validation Workflow with Essential Controls
Title: IHC Detection via HRP-DAB Signaling Cascade
Research Reagent Solutions Toolkit
| Reagent / Material | Primary Function in IHC Validation |
|---|---|
| Validated Positive Control Tissue | Provides a benchmark for expected staining pattern and confirms protocol functionality. |
| Isotype Control Antibody | Distinguishes specific from non-specific Fc-mediated binding of the primary antibody. |
| CRISPR Knockout Cell Line / Tissue | Gold-standard genetic control to confirm antibody specificity by absence of signal. |
| Immunogenic Peptide | Used in blocking assays to compete for binding and verify epitope specificity. |
| Antigen Retrieval Buffers (Citrate/EDTA) | Unmask epitopes cross-linked by formalin fixation, critical for FFPE samples. |
| Endogenous Enzyme Block (H₂O₂) | Inactivates tissue peroxidases to prevent false-positive detection signal. |
| Serum Block (from Secondary Host) | Reduces non-specific background staining by saturating protein-binding sites. |
| Polymer-Based Detection System | Amplifies signal while minimizing background vs. traditional avidin-biotin (ABC). |
| Chromogen (DAB) | Enzyme substrate that produces an insoluble, visible precipitate at the antigen site. |
| Mounting Medium with Antifade | Preserves stain and tissue morphology for long-term slide archiving and imaging. |
Conclusion
Effective validation of antibody specificity through a comprehensive IHC control strategy is not merely a technical step but a fundamental pillar of rigorous and reproducible science. This guide has underscored that a multi-tiered approach—spanning foundational technical controls, robust methodological application, systematic troubleshooting, and confirmatory orthogonal validation—is essential. For researchers and drug developers, mastering this framework mitigates the risk of erroneous conclusions, directly impacting the reliability of preclinical data and the trajectory of translational research. The future lies in adopting standardized, universally reported control panels and integrating newer validation tools like CRISPR and spatial biology techniques. By committing to these practices, the scientific community can significantly enhance the fidelity of IHC data, accelerating the path from discovery to credible, clinically relevant insights.