The Ultimate Guide to IHC Antibody Dilution Optimization: From Foundational Principles to Advanced Validation
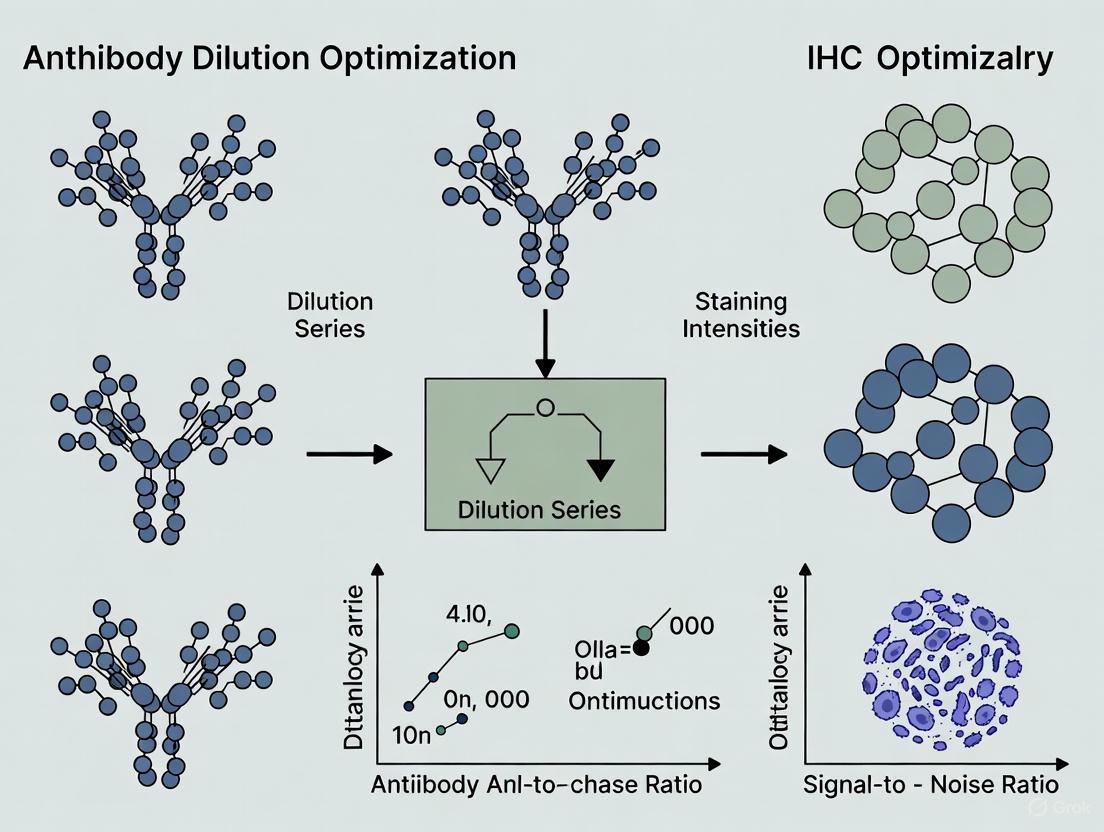
This comprehensive guide provides researchers, scientists, and drug development professionals with a systematic framework for optimizing antibody dilution in immunohistochemistry (IHC).
The Ultimate Guide to IHC Antibody Dilution Optimization: From Foundational Principles to Advanced Validation
Abstract
This comprehensive guide provides researchers, scientists, and drug development professionals with a systematic framework for optimizing antibody dilution in immunohistochemistry (IHC). Covering foundational principles, methodological applications, advanced troubleshooting, and rigorous validation protocols, the article delivers actionable strategies to achieve precise, reproducible staining with high signal-to-noise ratios. Updated with the latest 2024 CAP guidelines and incorporating best practices from leading antibody vendors, this resource aims to standardize IHC workflows, enhance data reliability in both research and diagnostic settings, and reduce costly experimental failures.
Understanding IHC Antibody Dilution: Core Principles and Critical Variables
The Critical Role of Antibody Dilution in IHC Signal and Specificity
FAQs on Antibody Dilution in IHC
Why is antibody dilution so critical in IHC?
Antibody dilution is fundamental because it directly controls the balance between signal (detection of your target) and specificity (only detecting your target). An overly concentrated antibody leads to high background and non-specific binding, as antibodies stick to off-target sites [1] [2]. An overly dilute antibody may not bind sufficiently to the target, resulting in weak or no detectable signal [3] [2]. Optimal dilution ensures a strong, clean signal specific to your protein of interest.
Can I just use the dilution recommended on the datasheet?
Datasheet recommendations are an excellent starting point, but they are not guarantees. The optimal dilution can vary based on your specific experimental conditions, including tissue type, fixation method, antigen retrieval technique, and detection system [4]. It is considered good laboratory practice to perform your own dilution series to determine the ideal concentration for your system [4].
What is the typical working concentration range for IHC antibodies?
Recommended antibody concentrations are typically given as a range and differ between monoclonal and polyclonal antibodies. The table below summarizes general guidelines.
| Antibody Type | Typical Working Concentration | Incubation Recommendation |
|---|---|---|
| Monoclonal | 5 - 25 µg/mL [5] | Overnight at 4°C [5] |
| Polyclonal (Immunogen Affinity Purified) | 1.7 - 15 µg/mL [5] | Overnight at 4°C [5] |
How do I optimize the antibody dilution for my experiment?
Optimization is best achieved by performing an antibody titration. This involves testing a series of antibody dilutions on consecutive tissue sections known to express your target protein [5] [2].
- Prepare a Dilution Series: Start with the vendor's recommended dilution and prepare several dilutions on either side of it. For example, if the recommendation is 1:500, test 1:100, 1:250, 1:500, 1:1000, and 1:2000 [4] [2].
- Stain Sections: Process all slides simultaneously using the same batches of reagents to ensure consistency.
- Evaluate Results: Examine the slides for the dilution that provides the strongest specific signal with the cleanest background (best signal-to-noise ratio).
Troubleshooting Guides
Problem: Weak or No Staining
This occurs when the specific signal from your target protein is faint or absent.
| Potential Cause | Solution |
|---|---|
| Primary antibody concentration is too low [3] [2] | Increase the antibody concentration and/or perform a titration experiment to find the optimal dilution [3]. |
| Ineffective antigen retrieval [3] [2] | Optimize antigen retrieval methods (e.g., try different buffers like Citrate pH 6.0 or EDTA pH 9.0, or adjust heating time) [6] [7]. |
| Primary antibody is not validated for IHC [3] | Confirm the antibody is validated for IHC in your specific tissue type (e.g., FFPE). Run a positive control tissue [2]. |
| Antibody has lost potency [1] | Ensure the antibody has been stored correctly and is not past its expiration date. Avoid repeated freeze-thaw cycles [3] [1]. |
Problem: High Background Staining
This appears as a diffuse, non-specific stain across the entire tissue section, obscuring the specific signal.
| Potential Cause | Solution |
|---|---|
| Primary antibody concentration is too high [1] [2] | This is the most common cause. Decrease the antibody concentration and perform a titration [3] [2]. |
| Insufficient blocking [3] [2] | Ensure proper blocking with serum from the secondary antibody host species. Block endogenous enzymes (e.g., peroxidases with H₂O₂) if using enzyme-based detection [1] [7]. |
| Tissue drying out [3] [2] | Perform all incubation steps in a humidified chamber to prevent sections from drying, which causes non-specific binding [8] [2]. |
| Secondary antibody cross-reactivity [3] [1] | Include a secondary-only control. Use a secondary antibody that has been adsorbed against serum proteins from the species of your tissue sample [3] [1]. |
Experimental Protocol: Antibody Titration for IHC
This protocol provides a detailed methodology for determining the optimal primary antibody dilution on formalin-fixed, paraffin-embedded (FFPE) tissue sections [7].
Materials Needed
- FFPE tissue sections known to express the target protein (positive control)
- Primary antibody
- Recommended detection kit (e.g., HRP or fluorescent-based)
- Antigen retrieval buffer (e.g., 10 mM Sodium Citrate, pH 6.0)
- Blocking buffer (e.g., 5% normal serum in PBS/TBS)
- 1X PBS or TBS wash buffer
- Humidified chamber
- Hydrophobic pen
Step-by-Step Method
- Deparaffinization and Rehydration: Follow standard procedures to deparaffinize and rehydrate your FFPE tissue sections [7].
- Antigen Retrieval: Perform heat-induced epitope retrieval (HIER) using an appropriate buffer and method (e.g., microwave in citrate buffer for 20 minutes) [6] [7].
- Blocking: Draw a barrier around the tissue with a hydrophobic pen. Apply blocking buffer to cover the tissue and incubate for 1 hour at room temperature in a humidified chamber [7].
- Primary Antibody Incubation:
- Washing: Wash the slides 3 times for 5 minutes each with wash buffer [7].
- Secondary Antibody and Detection:
- Apply the appropriate secondary antibody and detection reagents according to the manufacturer's instructions, ensuring consistent incubation times across all slides [7].
- Counterstaining and Mounting: Counterstain (e.g., with hematoxylin or DAPI), dehydrate (for chromogenic), and mount coverslips [7].
- Analysis: Image all slides under identical settings. The optimal dilution is the one that yields the strongest specific signal with minimal or no background.
The Scientist's Toolkit
Research Reagent Solutions
| Item | Function |
|---|---|
| Monoclonal Antibody | Recognizes a single, specific epitope on the target antigen. Offers high specificity and lower lot-to-lot variability [5]. |
| Polyclonal Antibody | Recognizes multiple epitopes on the same antigen. Can be more resilient to changes in antigen conformation but may have higher background [5]. |
| Normal Serum | Used in blocking buffers to prevent non-specific binding of the secondary antibody to the tissue. Should be from the same species as the secondary antibody host [3] [1]. |
| Antigen Retrieval Buffers | Solutions like Citrate (pH 6.0) or EDTA (pH 9.0) used to break cross-links formed during fixation, unmasking epitopes for antibody binding [6] [7]. |
| Biotin/Avidin Blocking Kit | Used to block endogenous biotin present in some tissues, which can cause high background in avidin-biotin-based detection systems [1] [2]. |
| Enzyme Blockers | Reagents like hydrogen peroxide (H₂O₂) to quench endogenous peroxidase activity, or levamisole to inhibit alkaline phosphatase, reducing false-positive signals [1] [7]. |
Workflow and Decision Pathways
IHC Antibody Optimization Workflow
Antibody Selection and Dilution Strategy
Core Concepts: Monoclonal vs. Polyclonal Antibodies
The choice between monoclonal and polyclonal antibodies is fundamental, as their inherent characteristics directly influence dilution strategy and experimental outcomes.
FAQ: What is the fundamental difference in how monoclonal and polyclonal antibodies bind?
Monoclonal antibodies are produced by a single B-cell clone and therefore bind with high specificity to a single epitope on the target protein. In contrast, polyclonal antibodies are a heterogeneous mixture produced by multiple B-cell clones and recognize multiple different epitopes on the same target antigen [9] [10].
The table below summarizes the key advantages and limitations of each antibody type.
| Feature | Monoclonal Antibodies | Polyclonal Antibodies |
|---|---|---|
| Epitope Recognition | Single, specific epitope [9] [10] | Multiple epitopes on the same antigen [9] [10] |
| Specificity & Background | High specificity; generally lower background [10] | Can have higher background; specificity improved by affinity purification [10] |
| Lot-to-Lot Variability | Low variability [10] | Higher variability [11] [10] |
| Robustness to Fixation | Vulnerable to epitope masking from fixation [10] | More resistant to changes in antigen conformation from fixation [10] |
| Typical Starting Concentration for IHC (Tissue) | 5-25 µg/mL, overnight at 4°C [9] [10] | 1.7-15 µg/mL, overnight at 4°C [9] [10] |
Figure 1: Decision pathway for selecting and diluting antibodies based on clonality.
Dilution Optimization Protocols
Optimizing antibody concentration is the most critical step for achieving a strong specific signal with minimal background.
FAQ: How do I determine the optimal working dilution for a new antibody?
The optimal dilution must be determined empirically through a titration experiment. It is the highest dilution (lowest concentration) that yields a strong specific signal with a clean background [12]. The general methodology is as follows:
- Starting Point: Use the manufacturer's recommended dilution as a midpoint.
- Dilution Series: Prepare a series of dilutions bracketing the recommended value. For example, if 1:200 is recommended, test 1:50, 1:100, 1:200, 1:400, and 1:500 [12].
- Consistent Conditions: Keep all other parameters constant (incubation time, temperature, antigen retrieval method) across all slides to ensure the results are due to concentration alone [9].
- Analysis: Compare the staining across the dilution series. The optimal dilution is the one just before a drop in specific signal intensity occurs.
The table below provides a generalized titration scheme for IHC on tissue sections.
| Antibody Type | Starting Concentration Range | Common Incubation Condition | Notes |
|---|---|---|---|
| Monoclonal | 5 - 25 µg/mL [9] [10] | Overnight at 4°C [9] [10] | Higher concentrations may be needed for a single epitope target. |
| Polyclonal (Affinity Purified) | 1.7 - 15 µg/mL [9] [10] | Overnight at 4°C [9] [10] | Multiple epitope binding allows for lower concentrations and can enhance signal [9]. |
Figure 2: Expected outcomes across a typical antibody titration series.
Troubleshooting Common Dilution Problems
Even with a titration, issues can arise. The table below addresses common problems and their solutions related to antibody concentration and clonality.
| Problem | Possible Cause | Recommended Solution |
|---|---|---|
| Weak or No Staining | Antibody concentration is too low [13]. | Increase antibody concentration or extend incubation time (e.g., overnight at 4°C) [9] [13]. |
| Epitope is masked by fixation (common for monoclonals) [10]. | Optimize antigen retrieval method (HIER/PIER) [13]. | |
| High Background Staining | Antibody concentration is too high [13] [1]. | Titrate to find a lower optimal concentration. This is the most common fix [13]. |
| Insufficient blocking [13]. | Increase blocking incubation time or change blocking reagent (e.g., 10% normal serum, 1-5% BSA) [13]. | |
| Non-specific binding from secondary antibody [13]. | Include a negative control (no primary antibody). Use a secondary antibody pre-adsorbed against the sample species [13] [1]. | |
| Nonspecific Staining | Cross-reactivity of the primary antibody [13]. | Use antigen affinity-purified polyclonal antibodies [9] or select a monoclonal antibody with higher specificity [10]. |
| Inadequate washing [13]. | Increase the number and duration of washes between steps [13]. |
FAQ: When should I stop troubleshooting an antibody and try a different one?
According to experts, if after a couple of rounds of well-designed optimization (e.g., adjusting epitope retrieval and antibody concentration) the staining remains poor, the antibody itself may not be suitable for IHC in your specific system. The affinity and specificity are inherent properties of an antibody, and optimization can only push the signal-to-noise ratio to what the antibody is capable of. For developing a robust assay, it is often more efficient to find a different, better-performing antibody [14].
The Scientist's Toolkit: Research Reagent Solutions
A successful IHC experiment relies on more than just the primary antibody. The following table lists essential reagents and their functions in the context of dilution optimization.
| Reagent / Material | Function in Optimization | Key Considerations |
|---|---|---|
| Antibody Diluent Buffer | Dilutes the primary and secondary antibodies to the desired concentration. | Should be a protein-based solution (e.g., with BSA) to stabilize antibodies. Avoid sodium azide if using HRP detection [13]. |
| Blocking Serum | Reduces non-specific binding of antibodies to the tissue, lowering background. | Use normal serum from the same species as the secondary antibody host [13] [1]. |
| Antigen Retrieval Reagents | Unmasks epitopes cross-linked by fixation, crucial for many monoclonal antibodies. | Heat-Induced Epitope Retrieval (HIER) with a basic buffer (e.g., sodium citrate, pH 6.0) is a strong starting point for >80% of antibodies [14]. |
| Wash Buffer (e.g., PBS/TBS) | Removes unbound antibodies and reagents between steps, reducing background. | Adding a low-concentration detergent (e.g., 0.05% Tween-20) can improve washing efficiency [1]. |
| Detection System | Visualizes the bound primary antibody. | Polymer-based systems are highly sensitive and can allow for lower primary antibody concentrations than older ABC methods [14]. |
In immunohistochemistry (IHC), determining the optimal antibody dilution is a critical step that directly impacts the sensitivity, specificity, and reproducibility of experimental results. This parameter is not universal; it is profoundly influenced by a triad of interconnected factors: the fixation method used to preserve the tissue, the resulting epitope accessibility, and the intrinsic characteristics of the tissue type itself. Optimizing dilution is a balancing act to achieve strong specific staining while minimizing non-specific background [15]. This guide provides troubleshooting and FAQs to help researchers systematically navigate this optimization process.
FAQs and Troubleshooting Guides
How does fixation affect the optimal antibody dilution?
The chemical fixative used and the duration of fixation directly alter tissue antigens, necessitating adjustments in antibody concentration.
- Problem: Over-fixation in formalin can cause excessive cross-linking, masking epitopes and requiring higher antibody concentrations or antigen retrieval to achieve a signal. Under-fixation can lead to antigen degradation or diffusion, causing weak or erratic staining [8] [16].
- Solution:
- For formalin-fixed, paraffin-embedded (FFPE) tissues, antigen retrieval is almost always required. The optimal antibody dilution may be higher than for frozen sections to compensate for epitope masking [17] [15].
- For alcohol-fixed frozen tissues, antigenicity is generally better preserved, and antigen retrieval is not recommended as it can damage tissue integrity. Antibody dilutions can often be higher (i.e., less antibody is needed) compared to FFPE samples [16].
- Standardize fixation time. For example, the College of American Pathologists recommends formalin fixation for a minimum of 6 hours and a maximum of 48 hours for breast tissue to ensure consistent results for biomarkers like estrogen receptor [15].
Why does the same antibody require different dilutions for different tissues?
Variations in tissue composition, endogenous enzyme activity, and target antigen concentration across different tissue types significantly influence the ideal dilution.
- Problem: An antibody dilution that works perfectly for liver tissue produces high background in spleen tissue, or shows no signal in a different organ.
- Solution:
- Tissue-specific titration: Always perform a dilution series for each new tissue type. Tissues with high endogenous biotin (e.g., liver, kidney) or high endogenous peroxidase activity (e.g., erythrocytes) often require more stringent blocking and may need a higher dilution to reduce background [18] [1].
- Use thin sections: Thick tissue sections can trap antibodies and cause high background. Using recommended section thickness (typically 4 μm) ensures even antibody penetration [19].
- Analyte concentration: Select a positive control with a low or intermediate analyte concentration. Tissues with very high antigen levels may stain strongly even with suboptimal HIER, making them insensitive for verifying the retrieval step, which directly impacts the effective antibody dilution [20].
What can I do if my IHC staining is weak or absent?
Weak or absent staining often indicates insufficient antibody binding due to epitope masking, low antibody concentration, or detection system failure.
- Investigation Path and Solutions:
How can I reduce high background staining in my IHC experiment?
High background, or non-specific staining, is frequently caused by an antibody concentration that is too high, inadequate blocking, or endogenous enzyme activity.
- Investigation Path and Solutions:
Key Data for Experimental Optimization
Fixation Methods and Their Impact on Dilution
The choice of fixative fundamentally changes tissue antigenicity and must be considered when titrating antibodies.
| Fixative Type | Mechanism | Impact on Morphology | Impact on Antigenicity | Recommended Antigen Retrieval | Dilution Consideration |
|---|---|---|---|---|---|
| Formaldehyde [8] [21] | Cross-linking via methylene bridges | Excellent preservation | Can mask epitopes via cross-links | Required (HIER or PIER) [17] | Higher concentrations often needed; requires titration post-retrieval |
| Ethanol/Methanol [8] [16] | Precipitation & dehydration | Good, but may distort detail | Better preservation; less masking | Not recommended (can damage tissue) [16] | Higher dilutions (less antibody) often possible |
| Acetone [21] | Precipitation & lipid extraction | Harsh on morphology | Good for many antigens | Not typically used | Used for frozen sections; requires titration |
Antigen Retrieval Methods and Protocols
Antigen retrieval is essential for FFPE tissues and must be optimized alongside antibody dilution.
| Method | Principle | Typical Conditions | Key Buffers (pH) | Effect on Dilution |
|---|---|---|---|---|
| Heat-Induced Epitope Retrieval (HIER) [17] [22] | Uses heat to break cross-links | 95-100°C for 20-30 min; or 120°C (pressure cooker) for 3-10 min [22] | Sodium Citrate (pH 6.0) [22], Tris-EDTA (pH 8.0-9.0) [17] [22] | Enables use of higher antibody dilutions by unmasking epitopes. Buffer pH is antigen-specific. |
| Proteolytic-Induced Epitope Retrieval (PIER) [17] | Uses enzymes to digest proteins | 37°C for 10-20 min (e.g., Trypsin, Proteinase K) [17] | Enzyme-specific buffers | Can be harsh; may require careful antibody titration to avoid background from over-digestion. |
The Scientist's Toolkit: Essential Reagents and Materials
| Item | Function in Optimization |
|---|---|
| 10% Neutral Buffered Formalin (NBF) [21] [19] | Standard cross-linking fixative for morphology. |
| Optimal Cutting Temperature (OCT) Compound [21] | Cryoprotective embedding medium for frozen tissues, often alcohol-fixed. |
| Antigen Retrieval Buffers (e.g., Citrate pH 6.0, Tris-EDTA pH 9.0) [17] [22] | Critical for unmasking epitopes in FFPE tissues, directly impacting antibody binding efficiency. |
| Protein Blocking Serum (e.g., Normal Goat Serum) or BSA [19] [18] | Reduces non-specific background staining, improving signal-to-noise ratio. |
| Endogenous Enzyme Blockers (3% H₂O₂, Levamisole) [19] [1] | Quenches peroxidase or alkaline phosphatase activity to prevent false-positive signals. |
| Polymer-based Detection Systems [18] | Highly sensitive, non-biotin systems that reduce background in tissues with endogenous biotin. |
| Validated Positive Control Tissues [20] [18] | Essential for verifying that the entire IHC protocol, including fixation, retrieval, and dilution, is working correctly. |
Optimizing antibody dilution is a cornerstone of robust and reproducible IHC. There is no single universal dilution for an antibody, it is a variable determined by the specific experimental conditions. Researchers must adopt a systematic approach, considering the intertwined variables of fixation, epitope accessibility, and tissue type. By using appropriate controls, performing careful titration, and understanding the need for antigen retrieval, scientists can effectively navigate this complexity to achieve clear, specific, and reliable staining results.
The Impact of Sample Preparation and Fixation Methods on Antigen Preservation
In immunohistochemistry (IHC), the accurate visualization of a target protein is entirely dependent on the preservation of its antigenic epitopes through proper sample preparation and fixation [23]. This process stabilizes cells and tissues, preserving morphological detail and preventing degradation during sample processing [23]. However, the very methods used to preserve tissue structure can damage or mask the antigens you aim to detect, leading to failed experiments and inconclusive results [3] [24]. Within the broader context of optimizing antibody dilution for IHC research, it is crucial to understand that even the most perfectly titrated antibody cannot bind to an epitope that has been destroyed, denatured, or rendered inaccessible during initial tissue handling [24]. This guide addresses the critical interplay between sample preparation and antibody performance, providing targeted solutions to ensure your antigens are preserved and detectable.
Frequently Asked Questions (FAQs)
1. How does the choice of fixative directly impact my primary antibody's ability to bind its target? Different fixatives preserve antigens through distinct mechanisms. Cross-linking fixatives like formalin create methylene bridges between proteins, which can physically obscure the epitope recognized by your antibody [8]. Precipitating fixatives like alcohols dehydrate the tissue and precipitate proteins, potentially altering the native conformation of the protein and denaturing the epitope [8]. An antibody validated for IHC is typically chosen for its ability to recognize its target after a specific fixation protocol.
2. Can overfixation affect my antibody dilution calculations? Yes, significantly. Overfixation increases epitope masking through excessive cross-linking [25] [8]. You might compensate by using a higher antibody concentration or a more sensitive detection system, but this often increases background noise [3]. The optimal solution is to standardize fixation times to ensure consistent epitope preservation, allowing for reliable and reproducible antibody titration.
3. Why is antigen retrieval necessary, and how does it work? Formalin fixation and paraffin embedding (FFPE) renders many target epitopes inaccessible to antibodies [24]. Antigen retrieval reverses the cross-links formed during fixation, effectively "unmasking" the epitopes and restoring the antibody's ability to bind [23]. The two principal methods are Heat-Induced Epitope Retrieval (HIER), which uses heat and a buffer to break cross-links, and Protease-Induced Epitope Retrieval (PIER), which uses enzymes like proteinase K to digest proteins and expose epitopes [24].
4. What is the consequence of a delay between tissue dissection and fixation? Delaying fixation can lead to antigen diffusion, degradation, or alteration (such as dephosphorylation) [3] [25]. This is due to the release of proteolytic enzymes from cellular compartments, which begins to degrade the tissue in a process called autolysis [25]. The result can be weak, diffuse, or completely absent staining, as the target antigen is no longer present in its original location or form.
Troubleshooting Guides
Common Issues and Solutions Related to Sample Preparation
The following table outlines frequent problems stemming from sample preparation and fixation, along with practical corrective actions.
| Potential Issue | Primary Cause | Recommended Solution |
|---|---|---|
| No or Weak Staining [25] [26] | Epitope masked by aldehyde fixation [3]. | Perform antigen retrieval (HIER or PIER) [3] [24]. |
| Tissue underfixation or autolysis [25]. | Increase fixation time; fix tissue promptly after dissection [3] [25]. | |
| The antibody does not recognize the native, non-denatured protein [3]. | Check the antibody datasheet for IHC validation [3] [24]. | |
| High Background Staining [3] [1] | Overfixation introducing excessive cross-linking [3]. | Optimize fixation time and conditions; use antigen retrieval [3]. |
| Non-specific binding due to insufficient blocking [26]. | Ensure fresh blocking reagents are used; increase blocking time or concentration [3] [26]. | |
| Tissue dried out during processing [3]. | Perform all incubation steps in a humidified chamber [3]. | |
| Poor Tissue Morphology [3] [25] | Antigen retrieval methods too harsh [3]. | Optimize retrieval incubation length or try a different method [3] [25]. |
| Tissue degradation due to slow/inadequate fixation [3]. | Fix tissue as soon as possible; increase fixation time or use perfusion fixation [3] [8]. | |
| Ice crystal formation in frozen sections [25]. | Rapidly freeze fresh tissue in chilled isopentane [24]. |
Optimizing Fixation for Antigen Preservation: A Comparative Table
Selecting the right fixative is a critical balance between preserving morphology and maintaining antigenicity. The table below compares the key characteristics of common fixatives.
| Fixative Type | Mechanism of Action | Impact on Antigens | Best Use Cases |
|---|---|---|---|
| Formalin/PFA [8] | Cross-linking via methylene bridges. | Can mask epitopes; often requires antigen retrieval. | General purpose; excellent morphology; FFPE samples. |
| Glutaraldehyde [8] | Strong cross-linking. | Can destroy many epitopes; high autofluorescence. | Electron microscopy; superior structural preservation. |
| Ethanol/Methanol [8] | Precipitation & dehydration. | May denature conformation-sensitive epitopes. | Frozen sections; cytology preparations; some specific antigens. |
| Acetone [8] | Precipitation. | Can be harsh on some epitopes; no cross-linking. | Frozen sections; cell smears; intracellular antigens. |
Experimental Protocols for Optimization
Protocol 1: Standardizing Formalin Fixation for FFPE Tissues
Objective: To preserve tissue morphology while maximizing antigen availability for antibody binding.
- Tissue Collection: Dissect tissue into small pieces (<10 mm thick) immediately after sacrifice [24].
- Immersion Fixation: Immerse tissue in a large volume of neutral-buffered 10% formalin (at least 10:1 fixative-to-tissue ratio) [8] [23].
- Fixation Time: Fix for 24-48 hours at room temperature. Note: The optimal time must be determined empirically, as prolonged fixation can mask epitopes [8].
- Washing & Processing: Rinse tissue thoroughly with buffer (e.g., PBS) to remove excess fixative before proceeding to dehydration and paraffin embedding [23].
Protocol 2: Heat-Induced Epitope Retrieval (HIER)
Objective: To reverse formaldehyde-induced cross-links and unmask antigens in FFPE sections.
- Deparaffinization & Rehydration: Dewax and hydrate slides using xylene and a graded series of ethanol to water [26].
- Retrieval Buffer: Place slides in a suitable buffer, such as 10 mM Sodium Citrate (pH 6.0) or 1 mM EDTA (pH 8.0) [1].
- Heating: Heat the slides using a pressure cooker, microwave, or water bath. A common method is heating in a pressure cooker for 20 minutes or in a microwave for 8-15 minutes [24] [1].
- Cooling: Allow the slides to cool in the buffer to room temperature (for approximately 20-30 minutes) [24].
- Washing: Rinse slides with distilled water and then with the wash buffer (e.g., PBS) used in the subsequent IHC steps [1].
Workflow: From Sample to Staining
The diagram below outlines the critical decision points in the sample preparation and fixation workflow that directly impact antigen preservation and the success of the final IHC stain.
The Scientist's Toolkit: Key Research Reagent Solutions
The following table lists essential reagents used to address antigen preservation challenges during sample preparation.
| Reagent / Solution | Primary Function in Antigen Preservation |
|---|---|
| Neutral Buffered Formalin [8] | Standard cross-linking fixative providing excellent tissue morphology for FFPE samples. |
| Antigen Retrieval Buffers (e.g., Citrate, EDTA) [24] [1] | To break methylene cross-links formed during formalin fixation and unmask epitopes. |
| Proteinase K / Trypsin [24] | Enzymes for Protease-Induced Epitope Retrieval (PIER), digesting proteins to expose hidden epitopes. |
| Bovine Serum Albumin (BSA) / Normal Serum [3] [24] | Used in blocking buffers to cover non-specific binding sites and reduce background staining. |
| Protein Phosphatase Inhibitors [3] | Added to fixatives and buffers to prevent dephosphorylation of labile phosphorylation sites. |
| Sodium Borohydride [1] | Used to reduce fixative-induced autofluorescence caused by aldehyde fixatives. |
| Chilled Isopentane [24] | Medium for rapid freezing of fresh tissues to prevent ice crystal formation that damages morphology and antigens. |
The path to successful IHC staining and reliable antibody optimization begins the moment tissue is collected. Proper sample preparation and fixation are not merely preliminary steps; they are the foundation upon which specific and sensitive detection is built [24] [23]. By understanding how these processes affect antigen integrity and implementing the standardized protocols and troubleshooting guides provided here, researchers can ensure that their carefully titrated antibodies reveal a true and clear picture of protein expression and localization.
Establishing a Systematic Framework for Antibody Titration Experiments
What is the primary goal of antibody titration? The primary goal of antibody titration is to find the optimal working concentration that provides the highest specific signal with the lowest background noise. This optimal balance, known as the signal-to-noise ratio, is critical for generating reliable, reproducible, and interpretable data in immunohistochemistry (IHC) [27] [2].
Why is a systematic approach superior to using manufacturer suggestions alone? While manufacturer datasheets provide a recommended starting dilution, the ideal concentration for your specific experiment can vary due to factors such as tissue type, fixation method, antigen retrieval technique, and the unique environment of your laboratory. A systematic titration experiment removes this uncertainty by empirically determining the best dilution for your conditions, ultimately saving time and reagents while ensuring data quality [28] [29].
The Core Principles of Antibody Titration
Foundational Concepts
- Signal-to-Noise Ratio: This is the key metric for titration. The "signal" is the specific staining of your target antigen. The "noise" or "background" is the non-specific binding of antibodies to off-target sites or tissue components. The optimal antibody concentration maximizes this ratio [27].
- The "Goldilocks" Zone: Using too little antibody results in a weak or absent signal. Using too much antibody increases background staining and can mask specific signal. Titration helps you find the concentration that is "just right" [28] [2].
- Quantitative Foundations: Antibody concentrations are often given in dilution factors (e.g., 1:100, 1:1000) or as a final concentration (e.g., μg/mL). A survey of the scientific literature shows that for IHC on paraffin-embedded tissues, the most frequently used final antibody concentrations fall within the 1-10 μg/mL range, providing a solid starting point for your titration series [27].
Table: Typical Final Antibody Working Concentrations in Research Publications
| Application | 0.1-0.9 μg/mL | 1-10 μg/mL | 10-99 μg/mL |
|---|---|---|---|
| Western Blot | 176 | 234 | 14 |
| IHC (Paraffin) | 35 | 128 | 42 |
| IHC (Frozen) | 6 | 121 | 21 |
| Immunocytochemistry | 47 | 258 | 117 |
| Flow Cytometry | 122 | 860 | 185 |
Data adapted from a survey of formal publications. Values indicate the number of publications reporting use within that concentration range [27].
The Titration Workflow
The following diagram illustrates the logical workflow for designing and executing a successful antibody titration experiment.
Step-by-Step Experimental Protocol
Designing and Performing the Titration Experiment
How do I design a dilution series for a new antibody? A good starting point is to perform a serial dilution of your primary antibody while keeping the concentration of the secondary antibody constant [30]. A typical series might include the following dilutions, which span a broad range to capture the optimal point:
- 1:100
- 1:250
- 1:500
- 1:750
- 1:1,000 [30]
What is the recommended protocol for running the experiment? The following step-by-step protocol is adapted from standard immunolabeling procedures [30]:
- Prepare Slides: Use positive control tissue sections with known antigen expression for the titration.
- Dilute Primary Antibody: Prepare the primary antibody staining solution at each dilution in your series. Use the recommended diluent (e.g., PBS or a specific antibody diluent) [30] [29].
- Apply Antibody: Remove the blocking solution from your samples. Add the primary antibody solutions to their respective tissue sections. For your negative control, apply only the diluent buffer without the primary antibody.
- Incubate: Incubate for 1 hour at room temperature or overnight at 4°C for enhanced sensitivity [30] [29].
- Wash: Remove the primary antibody solution and wash the slides 3 times with PBS [30].
- Apply Secondary Antibody: Add the secondary antibody staining solution to all slides, including the negative control. A good starting dilution for a secondary antibody is 1:1,000 [30].
- Incubate and Wash: Incubate for 30 minutes to 1 hour at room temperature, then wash 3 times with PBS [30].
- Complete Protocol: Proceed with the remaining steps of your IHC protocol (e.g., detection, counterstaining, and mounting).
Calculations and Dilution Preparation
How do I accurately prepare my antibody dilutions? The formula C1 × V1 = C2 × V2 is essential for preparing solutions of a desired concentration and volume [31] [32].
- C1 = Concentration of the stock solution
- V1 = Volume of the stock solution to use
- C2 = Desired final concentration
- V2 = Desired final volume
For example, if you have a stock antibody at 1 mg/mL and need 1 mL of a 1 μg/mL solution:
- C1 = 1 mg/mL = 1000 μg/mL
- C2 = 1 μg/mL
- V2 = 1 mL = 1000 μL
- V1 = (C2 × V2) / C1 = (1 μg/mL × 1000 μL) / 1000 μg/mL = 1 μL
You would add 1 μL of stock antibody to 999 μL of diluent [31].
Troubleshooting Guide: FAQs
Problem: After titration, I still have weak or no staining. What should I check? Weak staining can persist even at high antibody concentrations if other factors are at play.
- Solution 1: Verify Antibody and Antigen. Confirm your primary antibody is validated for IHC and your species of interest. Ensure the target protein is expressed in your tissue using a positive control [3] [28] [2].
- Solution 2: Optimize Antigen Retrieval. Epitopes masked by formalin fixation require unmasking. Optimize your antigen retrieval method (HIER or PIER), buffer, incubation time, and temperature [3] [28] [29].
- Solution 3: Check Antibody Integrity. Ensure antibodies have been stored correctly and are not past their expiration date. Avoid repeated freeze-thaw cycles [3] [28].
Problem: My optimal dilution has a high background. How can I reduce it? High background is often a sign of non-specific binding.
- Solution 1: Titrate Further. The optimal concentration for signal may still be too high for a clean background. Test even higher dilutions (e.g., 1:2,000 to 1:10,000 for the secondary antibody) [30].
- Solution 2: Enhance Blocking. Increase the concentration or duration of the blocking step. Use normal serum from the same species as the secondary antibody host [3] [28] [29].
- Solution 3: Improve Washing. Increase the length and number of washes with a buffer containing a mild detergent like Tween-20 to reduce hydrophobic interactions [29] [2].
- Solution 4: Use Adsorbed Secondaries. If your tissue is from the same species as the primary antibody, use a secondary antibody that has been pre-adsorbed against the host species immunoglobulins to minimize cross-reactivity [3] [28].
Problem: My staining is uneven across the tissue section. What caused this?
- Solution 1: Prevent Drying. Ensure tissue sections remain covered in liquid at all times during the staining procedure by using a humidified chamber [3] [2].
- Solution 2: Ensure Complete Coverage. Apply enough staining solution to fully cover the tissue section and ensure consistent reagent coverage during incubation [2].
- Solution 3: Check Deparaffinization. Inadequate deparaffinization can cause spotty, uneven staining. Repeat with new sections and fresh xylene [28] [29].
Problem: How do I titrate antibodies for a multiplex IHC experiment? Titration is even more critical in multiplexing to balance the signals of multiple targets.
- Solution: Titrate Individually and Collectively. First, titrate each antibody individually in a single-plex format to find its optimal dilution. Then, combine the optimized antibodies and run a final multiplex titration to fine-tune the panel, ensuring all signals are balanced and detectable without bleed-through [33].
The Scientist's Toolkit: Essential Research Reagent Solutions
The following table lists key reagents and materials required for performing a robust antibody titration experiment.
Table: Essential Reagents for Antibody Titration Experiments
| Item | Function/Purpose | Considerations for Use |
|---|---|---|
| Validated Primary Antibody | Binds specifically to the target protein of interest. | Check datasheet for IHC validation and recommended starting dilution [28] [2]. |
| Fluorophore- or Enzyme-Conjugated Secondary Antibody | Binds to the primary antibody for detection. | Must be raised against the host species of the primary antibody. Pre-adsorbed secondaries can reduce background [3] [30]. |
| Positive Control Tissue | Tissue known to express the target antigen. | Crucial for verifying the antibody performance and protocol during titration [30] [29]. |
| Antibody Diluent Buffer | Solution used to dilute antibodies to working concentrations. | Using the manufacturer's recommended diluent can improve performance and signal-to-noise [32] [29]. |
| Blocking Serum | Reduces non-specific binding of antibodies to the tissue. | Normal serum from the species of the secondary antibody host is often most effective [3] [29]. |
| Antigen Retrieval Buffers | Unmask epitopes cross-linked by formalin fixation. | Critical for FFPE tissues. Common buffers include Citrate (pH 6.0) and Tris-EDTA (pH 9.0) [28] [29]. |
The relationship between antibody concentration and staining outcome is summarized in the diagram below, illustrating the progression from suboptimal to optimal conditions.
Practical IHC Dilution Protocols: From Titration to Detection
Step-by-Step Guide to Antibody Titration for IHC Optimization
Why is antibody titration necessary for IHC?
Antibody titration is a critical optimization step in immunohistochemistry (IHC) to determine the highest dilution of an antibody that provides maximum specific signal with minimal background noise [34]. Using an antibody at an incorrect concentration is a common source of experimental failure; an overly concentrated antibody can cause high background and non-specific staining, while an overly dilute antibody may yield a weak or undetectable signal [3] [34]. Proper titration ensures results are reliable, reproducible, and interpretable.
Understanding Antibody Concentration and Dilution
The optimal antibody concentration is a balance between signal intensity and background staining [35]. The table below summarizes typical antibody concentration ranges for different sample types, as reported in the scientific literature.
Table 1: Typical Antibody Concentrations in IHC from Literature Survey
| Sample Type | Number of Publications Reporting Antibody Concentration (μg/mL) | ||
|---|---|---|---|
| 0.1-0.9 | 1-10 | 10-99 | |
| IHC (Overall) | 106 | 473 | 107 |
| IHC (Frozen) | 17 | 104 | 38 |
| IHC (FFPE) | 58 | 206 | 70 |
Data adapted from a survey of published literature [35].
For initial experiments, concentrations of 1-2 μg/mL are a practical starting point for titration [35]. It is crucial to distinguish between a dilution ratio (e.g., 1:100) and the resulting final concentration. A 1:100 dilution of a 100 μg/mL stock antibody yields the same 1 μg/mL final concentration as a 1:1000 dilution of a 1 mg/mL (1000 μg/mL) stock [35].
Experimental Protocol: Antibody Titration for IHC
Follow this step-by-step protocol to determine the optimal working dilution for your primary antibody.
Materials Required
Table 2: Research Reagent Solutions for IHC Titration
| Item | Function |
|---|---|
| Titration Slide | A single slide with multiple identical tissue sections for parallel testing of antibody dilutions [36]. |
| Primary Antibody | The antibody against your target protein, supplied as a concentrate or ready-to-use (RTU) solution [36]. |
| Antibody Diluent | A buffered solution used to serially dilute the primary antibody to the desired concentrations [34]. |
| Positive Control Tissue | A tissue section known to express the target protein, essential for validating the staining protocol [37]. |
| Appropriate Detection System | Includes secondary antibodies, detection polymers (e.g., HRP-polymer), and chromogens (e.g., DAB) matched to your primary antibody and sample type [36] [38]. |
Step-by-Step Procedure
- Prepare the Tissue Sections: Use high-quality, charged slides with thin, flat, and thoroughly dried sections to ensure even adhesion and prevent uneven staining [36]. Ensure tissue fixation is optimal and consistent, as under- or over-fixation can mask epitopes and lead to highly variable results [36] [3].
- Design the Titration Experiment: If the antibody datasheet suggests a 1:200 dilution, prepare a series of dilutions bracketing this value (e.g., 1:50, 1:100, 1:200, 1:400, and 1:500) [34]. Always include a no-primary antibody control (incubated only with diluent and secondary antibody) to assess non-specific binding from the detection system [37].
- Perform Antigen Retrieval: For formalin-fixed, paraffin-embedded (FFPE) tissues, antigen retrieval is almost always essential. Choose an appropriate method (e.g., Heat-Induced Epitope Retrieval/HIER or Proteolytic-Induced Epitope Retrieval/PIER) based on the primary antibody and fixation method [36] [39].
- Apply Primary Antibodies: Apply the different dilutions of your primary antibody to their respective tissue sections on your titration slide. Incubate under the recommended conditions (often overnight at 4°C for maximum signal) [40].
- Complete IHC Staining: Proceed with the remaining IHC steps according to your standard protocol, including blocking (e.g., with serum or BSA), applying the secondary antibody/detection system, and adding the chromogen (e.g., DAB) [36] [39].
- Counterstain and Coverslip: Apply a counterstain (e.g., Hematoxylin) that is carefully optimized to provide contrast without obscuring weak specific staining [36].
The workflow for the entire titration experiment is summarized in the following diagram:
Evaluating Results and Determining Optimal Dilution
Examine all sections, including controls, under a microscope. The optimal dilution is identified by comparing the signal-to-noise ratio across the dilution series [40].
- Optimal Dilution: The highest dilution (lowest concentration) where the specific staining intensity is strong and the background is clean.
- Too Concentrated: Strong background staining and potentially non-specific signal. The no-primary control should be clean; if not, the detection system requires further optimization [3] [37].
- Too Dilute: Weak or absent specific staining in the positive control tissue.
Frequently Asked Questions (FAQs)
Q1: The datasheet already provides a recommended dilution. Why should I still titrate? The recommended dilution is an excellent starting point, but it is a guideline determined under specific conditions. The optimal dilution can vary based on your unique experimental setup, including the type of tissue, fixation method, antigen retrieval technique, and detection system used in your lab [36] [34].
Q2: What is the difference between using antibody concentrates and ready-to-use (RTU) antibodies? Concentrates offer flexibility and a lower initial purchase price. You can optimize the working dilution to balance cost, staining time, and quality. However, they require preparation time and validation, and staining quality may be compromised if the diluted antibody deteriorates over time [36] [38]. RTU antibodies save time on dilution and validation, provide better consistency with reduced run-to-run variation, and simplify reagent management with a defined number of tests and expiry dates. They are ideal for standardized, high-throughput workflows [36] [38].
Q3: After titration, my staining is still weak. What should I check? Weak staining can result from several factors beyond antibody concentration [3]:
- Epitope Accessibility: Ensure your antigen retrieval method is effective for your specific antibody and tissue. You may need to optimize the retrieval buffer pH, method, or incubation time [3] [39].
- Antibody Integrity: Check that the antibody has been stored properly and has not been degraded by repeated freeze-thaw cycles or exposure to air and light [36] [3].
- Detection System Sensitivity: Your detection system (e.g., polymer-based systems) may not be sensitive enough for low-abundance targets. Consider using a more sensitive detection method [36] [38].
Q4: What controls are essential for validating my titration results? Appropriate controls are non-negotiable for interpreting IHC results reliably [37]:
- Positive Tissue Control: A tissue known to express the target protein confirms your entire IHC protocol is working.
- Negative Tissue Control: A tissue known not to express the target helps identify non-specific staining.
- No-Primary Antibody Control: This reveals non-specific binding or background caused by the secondary antibody or detection system.
- Isotype Control: An antibody with the same isotype but no specificity for the target helps confirm the specificity of the primary antibody's binding.
Q5: How do I adjust the protocol if I need to shorten the primary antibody incubation time? If moving from a recommended overnight incubation at 4°C to a shorter incubation (e.g., 1-2 hours at room temperature), you will likely need to increase the concentration of the primary antibody to compensate for the reduced binding time [40]. Be aware that this adjustment can increase costs and requires re-optimization, as the behavior can vary between different antibodies [40].
Selecting the Optimal Antibody Diluent for Enhanced Performance
FAQs: Antibody Diluent in IHC
What is the primary function of an antibody diluent in IHC?
Antibody diluent is a specialized buffer solution designed to optimize antibody performance during immunohistochemistry staining. Its core functions include maintaining a stable pH environment, preventing non-specific antibody binding through additives like BSA or casein, and preserving antibody stability. A high-quality diluent is foundational for achieving consistent, reproducible staining with high signal-to-noise ratio [41] [42].
How does antibody diluent composition affect staining results?
The specific composition of a diluent directly influences key staining parameters. A well-formulated diluent typically contains:
- Buffering agents to maintain optimal pH (usually 7.0-8.2) for antibody binding [1]
- Carrier proteins like BSA to minimize non-specific binding and reduce background [41] [43]
- Stabilizers to extend antibody shelf-life and maintain potency [41]
- Preservatives to prevent microbial contamination [41]
- Detergents to reduce hydrophobic interactions that cause background [2]
Can I use PBS or TBS as a diluent instead of a commercial formulation?
While phosphate-buffered saline (PBS) or tris-buffered saline (TBS) are sometimes used as simple diluents, they lack the essential components for optimal staining. Commercial formulations are specifically engineered to provide superior results by including blocking agents, stabilizers, and optimized ionic strength. Research demonstrates that the same antibody can perform significantly better when diluted in a specialized diluent compared to TBST/5% normal goat serum [44].
Troubleshooting Guides
Problem: High Background Staining
High background staining obscures specific signal and creates poor signal-to-noise ratio.
| Possible Cause | Solution |
|---|---|
| Insufficient blocking | Increase blocking incubation period; use 10% normal serum or 1-5% BSA [43]. |
| Primary antibody concentration too high | Titrate antibody to determine optimal concentration; incubate at 4°C [43] [2]. |
| Non-specific secondary antibody binding | Use pre-adsorbed secondary antibodies; include serum blocking from secondary host species [43] [1]. |
| Endogenous enzyme activity | Quench peroxidases with 3% H₂O₂; inhibit phosphatases with levamisole [43] [1]. |
| Hydrophobic interactions | Add 0.05% Tween-20 to wash buffers and diluent to minimize non-specific binding [2]. |
| Incompatible buffer composition | For HRP systems: avoid sodium azide; for AP systems: avoid phosphate buffers [43]. |
Problem: Weak or No Staining
Inadequate specific signal makes interpretation difficult or impossible.
| Possible Cause | Solution |
|---|---|
| Antibody not validated for IHC | Confirm antibody is validated for IHC applications and specific sample types [43] [42]. |
| Incorrect antibody concentration | Perform titration experiment; test multiple dilutions [2] [45]. |
| Epitope masking from fixation | Optimize antigen retrieval method (HIER or PIER); reduce fixation time [43] [7]. |
| Antibody degradation or contamination | Store antibodies properly; avoid repeated freeze-thaw cycles; use sterile techniques [43] [1]. |
| Incompatible detection system | Use polymer-based detection for enhanced sensitivity; verify reagent activity [44]. |
| Insufficient antigen retrieval | Increase retrieval time or temperature; try different retrieval buffers [43] [44]. |
Problem: Uneven or Patchy Staining
Inconsistent staining across the tissue section.
| Possible Cause | Solution |
|---|---|
| Incomplete reagent coverage | Use humidified chamber; ensure adequate volume fully covers tissue section [2]. |
| Tissue section drying | Never let sections dry out; keep covered with liquid throughout staining process [43] [44]. |
| Inadequate deparaffinization | Use fresh xylene; increase deparaffinization time [43] [44]. |
| Variable fixation | Standardize fixation time and conditions across all samples [2]. |
Antibody Diluent Optimization Data
Antibody Titration Guidelines
Systematic antibody titration is essential for optimizing signal-to-noise ratio.
| Antibody Type | Recommended Concentration | Incubation Conditions |
|---|---|---|
| Monoclonal | 5-25 µg/mL [45] | Overnight at 4°C [45] [44] |
| Polyclonal (affinity purified) | 1.7-15 µg/mL [45] | Overnight at 4°C [45] [44] |
| High abundance targets | Lower concentration (higher dilution) | 1-2 hours at room temperature [45] |
| Low abundance targets | Higher concentration (lower dilution) | Overnight at 4°C [42] |
Incubation Time and Temperature Optimization
The interaction between incubation time and temperature significantly impacts staining intensity and specificity.
| Temperature | Duration | Signal Intensity | Recommended Use |
|---|---|---|---|
| 4°C | Overnight | Highest [40] | Standard protocol; optimal results [40] [44] |
| 21°C (Room temp) | Overnight | Moderate [40] | When 4°C not available |
| 37°C | Overnight | Variable (may decrease) [40] | Target-dependent; not generally recommended |
| 21-37°C | 1-2 hours | Lower [40] | High-throughput workflows only |
Experimental Optimization Workflow
The Scientist's Toolkit: Essential Research Reagent Solutions
| Reagent | Function | Application Notes |
|---|---|---|
| Specialized Antibody Diluent | Optimizes pH, reduces nonspecific binding, preserves antibody stability | Preferred over simple buffers; formulation-specific performance [41] [44] |
| Normal Serum | Blocks nonspecific binding sites | Use serum from secondary antibody host species; typically 5-10% concentration [43] [1] |
| BSA (Bovine Serum Albumin) | Carrier protein that reduces background | Common concentration: 1-5%; alternative to serum blocking [43] [1] |
| Tween-20 | Detergent that minimizes hydrophobic interactions | Typical concentration: 0.025-0.05% in wash buffers [7] [2] |
| Antigen Retrieval Buffers | Unmasks epitopes crosslinked by fixation | Citrate (pH 6.0), Tris-EDTA (pH 9.0); target-dependent selection [7] [44] |
| Enzyme Blocking Solutions | Quenches endogenous peroxidase/phosphatase | 3% H₂O₂ for peroxidase; levamisole for phosphatase [43] [1] |
| Polymer-Based Detection Systems | Provides superior sensitivity over biotin-based methods | Enhanced tissue penetration; reduced background [44] |
Antibody Diluent Selection Algorithm
Troubleshooting Guides
Problem 1: Weak or No Staining
Weak or absent staining compromises experiment validity. The table below outlines common causes and solutions.
| Potential Cause | Troubleshooting Steps & Solutions | Supporting Experimental Protocol |
|---|---|---|
| Ineffective Antigen Retrieval [46] [17] | - Optimize retrieval method: Compare Heat-Induced Epitope Retrieval (HIER) using a microwave oven or pressure cooker versus a water bath [46].- Test buffer pH: Systematically test low-pH (e.g., Citrate buffer, pH 6.0) and high-pH (e.g., Tris-EDTA, pH 8.0-9.9) solutions [17].- Prepare fresh 1X unmasking solution daily [46]. | HIER Protocol [17]: Heat slides in retrieval buffer (95-97°C) for 10-30 minutes, followed by a 35-minute cooling period. Use a microwave oven or pressure cooker for optimal results. |
| Primary Antibody Potency [1] | - Verify antibody storage: Ensure aliquoted storage at recommended temperatures to avoid freeze-thaw cycles [1].- Include a positive control: Use tissue known to express the target antigen to confirm protocol functionality [1] [46].- Check antibody diluent pH: Maintain a pH between 7.0 and 8.2 for optimal binding [1]. | Positive Control Protocol [46]: Run a known positive control (e.g., paraffin-embedded cell pellets) alongside experimental samples to verify antibody and procedure performance. |
| Suboptimal Antibody Concentration [30] | - Perform a dilution series: Test primary antibody at 1:100, 1:250, 1:500, 1:750, and 1:1000 dilutions while keeping secondary antibody constant [30].- Reduce secondary antibody concentration if concentration is inhibitory (e.g., try 1:2000 to 1:10,000) [1] [30]. | Antibody Titration Protocol [30]: Dilute the primary antibody in a blocking solution or PBS. Incubate with samples, then wash and detect with a constant secondary antibody concentration. |
Problem 2: High Background Staining
Excessive background noise reduces signal-to-noise ratio. The following solutions address typical issues.
| Potential Cause | Troubleshooting Steps & Solutions | Supporting Experimental Protocol |
|---|---|---|
| Endogenous Enzymes [1] | - Quench endogenous peroxidases: Incubate slides in 3% H₂O₂ in methanol or water for 10 minutes [1] [46].- Inhibit endogenous phosphatases with levamisole [1]. | Endogenous Peroxidase Quenching [1]: Incubate a test tissue sample with only the detection substrate. If background signal appears, treat all slides with 3% H₂O₂ for 10 minutes at room temperature before primary antibody incubation. |
| Nonspecific Antibody Binding [1] | - Optimize blocking: Use 1X TBST with 5% normal serum from the secondary antibody host species for 30 minutes [46]. Serum concentration can be increased to 10% if necessary [1].- Add NaCl: Include 0.15 M to 0.6 M NaCl in the antibody diluent to reduce ionic interactions [1].- Avoid egg white-based reagents to prevent avidin-biotin interaction issues [1]. | Blocking Protocol [46]: Block slides with 5% Normal Goat Serum in TBST for 30 minutes at room temperature before applying the primary antibody. |
| Secondary Antibody Issues [1] [46] | - Include a negative control: Process a slide with secondary antibody only to identify cross-reactivity [30] [46].- Use cross-adsorbed secondary antibodies to minimize nonspecific binding.- Switch to polymer-based detection to avoid endogenous biotin in tissues like liver and kidney [46]. | Negative Control Protocol [30]: Incubate a sample with only the secondary antibody (omitting the primary antibody) to determine the level of background fluorescence from nonspecific secondary antibody binding. |
Frequently Asked Questions (FAQs)
Q1: What are the standard incubation conditions for a primary antibody in IHC?
While optimal conditions are antibody-specific, a standard starting point is overnight incubation at 4°C [46]. Alternatively, a 1-hour incubation at room temperature can be used for some antibodies [30] [47]. The concentration must be determined by titration, but a common starting dilution is 1:1000 for a 1 mg/mL antibody (equivalent to 1 μg/mL) [30]. Always consult the manufacturer's datasheet for validated protocols [46].
Q2: How do I systematically optimize my antibody dilution?
Perform a simple dilution series while keeping other variables constant [30].
- Prepare primary antibody dilutions (e.g., 1:100, 1:250, 1:500, 1:750, 1:1000) in the recommended diluent.
- Apply each dilution to matched tissue sections.
- Process all slides with the same detection system.
- Image the results and select the dilution that provides the strongest specific signal with the cleanest background [30].
Q3: Why is the antibody diluent so important, and can I use PBS?
The diluent is critical because it maintains antibody stability and minimizes nonspecific binding. While PBS is sometimes used [30], it is not always optimal. Commercial antibody diluents are specifically formulated with buffers, proteins (like BSA), and stabilizers to optimize performance and signal-to-noise ratio [41]. Some antibodies show vastly superior performance in a specific commercial diluent compared to a simple buffer like TBST/5% normal goat serum [46]. Always check the product datasheet for the recommended diluent.
Q4: My positive control is staining but my experimental tissue is not. What does this mean?
This indicates that your antibody and detection workflow are functioning correctly, but the target antigen may not be present or accessible in your experimental tissue. Consider the following:
- The experimental sample may be truly negative for the target [46].
- The antigen retrieval method may need further optimization for your specific tissue type [17].
- The fixation process for the experimental tissue might have been suboptimal (e.g., over-fixation) [8].
Experimental Workflow and Relationships
The diagram below illustrates the logical relationship between the key variables of time, temperature, and concentration, and how to optimize them to solve common IHC staining problems.
The Scientist's Toolkit: Key Research Reagent Solutions
This table details essential materials for standardized and reproducible IHC experiments.
| Item | Function & Importance |
|---|---|
| Validated Primary Antibodies | Antibodies validated specifically for IHC ensure recognition of the target in fixed tissue. Look for antibodies with application-specific data and Advanced Verification badges [1]. |
| Optimized Antibody Diluent | A specialized buffer that maintains antibody stability, prevents nonspecific binding, and ensures consistent pH. Superior to simple buffers like PBS for many antibodies [41] [46]. |
| Polymer-Based Detection Reagents | Sensitive detection systems that avoid issues with endogenous biotin, offering enhanced sensitivity and lower background compared to avidin-biotin (ABC) systems [46]. |
| Antigen Retrieval Buffers | Solutions (e.g., Citrate pH 6.0, Tris-EDTA pH 9.0) used in HIER to break formalin-induced crosslinks and expose epitopes, which is critical for successful staining of FFPE tissues [46] [17]. |
| Blocking Sera | Normal serum from the host species of the secondary antibody used to block nonspecific sites on the tissue, reducing background staining [1] [46]. |
Integrating Antigen Retrieval Methods with Dilution Optimization
Achieving high-quality results in Immunohistochemistry (IHC) requires the precise integration of antigen retrieval and antibody dilution parameters. These two factors are intrinsically linked: even an optimally diluted antibody cannot bind its target if the epitope remains masked by fixation, and a perfectly retrieved antigen will yield no signal if the antibody concentration is incorrect. This guide provides troubleshooting and FAQs to help researchers systematically optimize these critical variables for specific antibodies and experimental conditions, ensuring reproducible and reliable data.
Troubleshooting Common IHC Problems
No or Weak Staining
Problem: The tissue section shows little to no specific staining, making interpretation impossible.
Solutions:
| Possible Cause | Solution | Key Considerations |
|---|---|---|
| Epitope Masking [3] [17] | Perform antigen retrieval. Optimize retrieval conditions (buffer pH, heating time/method). | The chemical crosslinks from aldehyde fixation can mask the epitope. Heat-Induced Epitope Retrieval (HIER) is preferred. [17] |
| Insufficient Antibody Concentration [3] [48] | Increase primary antibody concentration and/or incubation time. Perform an antibody titration series. | Incubation overnight at 4°C can improve binding for low-abundance targets. [49] [30] |
| Ineffective Antigen Retrieval [3] | Optimize the antigen retrieval method. Try different retrieval buffers (e.g., Citrate pH 6.0 vs. Tris-EDTA pH 9.0) and heating methods. [50] [17] | No single retrieval condition works for all antibodies. Start with the datasheet protocol. [17] |
| Antibody Incompatibility [3] [48] | Confirm the antibody is validated for IHC and compatible with the tissue species. | The antibody may only work for denatured proteins (Western blot) and not native proteins in IHC. [3] |
| Protein Not Present/Expressed [3] [48] | Run a positive control tissue known to express the target protein. | Use existing protein or RNA databases to confirm expression. [3] |
High Background Staining
Problem: Non-specific staining obscures the specific signal, resulting in a poor signal-to-noise ratio.
Solutions:
| Possible Cause | Solution | Key Considerations |
|---|---|---|
| Antibody Concentration Too High [3] [48] [1] | Decrease primary antibody concentration. Perform an antibody titration. | High antibody concentrations increase non-specific binding. Titrate to find the optimal dilution. [3] |
| Insufficient Blocking [3] [48] | Increase blocking time (up to 1 hour). Use normal serum from the secondary antibody host species. [49] | Blocking serum should match the host species of the secondary antibody, not the primary. [49] |
| Secondary Antibody Cross-Reactivity [3] [50] [1] | Include a secondary-only control. Use cross-adsorbed secondary antibodies. | A secondary-only control is essential to identify this problem. [50] [30] |
| Inadequate Washing [3] [50] | Increase wash volume, duration, and frequency (e.g., 3 x 5 mins with adequate buffer). | Washes remove unbound antibodies that contribute to background. [50] |
| Endogenous Enzyme Activity [49] [50] [1] | Quench with 3% H₂O₂ (for HRP) or Levamisole (for Alkaline Phosphatase) before primary antibody incubation. | Necessary for tissues with high endogenous peroxidase or phosphatase levels. [50] [48] |
Overstaining and Non-specific Staining
Problem: The staining is too intense, obscuring cellular details, or appears in incorrect cellular locations.
Solutions:
| Possible Cause | Solution | Key Considerations |
|---|---|---|
| Primary Antibody Too Concentrated [48] | Dilute primary antibody further. Perform a titration to find the optimal concentration. | The same cause can lead to either high background or overstaining. [48] |
| Excessive Detection Incubation [48] | Reduce substrate development time. Monitor chromogen reaction visually. [49] | DAB reactions should be monitored under a microscope to prevent over-development. [49] |
| Over-retrieval [3] [17] | Optimize antigen retrieval incubation length. Avoid overly harsh retrieval conditions. | Excessive heat or protease digestion can damage tissue and expose non-specific epitopes. [17] |
| Insufficient Washing [48] | Increase the number and duration of washes after primary and secondary antibody steps. | Critical for removing loosely bound, non-specific antibody. [48] |
Frequently Asked Questions (FAQs)
Q1: How do I systematically optimize antigen retrieval and antibody dilution for a new antibody?
A: Follow a structured, matrix-approach protocol:
- Start with Datasheet: Always begin with the vendor's recommended protocol for retrieval and dilution. [50]
- Fixation and Sectioning: Use a control tissue fixed and processed identically to your experimental samples. [50]
- Antigen Retrieval Test: If signal is weak, test two different retrieval buffers: a low-pH Citrate buffer (pH 6.0) and a high-pH Tris-EDTA buffer (pH 9.0), using the same heating method (e.g., microwave or pressure cooker). [17]
- Antibody Titration: Using the best retrieval condition from step 3, perform a primary antibody titration (e.g., 1:100, 1:500, 1:1000, 1:2000) while keeping all other variables constant. [30]
- Evaluation: The optimal condition is the one that gives the strongest specific signal with the cleanest background. Always include a no-primary antibody control for each retrieval condition to assess background. [30]
Q2: What is the fundamental reason antigen retrieval is necessary, and how does it affect antibody dilution?
A: Formaldehyde fixation creates methylene bridges between proteins, cross-linking them and altering the 3D conformation of epitopes. This physically "masks" the epitope, preventing antibody access. [17] Antigen retrieval (HIER or PIER) breaks these cross-links, restoring epitope accessibility. [3] [17] This is directly linked to dilution: if an epitope is poorly retrieved, even a high antibody concentration may fail to bind, leading to weak staining. Effective retrieval exposes the epitope, allowing you to use a more optimal (often higher) dilution of the antibody, which reduces cost and minimizes non-specific background.
Q3: My positive control stains well, but my experimental tissue is weak. Should I adjust retrieval or dilution?
A: This indicates your protocol and reagents are working, and the issue likely lies with the experimental tissue itself. Before changing retrieval or dilution, consider:
- Fixation Delay: Was the experimental tissue fixed promptly after dissection? A delay can lead to antigen degradation. [3]
- Over-fixation: Was the experimental tissue fixed for much longer than the control? Excessive cross-linking can mask epitopes. You may need to increase retrieval time for the experimental tissue. [3]
- Actual Expression Level: The protein may be expressed at a lower level in your experimental tissue. In this case, a slight increase in antibody concentration or the use of a more sensitive detection system may be necessary. [50]
Q4: What are the critical controls for validating that my staining is specific?
A: Rigorous controls are non-negotiable for publication-quality IHC. [50]
- No-Primary Control: Incubate with secondary antibody only. This identifies background from secondary antibody cross-reactivity or endogenous enzyme activity. [50] [30]
- Positive Control Tissue: A tissue known to express the target protein confirms your entire protocol is working. [50]
- Negative Control Tissue: A tissue known not to express the target protein (or using an isotype control) helps verify specificity. [50] [51]
- Specificity Controls (Gold Standard): For the highest confidence, use a knockdown/knockout tissue or a blocking peptide (the specific antigen used to generate the antibody) to pre-absorb the primary antibody. The signal should be greatly reduced or eliminated. [17]
The Scientist's Toolkit: Key Research Reagent Solutions
| Item | Function | Application Note |
|---|---|---|
| Citrate Buffer (pH 6.0) [17] | A low-pH solution for Heat-Induced Epitope Retrieval (HIER). | Ideal for many phospho-specific targets and a wide range of antibodies. A standard starting point. [17] |
| Tris-EDTA Buffer (pH 9.0) [17] | A high-pH solution for HIER. | Can be more effective for certain nuclear antigens or tightly cross-linked epitopes. [17] |
| SignalStain Antibody Diluent [50] [51] | A commercial diluent optimized for primary antibodies. | Contains stabilizers and blockers to enhance specific signal and reduce background. Superior to simple PBS/BSA for some antibodies. [51] |
| Normal Serum (e.g., Goat, Donkey) [3] [50] | Used for blocking non-specific binding sites. | Should match the host species of the secondary antibody (e.g., use Normal Goat Serum with a goat-anti-rabbit secondary). [49] |
| Polymer-Based Detection Reagents [50] [51] | Biotin-free detection systems (e.g., SignalStain Boost). | Offer high sensitivity and avoid background from endogenous biotin, which is prevalent in tissues like liver and kidney. [50] [51] |
| Sodium Borohydride [1] | Reduces aldehyde-induced autofluorescence. | Treat fixed tissues to reduce background fluorescence caused by unreacted aldehyde groups from PFA/glutaraldehyde fixation. [1] |
Detection System Comparison: Core Principles and Characteristics
The choice between polymer-based and biotin-based detection systems is pivotal for the sensitivity and specificity of an immunohistochemistry (IHC) experiment. The table below summarizes the core components, advantages, and limitations of each system to guide your selection.
Table 1: Comparison of Polymer-Based and Biotin-Based Detection Systems
| Feature | Polymer-Based System | Biotin-Based System (e.g., ABC, LSAB) |
|---|---|---|
| Core Complex | Polymer backbone conjugated with multiple secondary antibodies and enzyme molecules [52]. | Avidin/Biotin-enzyme complex (ABC) or Streptavidin-enzyme complex (LSAB) [52]. |
| Sensitivity | Generally higher sensitivity [52] [53] [54]. | High sensitivity, but typically lower than polymer-based methods [52] [53]. |
| Key Advantage | Fewer steps; no endogenous biotin interference; enhanced tissue penetration due to smaller complex size (vs. ABC) [52] [53]. | Well-established history; signal amplification via high enzyme-to-antibody ratio [52]. |
| Key Limitation | - | Susceptibility to background from endogenous biotin, especially in liver, kidney, and frozen sections [52] [1] [53]. |
| Recommended Use | Ideal for tissues with high endogenous biotin; recommended for maximizing sensitivity and minimizing background [52] [53]. | Requires an additional step to block endogenous biotin for reliable results [52] [1]. |
Frequently Asked Questions (FAQs) and Troubleshooting Guides
FAQ 1: Why should I choose a polymer-based system over a traditional biotin-based method for my IHC experiment?
Polymer-based systems offer two primary advantages. First, they provide greater sensitivity due to the ability to conjugate a large number of enzyme molecules to a polymer backbone, which in turn is linked to the secondary antibody, resulting in superior signal amplification [52] [53]. A comparative study noted that a polymer-based system (ImmPRESS) yielded similar or higher reaction intensity than an avidin-biotin system (ENVISION+) for the majority of antigens tested [54]. Second, they eliminate non-specific background caused by endogenous biotin, which is prevalent in tissues like the liver and kidney [52] [53]. This eliminates the need for an endogenous biotin blocking step, streamlining your protocol and reducing the potential for background staining.
FAQ 2: I am getting high background staining with my biotin-based detection system. What is the cause and how can I fix it?
High background in biotin-based systems is frequently caused by endogenous biotin or lectins [1].
- Cause: Tissues with high natural levels of biotin (e.g., liver, kidney) will bind the avidin/streptavidin component of the detection complex, creating a false-positive signal [52] [1]. Formalin fixation reduces but does not always eliminate this endogenous biotin, and frozen sections are particularly susceptible [52].
- Solution:
- Block Endogenous Biotin: Use a commercial avidin/biotin blocking solution prior to applying the primary antibody [1] [53].
- Switch Detection Systems: The most effective solution is to use a polymer-based detection system, which does not rely on the biotin-avidin interaction and is therefore not affected by endogenous biotin [52] [53].
FAQ 3: My IHC staining is weak or absent, even though my positive control worked. What steps can I take to improve signal intensity?
Weak or absent staining can be related to the detection system or protocol.
- Check the Detection System: Ensure your detection reagent is not expired. Standard secondary antibodies directly conjugated to HRP may lack sufficient signal amplification. Polymer-based detection reagents or avidin-biotin complexes (ABC) are recommended for their superior amplification [52] [53].
- Optimize Antigen Retrieval: Inadequate antigen unmasking is a common cause of failure. Heat-Induced Epitope Retrieval (HIER) using a microwave oven or pressure cooker is highly recommended over a water bath [55] [53]. The pH of the retrieval buffer (e.g., citrate pH 6.0, EDTA pH 8.0-9.0) is also critical and should be optimized for your specific antibody [55] [19].
- Verify Antibody Dilution: An overly high concentration of the secondary antibody can sometimes be inhibitory and reduce antigen detection. Test decreasing concentrations of your secondary antibody to find the optimal dilution [1].
Experimental Protocols for Detection System Comparison
This protocol provides a methodology to empirically compare the sensitivity and background of polymer-based and biotin-based detection systems in your specific experimental context, directly supporting the optimization of your overall IHC workflow.
Protocol: Direct Comparison of Detection System Performance
Objective: To determine the optimal detection system (polymer-based vs. biotin-based) for a specific primary antibody and tissue type, assessing both signal intensity and background staining.
Materials:
- Research Reagent Solutions:
- Primary Antibody: Target-specific, optimized dilution [9] [56].
- Polymer-Based Detection System: HRP- or AP-conjugated, e.g., SignalStain Boost IHC Detection Reagents [53] or ImmPRESS [54].
- Biotin-Based Detection System: e.g., Avidin-Biotin Complex (ABC) or Labeled Streptavidin-Biotin (LSAB) kits [52].
- Chromogen Substrate: DAB or other compatible substrate [52] [53].
- Antigen Retrieval Buffer: Citrate (pH 6.0) or EDTA (pH 8.0-9.0) [55] [53].
- Blocking Solution: Normal serum from the secondary antibody host species or protein block [1] [19].
- Biotin Blocking Solution (if using biotin-based system) [1] [53].
- Peroxidase Block: 3% H₂O₂ in methanol or water [1] [53].
Methodology:
- Tissue Sectioning: Cut consecutive serial sections (4-5 μm) from the same FFPE tissue block, ensuring they contain both positive and negative (e.g., non-expressing) tissue regions [19].
- Deparaffinization and Antigen Retrieval: Process all slides simultaneously through deparaffinization and a standardized HIER protocol (e.g., microwave in citrate buffer, pH 6.0) to ensure consistent epitope unmasking [55] [53].
- Endogenous Enzyme Blocking: Block all slides with 3% H₂O₂ for 10 minutes at room temperature to quench endogenous peroxidase activity [1] [53].
- Protein Blocking: Apply a protein block to all slides for 30 minutes to reduce non-specific background [1] [19].
- Optional Biotin Block: For slides destined for the biotin-based system, perform an additional endogenous biotin block according to the kit instructions. Omit this step for the polymer-based system slides [53].
- Primary Antibody Incubation: Apply the target-specific primary antibody at the predetermined optimal dilution to all slides. Incubate overnight at 4°C [9] [56].
- Detection System Application (Split Experiment):
- Group A (Polymer-Based): Apply the polymer-based HRP detection system according to the manufacturer's instructions.
- Group B (Biotin-Based): Apply the appropriate biotinylated secondary antibody, followed by the ABC or LSAB complex, according to the manufacturer's instructions [52].
- Chromogenic Development and Counterstaining: Develop all slides with the same batch of DAB substrate for an identical duration. Counterstain with hematoxylin, dehydrate, and mount [1] [19].
Data Analysis:
- Sensitivity Assessment: Compare the signal intensity in the known positive tissue regions between Group A and Group B. A more intense specific stain indicates higher sensitivity.
- Background Assessment: Compare the level of non-specific staining in the negative tissue regions and in the negative control slides (no primary antibody) between the two groups. The system that produces a cleaner background is superior for specificity.
Visualizing the Workflow and Key Differences
The following diagram illustrates the logical decision-making process for selecting and troubleshooting an IHC detection system, integrating the concepts discussed in this guide.
Diagram 1: Detection System Selection & Troubleshooting
The Scientist's Toolkit: Essential Research Reagent Solutions
The following table lists key reagents essential for performing IHC experiments with the detection systems discussed, along with their critical functions in the protocol.
Table 2: Essential Reagents for IHC Detection Experiments
| Reagent | Function | Application Note |
|---|---|---|
| Polymer-Based Detection Reagent | A polymer backbone conjugated with multiple secondary antibodies and enzyme molecules (e.g., HRP) for high-sensitivity signal amplification [52] [53]. | Preferred for tissues with high endogenous biotin; often provides superior sensitivity and requires fewer steps than biotin-based methods [52] [53]. |
| Biotin-Based Detection Kit (ABC/LSAB) | Utilizes the high-affinity interaction between biotin and avidin/streptavidin to form a complex that links the primary antibody to an enzyme for signal generation [52]. | Requires a blocking step for endogenous biotin; a well-established and highly sensitive method [52] [1]. |
| Chromogen Substrate (e.g., DAB) | A soluble chemical converted by the detection enzyme (e.g., HRP) into an insoluble, colored precipitate at the site of antigen expression [52] [1]. | DAB produces a stable brown precipitate that is resistant to fading, making it suitable for long-term storage [52]. |
| Antigen Retrieval Buffer | A buffer solution (e.g., Citrate pH 6.0, EDTA pH 8.0-9.0) used in Heat-Induced Epitope Retrieval (HIER) to break protein cross-links formed during fixation, thereby unmasking epitopes [55] [53]. | The optimal buffer and retrieval method (microwave, pressure cooker) must be determined empirically for each antibody [55] [53]. |
| Biotin Blocking Solution | A sequential or mixed solution of avidin and biotin used to saturate endogenous biotin binding sites in tissue, preventing non-specific detection [1] [53]. | Critical when using biotin-based detection systems on tissues like liver, kidney, or frozen sections to minimize high background [52] [1]. |
Troubleshooting IHC Staining: Resolving Common Dilution-Related Issues
Diagnosing and Correcting Weak or Absent Staining
What are the primary causes of weak or absent staining?
Weak or absent immunohistochemistry (IHC) staining can stem from issues at various stages of the experimental process. The table below summarizes the most common causes and their direct solutions. [57]
| Cause | Description | Immediate Solution |
|---|---|---|
| Insufficient Primary Antibody | Antibody concentration is too low to adequately detect the target antigen. [57] | Increase antibody concentration or extend incubation time. [57] |
| Ineffective Antigen Retrieval | Formaldehyde fixation cross-links proteins, masking the target epitope. [8] [19] | Optimize heat-induced or enzymatic antigen retrieval methods. [19] |
| Antibody-Tissue Mismatch | The antibody has not been validated for the specific tissue preparation (e.g., FFPE vs. frozen). [57] | Confirm antibody suitability for your sample type and run a positive tissue control. [57] [58] |
| Incomplete Deparaffinization | Residual paraffin prevents antibodies from penetrating the tissue. [57] | Deparaffinize sections longer and ensure xylene is fresh. [57] |
| Over-fixation | Prolonged fixation can excessively mask epitopes, making them unavailable for binding. [57] | Reduce fixation duration or employ more aggressive antigen retrieval. [57] |
| Protein Not Present | The target antigen is not expressed in the tissues being examined. [57] | Run a positive control to verify antigen presence and assay functionality. [57] [58] |
| Antibody Degradation | Antibodies degrade due to improper storage or multiple freeze-thaw cycles. [57] | Aliquot antibodies upon arrival and avoid repeated freeze-thawing. [57] |
The following flowchart outlines a systematic approach to diagnosing the root cause of staining problems.
How do I optimize antibody dilution to prevent weak staining?
A critical, yet often overlooked, principle is establishing an optimal antibody dilution through a dilution series. Using an antibody at too high a concentration can increase background and non-specific staining, while too low a concentration results in a weak or absent signal. [59]
Quantitative Dilution Guidelines
The table below summarizes typical versus optimal antibody dilution ranges as demonstrated in scientific literature. [59] [56]
| Antibody Type | Typical Dilution Range (in literature) | Optimized Dilution (Demonstrated) | Concentration (if reported) |
|---|---|---|---|
| Monoclonal | 1:100 - 1:2,000 [59] | Up to 1:1,000,000 for some targets (e.g., Phospho-S129 α-Syn) [59] | 5-25 µg/mL [56] |
| Polyclonal (Affinity Purified) | 1:500 - 1:2,000 | Not specified in results | 1.7-15 µg/mL [56] |
Experimental Protocol: Determining Optimal Antibody Dilution
The following methodology is adapted from peer-reviewed studies to systematically identify the optimal working dilution for a primary antibody. [59]
- Step 1: Sample Preparation. Use a positive control tissue known to express your target antigen. Fix and section the tissue according to your standard protocol (e.g., 4 μm thick formalin-fixed, paraffin-embedded sections). [19]
- Step 2: Dilution Series. Reconstitute or dilute the primary antibody according to the vendor's instructions to create a stock solution. From this, prepare a series of doubling dilutions (e.g., 1:1000, 1:2000, 1:4000, 1:8000, 1:16,000, etc.). For a thorough optimization, extend the dilutions to at least two or three orders of magnitude higher than the recommended starting point. [59]
- Step 3: Staining. Process the slides with your standard IHC protocol (deparaffinization, antigen retrieval, blocking), but incubate each slide with a different dilution of the primary antibody. Keep all other variables (incubation time, temperature, detection system) constant. [59] [19]
- Step 4: Analysis. Examine the stained slides under a microscope. The optimal dilution is the highest dilution (lowest antibody concentration) that produces a strong specific signal with minimal or no background staining. [59] Using antibodies at very high dilutions can often provide better morphological detail and contrast by reducing background. [59]
What experimental controls are essential for diagnosing staining problems?
Appropriate controls are non-negotiable for validating your IHC results and differentiating true negatives from technical failures. [58] The table below details the essential controls for any IHC experiment.
| Control Type | Purpose | How to Implement | Interpretation of Result |
|---|---|---|---|
| Positive Tissue Control | Verifies that the entire IHC protocol is functioning correctly. [58] | Stain a tissue section known to express the target antigen alongside your test tissue. [58] | Staining: Protocol is working. [58] No staining: Protocol error; requires troubleshooting. [58] |
| Negative Tissue Control | Reveals non-specific binding and false positives. [58] | Use a tissue known not to express the target protein, or a knockout/knockdown sample. [58] | Staining: Indicates non-specific binding; optimize blocking or antibody concentration. [58] |
| No Primary Antibody Control | Assesses non-specific binding of the secondary antibody. [58] | Omit the primary antibody. Incubate with only antibody diluent, then proceed with secondary antibody and detection. [58] | Staining: Secondary antibody is binding non-specifically; use a different secondary or improve blocking. [58] |
| Isotype Control | Identifies background caused by non-specific interactions of the antibody's isotype. [58] | Use an antibody of the same isotype, host species, and conjugation as the primary, but with no target specificity. [58] | Staining: Background is from non-specific IgG binding. No staining: Confirms signal specificity. [58] |
How does fixation and antigen retrieval impact staining intensity?
Fixation preserves tissue architecture but can hinder antibody binding, making antigen retrieval a critical step for many targets, especially in formalin-fixed tissues. [8] [19]
Fixation Pitfalls and Solutions
- Under-fixation leads to proteolytic degradation and poor morphology. [8]
- Over-fixation causes excessive cross-linking, irreversibly masking epitopes. [57] [8] The recommended fixation in 10% Neutral Buffered Formalin is typically 24 hours at room temperature. [19]
- Ischemic Time: Variation in the time between tissue resection and fixation can alter the results of several antigens (e.g., ER, PR, HER2, Ki-67). Rapid fixation is crucial. [19]
Antigen Retrieval Optimization Protocol
The goal of antigen retrieval is to break the methylene bridges formed during formalin fixation, thereby "unmasking" the epitope. [19]
- Choose a Method: Heat-Induced Epitope Retrieval (HIER) is the most widely used method. This can be done using a pressure cooker, microwave, water bath, or steamer. [19] Enzymatic retrieval (e.g., with trypsin or proteinase K) is used for a limited number of antigens. [19]
- Select a Retrieval Buffer: The pH of the retrieval buffer is critical. Common buffers include:
- Sodium Citrate (pH 6.0)
- Tris-EDTA (pH 9.0)
- The optimal buffer and pH must be determined empirically for each antibody. [19]
- Apply Heat: A standard HIER condition is incubating the slides in pre-heated buffer in a water bath or pressure cooker at 95-100°C for 20-30 minutes. [19]
- Cool and Wash: Allow the slides to cool in the buffer for about 20 minutes at room temperature, then rinse with distilled water and proceed to the staining protocol. [19]
The Scientist's Toolkit: Essential Research Reagent Solutions
The following table lists key reagents, their critical functions, and optimization tips to ensure robust IHC staining.
| Reagent | Function | Key Considerations |
|---|---|---|
| Primary Antibody | Binds specifically to the target antigen. | Validate for your application (IHC). Choose monoclonal for specificity or polyclonal for signal amplification. Always perform a dilution series. [59] [56] |
| Detection System | Amplifies and visualizes the antibody-antigen complex. | For chromogenic IHC, HRP-based systems are most common. Use indirect methods (e.g., Labeled Streptavidin Biotin, LSAB) for greater sensitivity than direct detection. [38] [60] |
| Chromogen | Produces a colored precipitate at the antigen site. | DAB (brown) is most common and permanent. Fast Red/AP Red is used for double-staining or on tissues with high melanin. [38] [60] |
| Blocking Serum | Reduces nonspecific binding of antibodies to tissue. | Use 5-10% normal serum from the species of the secondary antibody. Synthetic blocking peptide mixes are also effective. [19] |
| Antigen Retrieval Buffer | Reverses formaldehyde-induced cross-linking. | The pH (6-10) is critical. Sodium citrate (pH 6.0) and Tris-EDTA (pH 9.0) are common starters. Optimization is required. [19] |
High background staining is a common challenge in immunohistochemistry (IHC) that can obscure specific signals and compromise experimental results. This technical guide addresses the critical roles of blocking strategies and wash optimization in reducing non-specific binding within the context of antibody dilution optimization. Proper implementation of these techniques is essential for researchers aiming to achieve clean, reproducible, and interpretable IHC data with high signal-to-noise ratios.
Common Causes of High Background and Solutions
Table 1: Troubleshooting High Background Staining in IHC
| Cause of Background | Mechanism | Solution |
|---|---|---|
| Insufficient Blocking | Non-specific antibody binding to reactive sites or Fc receptors in tissue [61] [62] | Extend blocking time; use 1-5% normal serum from secondary antibody species or 1-5% BSA [61]. |
| High Antibody Concentration | Excessive antibody leads to non-specific, charge-based, or hydrophobic interactions [62] [2] | Titrate primary and secondary antibodies to find optimal dilution [9] [62]. |
| Inadequate Washing | Accumulation of unbound antibody in the tissue [62] | Increase wash volume/frequency; use buffers with detergents like 0.05% Tween-20 [62] [2]. |
| Endogenous Enzyme Activity | Endogenous peroxidases or phosphatases react with chromogen [2] [63] | Block with 3% H2O2 (peroxidases) or levamisole (alkaline phosphatase) [62] [63]. |
| Tissue Drying | Irreversible non-specific antibody binding to exposed hydrophobic groups [2] | Perform incubations in a humidified chamber; ensure tissue sections remain fully covered [2]. |
Optimized Experimental Workflow
The following workflow integrates blocking and wash optimization for background reduction.
Research Reagent Solutions
Table 2: Essential Reagents for Blocking and Wash Optimization
| Reagent | Function & Rationale | Example Formulations & Notes |
|---|---|---|
| Normal Serum | Blocks Fc receptors to prevent non-specific secondary antibody binding. Use serum from the species of the secondary antibody [61]. | 1-5% (v/v) in buffer. Critical for indirect detection methods [61]. |
| Protein Blockers | Competes for non-specific hydrophobic and charge-based binding sites on tissue [61]. | Bovine Serum Albumin (BSA) 1-5% (w/v); Non-fat dry milk (avoid with biotin systems) [61] [2]. |
| Wash Buffers | Removes unbound antibodies and reagents. Detergents reduce hydrophobic interactions [2]. | 1X PBS or TBS with 0.05% Tween-20 [62] [2]. |
| Commercial Blockers | Proprietary, ready-made formulations; often provide consistent performance and longer shelf-life [61]. | Various protein-free or purified protein mixtures [61]. |
| Endogenous Enzyme Blockers | Quenches tissue enzyme activity that causes background with enzymatic detection [2] [63]. | 3% H2O2 for peroxidases; Levamisole for alkaline phosphatase [62] [63]. |
Frequently Asked Questions
What is the most critical factor for effective blocking?
The most critical factor is using the correct normal serum. For the best Fc receptor blocking, the serum should be from the same species as the secondary antibody, not the primary antibody. This prevents the secondary antibody from binding to non-specifically adsorbed immunoglobulins in the tissue [61].
How long should I block my samples, and at what temperature?
Blocking incubation times can vary from 30 minutes to overnight, at either room temperature or 4°C, based on the specific protocol [61]. For challenging backgrounds, a longer incubation (e.g., overnight at 4°C) can be more effective. Empirical testing is required to determine the optimal conditions for your specific tissue and antibody combination.
Should I wash after the blocking step before applying the primary antibody?
Practices vary. Some protocols include a brief wash to remove excess blocking protein. However, many researchers omit this wash and simply dilute their primary antibody in the same type of blocking buffer used for the initial blocking step. This maintains a blocking environment during the primary antibody incubation [61].
My background is still high after standard blocking. What are advanced strategies?
- Fc Receptor Blocking: For immune tissues rich in Fc receptors, use a specific Fc receptor blocking reagent in addition to protein blocking [64].
- Hydrophobic Blocking: Ensure your antibody diluent and wash buffers contain a mild detergent like 0.05% Tween-20 to minimize hydrophobic interactions [2].
- Endogenous Biotin Blocking: If using a biotin-streptavidin detection system, use an avidin/biotin blocking kit on tissues with high endogenous biotin (e.g., liver, kidney) [2] [63].
How can wash steps be optimized to reduce background?
- Increase Stringency: Use a buffer with appropriate pH and salt concentration.
- Use Detergents: Include 0.05% Tween-20 in your PBS or TBS wash buffer [62] [2].
- Increase Volume and Frequency: Ensure a sufficient volume of wash buffer fully covers the tissue. Perform three washes of 2-5 minutes each after each incubation step with thorough agitation [62]. Inadequate washing is a common cause of high background due to accumulated unbound antibody.
Addressing Uneven or Patchy Staining Artifacts
A systematic guide to diagnosing and resolving one of the most common frustrations in immunohistochemistry.
Why is my IHC staining uneven or patchy?
Uneven or patchy staining presents as inconsistent signal intensity across the tissue section, creating artifacts that compromise interpretation and quantification. This problem stems from technical inconsistencies rather than biological variation, making it essential to identify and correct the underlying cause for reliable, reproducible results.
The table below summarizes the primary causes and their direct solutions.
| Primary Cause | Underlying Issue | Immediate Solution |
|---|---|---|
| Incomplete Deparaffinization [65] [63] | Residual paraffin wax creates a hydrophobic barrier, preventing aqueous reagents from evenly covering the tissue. | Repeat with fresh xylene for deparaffinization and new tissue sections [65]. |
| Variable Fixation [2] [63] | Tissue pieces fixed for different durations or unevenly, leading to inconsistent antigen preservation. | Standardize fixation time and conditions for all samples [2]. |
| Inconsistent Reagent Coverage [2] | Antibody or buffer solutions do not cover the entire tissue section, often due to surface tension or improper technique. | Use a humidified chamber and ensure reagents form a continuous layer over the tissue [2]. |
| Poor Section Adhesion [2] [3] | Tissue folds, detaches, or has poor contact with the slide, causing localized staining failures. | Use properly charged or adhesive slides and check sections for folds before staining [2]. |
| Ineffective Antigen Retrieval [65] [63] | Inconsistent heating during heat-induced epitope retrieval (HIER) or uneven enzyme activity in proteolytic retrieval. | Ensure retrieval buffer fully covers the tissue and use a consistent, optimized heating method (e.g., microwave, pressure cooker) [65]. |
The following workflow diagram maps out the logical process for diagnosing and resolving patchy staining, from initial observation to final solution.
The Scientist's Toolkit: Essential Reagents for Resolution
Having the right tools is critical for preventing and resolving staining artifacts. The table below lists key reagents and their specific roles in achieving even, consistent staining.
| Item | Function in Preventing Patchy Staining |
|---|---|
| Fresh Xylene [65] | Critical for complete paraffin removal; old or contaminated xylene leaves a hydrophobic film causing spotty background. |
| Charged/Adhesive Slides [63] | Promote strong tissue section adhesion throughout the rigorous staining process, preventing detachment and folding. |
| Antigen Retrieval Buffer (e.g., Citrate pH 6.0, Tris-EDTA pH 9.0) [63] [66] | Breaks protein cross-links from fixation. The correct pH and freshness are vital for uniform epitope unmasking. |
| Humidified Chamber [8] [3] | Prevents evaporation of reagents during incubation, ensuring the tissue section remains covered and avoiding edge artifacts. |
| Buffers with Detergent (e.g., TBST, PBST) [67] | Tween-20 in wash buffers reduces surface tension and hydrophobic interactions, promoting even coverage and washing. |
Detailed Experimental Protocols for Resolution
Optimizing Antigen Retrieval for Uniformity
Heat-induced epitope retrieval (HIER) is a common source of variability. This protocol ensures consistent heating across the sample [65] [63] [66].
- Step 1: Buffer Selection. Prepare a fresh 1X antigen retrieval solution daily. Citrate buffer (pH 6.0) is a common starting point, but some antibodies may require a basic buffer like Tris-EDTA (pH 9.0). Consult the antibody datasheet for recommendations [65] [63].
- Step 2: Heating Method. A microwave oven is generally recommended over a water bath for more uniform heating. For stubborn targets, a pressure cooker may provide enhanced and more consistent signal [65].
- Step 3: Standardized Protocol. Place slides in a coplin jar with sufficient retrieval buffer to fully cover them. Heat in the microwave using a consistent cycle (e.g., 5-minute cycles at high power to reach near-boiling, then 15-20 minutes at a lower power to maintain sub-boiling temperature). Avoid boiling.
- Step 4: Controlled Cooling. After heating, carefully remove the jar and allow it to cool at room temperature for 20-30 minutes before proceeding with washing and staining.
Standardizing Fixation to Prevent Artifacts
Variable fixation is a pre-analytical variable that can lead to irreversible patchiness [63] [68].
- Immersion Fixation Protocol: For dissected tissues, immediately immerse samples in a volume of fixative that is 10-20 times greater than the tissue volume. Fixation time should be standardized; for 10% neutral buffered formalin, 24-48 hours is typical for small specimens. Under-fixation (<12 hours) or over-fixation (>48 hours) can negatively impact staining [63].
- Perfusion Fixation (for animal tissues): For optimal uniformity, especially in neural or delicate tissues, perfuse the animal transcardially with fixative (e.g., 4% paraformaldehyde). Follow by post-fixing the dissected tissue by immersion for a standardized period (e.g., 2-24 hours) [8].
Ensuring Complete and Even Reagent Coverage
This simple but critical step is often overlooked [2].
- Use a Humidified Chamber: For all incubation steps, place slides in a sealed container with moist paper towels at the bottom. This prevents evaporation and drying of the tissue, which causes extreme edge artifacts and high background [8] [3].
- Adequate Volume: Apply enough primary antibody, secondary antibody, and blocking solutions to form a continuous layer that completely covers the tissue section without spilling over.
- Even Application: Pipette the reagent onto one end of the section and allow it to flow gently across the entire surface. Avoid introducing bubbles.
Key Takeaways for Researchers
- Systematic Troubleshooting is Key: Address patchy staining by systematically evaluating fixation, deparaffinization, reagent coverage, section adhesion, and antigen retrieval.
- Pre-Analytical Factors are Paramount: Many staining artifacts originate from inconsistent sample preparation before the IHC protocol even begins. Standardizing fixation and embedding is foundational [68].
- Consistency in Protocol Execution: Using fresh reagents, humidified chambers, and standardized heating methods during antigen retrieval is non-negotiable for achieving uniform results.
- Validate with Controls: Including a positive control tissue processed alongside your experimental samples is the best way to determine if patchiness is due to the sample itself or the staining protocol.
Solving Autofluorescence and Non-Specific Binding Issues
Frequently Asked Questions (FAQs)
What are the primary causes of non-specific antibody binding in IHC?
Non-specific binding occurs when antibodies interact with tissue components through mechanisms other than specific antibody-epitope binding. The main causes are:
- Hydrophobic and Ionic Interactions: The same attractive forces (hydrophobic interactions, hydrogen bonding) that govern specific antibody-epitope binding can also cause antibodies to stick non-specifically to serum proteins or tissue components with net opposite charges [69].
- High Antibody Concentration: Using a primary antibody concentration that is too high is a frequent cause of high background staining, as it increases non-specific interactions [70] [71].
- Cross-reactivity: The secondary antibody may exhibit affinity for epitopes on non-target antigens or endogenous immunoglobulins in the sample [70] [72].
What common tissue components cause autofluorescence, and how can I identify them?
Autofluorescence can stem from numerous endogenous molecules in biological samples. Common sources and their identification methods include [73]:
- Common Sources: Collagen and elastin in the extracellular matrix, lipofuscin in post-mitotic cells, riboflavin and NADH involved in metabolism, and heme found in red blood cells.
- Aldehyde Fixatives: Formaldehyde and glutaraldehyde can induce autofluorescence by reacting with amine groups to form fluorescent Schiff's bases [73].
- Identification: To evaluate the level of autofluorescence in your sample, run an unstained control (omitting the fluorescently-labeled reagent) and observe it using your available filter sets [73].
My IHC staining has high background. How can I determine if it's due to autofluorescence or non-specific binding?
You can distinguish between these issues with a simple set of controls. The table below outlines the necessary controls and how to interpret them [70] [73].
| Control Type | Preparation Method | Interpretation of Result |
|---|---|---|
| Unstained Control | Process sample without adding any primary or secondary antibody. | Signal observed is due to autofluorescence. |
| Secondary-Antibody-Only Control | Process sample with secondary antibody applied, but no primary antibody. | Signal observed is due to non-specific binding of the secondary antibody or autofluorescence. |
| No Primary Antibody Control | Use species-specific IgG instead of primary antibody, then apply secondary antibody. | Signal indicates non-specific binding from the immunological reagents. |
Troubleshooting Guides
Resolving Non-Specific Binding and High Background Staining
The following table summarizes the common causes of non-specific binding and high background, along with targeted solutions [70] [69] [72].
| Problem Cause | Recommended Solution |
|---|---|
| Primary antibody concentration too high | Titrate the antibody to find the optimal dilution; reduce concentration [70] [71]. |
| Insufficient blocking | Increase blocking incubation time; use 5-10% normal serum from the secondary antibody host species or 1-5% BSA [69] [71]. |
| Endogenous enzyme activity | Quench endogenous peroxidases with 3% H2O2; inhibit alkaline phosphatase with levamisole [70] [69] [72]. |
| Endogenous biotin | Use a polymer-based detection system instead of biotin-streptavidin; or block with an avidin/biotin blocking kit [70] [72]. |
| Secondary antibody cross-reactivity | Include a secondary-antibody-only control; use secondary antibodies pre-adsorbed against the species of your sample [70] [72]. |
| Ionic interactions | Increase the ionic strength of the antibody diluent by adding NaCl to a final concentration of 0.15-0.6 M [70] [69]. |
| Inadequate washing | Increase wash frequency and duration (e.g., 3 washes for 5 minutes each with TBST after each antibody incubation) [72]. |
Managing and Reducing Autofluorescence
Autofluorescence can be managed through sample treatment and strategic experimental design. The solutions below are ranked from more common to more specialized approaches [70] [73] [74].
| Problem Cause | Recommended Solution |
|---|---|
| Aldehyde-induced fluorescence | Treat aldehyde-fixed samples with sodium borohydride (1 mg/mL in PBS) to reduce fluorescent Schiff's bases [70] [73]. |
| General tissue autofluorescence | Apply autofluorescence-reducing agents like Sudan Black B (0.1-1% in 70% ethanol) or Pontamine Sky Blue to quench the signal [73] [74]. |
| Signal overlaps with green channel | Choose fluorophores in the red or near-infrared spectrum (e.g., Alexa Fluor 647, Alexa Fluor 750) that are distinct from common green autofluorescence [73]. |
| High autofluorescence in FFPE tissue | For persistent issues, consider switching to frozen sections, which often exhibit lower autofluorescence [70]. |
Experimental Protocols
Protocol 1: Antibody Titration for Optimal Signal-to-Noise Ratio
Optimizing the primary antibody dilution is the most critical step for maximizing specific signal while minimizing background [40].
Methodology:
- Prepare Test Slides: Use tissue sections or cell pellets known to express your target (positive control) and those that do not (negative control) [40].
- Prepare Antibody Dilutions: Prepare a series of dilutions for your primary antibody. A typical range might be 1:50, 1:100, 1:200, 1:500, and 1:1000, though this should be guided by the manufacturer's recommendation [40] [75].
- Incubate and Process: Apply the different antibody dilutions to serial sections and process all slides simultaneously using the same detection system.
- Analyze and Calculate: Image the slides and quantify the Mean Fluorescence Intensity (MFI) in both positive [MFI(+)] and negative [MFI(-)] control samples. Calculate the Signal-to-Noise (S/N) ratio for each dilution using the formula: S/N = MFI(+) / MFI(-) [40].
- Select Optimal Dilution: The optimal dilution is the one that yields the highest S/N ratio, not necessarily the strongest positive signal [40].
Protocol 2: Comprehensive Blocking for Non-Specific Interactions
A robust blocking step is essential to prevent non-specific binding of both primary and secondary antibodies [69].
Methodology:
- After antigen retrieval and permeabilization, rinse slides with PBS or TBST.
- Prepare blocking solution. A common and effective blocker is 5% normal serum from the same species as the secondary antibody host, prepared in TBST. For example, use Normal Goat Serum if your secondary antibody is goat anti-rabbit [69] [72].
- Apply the blocking solution to completely cover the tissue section. Incubate for 30-60 minutes at room temperature in a humidified chamber.
- Do not rinse the blocking solution off. Instead, tap off the excess liquid and proceed directly to applying the primary antibody diluted in a suitable buffer (which may also contain a protein blocker like BSA) [69].
Research Reagent Solutions
The following table lists key reagents used to address the issues discussed in this guide, along with their primary functions [70] [69] [73].
| Reagent | Primary Function in Troubleshooting |
|---|---|
| Normal Serum | Blocks non-specific hydrophobic binding sites; should be from the secondary antibody host species [69]. |
| Bovine Serum Albumin (BSA) | A common protein used in blocking buffers and antibody diluents to reduce non-specific binding [69]. |
| Hydrogen Peroxide (H₂O₂) | Used at 3% concentration to quench endogenous peroxidase activity in tissues when using HRP-based detection [70] [72]. |
| Levamisole | Inhibits endogenous alkaline phosphatase activity; ineffective on the intestinal isoform [70] [69]. |
| Sodium Borohydride | Reduces aldehyde-induced fluorescence in fixed samples by neutralizing fluorescent Schiff's bases [70] [73]. |
| Sudan Black B | A dye used to quench broad-spectrum autofluorescence in tissue samples [73] [74]. |
| Triton X-100/Tween 20 | Non-ionic detergents added to buffers (e.g., at 0.1-0.3%) to permeabilize membranes and reduce hydrophobic interactions [69]. |
| Avidin/Biotin Blocking Kit | Used to sequentially block endogenous biotin in tissues like liver and kidney before using biotin-streptavidin detection [70] [72]. |
Workflow Diagrams
Diagram 1: Systematic Troubleshooting Pathway
This diagram provides a logical workflow for diagnosing and resolving the common issues of high background in IHC/IF experiments.
Diagram 2: Antibody Titration Optimization
This diagram illustrates the experimental process of titrating an antibody to achieve the optimal signal-to-noise ratio, which is fundamental for assay optimization.
Optimizing Dilution for Multiplex IHC/IF Applications
This technical support center provides targeted guidance and troubleshooting for researchers optimizing antibody dilutions in multiplex immunohistochemistry (IHC) and immunofluorescence (IF) experiments.
Troubleshooting Guides
FAQ: Resolving Common Antibody Dilution Issues
What are the primary causes of weak or no signal in my mIHC/IF experiment, and how can dilution optimization help?
Weak signal often stems from overly dilute primary antibodies, inadequate fixation masking epitopes, or suboptimal antigen retrieval. Proper dilution is crucial for balancing signal intensity with background noise [76] [3].
| Possible Cause | Recommended Solution |
|---|---|
| Incorrect antibody dilution [76] | Consult the product datasheet for the recommended dilution and perform a titration series to empirically determine the optimal concentration for your specific tissue [3]. |
| Inadequate fixation or antigen retrieval [3] | Optimize fixation time and antigen retrieval method (HIER or PIER) to ensure the epitope is exposed and accessible to the antibody [3] [77]. |
| Low expression of target protein [76] | Modify your detection approach; consider using signal amplification methods (e.g., TSA) or pairing with a brighter fluorophore instead of simply increasing the antibody concentration [76] [78]. |
| Primary antibody incubation time too short [76] | For consistent results, incubate primary antibodies at 4°C overnight, as many validated protocols require this for optimal binding [76] [9]. |
How can I address high background staining that is obscuring my results?
High background is frequently caused by non-specific antibody binding, often due to the primary or secondary antibody being too concentrated, or insufficient blocking [76] [3].
| Possible Cause | Recommended Solution |
|---|---|
| Primary antibody concentration too high [3] [77] | Decrease the concentration of the antibody. Perform a titration experiment to find the dilution that gives a strong specific signal with minimal background [77]. |
| Insufficient blocking [76] [3] | Use normal serum from the same species as the secondary antibody host. Increase the blocking incubation time or consider charge-based blockers [76]. |
| Non-specific binding by secondary antibody [76] [77] | Include a negative control (no primary antibody) to check for secondary antibody cross-reactivity. Use secondary antibodies that have been pre-adsorbed against the immunoglobulins of the sample species [77]. |
| Sample dried out during processing [76] [3] | Ensure the tissue sample remains covered in liquid throughout the entire staining procedure by using a humidified chamber [76]. |
When moving from a single-plex to a multiplex assay, my previously optimized dilution no longer works. Why?
Multiplexing introduces complexity due to antibody cross-talk, fluorophore spectral overlap, and the cumulative effect of multiple staining rounds. An antibody dilution optimized for single-plex may be too concentrated (increasing background) or too dilute (weak signal) in a multiplex panel [79] [80] [78].
- Antibody Cross-Reactivity: Ensure primary antibodies are from distinct host species and that secondary antibodies are species-specific to prevent cross-recognition [3].
- Fluorophore Pairing: The order of antibodies and the brightness of paired fluorophores must be optimized. Stain low-abundance targets with strong fluorophores and high-abundance targets with weaker ones [79] [78].
- Sequential Staining: In cyclic methods (e.g., TSA), the staining, signal development, and antibody stripping steps can affect epitope accessibility in subsequent rounds, requiring dilution re-optimization [78].
How should I systematically optimize antibody dilution for a new multiplex panel?
A structured approach is key to successfully balancing multiple antibodies in one panel.
- Start with Single-Plex Titration: For each antibody, perform a dilution series on a control tissue to establish the working range. The optimal dilution is the highest dilution that provides a strong specific signal with minimal background [80] [9].
- Create a Checkerboard Matrix: Test different combinations of your selected antibodies at their optimal single-plex dilutions and one dilution higher and lower. This helps identify any interactions or cross-talk that impact signal or background [79].
- Validate with Controls: Include single-color controls (each antibody alone), an unstained control, and a no-primary-antibody control for each secondary antibody used. These are essential for setting exposure times and for spectral unmixing during image analysis [80].
- Confirm Specificity: Verify the staining pattern and co-localization with other markers. For example, confirm that all CD8+ cells are also CD3+ [79].
Key Experimental Protocols
Protocol: Antibody Titration for Multiplex IHC/IF
This protocol outlines the steps to determine the optimal working dilution for a primary antibody in a multiplex setting [80] [9].
- Tissue Preparation: Use a control tissue known to express the target antigen. For FFPE tissues, perform deparaffinization, rehydration, and antigen retrieval using a standardized method (e.g., HIER with EDTA or citrate buffer) [7] [80].
- Blocking: Block the tissue sections with an appropriate buffer (e.g., 3% BSA or 10% normal serum) for 1 hour at room temperature to reduce non-specific binding [7] [80].
- Prepare Antibody Dilutions: Prepare a series of dilutions for the primary antibody. A typical starting range for a monoclonal antibody is 5-25 µg/mL, and for an affinity-purified polyclonal antibody, it is 1.7-15 µg/mL [9]. A common dilution series is 1:10, 1:50, 1:100, and 1:500 from a commercial stock [80].
- Apply Antibodies: Apply the different antibody dilutions to serial tissue sections. Incubate overnight at 4°C in a humidified chamber [76] [9].
- Detection and Imaging: Complete the staining protocol with the appropriate secondary antibody and detection system. Image all sections under identical microscope or scanner settings.
- Analysis: The optimal dilution is the one that provides the strongest specific signal with the cleanest background (highest signal-to-noise ratio).
Antibody Titration Workflow
The Scientist's Toolkit
Research Reagent Solutions
Essential materials and reagents for optimizing antibody dilution in multiplex IHC/IF.
| Item | Function in Optimization |
|---|---|
| Positive Control Tissue | A tissue known to express the target(s) of interest is essential for determining the correct staining pattern and signal intensity during titration [79]. |
| Antigen Retrieval Buffers (e.g., Citrate pH 6.0, EDTA pH 9.0) | Used to unmask epitopes cross-linked during fixation; the choice of buffer and method (HIER/PIER) can significantly impact antibody binding and required dilution [7] [3]. |
| Blocking Buffers (e.g., BSA, Normal Serum) | Reduce non-specific background staining, allowing for the use of higher antibody concentrations without increasing noise [76] [80]. |
| Signal Amplification Kits (e.g., TSA) | Can be used to enhance the signal for low-abundance targets, which may allow for the use of a more dilute primary antibody, reducing potential background [78]. |
| Pre-adsorbed Secondary Antibodies | Secondary antibodies that have been adsorbed against serum proteins of multiple species minimize cross-reactivity, a critical factor for clean multiplexing [3] [77]. |
| Antibody Diluent | A consistent, protein-based diluent helps maintain antibody stability and activity during incubation steps [77]. |
Factors Influencing Optimal Dilution
Validation and Quality Control: Ensuring Reproducible IHC Results
Implementing Appropriate Controls for IHC Assay Validation
In the context of optimizing antibody dilution for immunohistochemistry (IHC) research, implementing appropriate controls is not merely a supplementary step but a fundamental requirement for ensuring assay specificity, sensitivity, and reproducibility. Proper controls validate that observed staining patterns reflect true antigen-antibody interactions rather than artifacts, non-specific binding, or background interference. For researchers, scientists, and drug development professionals, a robust validation framework is essential for generating reliable data that can inform research conclusions and clinical decisions. This guide addresses common questions and troubleshooting scenarios encountered during IHC assay validation, with particular emphasis on how control implementation intersects with antibody dilution optimization.
FAQs & Troubleshooting Guides
What are the essential positive and negative controls for a new IHC assay, and why are they necessary?
Answer: Positive and negative controls are the cornerstone of a validated IHC assay. They are necessary to confirm that every component of your staining procedure is functioning correctly and specifically.
- Positive Control: A tissue or cell line known to express the target antigen. Its purpose is to verify that the antibody specifically recognizes its target and that the entire IHC protocol (antigen retrieval, detection, etc.) has worked. A positive control should always show the expected staining pattern. The use of controls such as formalin-fixed, paraffin-embedded (FFPE) cell pellets is recommended for this purpose [81].
- Negative Control: This encompasses several types, each designed to test a different aspect of specificity:
- No-Primary-Antibody Control: The primary antibody is omitted and replaced with buffer or an isotype control. This identifies background caused by the detection system or by non-specific binding of the secondary antibody [82] [81].
- Isotype Control: A non-specific immunoglobulin of the same class (e.g., IgG) as the primary antibody is used at the same concentration. This helps identify background staining due to Fc receptor binding or other non-specific protein interactions.
- Tissue with No/Low Antigen Expression: Staining a tissue known to lack the target antigen confirms that positive staining in your test sample is specific.
Running these controls concurrently with your experimental samples is a critical good laboratory practice [1] [81].
How does antibody dilution specifically impact background staining and how can I troubleshoot it?
Answer: High background staining is a frequent issue often directly linked to suboptimal antibody concentration. Using an antibody at too high a concentration increases the likelihood of non-specific, low-affinity binding to off-target epitopes, leading to a poor signal-to-noise ratio [1] [59].
Troubleshooting Steps:
- Perform an Antibody Titration: This is the most critical step. Test a series of dilutions (e.g., 1:100, 1:500, 1:1000, 1:5000) on a positive control tissue. The optimal dilution provides strong specific staining with minimal background. Research demonstrates that antibodies can often be used at significantly higher dilutions (e.g., 1:500,000 for some NeuN antibodies) than those commonly published, resulting in superior specificity and lower background [59].
- Block Endogenous Activities:
- Endogenous Peroxidases: Quench with 3% H₂O₂ in methanol or water for 10-15 minutes at room temperature before primary antibody incubation [1] [81].
- Endogenous Biotin: Use an avidin/biotin blocking kit, especially for tissues like liver and kidney with high endogenous biotin levels. Alternatively, switch to a polymer-based detection system which avoids biotin altogether [1] [81].
- Optimize Blocking and Diluent: Block tissue with 1-5% BSA or normal serum from the species in which the secondary antibody was raised for 30-60 minutes. If background persists, increase the serum concentration to as high as 10% or add NaCl (0.15 M to 0.6 M) to the antibody diluent to reduce ionic interactions [1].
- Verify Secondary Antibody Specificity: Include a negative control stained only with the secondary antibody. High background in this control indicates cross-reactivity with endogenous immunoglobulins in the tissue, necessitating more thorough blocking or a different secondary antibody [81].
I have no staining in my experimental sample, but my positive control works. What does this mean and what should I do next?
Answer: This scenario confirms that your IHC protocol and reagents are functioning correctly, but suggests an issue specific to your experimental sample.
Troubleshooting Steps:
- Confirm Antigen Presence: Verify that your experimental tissue actually expresses the target protein. Consult literature or databases, or use an alternative method like Western blot.
- Check Sample Quality and Fixation:
- Fixation: Over-fixation can mask epitopes. Ensure fixation times are standardized and not excessive. Aldehyde fixation can sometimes induce autofluorescence or mask epitopes, which may require optimization of the fixative type and duration [1] [82].
- Slide Storage: Slides can lose antigenicity over time. Use freshly cut sections where possible. If slides must be stored, keep them at 4°C [81].
- Re-optimize Antigen Retrieval: This is a common culprit. Inadequate antigen retrieval will prevent antibody access.
- Re-assay with a Wider Antibody Dilution Range: While your positive control works, the antigen level or accessibility in your test sample may be lower. Staining may appear at a different (often higher) antibody concentration. Include your test sample in the titration experiment [59].
What is the role of a titration experiment in IHC validation, and how is it properly performed?
Answer: An antibody titration experiment is the definitive method for identifying the optimal working dilution that maximizes specific signal while minimizing background. It is an economic and scientifically rigorous practice that should be performed whenever an antibody is used for the first time in a lab, regardless of manufacturer recommendations [59].
Experimental Protocol for Antibody Titration:
- Preparation: Select a known positive control tissue. Prepare a dilution series of the primary antibody. It is recommended to start with a broad range, for example, from 1:100 up to 1:1,000,000, doubling the dilution with each step [59].
- Staining: Process all slides in the dilution series simultaneously using the exact same IHC protocol (antigen retrieval, blocking, incubation times, detection, etc.).
- Analysis: Examine the stained slides microscopically. The optimal dilution is the highest dilution (lowest concentration) that yields intense, specific staining with a clean background. The table below summarizes the expected outcomes from a typical titration experiment.
Table: Interpreting Results from an Antibody Titration Experiment
| Antibody Dilution | Specific Staining | Background Staining | Interpretation |
|---|---|---|---|
| Too Concentrated (e.g., 1:100) | Strong | High | Excessive antibody leads to non-specific binding; dilution is too low. |
| Optimal | Strong | Low or Absent | Ideal signal-to-noise ratio; this is the working dilution. |
| Too Dilute (e.g., 1:1,000,000) | Weak or Absent | Low | Antibody concentration is insufficient for robust detection. |
What are the key regulatory and validation guidelines for IHC assays in a clinical or diagnostic setting?
Answer: For laboratories developing IHC assays for clinical decision-making, adherence to regulatory guidelines is mandatory. The College of American Pathologists (CAP) provides evidence-based guidelines for the analytic validation of IHC assays. Key principles from the 2024 update include [83] [84]:
- Assay Validation vs. Verification: Laboratories must validate laboratory-developed tests (LDTs) and verify that FDA-cleared/approved tests perform as expected in their lab.
- Concordance Requirements: A minimum of 90% positive and negative concordance is required when comparing a new assay to a validated comparator.
- Scoring Systems: Assays with distinct scoring systems (e.g., PD-L1, HER2) must be separately validated for each scoring system.
- Cytology Specimens: IHC performed on cytology specimens fixed differently from FFPE tissues require separate validation with a minimum of 10 positive and 10 negative cases.
Other critical regulations and standards include CLIA (Clinical Laboratory Improvement Amendments) for US laboratory operations, and ISO standards (e.g., ISO 13485, ISO 15189) for quality management systems, especially for commercial IVD development [85].
Research Reagent Solutions
The following table details key reagents and their critical functions in IHC assay validation and troubleshooting.
Table: Essential Reagents for IHC Assay Validation and Troubleshooting
| Reagent / Solution | Primary Function | Key Considerations |
|---|---|---|
| Antigen Retrieval Buffers (e.g., Sodium Citrate, Tris-EDTA) | Reverses formaldehyde-induced cross-links to expose epitopes. | The optimal pH and buffer type are antigen-specific. Must be prepared fresh daily [81]. |
| Blocking Sera / BSA | Reduces non-specific binding of antibodies to tissue. | Should be from the same species as the secondary antibody or an unrelated protein like BSA [82]. |
| Peroxidase Blockers (e.g., 3% H₂O₂) | Quenches endogenous peroxidase activity to prevent false-positive signals in HRP-based detection. | Use in methanol or water for 10-15 minutes at room temperature [1] [81]. |
| Biotin Blockers | Blocks endogenous biotin, prevalent in tissues like liver and kidney. | Essential when using avidin-biotin complex (ABC) detection methods [1]. |
| Polymer-Based Detection Kits | Non-biotin detection system offering high sensitivity and low background. | Eliminates issues with endogenous biotin, often providing superior signal-to-noise [81]. |
| Specific Primary Antibody Diluent | Optimized buffer for stabilizing the primary antibody. | The composition (pH, salt, protein stabilizers) can dramatically affect signal and background; use the manufacturer's recommended diluent when available [81]. |
Workflow Diagrams
IHC Control Implementation Workflow
Antibody Titration Optimization Protocol
Adhering to 2024 CAP Guidelines for IHC Analytic Validation
FAQs on the 2024 CAP Guideline Update
What is the primary goal of the 2024 CAP IHC Analytic Validation Guideline update? The update aims to affirm and expand upon the 2014 publication to ensure accuracy and reduce variation in immunohistochemistry (IHC) laboratory practices. It incorporates new evidence and addresses evolving laboratory needs, particularly for predictive markers and cytology specimens [83].
What are the major new recommendations in this update? Key new recommendations include providing guidance for validating IHC assays performed on cytology specimens, validating predictive markers with distinct scoring systems (like PD-L1 and HER2), and harmonizing validation requirements for all predictive markers to a 90% concordance threshold [83] [86] [87].
Do these updated guidelines mandate revalidation of existing assays? For most existing assays, no. However, the guideline states that if documentation of a previous proper validation study does not exist—particularly for assays used on cytology specimens fixed differently from original validation tissues—the laboratory may not be in compliance with accrediting agencies and should perform validation [83].
What are the specific validation requirements for cytology specimens? For IHC performed on specimens fixed in alternative fixatives (not identical to those used for initial validation), the guideline conditionally recommends separate validations with a minimum of 10 positive and 10 negative cases [83].
How does the update handle predictive markers with multiple scoring systems? For predictive markers like HER2 and PD-L1 that employ different scoring systems based on tumor site or type, the guideline strongly recommends that laboratories separately validate/verify each assay-scoring system combination [83] [86].
What is the new standardized concordance requirement? The update harmonizes the concordance requirement for all IHC assays, including predictive markers like ER, PR, and HER2, to a minimum of 90% overall concordance between the new assay and the comparator [83] [86].
Troubleshooting IHC Validation and Performance
Common IHC Staining Issues and Solutions
| Problem | Possible Source | Test or Action |
|---|---|---|
| Lack of Staining | Inadequate tissue fixation | Increase fixation time or try a different fixative [25] |
| Tissue overfixation | Reduce immersion time; use antigen retrieval techniques [25] | |
| Inactive primary antibody | Test antibody viability; follow proper storage instructions [25] | |
| Ineffective antigen retrieval | Increase retrieval treatment time or change the treatment solution [25] [88] | |
| Epitope altered during processing | Try different antigen retrieval methods (HIER or PIER) [25] [89] | |
| High Background | High antibody concentration | Titer antibody to determine optimal concentration [25] |
| Non-specific binding | Use a blocking step (e.g., BSA with normal serum) prior to primary antibody incubation [25] | |
| Tissue dried out | Avoid letting the tissue dry during the staining procedure [25] | |
| Ionic interactions | Increase the ionic strength of the diluent buffer [25] | |
| Poor Morphology | Antigen retrieval too harsh | Find conditions that preserve morphology while restoring immunoreactivity [25] |
| Tissue underfixation | Increase fixation time and/or ratio; consider cross-linking fixative [25] | |
| Sectioning issues | Use a sharp blade; cut thinner sections [25] | |
| Inappropriate Staining | Fixation method inappropriate for antigen | Try a different fixative or increase fixation time [25] |
| Delay in fixation caused antigen diffusion | Fix tissue promptly; consider a cross-linking fixative [25] |
Counterstaining Troubleshooting Guide
| Issue | Cause | Solution |
|---|---|---|
| Overstaining (Hematoxylin) | Staining time too long or solution too concentrated | Shorten staining time; use more dilute hematoxylin solution [90] |
| Under-staining | Staining time too short or differentiation too harsh | Increase staining time; adjust pH/acid steps [90] |
| Uneven Staining | Inconsistent section thickness or incomplete deparaffinization | Ensure uniform section thickness; complete deparaffinization [90] |
| High Eosin Background | Eosin concentration too high or over-staining | Reduce eosin concentration or time; use brief acid wash [90] |
| Spectral Overlap (Fluorescence) | Nuclear stain and antibody fluorophore emit similar colors | Choose dyes with well-separated spectra (e.g., use red nuclear dye if antibody is blue) [90] |
Experimental Protocols for Validation and Optimization
Protocol 1: Initial Analytic Validation for a New IHC Assay
This protocol aligns with CAP guidelines for establishing a new IHC assay before patient testing [83].
Define Validation Study Design: Select an appropriate comparator from the following options, listed from most to least stringent [83]:
- IHC results from cell lines with known protein amounts ("calibrators").
- Results from a non-IHC method (e.g., flow cytometry, FISH).
- Results from testing the same tissues in another lab using a validated assay.
- Prior testing results of the same tissues in your lab with a validated assay.
Determine Sample Size: For a qualitative assay, use a minimum number of cases that ensures statistical confidence. The CAP guideline implies that common practice of 20-60 cases is acceptable, with specific requirements for cytology (10 positive, 10 negative) [83].
Execute Staining and Scoring:
- Process selected tissue samples using the fully optimized IHC protocol.
- Score the results blinded to the comparator method's results.
Calculate Concordance: Determine the overall percent agreement (concordance) between the new assay and the comparator. The CAP guideline recommends a minimum of 90% concordance for all IHC assays [83] [86].
Investigate Discrepancies: If validation yields unexpected results or concordance below 90%, the causes must be investigated by the IHC Medical Director before the assay is approved for clinical use [83] [86].
Protocol 2: Antibody Dilution Optimization (Titration)
Optimizing antibody dilution is critical for achieving specific signal with minimal background, a core principle of analytic validation [25].
Prepare Dilution Series: Prepare a series of primary antibody dilutions (e.g., 1:100, 1:200, 1:500, 1:1000) in the recommended antibody diluent.
Apply to Test Tissues: Apply each dilution to consecutive sections of a well-characterized control tissue that expresses the target antigen. Include a known negative control tissue.
Process Slides: Run all slides through the same IHC staining procedure simultaneously to ensure consistent conditions.
Evaluate Staining: Examine slides microscopically for:
- Specific Signal Intensity: Strength of staining at the correct cellular location.
- Background Staining: Non-specific staining in areas that should be negative.
- Signal-to-Noise Ratio: The ideal dilution provides the strongest specific signal with the cleanest background.
Select Optimal Dilution: Choose the dilution that yields intense specific staining with minimal to no background. This dilution should be used for all subsequent validation and clinical testing.
Workflow Diagram for IHC Assay Validation
Workflow Diagram for Antibody Titration
The Scientist's Toolkit: Essential Research Reagent Solutions
| Item | Function in IHC Validation |
|---|---|
| Cell Line Microarrays | Contain cell pellets with known protein expression levels; serve as stringent calibrators for validation according to CAP guidelines [83]. |
| FFPE Tissue Sections | Formalin-Fixed, Paraffin-Embedded tissues are the gold standard for morphology and most common specimen type for validation studies [88]. |
| Cytology Specimens | Specimens fixed in alternative fixatives (e.g., CytoLyt); require separate validation with 10 positive and 10 negative cases per CAP update [83]. |
| Antigen Retrieval Buffers | Solutions (e.g., Citrate pH 6.0, EDTA pH 8.0) to unmask epitopes cross-linked during fixation; critical for antibody accessibility [88] [89]. |
| Validated Primary Antibodies | Antibodies whose performance characteristics (specificity, sensitivity) have been established for IHC application in specific tissues [83] [25]. |
| Blocking Serums | Normal sera (e.g., donkey, goat) used to block non-specific binding sites and reduce background staining [25]. |
| Detection Systems | Enzyme-based (e.g., HRP/DAB) or fluorescent systems to visualize antibody-antigen binding [88] [90]. |
| Counterstains | Dyes (e.g., Hematoxylin, DAPI) that provide contrast by staining cellular components not targeted by the primary antibody [90]. |
| Mounting Media | Aqueous or permanent media to preserve staining and create optimal refractive index for microscopy [88]. |
Verification Protocols for Antibody and Procedure Changes
This technical support center provides targeted troubleshooting guides and FAQs to assist researchers in verifying and validating changes to their immunohistochemistry (IHC) protocols, ensuring reliable and reproducible results.
Troubleshooting Guides
Why is antibody validation critical when introducing a new antibody into an IHC protocol?
Antibody validation is the process of confirming that an antibody binds to its target antigen specifically, sensitively, and reproducibly within a given experimental context [91]. It is a foundational step for research reproducibility. Without rigorous validation, experimental results can be unreliable, leading to wasted resources and incorrect conclusions [91]. The "five pillars" of antibody validation provide a comprehensive framework for this process [91].
- Knockout/Knockdown (KO/KD): This method uses cells or organisms where the gene encoding the target protein has been inactivated. The specificity of the antibody is confirmed by a lack of signal in the KO/KD sample compared to the control [91].
- Use of Comparable Antibodies: This involves using multiple antibodies that recognize different epitopes on the same target protein. Increased confidence in specificity is gained if these independent antibodies yield similar staining patterns [91].
- Immunoprecipitation followed by Mass Spectrometry (IP/MS): The antibody is used to pull down the target protein from a complex mixture. Mass spectrometry then identifies the pulled-down proteins, providing direct evidence of the antibody's specificity and revealing potential off-target bindings [91].
- Biological and Orthogonal Validation: This pillar uses biological knowledge (e.g., known subcellular localization) or a non-antibody-based method to measure the same target. Consistency between the antibody-based method and the orthogonal method strongly validates the antibody [91].
- Recombinant Protein Expression: The gene for the target protein is cloned and expressed in a system that does not normally produce it. This recombinant protein serves as a positive control, with a band at the expected molecular weight confirming specificity in assays like Western blot [91].
What are the most common issues when changing an IHC procedure, and how can they be resolved?
Altering any step in the IHC workflow, from sample preparation to detection, can introduce staining artifacts. The table below outlines frequent problems and their solutions.
| Problem & Description | Primary Causes | Recommended Solutions |
|---|---|---|
| Little to No Staining [92] [1] | • Antibody Potency: Degraded or denatured antibody [93] [1].• Antigen Masking: Over-fixation or insufficient antigen retrieval [92].• Suboptimal Protocol: Incorrect antibody dilution, diluent, or detection system [92]. | • Use a positive control tissue known to express the target [92].• Optimize antigen retrieval method and buffer (e.g., use microwave over water bath) [92].• Use the manufacturer's recommended antibody diluent and titrate the antibody [92]. |
| High Background Staining [92] [1] | • Endogenous Enzymes: Peroxidases or phosphatases in the tissue [1].• Nonspecific Binding: Primary or secondary antibody binding to off-target sites [1].• Inadequate Blocking/Washing [92]. | • Quench endogenous peroxidases with 3% H2O2 [1].• Reduce primary antibody concentration; add normal serum from the secondary host species to the block [1].• Ensure adequate washing (3x5 min with TBST) after each incubation step [92]. |
| Weak or Variable Staining | • Suboptimal Fixation: Under-fixation degrades antigen; over-fixation masks it [8].• Inconsistent Sample Prep: Inadequate deparaffinization can cause spotty staining [92].• Old Reagents: Detection reagents, especially chromogenic substrates, can lose potency over time [1]. | • Optimize fixation time and fixative type (e.g., 10% neutral buffered formalin) [8].• Use fresh xylene for deparaffinization and ensure sections do not dry out [92].• Check expiration dates and prepare fresh buffers daily [92]. |
The following workflow diagram illustrates the logical process for diagnosing and resolving these common IHC issues:
Frequently Asked Questions (FAQs)
How should I systematically titrate a new antibody for IHC?
Titration is essential for finding the optimal balance between specific signal and low background. A systematic approach is required, especially in multiplex IHC where antibody-fluorophore pairing must also be balanced [94].
- Prepare a Dilution Series: Using the manufacturer's recommended diluent (e.g., a specialized antibody diluent [41] [92]), prepare a series of antibody dilutions. A typical range might be 2x, 1x, 1/2x, and 1/4x the recommended starting concentration.
- Run the Assay in Parallel: Test all dilutions on consecutive sections of the same positive control tissue under identical conditions, including antigen retrieval and detection.
- Evaluate Staining: Assess the slides for signal intensity, background, and signal-to-noise ratio. The optimal dilution provides a strong specific signal with the cleanest background. A dilution that is too high may give a weak signal, while one that is too low increases background [1].
What are the essential controls for validating a procedural change?
Appropriate controls are non-negotiable for validating any change to your IHC protocol.
- Positive Control: A tissue or cell sample known to express the target antigen. It verifies that the entire procedure, from fixation to detection, is working correctly [92].
- Negative Control: This can take several forms, each answering a different question:
- No-Primary Control: Omission of the primary antibody (replaced with diluent) controls for nonspecific binding of the detection system [92].
- Isotype Control: An antibody of the same isotype but irrelevant specificity controls for Fc receptor binding [1].
- Tissue Control: A tissue known not to express the target antigen.
- Biological Controls: When using phospho-specific antibodies or studying variable targets, include both known positive and known negative tissue samples to confirm the specificity of the observed staining pattern [92].
My antibody was working, but now it's not. What happened?
Antibodies, especially in dilute solutions, can lose reactivity over time due to degradation, denaturation, or contamination [93]. Key causes include:
- Repeated Freeze-Thaw Cycles: Aliquot antibodies to minimize freeze-thaw cycles [93].
- Improper Storage: Diluted antibodies are less stable and should be used immediately or stored for very short periods at 2–8°C [93].
- Contamination: Always use sterile techniques when handling antibodies [1]. To troubleshoot, test the antibody on a known positive control. If the control fails, the antibody has likely lost potency and should be replaced [1].
How can I minimize non-specific binding when changing antibody diluents?
The composition of the antibody diluent is critical. Specialized diluents are optimized with buffers at a balanced pH (typically 7.0-8.2), carrier proteins (like BSA or casein), and salts to prevent nonspecific binding and extend antibody shelf-life [41] [92]. If you encounter high background with a new diluent:
- Add NaCl: Increasing the ionic strength to 0.15-0.6 M NaCl can reduce ionic interactions causing background [1].
- Increase Protein Block: Add 2-10% normal serum from the host species of the secondary antibody to the diluent or blocking buffer [1].
- Verify pH: Ensure the diluent's pH is within the optimal range for antibody binding [1].
The Scientist's Toolkit: Key Research Reagent Solutions
The following table details essential materials and their functions for successful IHC verification experiments.
| Reagent / Material | Primary Function | Key Considerations |
|---|---|---|
| Validated Primary Antibodies [91] | Binds specifically to the target protein of interest. | Must be validated for IHC application. Look for antibodies validated via KO/KD or other pillars. |
| Antibody Diluent [41] [92] | Dilutes the antibody to working concentration while maintaining stability and minimizing non-specific binding. | Use manufacturer-recommended diluent. Formulations often contain BSA, stabilizers, and preservatives. |
| Antigen Retrieval Buffers [92] | Reverses formaldehyde-induced cross-links to "unmask" epitopes and restore antibody binding. | Common buffers: citrate (pH 6.0) or Tris/EDTA (pH 9.0). Method (microwave, pressure cooker) must be optimized. |
| Blocking Buffers [92] [1] | Blocks charged sites and Fc receptors on tissue to prevent non-specific antibody binding. | Often 5% normal serum or protein (BSA) in TBST. Use serum from secondary antibody species for best results. |
| Polymer-Based Detection Kits [92] | Provides high-sensitivity detection of the primary antibody with minimal background. | More sensitive and less prone to endogenous biotin interference than avidin-biotin (ABC) systems. |
| Positive Control Tissues [92] | Tissue known to express the target antigen; essential for verifying protocol functionality. | Paraffin-embedded cell pellets or tissue microarrays are excellent standardized controls. |
The following workflow provides a high-level overview of the key stages in a robust IHC verification protocol, highlighting where the tools and controls above are critical.
Comparative Analysis of Detection Systems and Their Impact on Sensitivity
Immunohistochemistry (IHC) detection systems are critical for visualizing antibody-antigen interactions in tissue samples. These systems vary significantly in their complexity, sensitivity, and applications, directly impacting the reliability and interpretation of experimental results. The choice of detection method represents a compromise between desired sensitivity, background levels, cost, and experimental timeframe [95]. This guide explores the major detection systems, their working principles, and provides troubleshooting advice for researchers optimizing IHC protocols.
Fundamental Detection Methodologies
IHC detection methods can be broadly categorized into direct and indirect systems, with several amplification techniques available to enhance sensitivity for detecting low-abundance antigens [95].
Table 1: Core Types of IHC Detection Systems
| System Type | Principle | Key Features | Best For |
|---|---|---|---|
| Direct [95] | Primary antibody directly conjugated to enzyme or fluorophore | Simple, rapid, minimal steps; lower sensitivity | Highly expressed antigens; avoiding secondary antibody cross-reactivity |
| Indirect [95] | Labeled secondary antibody binds to primary antibody | Higher sensitivity than direct; signal amplification; flexible | Routine staining; good balance of sensitivity and specificity |
| Bridged (e.g., PAP, APAAP) [95] | Tertiary enzyme-anti-enzyme complex linked by bridge antibody | Very high sensitivity; no chemical antibody modification | Detecting low-abundance antigens; high-resolution requirements |
| Avidin-Biotin (ABC, LSAB) [96] | Leverages high-affinity avidin-biotin binding | Very high signal intensity; multiple labels per site | Maximum signal amplification; FFPE tissues |
| Polymer/Micropolymer [96] | Enzyme and secondary antibody on polymer backbone | High sensitivity; avoids endogenous biotin issues | Tissues with high endogenous biotin (e.g., liver, kidney) |
Diagram 1: IHC detection methods and typical sensitivity outcomes. Multi-step amplified methods generally provide the highest signal.
Frequently Asked Questions (FAQs)
1. How does the choice of detection system directly impact my IHC sensitivity? The detection system determines the number of reporter molecules (enzymes or fluorophores) deposited at the antigen site. Simple direct methods attach one label per primary antibody, providing low sensitivity. In contrast, indirect methods allow multiple secondary antibodies, each with a label, to bind to a single primary antibody, offering signal amplification. Advanced systems like polymer-based or avidin-biotin complexes further dramatically increase the number of enzyme molecules per primary antibody, significantly lowering the limit of detection for challenging targets [95] [96].
2. My negative control shows high background. Is this detection system-related? Yes, high background in negative controls often points to issues in the detection system. Common causes include:
- Endogenous enzyme activity: In chromogenic IHC, endogenous peroxidases or phosphatases can react with the substrate. Block with 3% H₂O₂ (for HRP) or levamisol (for AP) [19].
- Endogenous biotin: Particularly problematic in frozen sections and certain tissues like liver. Endogenous biotin binds to the streptavidin in ABC/LSAB systems, causing false positives. Use a biotin-blocking step or switch to a polymer-based (biotin-free) system [96].
- Non-specific secondary antibody binding: Ensure your blocking serum is from the same species as the secondary antibody to occupy non-specific binding sites [97].
3. I have a low-abundance target. What is the most sensitive detection system I can use? For the utmost sensitivity, tyramide signal amplification (TSA) systems are among the most powerful, offering up to 100-1000-fold increase compared to basic indirect methods [95]. After the primary and secondary antibody steps, HRP catalyzes the deposition of numerous labeled tyramide molecules at the antigen site. Other highly sensitive options include the avidin-biotin complex (ABC) and modern compact polymer systems, which concentrate a high density of enzyme molecules at the target site [95] [96].
4. Can I use a fluorescent detection system for my FFPE tissues, and how does its sensitivity compare to chromogenic? Yes, fluorescent detection is widely used on FFPE tissues. Chromogenic detection is often considered more sensitive due to the signal amplification from enzyme-substrate reactions, which produces a stable, precipitable product [96]. However, the sensitivity of fluorescent systems has greatly improved. A key advantage of fluorescence is the ability to easily multiplex (detect multiple targets simultaneously), which requires careful spectral separation of fluorophores and controls to avoid cross-talk [8] [96].
Troubleshooting Guides
Problem 1: Weak or Absent Staining
Potential Causes and Solutions:
- Cause: Over-fixation or improper antigen retrieval. Formalin fixation can mask epitopes via cross-linking [19] [98].
- Cause: Detection system sensitivity is insufficient for the antigen abundance.
- Cause: Primary antibody concentration is too low.
- Solution: Perform an antibody titration experiment. While a longer incubation (overnight at 4°C) can improve binding, the concentration is critical [99].
Problem 2: High Background Staining
Potential Causes and Solutions:
- Cause: Non-specific binding of the primary or secondary antibody.
- Cause: Endogenous biotin activity (for avidin-biotin systems).
- Solution: Use a commercial biotin-blocking kit prior to applying the primary antibody. Alternatively, switch to a non-biotin polymer-based detection system, which is often the most effective solution [96].
- Cause: Detection system over-amplification.
Problem 3: Inconsistent Staining Between Runs
Potential Causes and Solutions:
- Cause: Variability in the detection reagent preparation or storage.
- Solution: Prepare all reagents fresh according to manufacturer instructions and ensure consistent storage conditions. Aliquot reagents to avoid freeze-thaw cycles.
- Cause: Improper washing.
- Solution: Standardize washing steps. Use an adequate volume of buffer (e.g., TBS-T or PBS) and ensure consistent wash duration and agitation between all steps to remove unbound reagents completely [19].
- Cause: Inconsistent incubation times or temperatures.
- Solution: Use a timer and a calibrated heating plate or water bath for all incubations. For critical steps like primary antibody binding, overnight incubation at 4°C provides more consistency than room temperature incubation [99].
Experimental Protocols for Detection System Comparison
Protocol: Side-by-Side Comparison of Detection System Sensitivity
This protocol is designed to empirically determine the most suitable detection system for a specific antibody-antigen pair on FFPE tissue sections.
1. Sample Preparation:
- Use consecutive 4 µm sections from the same FFPE tissue block known to express your target antigen at variable levels [19].
- Adhere slides to coated glass slides, dry, and bake.
2. Shared Pre-Treatment Steps:
- Deparaffinization & Rehydration: Use xylene and graded alcohols [19].
- Antigen Retrieval: Perform Heat-Induced Epitope Retrieval (HIER) using the optimal buffer and method (microwave, water bath, or pressure cooker) for your primary antibody [98].
- Endogenous Enzyme Blocking: Incubate with 3% H₂O₂ in methanol for 10-15 minutes to quench endogenous peroxidase activity [19].
- Protein Blocking: Apply a protein block (e.g., 5% normal serum or BSA) for 30 minutes at room temperature to reduce non-specific background [19] [97].
3. Primary Antibody Application:
- Apply the optimally diluted primary antibody in blocking buffer to all slides.
- Incubate for 30-60 minutes at room temperature or overnight at 4°C for higher sensitivity [99].
- Wash slides 3 times for 5 minutes each in wash buffer.
4. Detection System Application (The Variable Step):
- Divide slides into groups. Apply a different detection system to each group, following the manufacturer's instructions. For example:
- Group A: Direct system (if labeled primary is available).
- Group B: Indirect system (HRP-conjugated secondary antibody).
- Group C: Avidin-biotin complex (ABC) system.
- Group D: Polymer-based system.
- Include a negative control (no primary antibody) for each detection system.
5. Visualization and Analysis:
- Chromogenic Detection: Apply DAB or other suitable chromogen for 1-3 minutes, monitor development, and stop in water [19].
- Counterstain and Mount: Counterstain with hematoxylin, dehydrate, clear, and mount with permanent mounting medium [19] [96].
- Analysis: Compare slides for signal intensity at the expected localization and level of non-specific background staining.
Table 2: Quantitative Comparison of Detection System Performance
| Detection System | Relative Sensitivity | Approx. Incubation Time | Key Reagent Components |
|---|---|---|---|
| Direct | 1x (Baseline) | 1-2 hours | Enzyme- or fluorophore-conjugated primary antibody |
| Indirect | 10-50x | 2-3 hours | Unlabeled primary antibody, labeled secondary antibody |
| APAAP/PAP | 100-1000x | 3-4 hours | Primary antibody, bridge antibody, enzyme-anti-enzyme complex |
| ABC | Very High | 2.5-3.5 hours | Biotinylated secondary antibody, pre-formed Avidin-Biotin-Enzyme Complex |
| Polymer/Micropolymer | Very High | 2-3 hours | Secondary antibody and enzyme bound to a dextran polymer backbone |
Diagram 2: Workflow for comparing IHC detection system sensitivity on FFPE tissue.
The Scientist's Toolkit: Essential Research Reagent Solutions
Table 3: Key Reagents for IHC Detection System Optimization
| Reagent / Solution | Critical Function | Optimization Tip |
|---|---|---|
| Antigen Retrieval Buffers (e.g., Citrate pH 6.0, EDTA pH 8.0/9.0) | Unmasks epitopes cross-linked by formalin fixation, crucial for FFPE tissues. | The optimal pH is antibody-dependent. Test different buffers if staining is weak [98]. |
| Protein Blocking Serum (e.g., Normal Goat/Donkey Serum) | Reduces non-specific background by occupying reactive sites before antibody application. | Use serum from the same species as the secondary antibody for most effective blocking [97]. |
| Endogenous Enzyme Blockers (3% H₂O₂, Levamisol) | Inactivates endogenous peroxidases (H₂O₂) or alkaline phosphatases (Levamisol) to prevent false positives. | Always perform this step before applying the detection system in chromogenic IHC [19] [96]. |
| Primary Antibody Diluent | A buffered solution with stabilizers (e.g., BSA) to maintain antibody stability and prevent non-specific binding during incubation. | Using a commercial antibody diluent can improve reproducibility and shelf-life compared to simple buffers [41]. |
| Chromogenic Substrates (e.g., DAB, AEC) | Converted by enzymes (HRP/AP) into an insoluble, colored precipitate at the antigen site. | DAB is permanent and alcohol-resistant, while AEC is alcohol-soluble and requires aqueous mounting [96]. |
| Polymer-Based Detection Kits | Non-biotin systems where enzyme and secondary antibody are on a polymer backbone, offering high sensitivity and low background. | The ideal choice for tissues with high endogenous biotin, eliminating the need for biotin-blocking steps [96]. |
Establishing Laboratory Standards for Reproducible IHC Dilution
Immunohistochemistry (IHC) is an antibody-based technique used to characterize protein expression in tissue while preserving its structural organization [100]. Achieving reproducible IHC results requires meticulous optimization of antibody dilution parameters, which forms the critical foundation for reliable research outcomes and clinical diagnostics. This guide establishes comprehensive laboratory standards for reproducible IHC dilution protocols, addressing common challenges and providing evidence-based solutions for researchers, scientists, and drug development professionals.
Fundamentals of IHC Antibody Dilution
Why Antibody Dilution Matters
Antibody dilution is not merely a procedural step but a critical determinant of IHC success. Optimal dilution ensures specific antibody binding to target antigens while minimizing non-specific background staining [1] [2]. When antibody concentration is too high, it increases non-specific interactions with non-target epitopes, resulting in excessive background staining that obscures specific signal [1] [2]. Conversely, excessively dilute antibodies may fail to detect the target antigen, resulting in weak or absent staining [2]. Furthermore, extremely high secondary antibody concentrations can paradoxically reduce antigen detection through a prozone effect where antibody excess inhibits proper complex formation [1].
Key Factors Influencing Optimal Dilution
Multiple variables interact to determine the ideal antibody dilution for any given IHC application:
- Target antigen abundance: Low-abundance targets typically require higher antibody concentrations than abundant antigens
- Tissue fixation and processing: Formalin-fixed paraffin-embedded (FFPE) tissues often need different dilutions than frozen sections due to antigen masking during fixation [100]
- Antibody affinity and specificity: High-affinity antibodies can be used at higher dilutions
- Detection system sensitivity: Polymer-based systems permit greater antibody dilution than traditional avidin-biotin complex (ABC) methods [101]
Table 1: Critical Factors Affecting Optimal Antibody Dilution
| Factor | Impact on Dilution | Considerations |
|---|---|---|
| Antigen Abundance | Low abundance → higher concentration | Nuclear antigens vs. membrane receptors |
| Fixation Method | FFPE → often higher concentration vs. frozen | Cross-linking fixatives mask epitopes |
| Antibody Clone | Monoclonal → more predictable dilution | Polyclonal → may require more optimization |
| Detection System | Polymer → higher dilution possible | ABC → may need higher antibody concentration |
| Tissue Type | High background tissues → titration needed | Liver, kidney have endogenous biotin |
Standardized Protocol for Establishing IHC Dilution
Systematic Dilution Optimization
A systematic approach to antibody dilution ensures reproducible and reliable staining. The following protocol establishes a standardized method for dilution optimization:
Preliminary Dilution Range Selection
- Begin with manufacturer's recommended dilution as midpoint
- Create a series of 2-fold serial dilutions above and below recommended concentration
- Include a no-primary antibody control for background assessment [101]
Experimental Setup
Staining and Evaluation
- Apply diluted antibodies under standardized conditions
- Use validated detection systems with fresh substrate preparation [1]
- Evaluate staining intensity, specificity, and background using standardized scoring system
The following diagram illustrates the complete workflow for establishing optimal IHC dilution parameters:
Quantitative Assessment and Documentation
Establish objective criteria for evaluating dilution series results:
- Staining intensity: Score 0 (none) to 4+ (very strong) for specific signal
- Background staining: Score 0 (none) to 3+ (heavy) for non-specific staining
- Signal-to-noise ratio: Calculate as staining intensity minus background score
- Cellular localization: Verify staining pattern matches expected subcellular localization
Document all parameters including antibody catalog number, lot number, dilution buffer composition, incubation time and temperature, retrieval method, and detection system [101]. This detailed documentation enables precise protocol replication.
Troubleshooting Common IHC Dilution Problems
FAQ: Addressing Frequent Dilution Challenges
Q: Despite using recommended dilution, I observe weak or absent staining. What should I investigate?
A: Begin troubleshooting with these systematic checks:
- Verify antibody compatibility with your specific application and tissue type [2]
- Confirm proper antigen retrieval method (HIER vs. PIER) and buffer pH [102]
- Check antibody storage conditions and expiration date [1]
- Ensure detection system components are active and properly prepared [1]
- Validate entire protocol using a known positive control tissue [101]
Q: My IHC shows high background staining. How can dilution adjustments help resolve this?
A: High background frequently results from excessive antibody concentration. Implement these solutions:
- Perform antibody titration to identify optimal concentration [2]
- Increase NaCl concentration (0.15-0.6 M) in antibody diluent to reduce ionic interactions [1]
- Enhance blocking with 5-10% normal serum from secondary antibody species [1] [101]
- Include appropriate endogenous enzyme blocks (peroxidase, phosphatase) [1] [101]
- Add detergent (0.05% Tween-20) to wash buffers to reduce hydrophobic interactions [2]
Q: I notice inconsistent staining between experiments using the same dilution. What could cause this variability?
A: Address these potential sources of variability:
- Standardize tissue fixation time and conditions across all samples [100]
- Use freshly prepared buffers, especially antigen retrieval and substrate solutions [101]
- Control incubation temperature and time precisely, particularly for primary antibody [101]
- Implement consistent antigen retrieval method (microwave preferred over water bath) [101]
- Use the same antibody diluent composition across all experiments [101]
Q: How does antigen retrieval choice affect optimal antibody dilution?
A: Antigen retrieval method significantly impacts epitope availability:
- Heat-induced epitope retrieval (HIER) with appropriate buffer (citrate pH 6.0, Tris-EDTA pH 9.0) dramatically affects staining efficiency [101] [102]
- Optimal retrieval may enable higher antibody dilutions while maintaining strong signal
- Different antibodies may require specific retrieval conditions regardless of dilution [101]
- Always optimize retrieval method and buffer simultaneously with dilution
Table 2: Troubleshooting Guide for Common IHC Dilution Problems
| Problem | Possible Causes | Solutions |
|---|---|---|
| Weak or No Staining | Over-diluted antibodyInactive antibodyImproper antigen retrievalOver-fixation | Titrate to higher concentrationUse positive control validationOptimize HIER buffer/pH [102]Increase retrieval intensity |
| High Background | Antibody too concentratedInsufficient blockingNon-specific bindingEndogenous enzymes | Titrate to lower concentrationIncrease serum blocking to 10% [1]Add NaCl to diluent [1]Quench with H2O2 [101] |
| Patchy Staining | Incomplete tissue coverageSection dryingInconsistent fixation | Use humidity chamberEnsure sections remain wetStandardize fixation protocol |
| Variable Results | Inconsistent retrievalBuffer degradationDifferent lot numbers | Standardize HIER method [101]Prepare fresh solutions dailyRe-optimize with new antibody lot |
Advanced Dilution Considerations
Specialized Applications
Phospho-Specific Antibodies
- Often require different dilution parameters than total protein antibodies
- May need specialized antigen retrieval conditions
- Typically demonstrate more variable staining patterns [101]
Multiplex IHC
- Requires balancing dilutions of multiple primary antibodies
- Consider species compatibility and cross-reactivity
- May employ sequential staining with antibody stripping between rounds
Rapid IHC Protocols
- Microfluidic approaches can reduce incubation times to minutes [103]
- May require increased antibody concentration to compensate for reduced incubation time
- Enable high-throughput dilution screening using minimal reagent [103]
Detection System Interplay
The choice of detection system significantly influences optimal antibody dilution:
- Polymer-based systems: Provide enhanced sensitivity, allowing higher antibody dilutions [101]
- Avidin-biotin complex (ABC): Traditional method with good sensitivity but potential endogenous biotin interference [1]
- Direct fluorescence: Minimal amplification but reduced background, often requiring higher antibody concentration
The following diagram illustrates the relationship between detection system sensitivity and appropriate antibody dilution:
Research Reagent Solutions for IHC Dilution Standards
Table 3: Essential Reagents for Reproducible IHC Dilution Protocols
| Reagent Category | Specific Examples | Function in Dilution Optimization |
|---|---|---|
| Antibody Diluents | SignalStain Antibody DiluentPBS/BSA with stabilizers | Maintains antibody stability during incubation; composition affects specificity [101] |
| Retrieval Buffers | Sodium citrate (pH 6.0)Tris-EDTA (pH 9.0) | Unmasks epitopes cross-linked during fixation; enables antibody access [102] |
| Blocking Solutions | Normal serum (5-10%)Commercial blocking reagents | Reduces non-specific binding; critical for minimizing background [1] [101] |
| Detection Systems | Polymer-based (SignalStain Boost)HRP/DAB substrates | Amplifies signal; system choice determines usable antibody dilution range [101] |
| Wash Buffers | TBST, PBST (0.05-0.1% Tween-20) | Removes unbound antibody; reduces hydrophobic interactions [1] |
Establishing reproducible IHC dilution standards requires systematic optimization, comprehensive documentation, and understanding of how multiple variables interact within the staining protocol. By implementing the standardized approaches outlined in this guide—including systematic titration, appropriate controls, and evidence-based troubleshooting—laboratories can achieve consistent, reliable IHC results. Remember that optimal dilution is not a fixed value but a balance between signal intensity and specificity that must be determined empirically for each antibody-tissue combination. Continuing adherence to these standardized protocols ensures the reproducibility essential for both research excellence and clinical diagnostic accuracy.
Conclusion
Optimizing antibody dilution is not merely a technical step but a fundamental determinant of IHC success, directly impacting staining specificity, sensitivity, and reproducibility. By systematically addressing foundational principles, methodological applications, troubleshooting strategies, and rigorous validation protocols, researchers can achieve reliable, publication-quality results. The integration of updated 2024 CAP guidelines ensures clinical relevance and standardization across laboratories. Future directions include the adoption of multiplex IHC/IF with advanced image analysis and AI-driven quantification, requiring even more precise dilution optimization. Ultimately, mastering antibody dilution transforms IHC from an art into a precise science, accelerating discoveries in basic research and enhancing diagnostic accuracy in clinical practice.
References
- 1. IHC Troubleshooting Guide [https://www.thermofisher.com/us/en/home/life-science/protein-biology/protein-biology-learning-center/protein-biology-resource-library/pierce-protein-methods/ihc-troubleshooting-guide.html]
- 2. Ultimate IHC Troubleshooting Guide: Fix Weak Staining & ... [https://www.atlasantibodies.com/knowledge-hub/blog/the-ultimate-ihc-troubleshooting-guide-from-weak-staining-to-high-background/]
- 3. Immunohistochemistry Troubleshooting [https://www.antibodies.com/applications/immunohistochemistry/ihc-troubleshooting]
- 4. Antibody Dilution Recommendations | PhosphoSolutions [https://www.antibodiesinc.com/blogs/news/antibody-dilution-recommendations-what-you-need-to-know?srsltid=AfmBOooZDpJSwtowb1vHOyM1tVNIVnNKa2QH1mil3naovn6rHOBJxHHf]
- 5. IHC Primary Antibody Selection & Optimization [https://www.novusbio.com/primary-antibody-selection-optimization?srsltid=AfmBOooNQyYjTEu8820c2NZsxpHSmYUr039cUqpn8MIF8jR5uMiRU3Ts]
- 6. Immunohistochemistry (IHC) [https://www.cellsignal.com/learn-and-support/overview-of-ihc?srsltid=AfmBOopzrP1dzTJDvg-y9Sw8GfvPH8gdFtYuFt_yyUzVkxxPlHzK_r7x]
- 7. Immunohistochemistry Protocols [https://www.antibodies.com/applications/immunohistochemistry/ihc-protocol]
- 8. Immunohistochemistry (IHC): The Complete Guide [https://www.antibodies.com/applications/immunohistochemistry]
- 9. Primary Antibody Selection & Optimization [https://www.rndsystems.com/resources/protocols/primary-antibody-selection-optimization]
- 10. IHC Primary Antibody Selection & Optimization [https://www.novusbio.com/primary-antibody-selection-optimization?srsltid=AfmBOoq4MT_zpyHnJummPBkJvBlk1kNUQ2g3YgsfdxY-8yaNI7il2l8e]
- 11. The challenges with the validation of research antibodies [https://pmc.ncbi.nlm.nih.gov/articles/PMC5333605/]
- 12. Tips for Diluting Antibodies [https://www.rockland.com/resources/tips-for-diluting-antibodies/?srsltid=AfmBOoqrc8jqS3jvWK2dC1oYgBCfo8nBmmDZtlGmn4OMyfJm8VkGSB-q]
- 13. IHC Troubleshooting Guide | Common Issues & Fixes [https://www.bosterbio.com/protocol-and-troubleshooting/ihc-troubleshooting?srsltid=AfmBOopOM4ouEv2aq7qgSrBjWfAthcbm_cI1tqtwh72ib7IJICX76QDd]
- 14. Expert Tips On IHC Antibody Selection, Optimization & ... [https://www.bosterbio.com/boster-interviews/expert-tips-on-ihc-antibody-selection-optimization-and-ihc-negative-controls?srsltid=AfmBOoqV2P6VJ5fN7Tjz_fVYQAtVmZfBpJ-p8yh2GvZruyicKYdU_hRw]
- 15. Effects of Fixation and Tissue Processing on ... [https://www.leicabiosystems.com/us/knowledge-pathway/effects-of-fixation-and-tissue-processing-on-immunocytochemistry/]
- 16. IHC/ICC Sample Fixation (Formalin vs. Alcohol) [https://www.novusbio.com/sample-fixation-for-ihc-icc?srsltid=AfmBOorLb841evmoWwyGM21_BYoPbuVSLUYEyfPBYlbqF_b1mpdvdD2-]
- 17. Antigen Retrieval in IHC: Why It Matters and How to Get ... [https://www.atlasantibodies.com/knowledge-hub/blog/antigen-retrieval-in-ihc-why-it-matters-and-how-to-get-it-right/]
- 18. Immunohistochemistry (IHC) Troubleshooting Guide & the ... [https://www.cellsignal.com/learn-and-support/troubleshooting/ihc-troubleshooting-guide?srsltid=AfmBOopqtJJYlIE7arvw0ll5eyfrNL4fDzK9N1ibAeLiEPq1qmEY8yvD]
- 19. Immunohistochemistry for Pathologists: Protocols, Pitfalls, ... [https://pmc.ncbi.nlm.nih.gov/articles/PMC5122731/]
- 20. Selecting an Optimal Positive IHC Control for Verifying ... [https://pmc.ncbi.nlm.nih.gov/articles/PMC6437345/]
- 21. Fixation Strategies and Formulations Used in IHC Staining [https://www.thermofisher.com/us/en/home/life-science/protein-biology/protein-biology-learning-center/protein-biology-resource-library/pierce-protein-methods/fixation-strategies-formulations.html]
- 22. IHC antigen retrieval protocol [https://www.abcam.com/en-us/technical-resources/protocols/ihc-antigen-retrieval]
- 23. Review of immunohistochemistry techniques: Applications, ... [https://www.sciencedirect.com/science/article/abs/pii/S0740257024000467?utm_source=chatgpt.com]
- 24. Tips and Techniques for Troubleshooting ... [https://www.sigmaaldrich.com/US/en/technical-documents/protocol/protein-biology/immunohistochemistry/antibody-immunohistochemistry-expert-tips-and-techniques?srsltid=AfmBOop2TfdkXlnrCk9oJfw3pGeJ7IPvQb3wiWa_amypBXJEEVkmT0sO]
- 25. Troubleshooting Guide: Immunohistochemistry [https://www.rndsystems.com/resources/technical/troubleshooting-guide-immunohistochemistry]
- 26. IHC Troubleshooting Guide | Common Issues & Fixes [https://www.bosterbio.com/protocol-and-troubleshooting/ihc-troubleshooting?srsltid=AfmBOop-DlgiDs9DKvRzpIsNNfckNRpztHaxX6oLJ8slJmM2M5IVEWtB]
- 27. Antibody Dilution and Antibody Titer [https://www.labome.com/method/Antibody-Dilution-and-Antibody-Titer.html]
- 28. IHC Troubleshooting Guide | Common Issues & Fixes [https://www.bosterbio.com/protocol-and-troubleshooting/ihc-troubleshooting?srsltid=AfmBOopPDNkWxk0Dm41DaK5CsnbNacemt-VcJ9AYBXkd-IYOMusV8tuZ]
- 29. Immunohistochemistry (IHC) Troubleshooting Guide & the ... [https://www.cellsignal.com/learn-and-support/troubleshooting/ihc-troubleshooting-guide?srsltid=AfmBOoqkdNl5p04XNCDILy1fkjpUw--S3QHS5VRi7qJTKksuc-gbwxXA]
- 30. Immunolabeling Using Secondary Antibodies Protocol [https://www.thermofisher.com/us/en/home/life-science/cell-analysis/cell-analysis-learning-center/molecular-probes-school-of-fluorescence/imaging-basics/protocols-troubleshooting/protocols/immunolabeling-using-secondary-antibodies.html]
- 31. Volume-to-Volume Dilutions [https://www.fortislife.com/protocols/antibody-protocols/volume-to-volume-dilutions]
- 32. Dilution Calculator [https://bioxcell.com/dilution-calculator/]
- 33. Multiplex IHC Optimization: Antibody Pairing & Titration [https://awsprod-www.cellsignal.com/learn-and-support/videos-and-webinars/mihc-antibody-pairing-titration]
- 34. Tips for Diluting Antibodies [https://www.rockland.com/resources/tips-for-diluting-antibodies/?srsltid=AfmBOorOZ0MnQylnL5NI8rqoDkICPOIgTcKJbsiOFAZGA0mBcFtK-j7J]
- 35. 抗体稀释和抗体滴度解析 [https://www.genecreate.cn/subject/935.html]
- 36. 免疫组化: 改善IHC 染色的概述+ 步骤 [https://www.leicabiosystems.com/zh/knowledge-pathway/immunohistochemistry-an-overview-steps-to-better-ihc-staining/]
- 37. 6 Essential IHC Controls for Reliable Staining Results [https://www.bosterbio.com/blog/post/6-ihc-controls-you-should-know?srsltid=AfmBOooDOgUunh6uPOq3BMSbCBmS_ljeQorLB9Ql25Z_14KhtowLZ6Ph]
- 38. Intro to Immunohistochemistry (IHC) Staining: Steps & Best ... [https://www.leicabiosystems.com/us/knowledge-pathway/immunohistochemistry-an-overview-steps-to-better-ihc-staining/]
- 39. 免疫组织化学规程指南 [https://www.assaygenie.com/immunohistochemistry-protocol-guide-mandarin?srsltid=AfmBOooF7GgLipSZp-q0CpHH8U7xZ1lvCVcFwsfie4YA36B3v9ZD0-AE]
- 40. Immunofluorescence: Antibody Dilution and Incubation ... [https://blog.cellsignal.com/successful-immunofluorescence-antibody-dilution-and-incubation]
- 41. How Antibody Diluent For IHC Works — In One Simple ... [https://www.linkedin.com/pulse/how-antibody-diluent-ihc-works-one-simple-flow-2025-h0rff/]
- 42. Antibodies in IHC [https://www.abcam.com/en-us/technical-resources/guides/ihc-guide/antibodies-in-ihc]
- 43. IHC Troubleshooting Guide | Common Issues & Fixes [https://www.bosterbio.com/protocol-and-troubleshooting/ihc-troubleshooting?srsltid=AfmBOooi5k7og676QBtQV0FPPPWUTz59xuGrpvVg4JUPDo2EbOFKQ1on]
- 44. Immunohistochemistry (IHC) Troubleshooting Guide & the ... [https://www.cellsignal.com/learn-and-support/troubleshooting/ihc-troubleshooting-guide?srsltid=AfmBOop__6ecK69LRyci7LOnRX3uuljEbQyna6N-rlQGNg7SPTw8Qflp]
- 45. IHC Primary Antibody Selection & Optimization [https://www.novusbio.com/primary-antibody-selection-optimization?srsltid=AfmBOooY8jaGeMxXzh0fiYwMsXls6IAc5VkEv2fBVBx_38GJk5oy-NVm]
- 46. Immunohistochemistry (IHC) Troubleshooting Guide & the ... [https://www.cellsignal.com/learn-and-support/troubleshooting/ihc-troubleshooting-guide?srsltid=AfmBOopcI9mF09aXE9Esg2Bj3rh9Ym6t-cS2D8SCtJfJkkHBV-ezvvJ3]
- 47. Western blotting guide: Part 5, Primary Antibodies [https://www.jacksonimmuno.com/secondary-antibody-resource/immuno-techniques/western-blotting-guide-part-5/]
- 48. IHC Troubleshooting Guide | Common Issues & Fixes [https://www.bosterbio.com/protocol-and-troubleshooting/ihc-troubleshooting?srsltid=AfmBOorhc6IbB4rdepvOeROsYtwok-lp1kpLX91teri3nBG52Ikx4r51]
- 49. for performing Protocol on frozen samples | Abcam IHC [https://www.abcam.com/en-us/technical-resources/protocols/ihc-with-frozen-samples]
- 50. Immunohistochemistry (IHC) Troubleshooting Guide & the ... [https://www.cellsignal.com/learn-and-support/troubleshooting/ihc-troubleshooting-guide?srsltid=AfmBOoo6mEmORxVhKLVc3_ABmuXzKlY8YpBS9eQn3k4h_7wJqdQhaR7q]
- 51. Reagents for Reliable Immunohistochemistry ( IHC ) Results [https://www.cellsignal.com/applications/immunohistochemistry/solutions-for-consistent-ihc-results]
- 52. IHC Detection Systems: Advantages and Disadvantages [https://www.novusbio.com/ihc-detection?srsltid=AfmBOorGpH4eZ4O-xavfdegFb8fS98GQTtPc_ZsaUWdqlzk-pjoRvbhI]
- 53. Immunohistochemistry (IHC) Troubleshooting Guide & the ... [https://www.cellsignal.com/learn-and-support/troubleshooting/ihc-troubleshooting-guide?srsltid=AfmBOop1pilMwjOu6Xlu6lbEVkNW0hCzcknfT6p9soyNQIy9qC4aKa0k]
- 54. Comparison of two polymer-based immunohistochemical ... [https://pubmed.ncbi.nlm.nih.gov/17204059/]
- 55. Immunohistochemistry (IHC) [https://www.cellsignal.com/learn-and-support/overview-of-ihc?srsltid=AfmBOoqIeDkyrZUpoNbOaApJgRg9vy2akfOjSk3LXTAZ0j1a0NtOIvFg]
- 56. IHC Primary Antibody Selection & Optimization [https://www.bio-techne.com/applications/imaging/immunohistochemistry/primary-antibody-selection-optimization]
- 57. Immunohistochemistry Troubleshooting | Tips & Tricks [https://www.stressmarq.com/support/technical-support/troubleshooting/immunohistochemistry-troubleshooting/]
- 58. 6 Essential IHC Controls for Reliable Staining Results [https://www.bosterbio.com/blog/post/6-ihc-controls-you-should-know?srsltid=AfmBOopF4GNthjWwI1VEVTSkR0TVsUS6b_INCFo7zLOLHK2Y-_uNhLtl]
- 59. A Forgotten Principle in Immunocytochemistry: Optimal Dilution [https://pmc.ncbi.nlm.nih.gov/articles/PMC9903208/]
- 60. IHC Immunodetection (Staining) [https://www.thermofisher.com/us/en/home/life-science/protein-biology/protein-biology-learning-center/protein-biology-resource-library/pierce-protein-methods/ihc-immunodetection.html]
- 61. Blocking Strategies for IHC [https://www.thermofisher.com/us/en/home/life-science/protein-biology/protein-biology-learning-center/protein-biology-resource-library/pierce-protein-methods/blocking-strategies-ihc.html]
- 62. How to Avoid or Reduce High Background in ... [https://www.linkedin.com/pulse/how-avoid-reduce-high-background-immunohistochemistry-huang-md-phd-xtvpe]
- 63. A Guide to Better IHC Staining: Steps, Troubleshooting, ... [https://www.celnovte.com/solution/a-guide-to-better-ihc-staining-steps-troubleshooting-and-optimization/]
- 64. Optimization of the Blocking and Signal Preservation ... [https://pmc.ncbi.nlm.nih.gov/articles/PMC12462741/]
- 65. Immunohistochemistry (IHC) Troubleshooting Guide & the ... [https://www.cellsignal.com/learn-and-support/troubleshooting/ihc-troubleshooting-guide?srsltid=AfmBOorfnh2OnhlLdZWUjdK_fGlKI6JfO6U0wWeZf6y0SOvTOM0PLf6P]
- 66. Immunohistochemistry (IHC) [https://www.cellsignal.com/learn-and-support/overview-of-ihc?srsltid=AfmBOoqsKXHxpgeLHWH1wNwroYn2MAes9RX0lt24j4nseRXZTVpAbfiu]
- 67. How to Optimize mIHC Results: Antibody Diluents That Can't ... [https://www.antbioinc.com/blogs/technical-articles/how-to-optimize-mihc-results-antibody-diluents-that-cant-be-ignored]
- 68. Expert Tips On IHC Antibody Selection, Optimization & ... [https://www.bosterbio.com/boster-interviews/expert-tips-on-ihc-antibody-selection-optimization-and-ihc-negative-controls?srsltid=AfmBOooWuOPBFxQIiQGkxcpi5KCK67JOWXjfjFn3NQrR_w7mKyjihv16]
- 69. ICC/IHC Non-Specific Binding / Staining Prevention Protocol [https://www.rndsystems.com/resources/protocols/preventing-non-specific-staining]
- 70. IHC Troubleshooting Guide [https://www.thermofisher.com/ng/en/home/life-science/protein-biology/protein-biology-learning-center/protein-biology-resource-library/pierce-protein-methods/ihc-troubleshooting-guide.html]
- 71. IHC Troubleshooting Guide | Common Issues & Fixes [https://www.bosterbio.com/protocol-and-troubleshooting/ihc-troubleshooting?srsltid=AfmBOorDSosW3PKfuwzTtgWSwHKaurjxiYHi4n1XAOa_IovZcAGQFEBA]
- 72. Immunohistochemistry (IHC) Troubleshooting Guide & the ... [https://www.cellsignal.com/learn-and-support/troubleshooting/ihc-troubleshooting-guide?srsltid=AfmBOordsrNqEHoCvP6iC4utyh5ZdAfiLdaSo58gUC9YYwl3F3DsEtBQ]
- 73. Autofluorescence [https://www.jacksonimmuno.com/secondary-antibody-resource/immuno-techniques/autofluorescence/]
- 74. Ten Approaches That Improve Immunostaining: A Review of ... [https://pmc.ncbi.nlm.nih.gov/articles/PMC8836139/]
- 75. Primary Antibody Selection for IHC : Monoclonal... : Novus Biologicals [https://www.novusbio.com/primary-antibody-selection-optimization]
- 76. Immunofluorescence (IF) Troubleshooting Guide [https://www.cellsignal.com/learn-and-support/troubleshooting/if-troubleshooting-guide?srsltid=AfmBOoomW-nqhO7XvjSLn9hiq-aGHHNVDYfrqBkG1LCBs-zm9WZrlujN]
- 77. IHC Troubleshooting Guide | Common Issues & Fixes [https://www.bosterbio.com/protocol-and-troubleshooting/ihc-troubleshooting?srsltid=AfmBOoqVHG9RB7UwNqgjiI2UG-TXBaZg8o63wi80yMkWf05k3Zd9bk2s]
- 78. A Guide to mIHC: Procedures and Troubleshooting [https://www.medchemexpress.com/literature/a-guide-to-mihc-procedures-and-troubleshooting.html?srsltid=AfmBOooAGdzjiCpEvOWQWV1jSV6KIQxPK0J-w-P2r_HMO06kPJjYGb7Q]
- 79. SignalStar™ Multiplex IHC Frequently Asked Questions [https://www.cellsignal.com/applications/signalstar-multiplex-ihc-faq?srsltid=AfmBOooQLHvljQGvbajoclPzzAZN7YaNnceUcWAhL0SS7wQMfUEEv4w7]
- 80. Multiplexed IHC Staining with Primary Antibodies ... [https://www.thermofisher.com/us/en/home/references/protocols/cell-and-tissue-analysis/protocols/multiplex-ihc-primary-antibodies.html]
- 81. Immunohistochemistry (IHC) Troubleshooting Guide & the ... [https://www.cellsignal.com/learn-and-support/troubleshooting/ihc-troubleshooting-guide?srsltid=AfmBOooRAhgx4DP6h9VxHJ3ndkicWDJS71ymwL8HUupHFGChdmZ-_W5Z]
- 82. 9 Tips to optimize your IF experiments [https://www.ptglab.com/news/blog/9-tips-to-optimize-your-if-experiments/?srsltid=AfmBOorpUHhZ_4pC8p9ehaKSCOpQBijarOdYxbwkoxq8wZlkkN-W63ys]
- 83. Principles of Analytic Validation of Immunohistochemical ... [https://www.cap.org/protocols-and-guidelines/cap-guidelines/current-cap-guidelines/principles-of-analytic-validation-of-immunohistochemical-assays]
- 84. Principles of Analytic Validation of Immunohistochemical ... [https://pubmed.ncbi.nlm.nih.gov/38391878/]
- 85. Optimizing Immunohistochemistry Validation and ... [https://www.precisionformedicine.com/blog/optimizing-ihc-validation-regulatory-strategies]
- 86. CAP Updates Their 'Principles of Analytic Validation ... [https://www.bioanalysis-zone.com/cap-updates-their-guidelines-for-principles-of-analytic-validation-of-immunohistochemical-assays/]
- 87. CAP releases updated guideline for validation of IHC assays [https://tissuepathology.com/2024/02/28/cap-releases-updated-guideline-for-validation-of-ihc-assays/]
- 88. Immunohistochemistry (IHC) [https://www.cellsignal.com/learn-and-support/overview-of-ihc?srsltid=AfmBOoo3qhVaAKbv8HCmTa0loHAfoPbt1wJTR1nnTl67ZfDh7dKEPEAG]
- 89. Immunohistochemistry (IHC) Optimization Guide [https://www.bosterbio.com/protocol-and-troubleshooting/ihc-optimization?srsltid=AfmBOortD_ySNrLYK32bSilwYSp3EwPAeTpM_qcUxaMO-SOLsCwo0HGb]
- 90. Counterstains in Immunohistochemistry: Principles, ... [https://www.bosterbio.com/blog/post/counterstains-in-immunohistochemistry-principles-options-and-troubleshooting?srsltid=AfmBOopIaVSTZsUu-lIYhQk1a7MfMOPLPs160eEwK8kj-nfacdm_t_sU]
- 91. Guide to Antibody Validation Techniques [https://www.neobiotechnologies.com/resources/antibody-validation-methods/?srsltid=AfmBOorZo4nnNWU6xI9LXKth1dpmO9kl9Q6RhDVtT-x6hKCatth9kSnp]
- 92. Immunohistochemistry (IHC) Troubleshooting Guide & the ... [https://www.cellsignal.com/learn-and-support/troubleshooting/ihc-troubleshooting-guide?srsltid=AfmBOoq1n2fqGe7zCcvDDzyMvGXfDxwwiuGp6avBdAcGhMY0O8231dl_]
- 93. Antibodies Support—Troubleshooting [https://www.thermofisher.com/us/en/home/technical-resources/technical-reference-library/antibodies-immunoassays-support-center/antibodies-support/antibodies-support-troubleshooting.html]
- 94. Multiplex IHC Optimization: Antibody Pairing & Titration [https://www.cellsignal.com/learn-and-support/videos-and-webinars/mihc-antibody-pairing-titration?srsltid=AfmBOoqi6mHHkuGJK3RX04FU6KzahpEZKEKie9OrT_1tgnv6MqL516QE]
- 95. Detection Systems in Immunohistochemistry [https://www.intechopen.com/chapters/64808]
- 96. Detection and amplification systems [https://www.abcam.com/en-us/technical-resources/guides/ihc-guide/detection-and-amplification-systems]
- 97. 9 Tips to optimize your IF experiments [https://www.ptglab.com/news/blog/9-tips-to-optimize-your-if-experiments/?srsltid=AfmBOophMKUSA0AupcYvummEkQCjkbcQO48lvwvB7ZpjSuq5lAtfbJbi]
- 98. Immunohistochemistry (IHC) [https://www.cellsignal.com/learn-and-support/overview-of-ihc?srsltid=AfmBOork3aYPXwGlx7jb4I_YJP7gVEn-2Sv0D2iRlW7_luFQhqRC-VI0]
- 99. Antibody Selection and Protocol Optimization [https://www.neobiotechnologies.com/resources/antibodies-for-ihc/?srsltid=AfmBOorxzF3xMotZSbyn0-w-aL71tqeoEhzEYvEBn8LmDhIaWm7Gswm2]
- 100. Immunohistochemistry (IHC) [https://www.cellsignal.com/learn-and-support/overview-of-ihc?srsltid=AfmBOopTae4UF1rV_HKcs5ODPZL6k6IYpuCDBOCOeQJINshE3q6oPH3D]
- 101. Immunohistochemistry (IHC) Troubleshooting Guide & the ... [https://www.cellsignal.com/learn-and-support/troubleshooting/ihc-troubleshooting-guide?srsltid=AfmBOopu20V4YwOsrPqgXOIkoPoDDOvTf3pLL6RIZN9fjVKCzLkd_alu]
- 102. Optimizing HIER Antigen Retrieval for IHC [https://www.bosterbio.com/blog/post/protocol-for-optimizing-hier-antigen-retrieval-conditions?srsltid=AfmBOooR9X2fWshQPKA-uq6lCNFjCw6SHehF2Irb9wnRq-dLYLPHLKLw]
- 103. Rapid micro-immunohistochemistry [https://www.nature.com/articles/s41378-020-00205-2]